Merging duplicate contacts

Looking for something more interactive?
Access SmartySkills
SmartyGrants' Duplicate Finder tool thoroughly scans your Contacts directory for what are potentially duplicate entries - for example, two separate Organisation records with the same ABN that are likely to be the same organisation. Or, two Contact Person entries with the same email address that are likely to be the same person.
The Duplicate Finder lets you decide whether to merge these potentially duplicate entries or keep them separate.
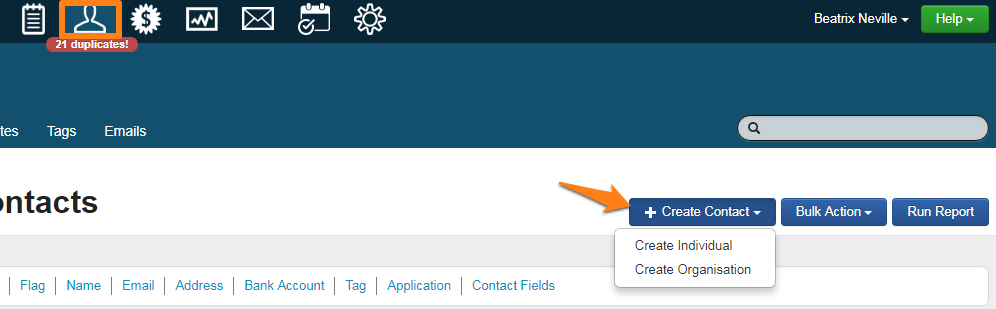
The number of potential duplicates is displayed in a red box just above the blue Contacts tab.
Accessing the Duplicate Finder
There are two ways to access the Duplicate Finder.
1. Click the red number (if it is present) on the Contacts Tab at the top of any page (as shown below).

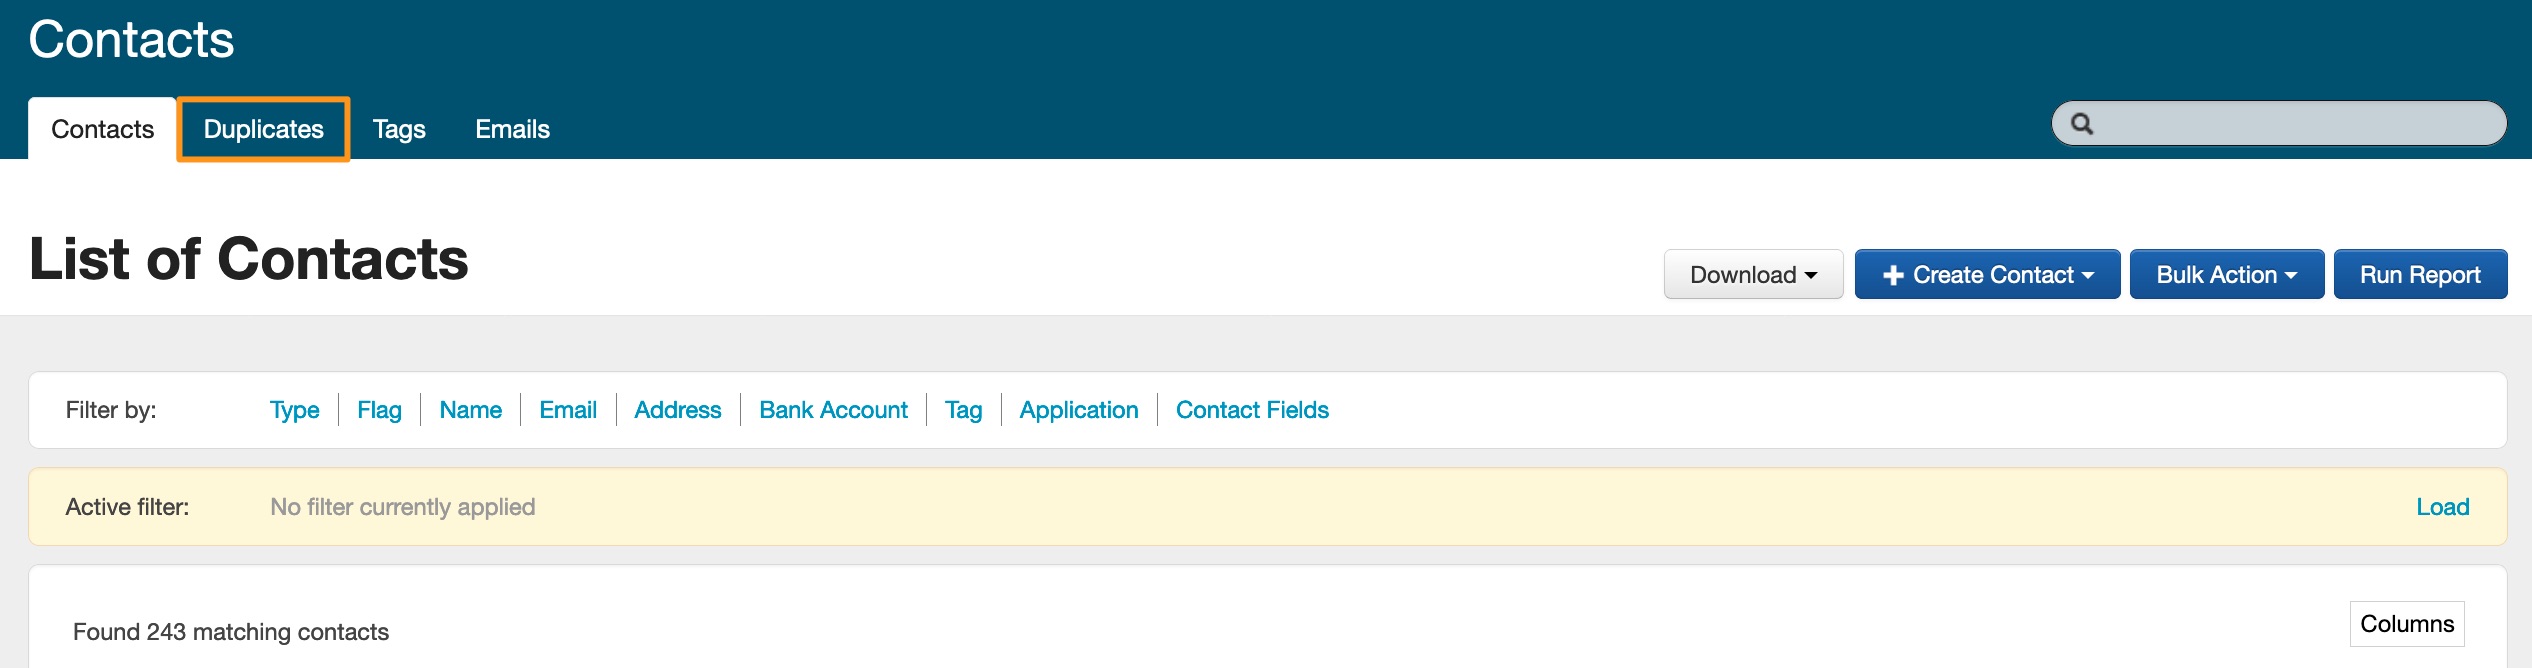
2. Click on the 'Duplicates' tab at the top of the screen.
What does the Duplicate Finder check?
The Duplicate Finder will identify a duplicate contact as one that is 100% identical to an existing contact. In addition, the Duplicate Finder will detect duplicates based on the following:
a) First name and last name: searches for approximate match.
b) Email address: searches for approximate match.
c) Any two of (a) or (b) in combination (e.g., first name matches email address, last name matches email address etc.).
d) ABN, CRN or NZBN: searches for exact match.
In addition:
Matches on last name AND any of the following: | Matches on organisation name AND any of the following: | Matches on address AND any of the following: |
|---|---|---|
i) Phone number | i) Phone number | i) First name |
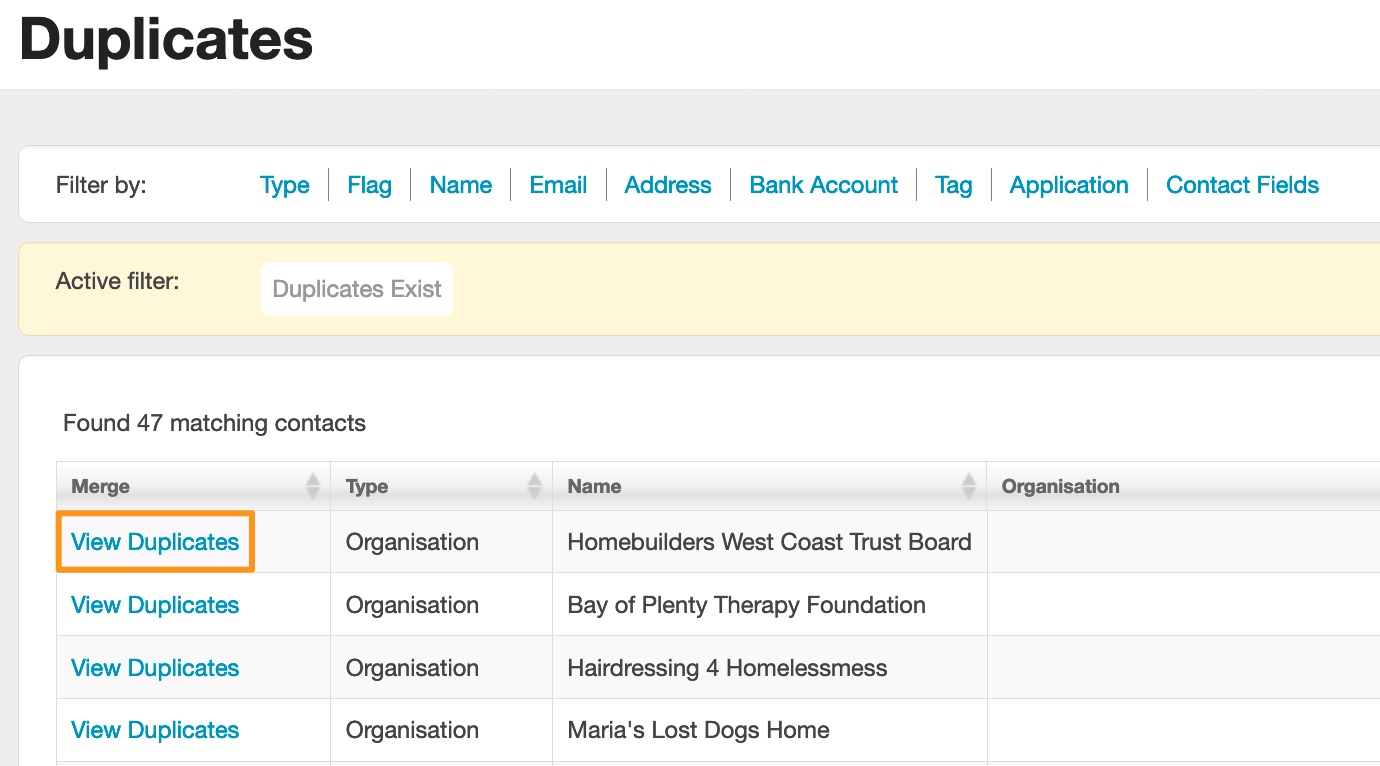
Reviewing duplicates
To review an individual potential duplicate, use the View Duplicates links to the left of the screen.
You can move from one duplicate to the next by clicking the 'Next' button in the top right of the screen.

Merging or Reviewing duplicates
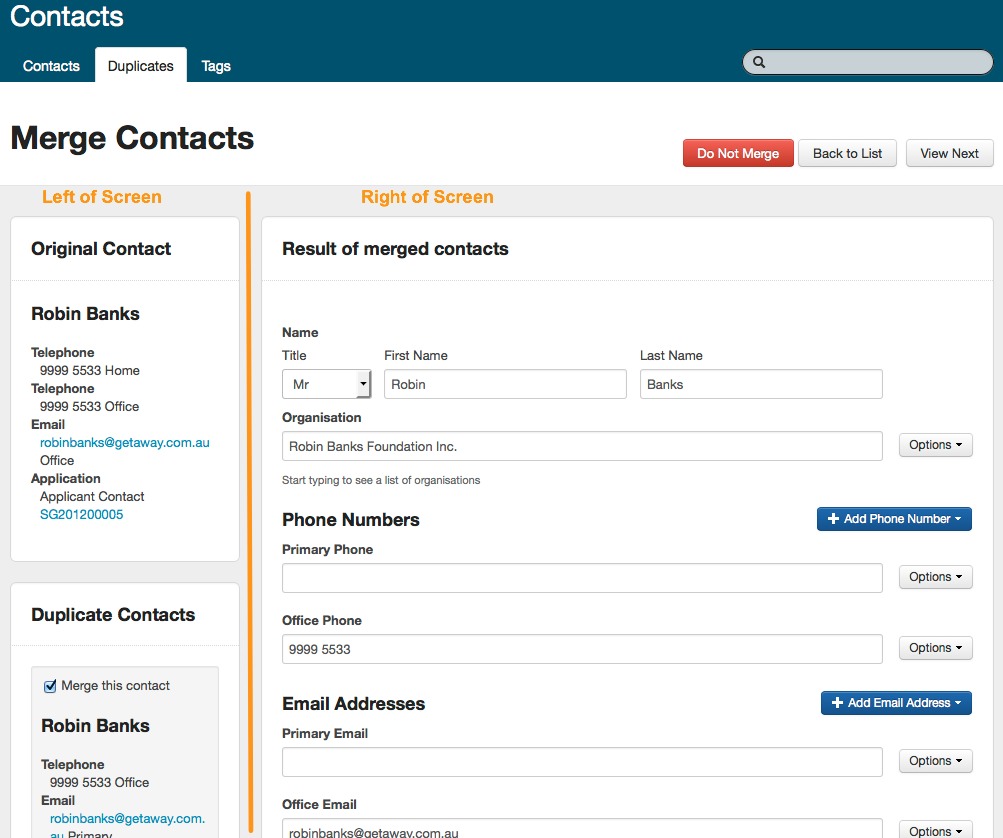
Left of screen
As shown in the image above, the original Contact is shown at the top of the left panel, while below it are the potential duplicates of this Contact that exist.
Each potential duplicate has a tick box labelled 'Merge this Contact'. Untick any Contacts that have been incorrectly identified as duplicates. This will ensure that you review the set of duplicates but the two contact records are not merged together.
Right of screen
If you decide that the records do need to be merged, the contact details displayed to the right of screen will be saved into the new merged Contact record. You can amend the details on the right of screen, for example, deciding which should be the primary details (click on the options button to amend).
Note: While the Duplicate Finder does analyse which details are correct, it is always best to double check.
To merge the records, click the Save and Merge button at the bottom of the form.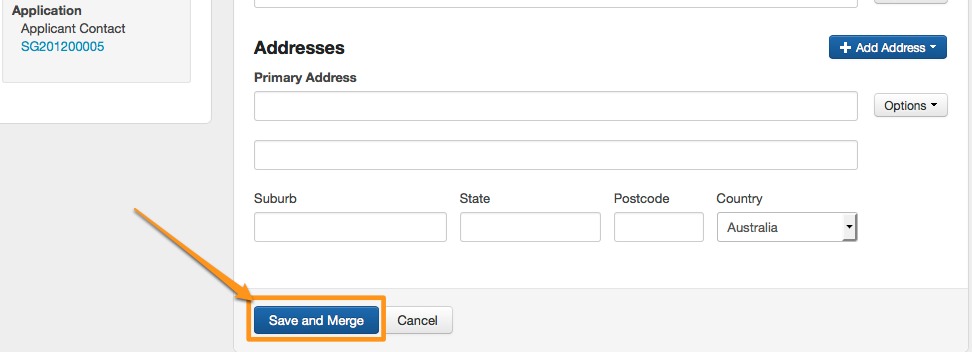
To keep all these entries separate, click the Do Not Merge button at the top right of screen.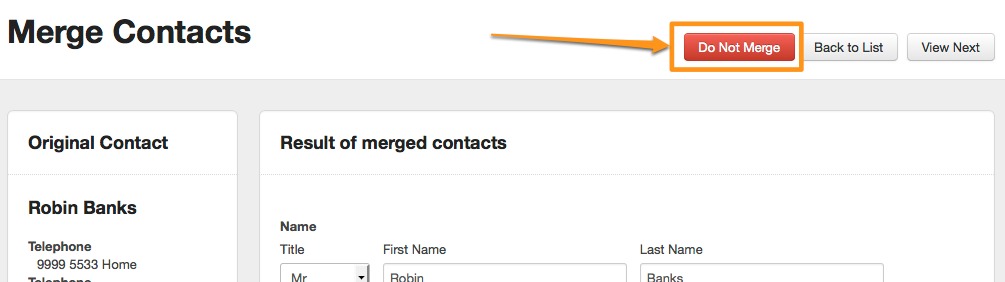
To return to these potential duplicates later without saving, click the View Next button or the Back to List button.
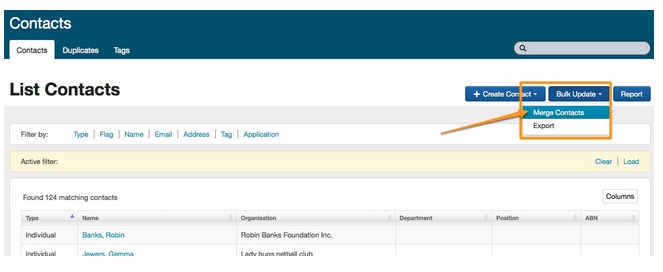
Bulk Merge Contacts
You also have the ability to 'bulk merge' a selection of contacts.
To complete a bulk merge, visit the contact directory and click on the 'Bulk Update' button and select 'Merge Contacts'.
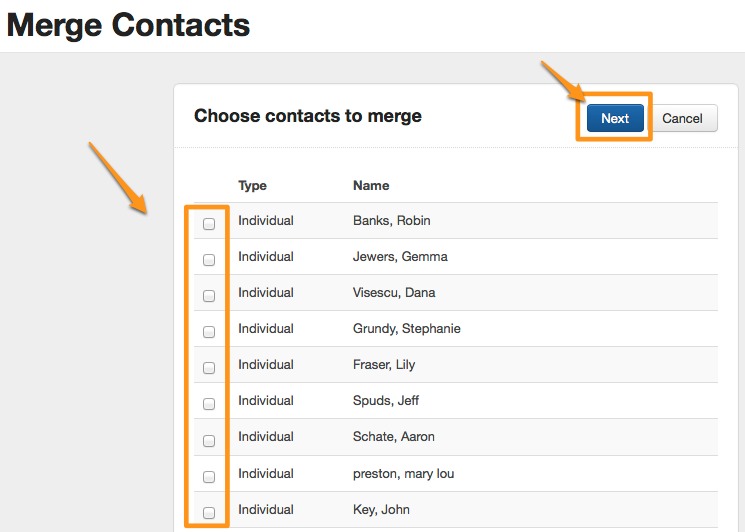
Select the duplicate contacts you wish to bulk merge and click on 'Next'
Make any amendments to the details for the merged record and click on 'Save and Merge'.

Oops! I've merged two contacts that I shouldn't have. Can I undo this?
If you have accidentally merged the wrong contacts, you will need to follow the below steps to restore the contacts as they are.
In the example below, I have accidentally merged my contact card for Daisy Duke with the contact card for Daisy Duck.
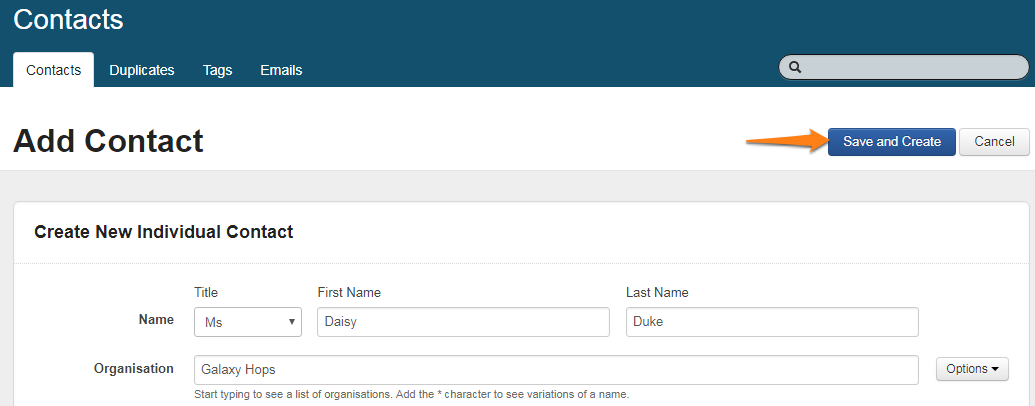
Step 1: Recreate the contact you have merged.
Click into contact directory.
Click create contact and select either an individual or organisation contact.
Fill in the contact details for your contact and then click save and create.
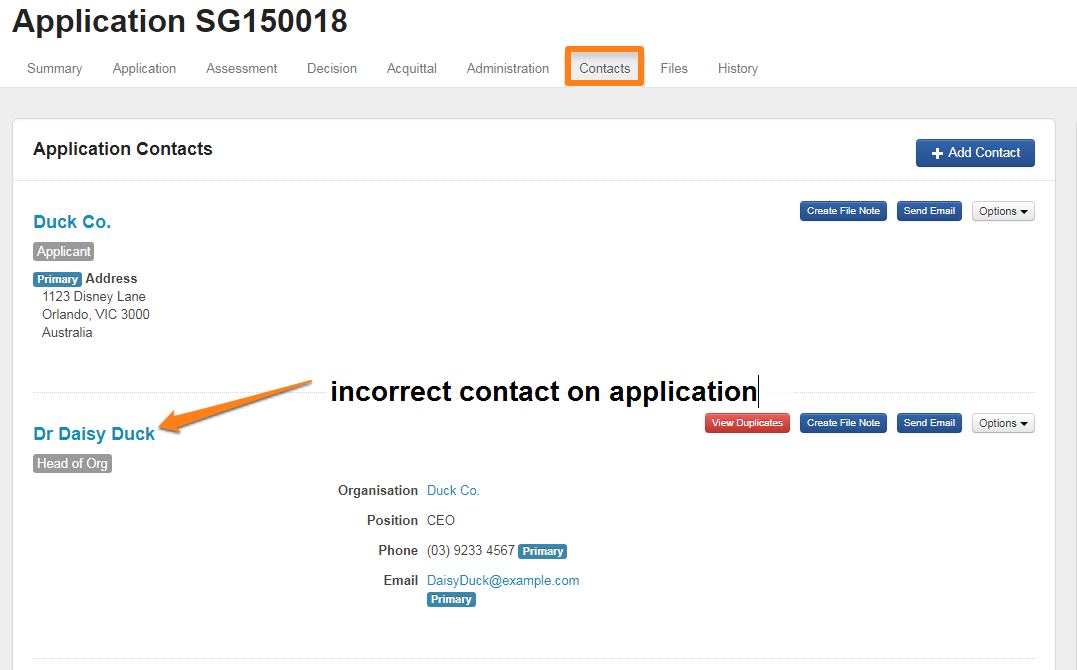
Step 2: Remove the incorrect contact from the application.
When you merge a contact, you are merging the grant involvement history. This means that in my example above, I need to click into Daisy Duck's contact card, and establish which applications actually belong to the merged contact - Daisy Duke.
Establish applications where the wrong contact is displaying as related to an application
From the contact directory, click on the application ID number to the contacts tab of an application.
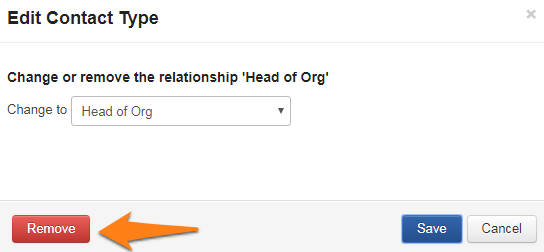
Click on the options button and then the contact type

Click on the red remove button to remove the incorrect contact from the application
Step 3: Add correct contact to application.
Now that you have removed the incorrect contact from the application, you will need to add the correct contact back onto the application. This is the contact you created in step 1.
click on add contact
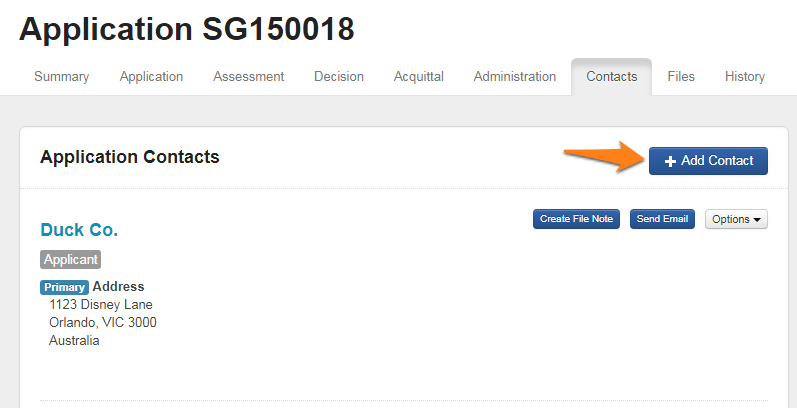
Search for your contacts name, and set the appropriate contact type
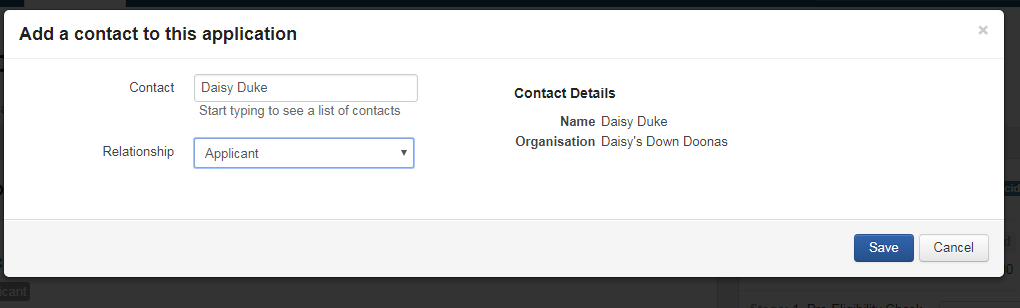
Click save. You should now see your contact added to the application.

Duplicate Application Tracker
If you would like to run a report that flags duplicate Applications submitted by your Applicant, we have created this handy report template that does just that. Simply download the template and save it locally. You can then create a new Multi-Program template and upload the template using the 'Upload existing layout file' option.