Mailouts

Looking for something more interactive?
Access SmartySkills
Mailout functionality allows users to send bulk email communications to applicants and associated contact types within SmartyGrants. Users can filter across programs and applications to ensure the right audience is selected for your correspondence.
You can also send individual emails to applicants and contact types, this is called "Send Email" and can be done from within a contact record on the application contact tab or the contact directory. For more information on how to use Send Email please refer to the Send Email Section below.
Send Mailout
Step 1 - Filter Items
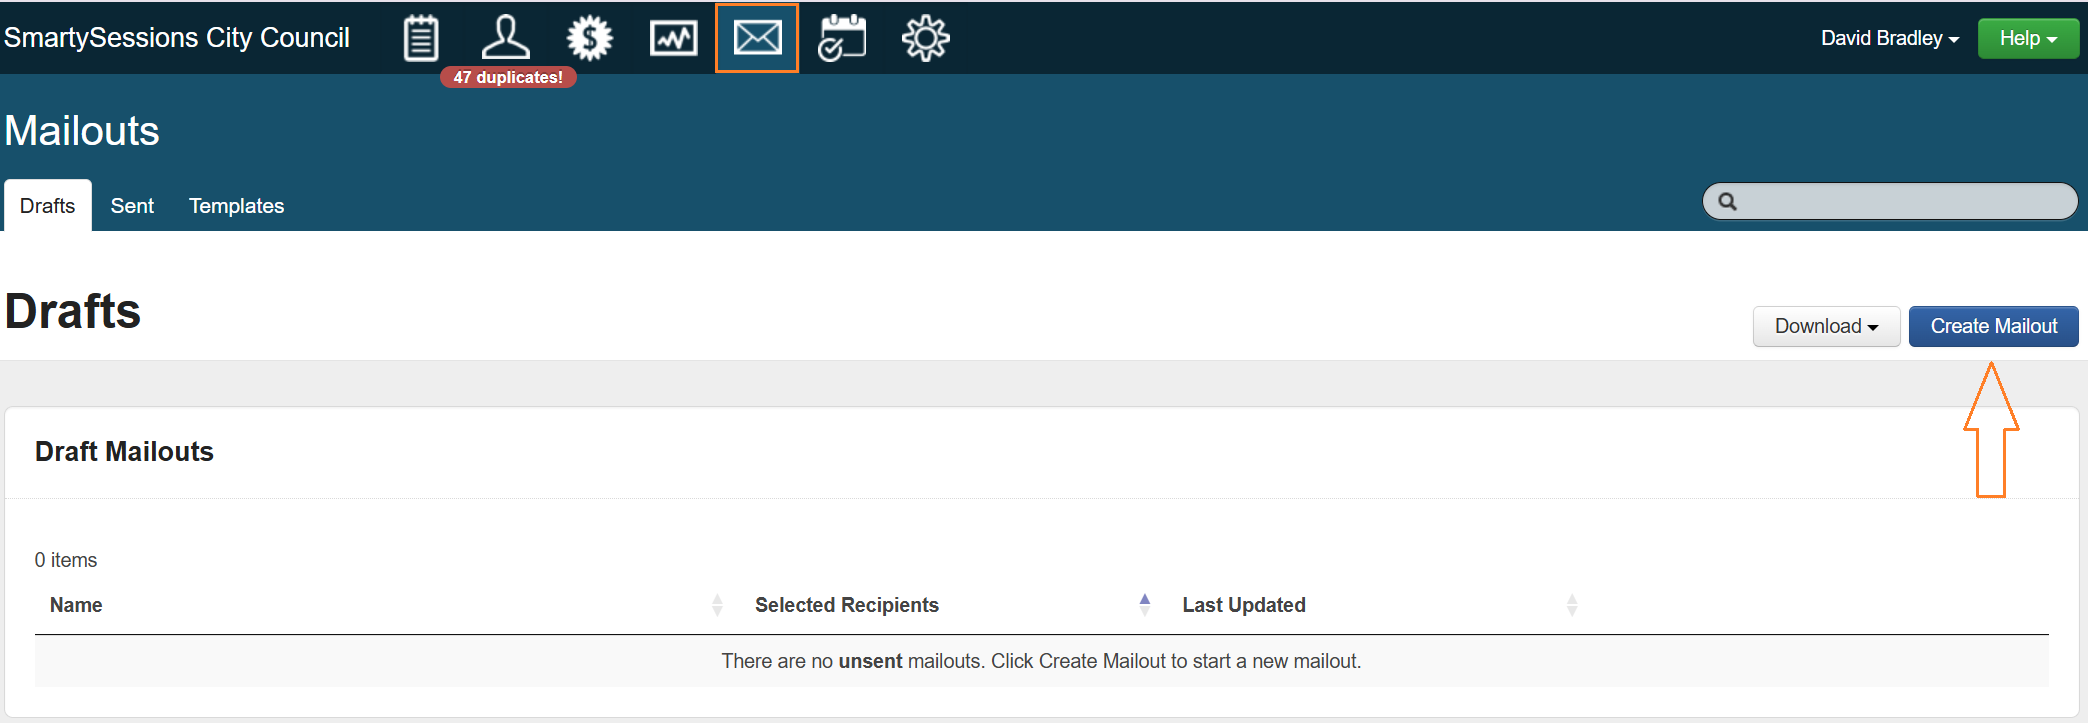
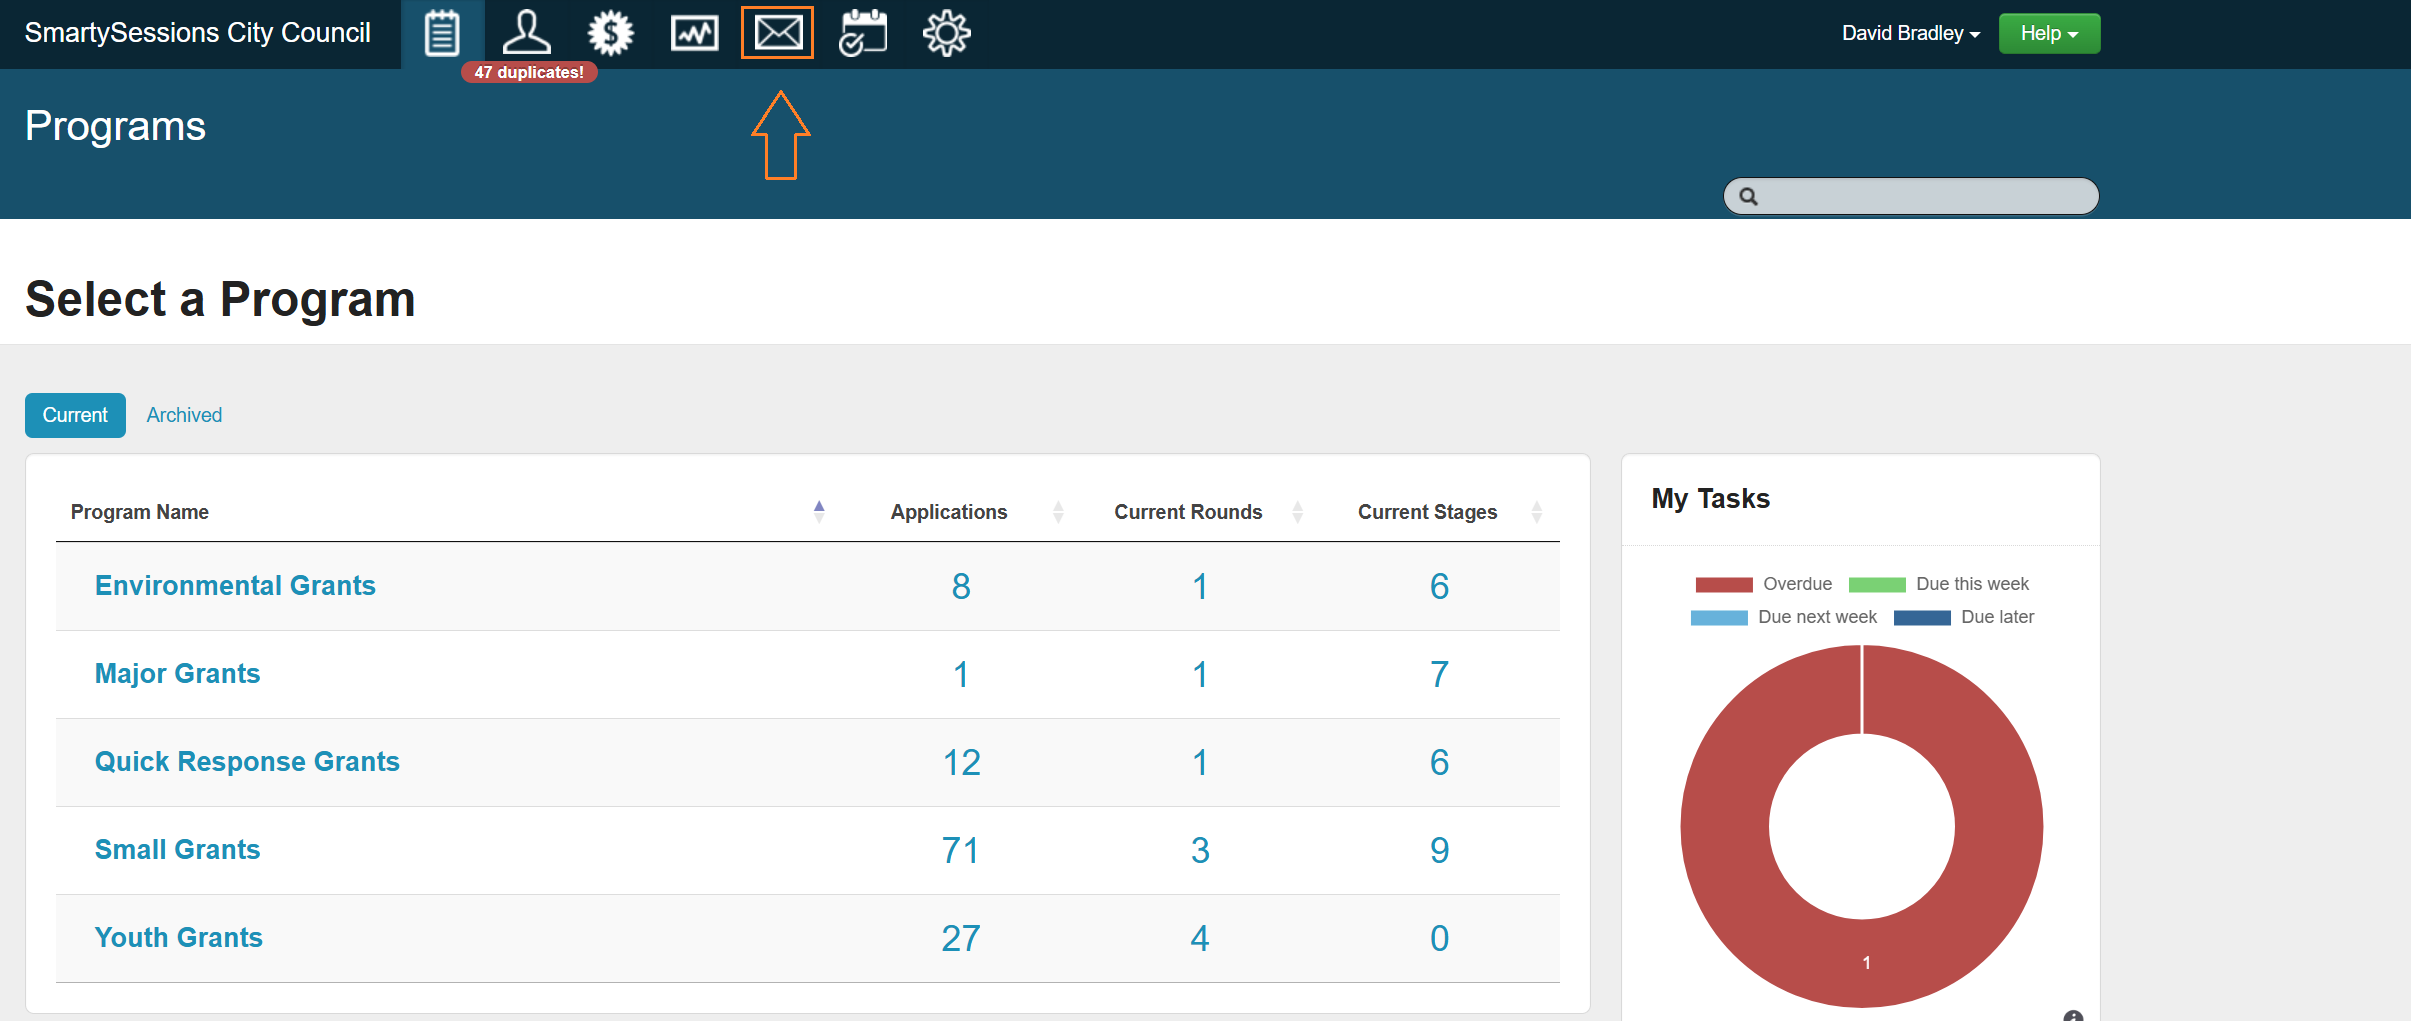
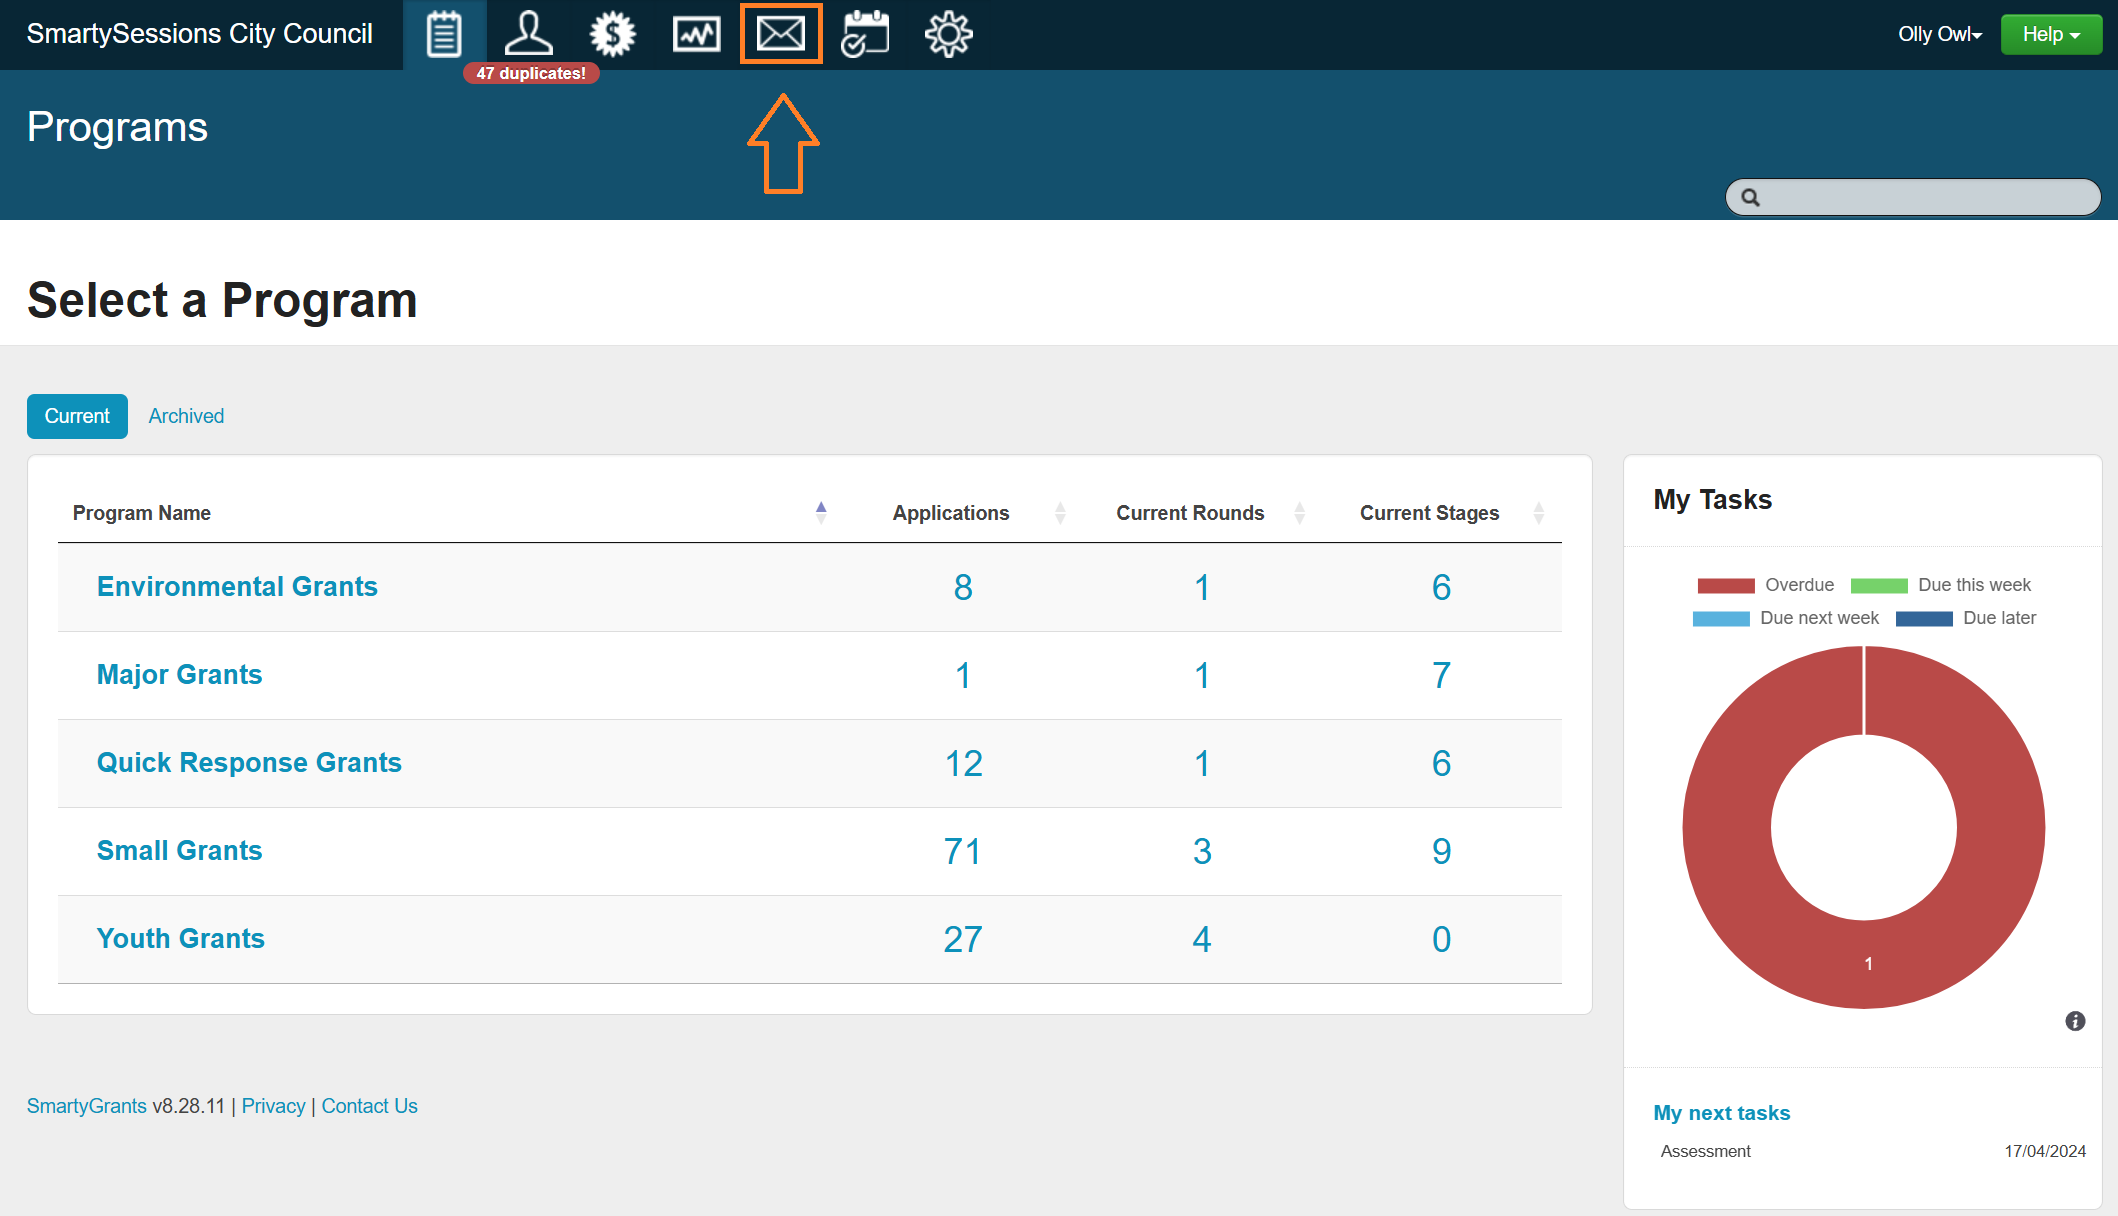
Select the envelope icon at the top of the screen
Select blue Create Mailout button
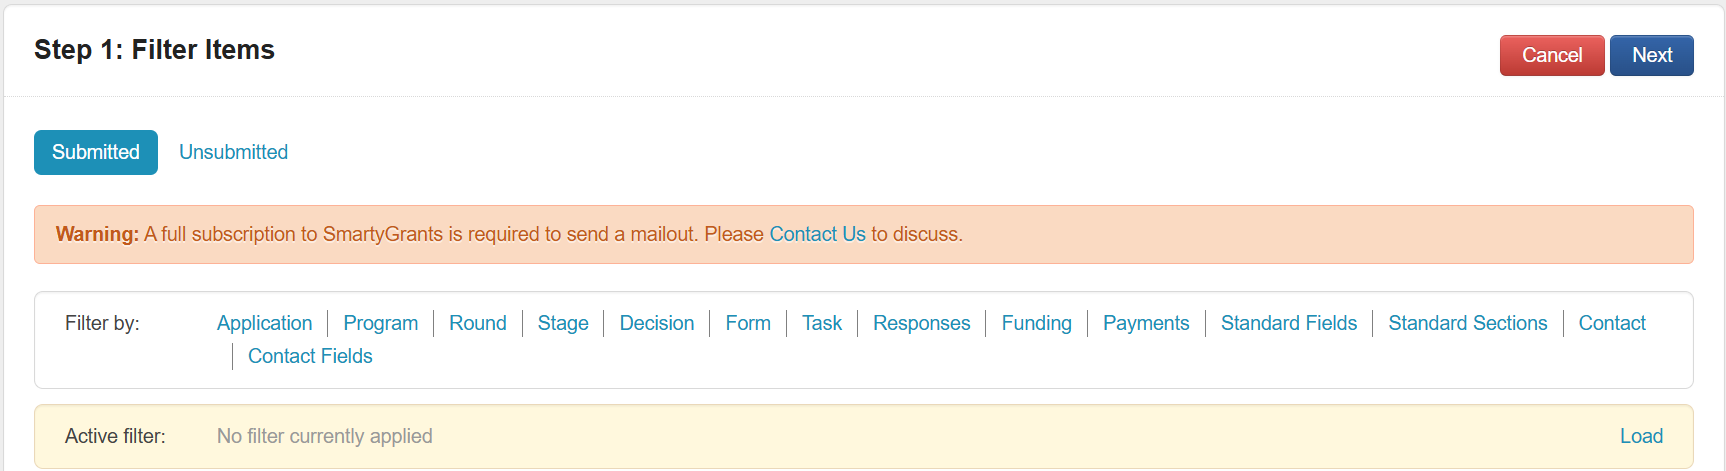
Use the available filters to select applications from as many programs and/or rounds as you need to ensure you have captured the correct audience for your Mailout. This filter screen works in a similar way to the application filter screen. For more information on filtering please see Application Filter.
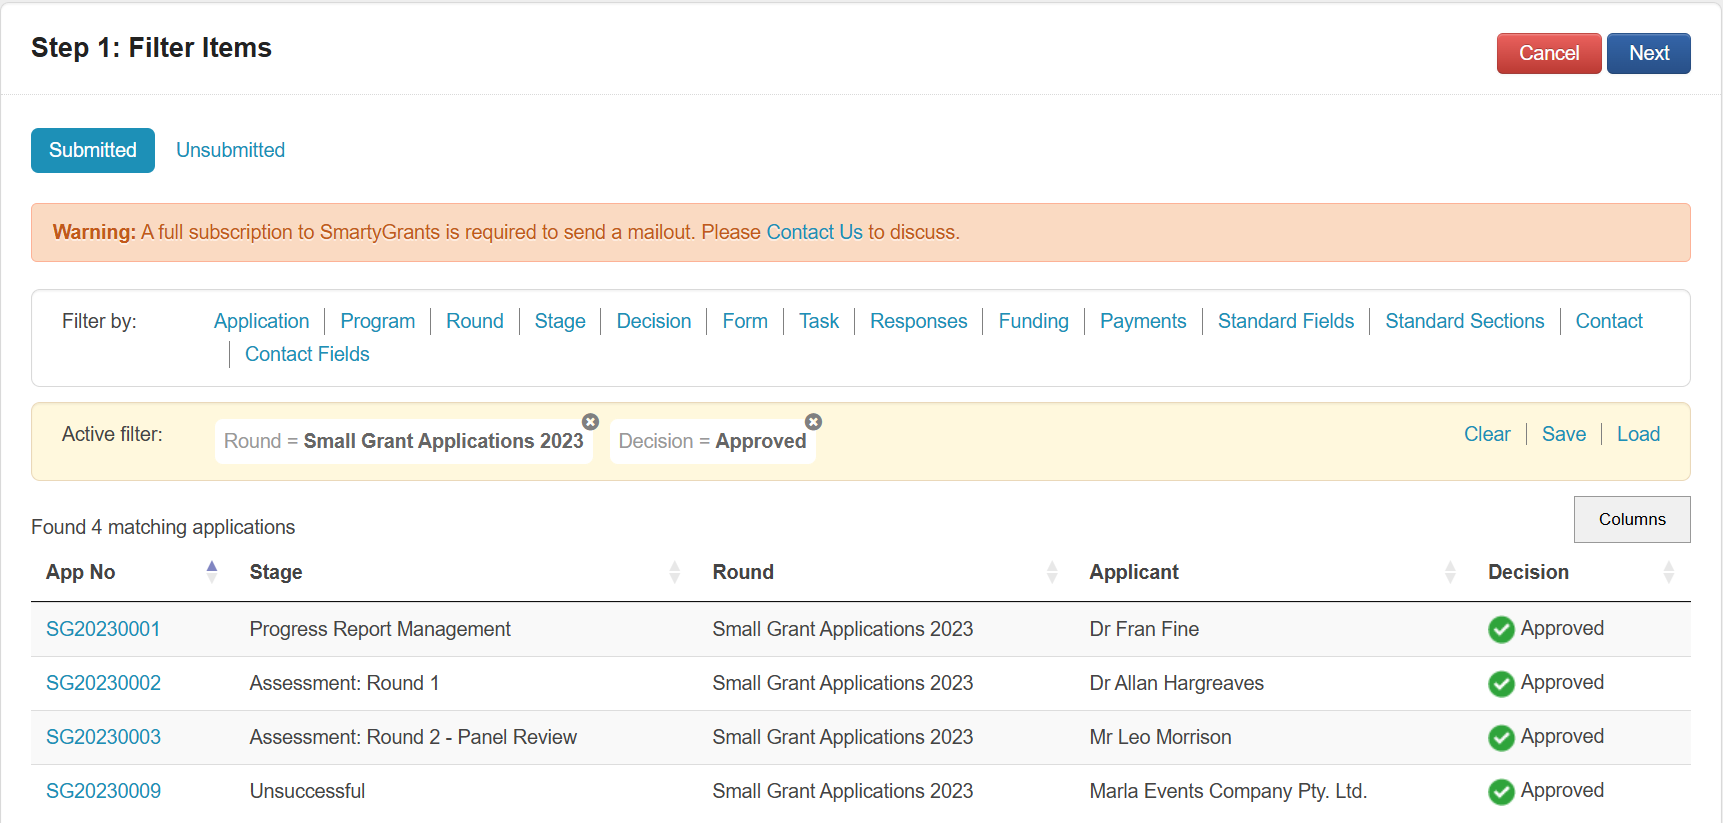
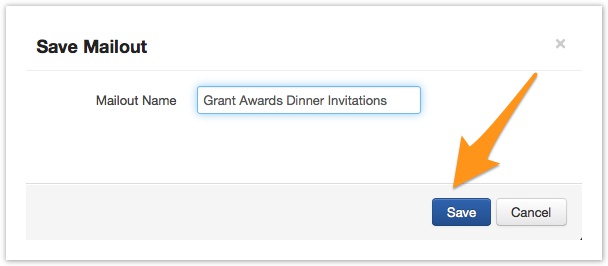
Once you have applied the filters to choose the applications to be used in the mailouit, select the blue Next button and save your Mailout Name.
Step 2 - Select Recipients
After your filters have been selected you will need to select the recipients of your Mailout. SmartyGrants will provide a list of contact types available within the applications selected in Step 1.
Please note that each of your chosen contact types will not be able to see each others email addresses, unless the contacts are Cc'd recipients from the same application. Each contact type will only see the email you have created and any attachment and/or report that you have included in your Mailout. For more information see CC and BCC recipients below.
Select the Edit button/s to begin selecting recipients
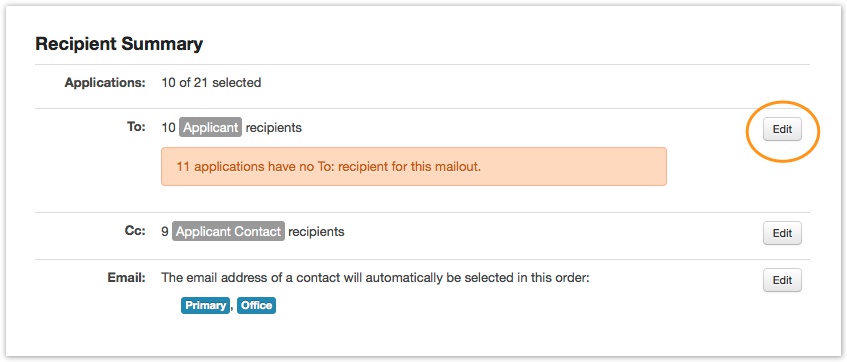
You can choose one "To" contact type and several "Cc" contact types.


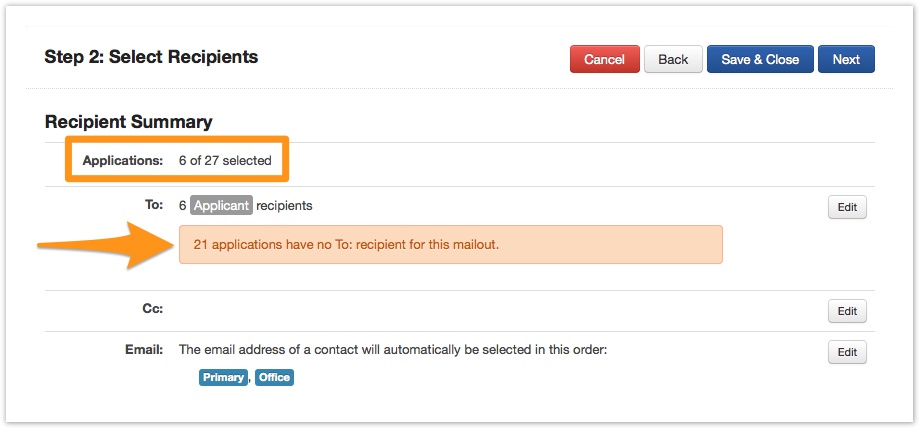
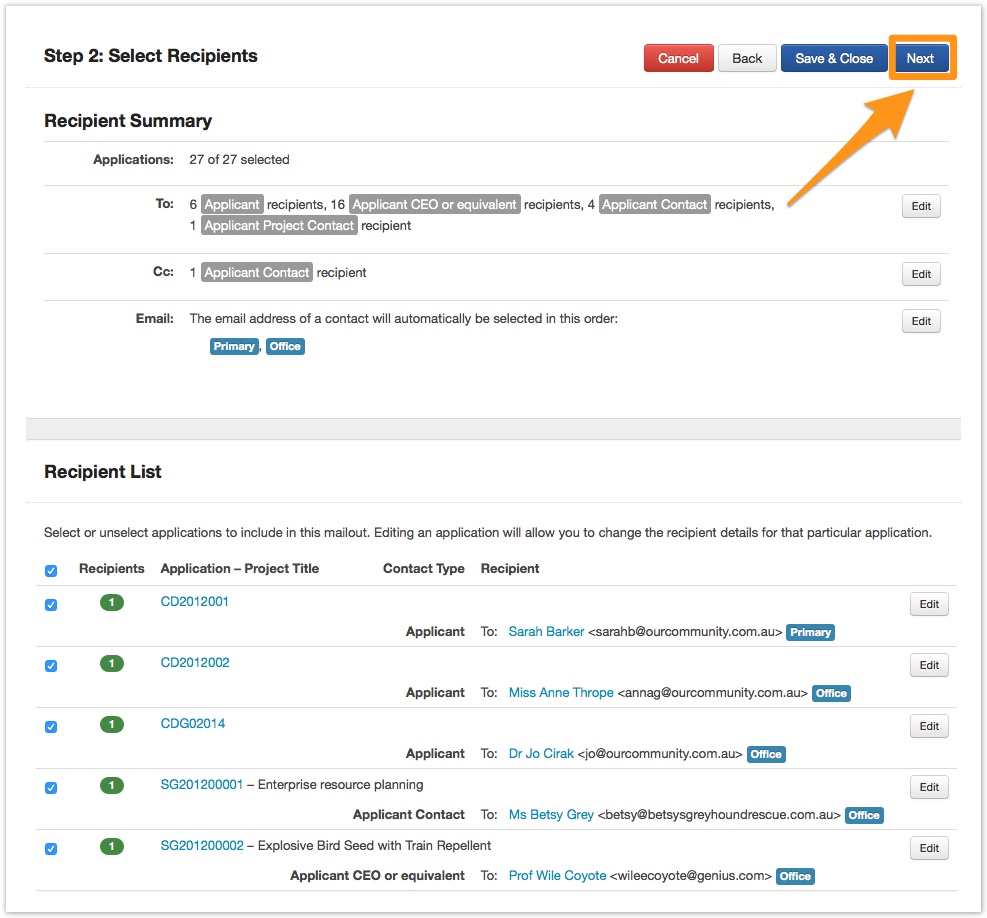
The recipient summary reflects how many of your chosen "To" contact types are available in the applications you have selected.
In the below example 6 of 27 applications have an "applicant" contact type. This means that you will need to select a contact type for the remaining 21 applications of the mailout. These applications are identified in the recipient list as errors, each of these errors will need to be edited and a contact type chosen. Refer to editing the recipient list below
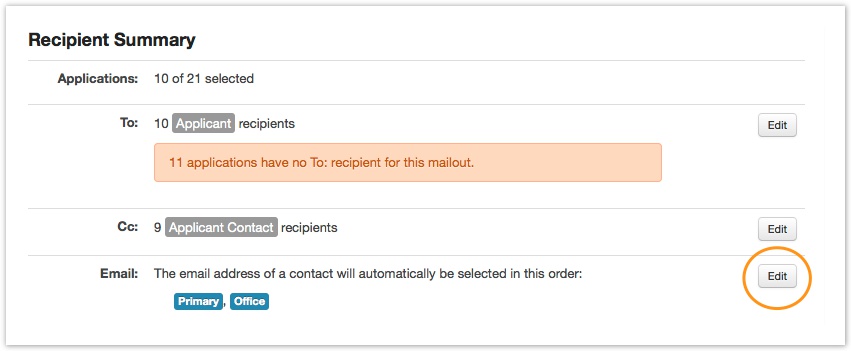
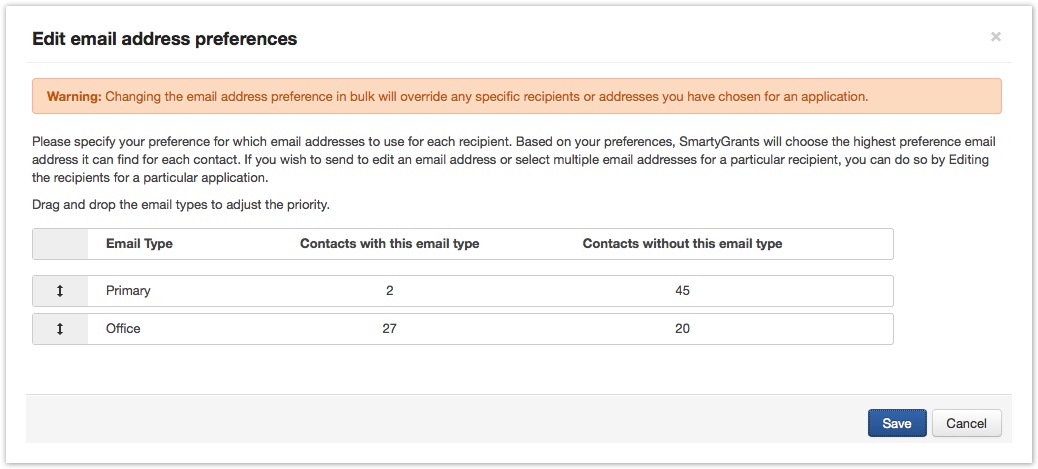
SmartyGrants allows you to specify your preference for the email address type to use for each recipient eg: primary, office etc. You can edit this by dragging and dropping the email types to adjust the priority order. SmartyGrants will default the priority order and send an email based on the highest priority email address it can find.
Editing the Recipient List allows you to modify contact types within each application to include in the mailout.E
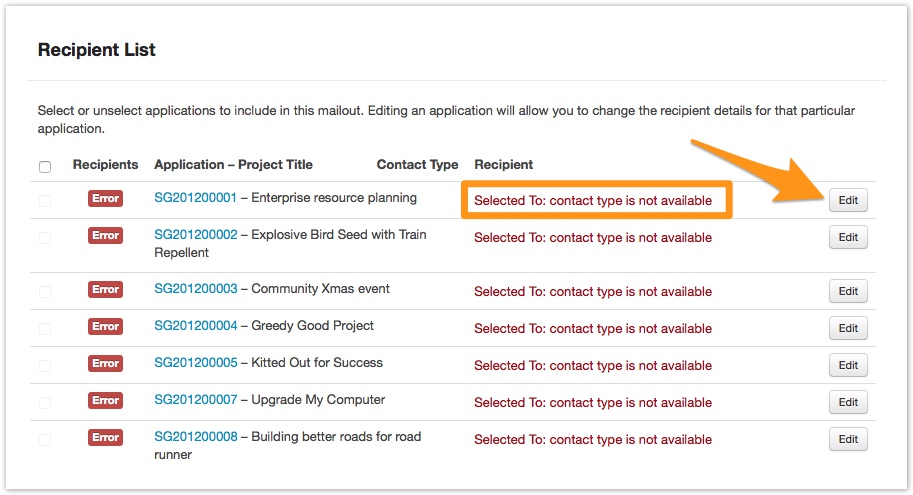
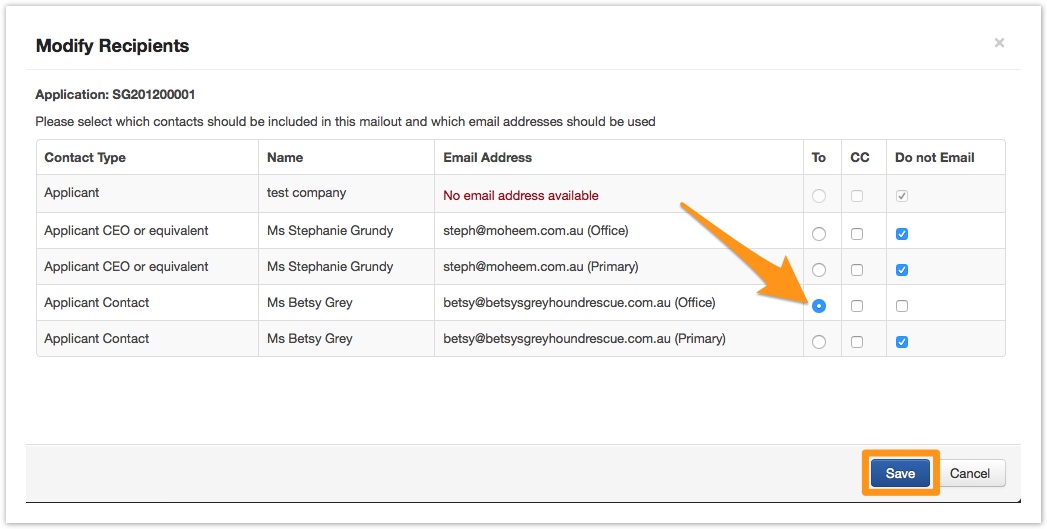
Selecting Edit will show you all contact types available within that application and allow you to select the contact type you wish to include and discard those you do not want to send or Cc. Once you have modified your choices ensure you save.
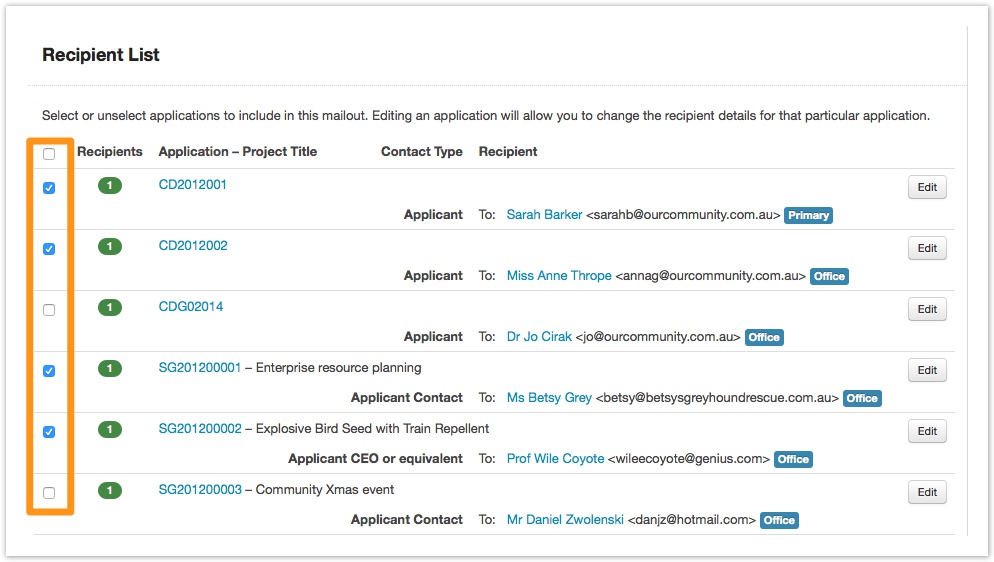
The final step of the recipient list is to select or deselect those applications you want to include in the mailout.
Once your recipient list has been modified as required and your selection is complete you are ready to move to the next step. To do that select Next at the top of the screen.
If you Save & Close a mailout to come back later, any applications that may be submitted after this time will not be included.
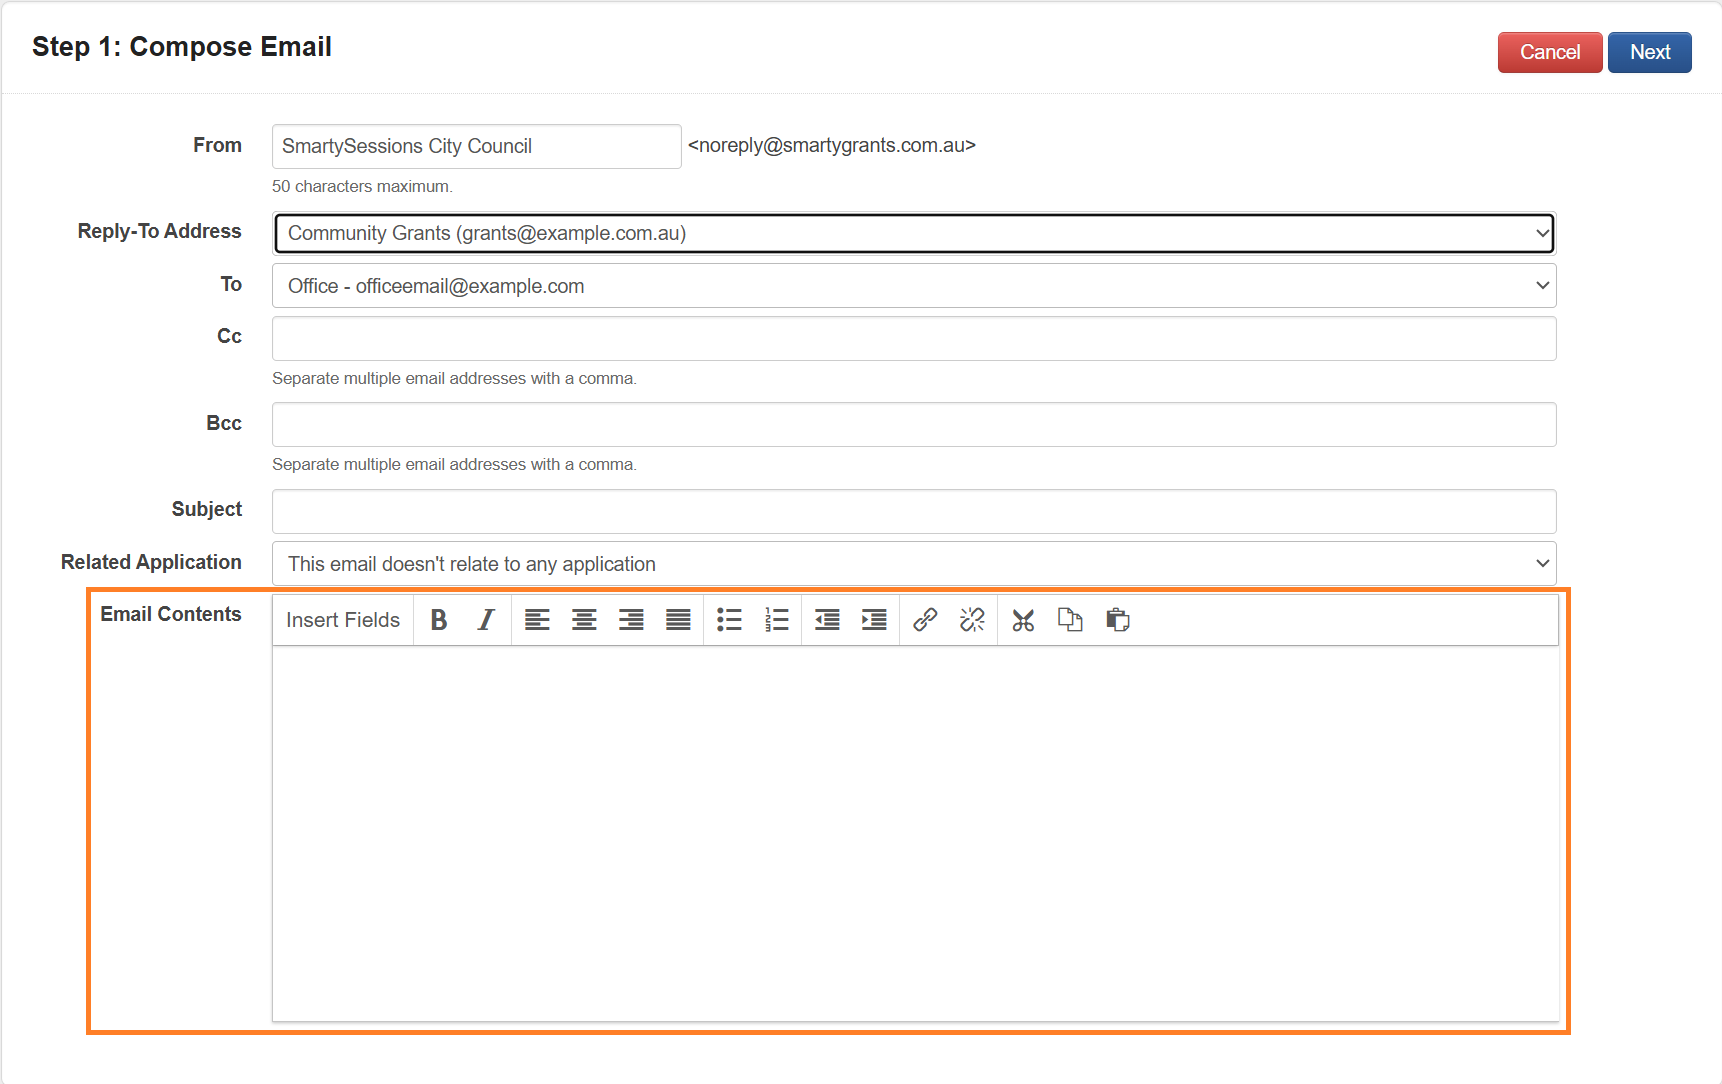
Step 3 - Compose Mailout
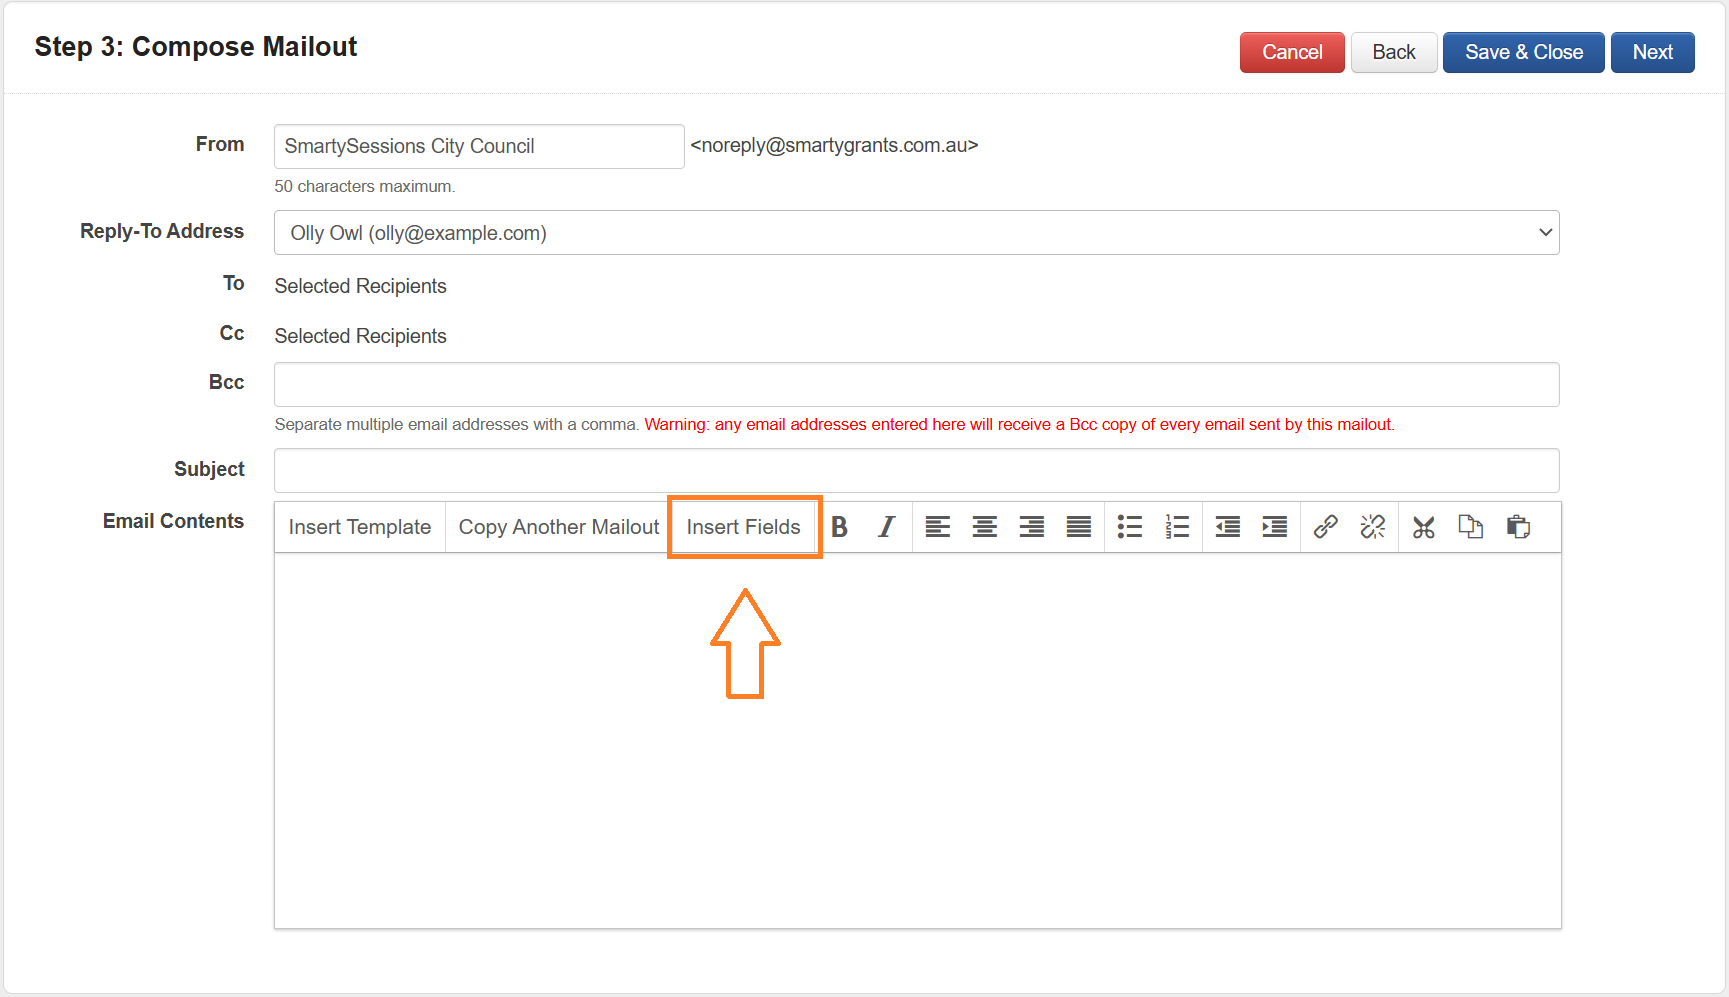
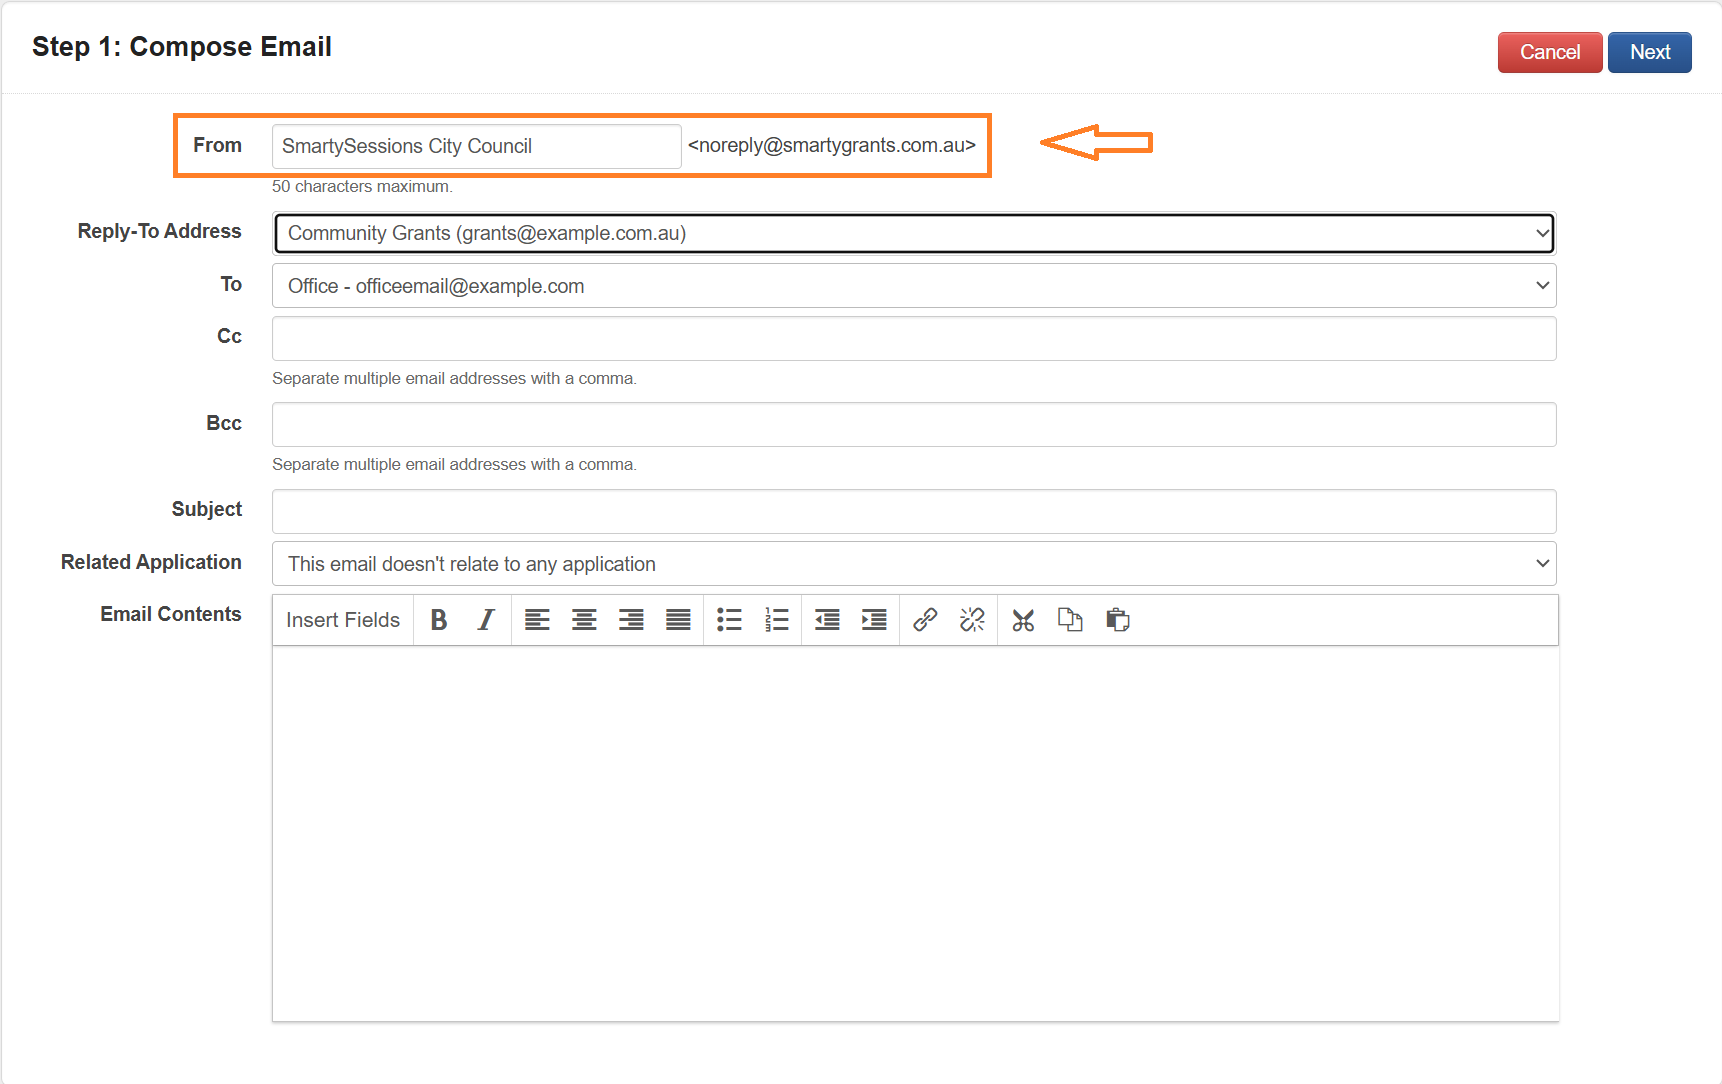
Complete the fields highlighted below.
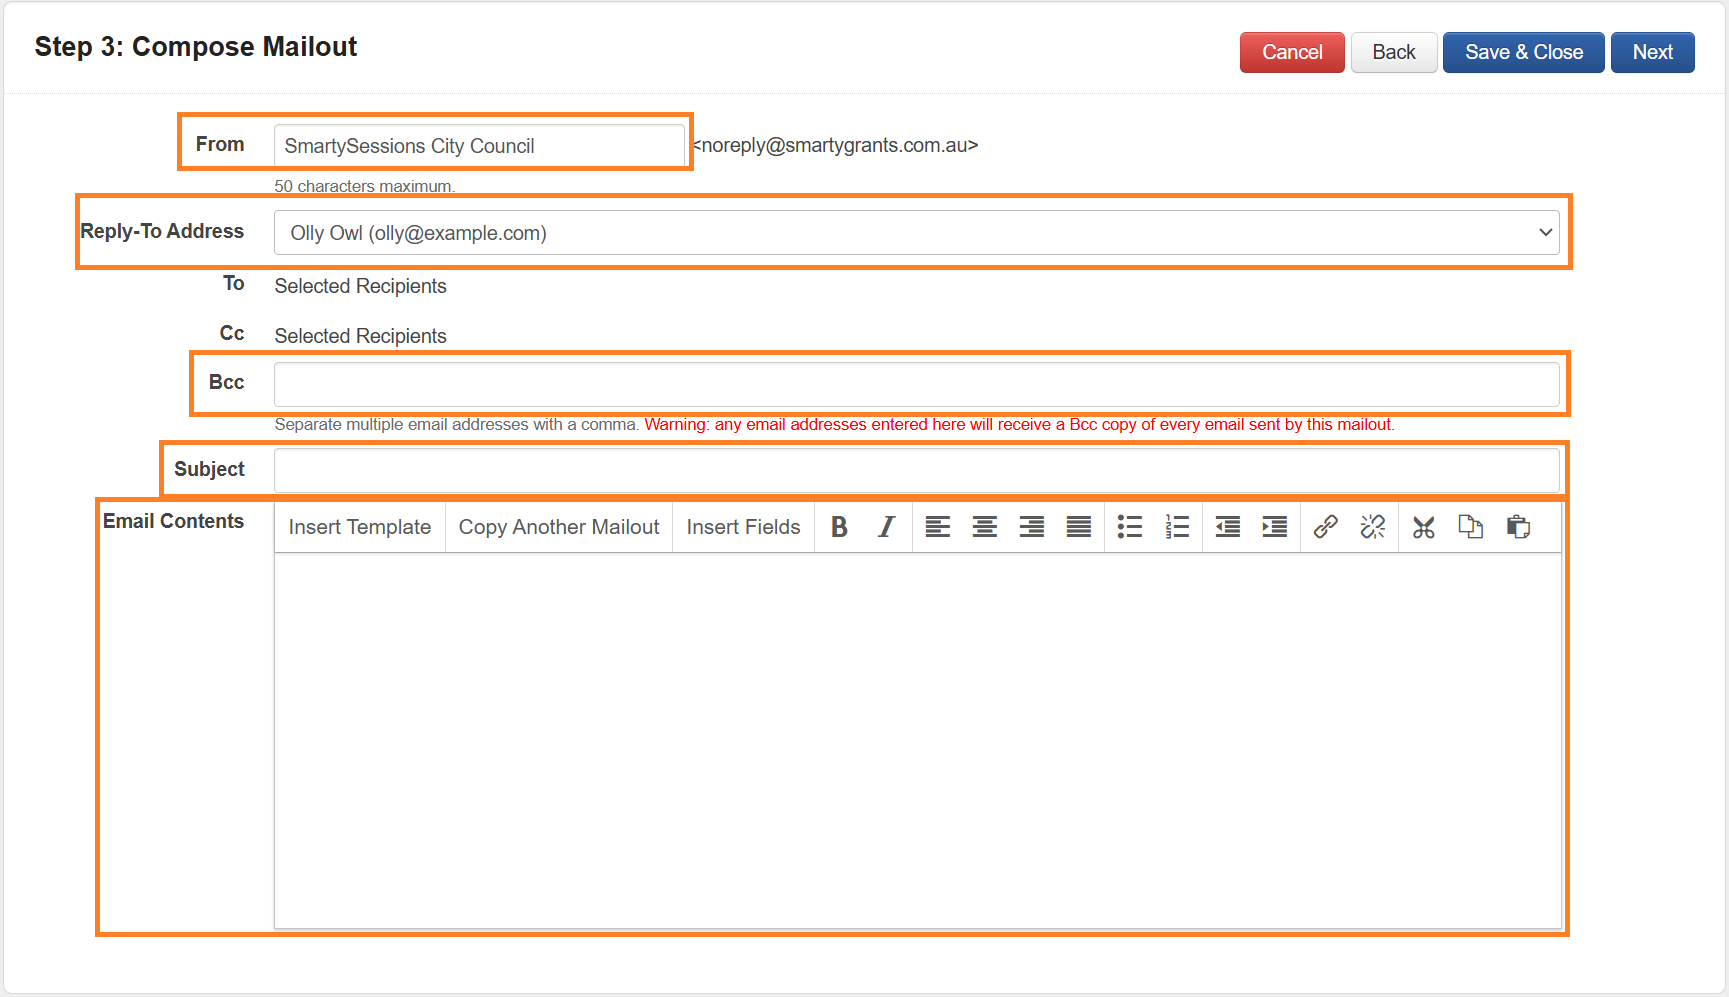
Details of each of the highlighted fields are:
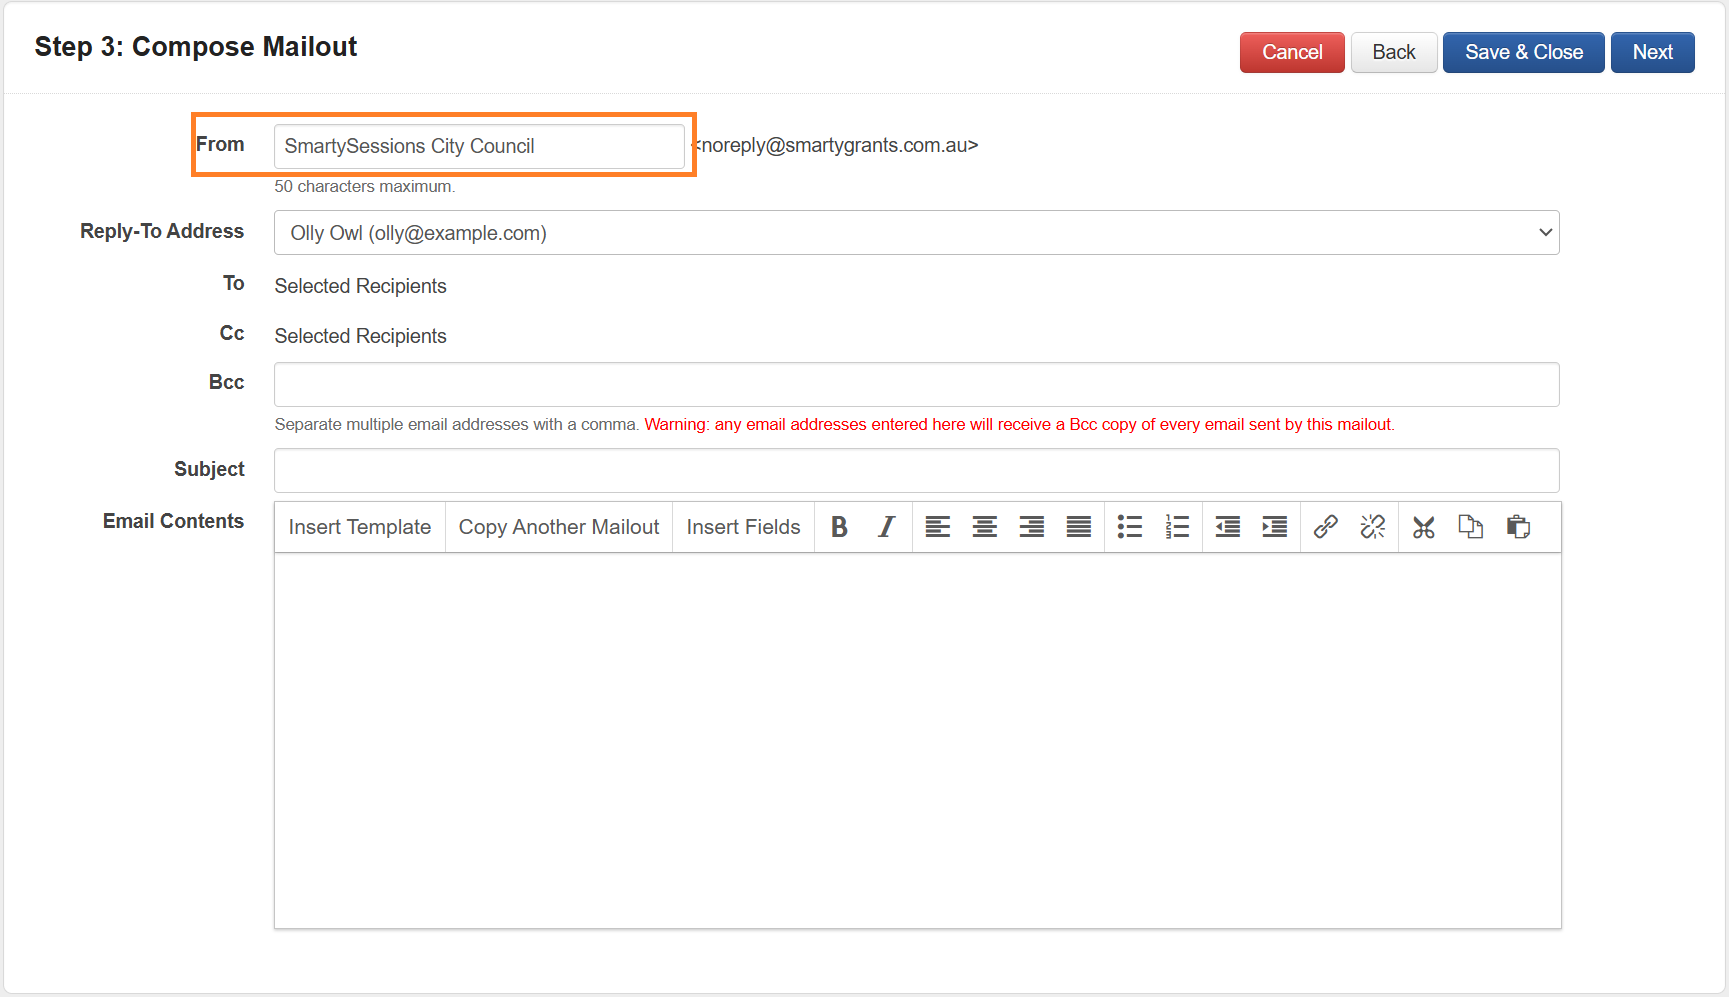
From: This field will be displayed in the recipients inbox. This will default to the instance name and can be edited manually. To edit, select the From field and enter the required content.
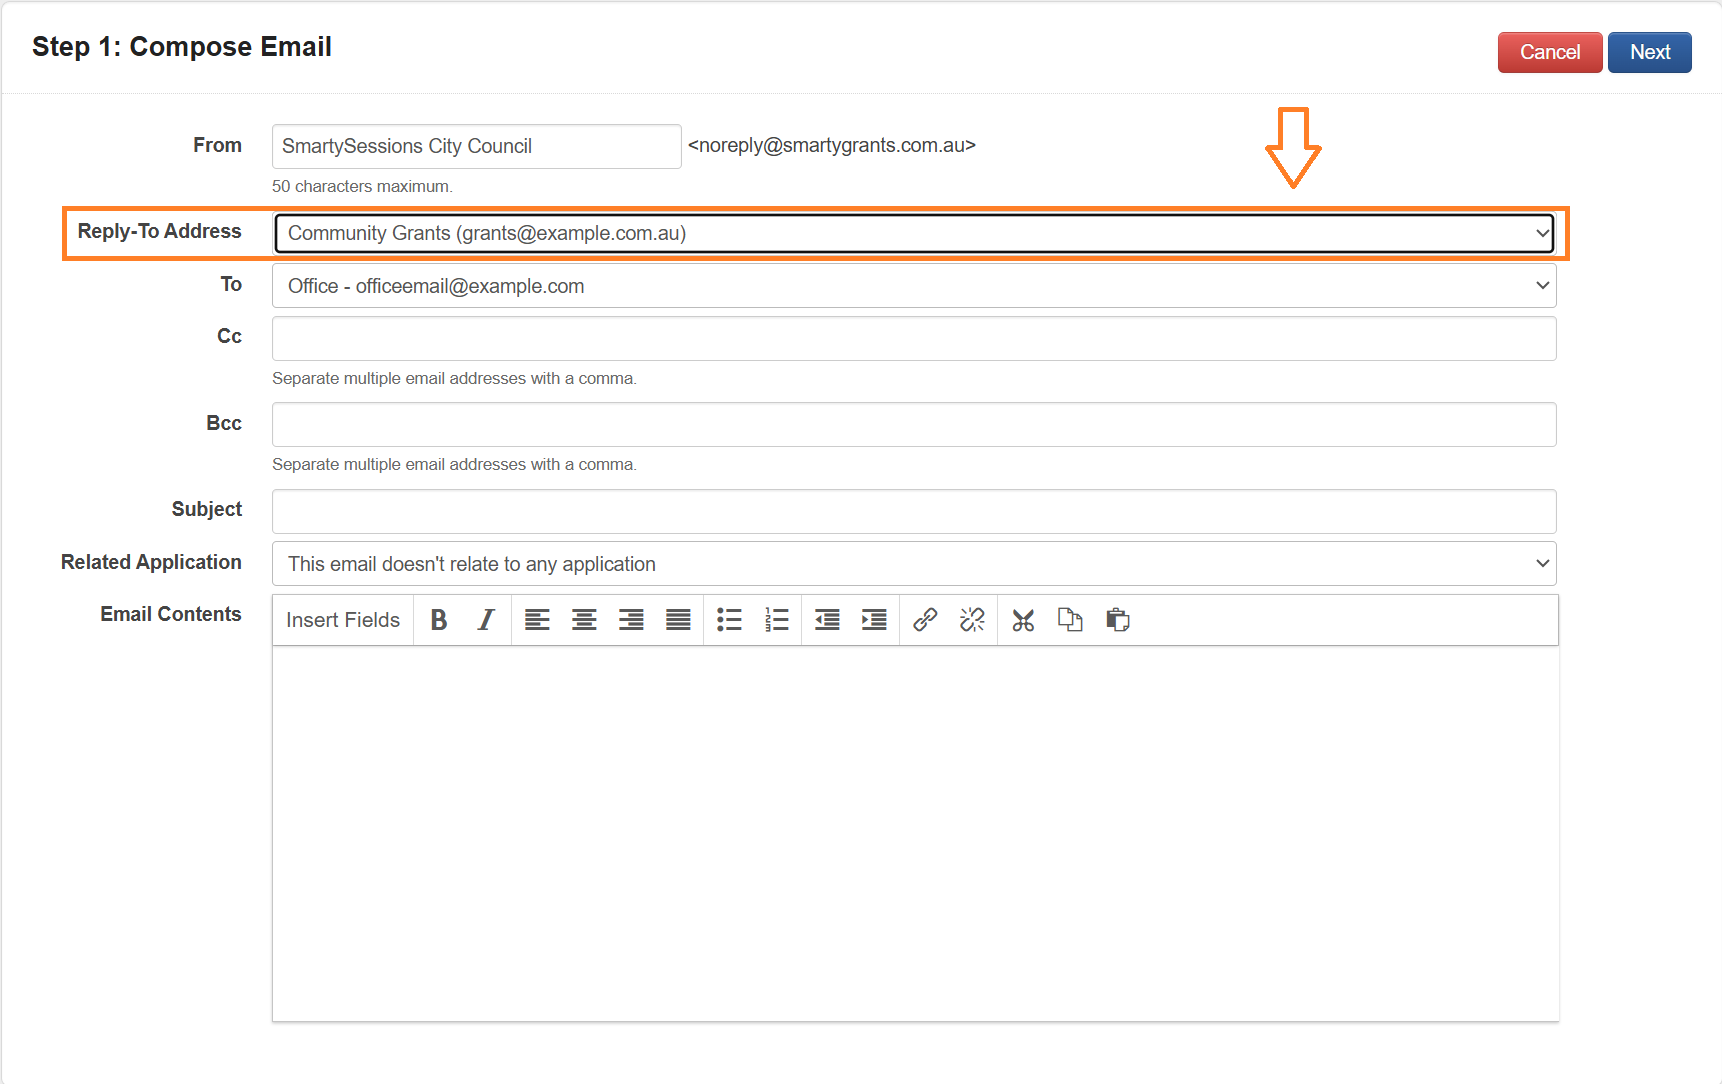
Reply-To Address: Any replies to the sent mailout/email will go to the address selected here. This will default to the username of the user who is creating the mailout/email and can be edited. To edit, select Reply-To Address and choose the required iption from the drop down.
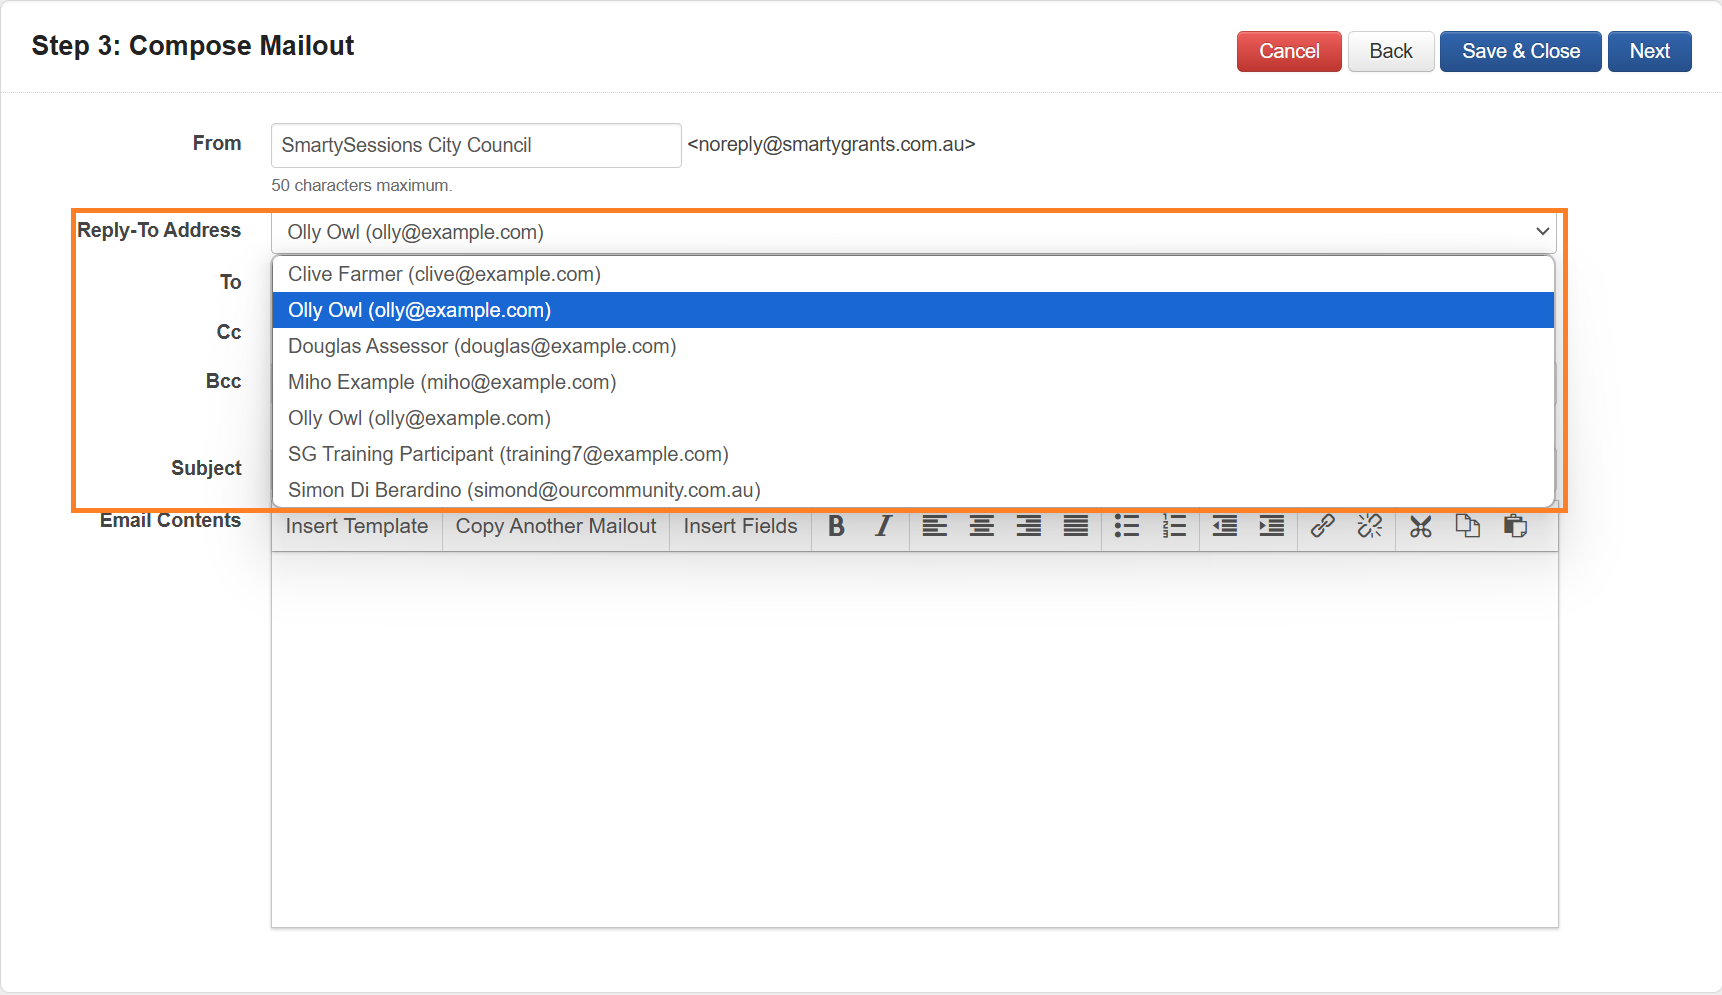
The options available in the Reply-To Address drop down list include all user with access to Mailouts for the instance and program as well as an Reply-To Email configured at program or instance level via Settings.
Bcc: Manually enter any valid email address here to include that recipient as a Bcc.

"Bcc" recipients will receive a copy of each email sent for each "To" recipient within the mailout. eg: if there are 6 "To" recipients in the mailout then any recipient listed as a "Bcc" will receive 6 emails.
Subject: the subject line as displayed in the recipients inbox.
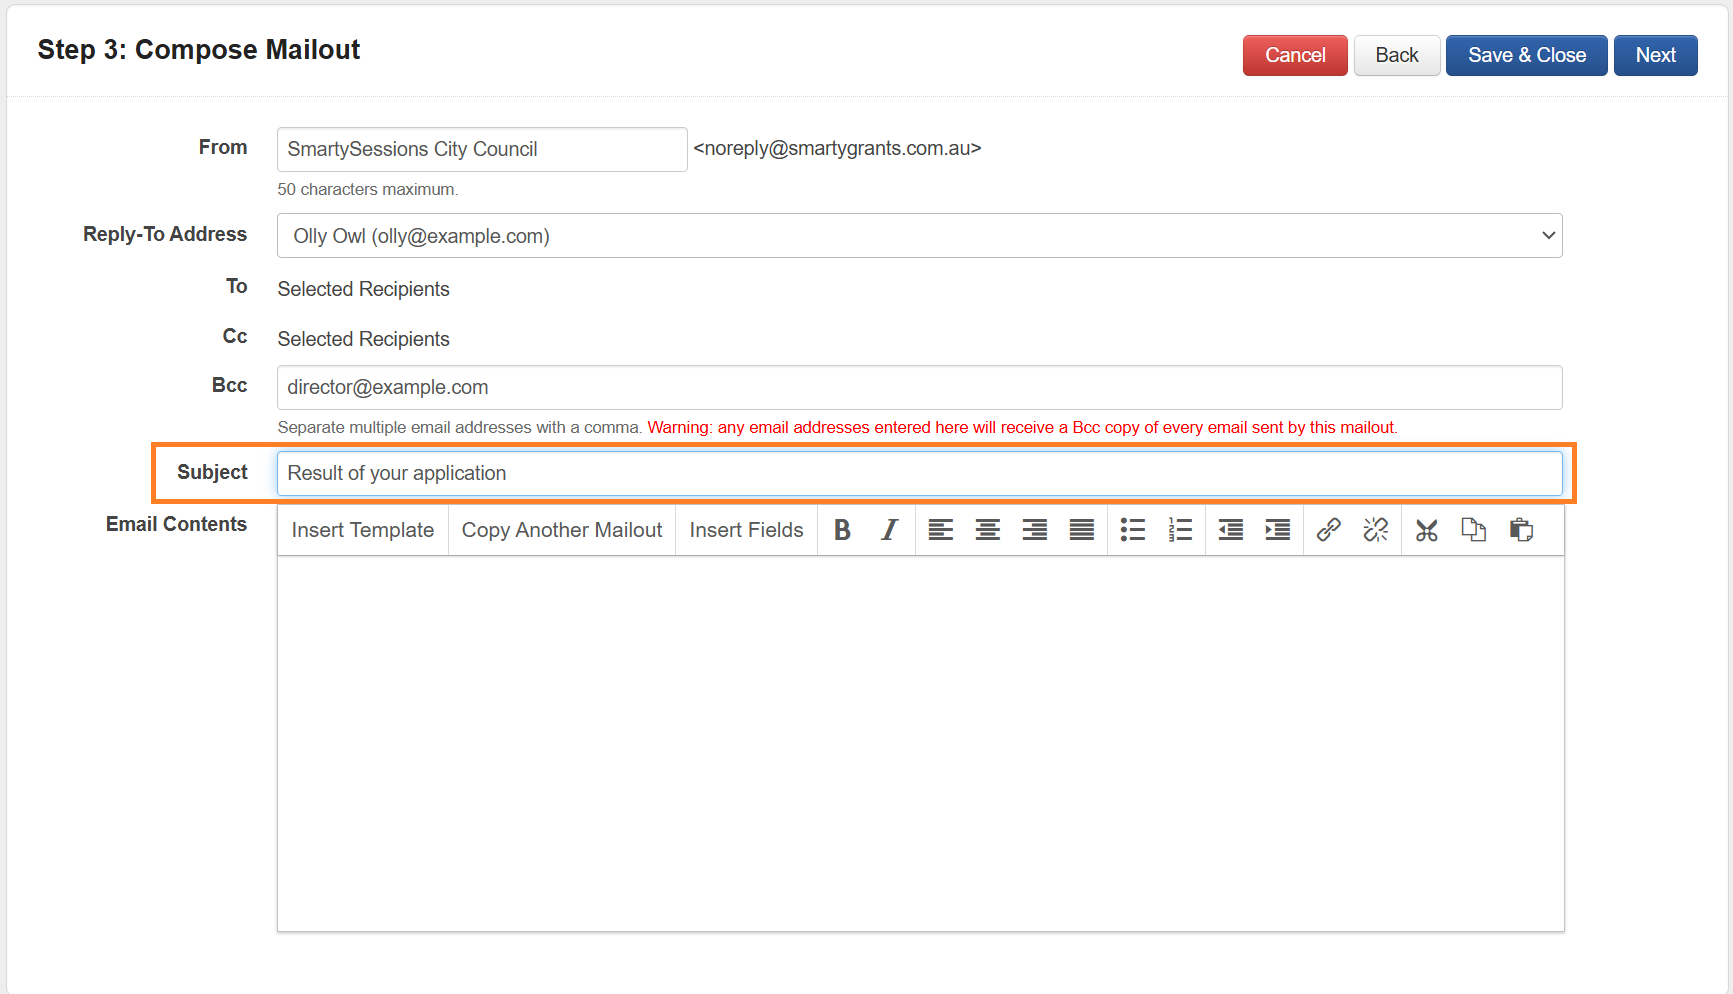
If using a Mailout Template the subject configured in the template will populate here.
Email Contents: enter the email body content you would like to have included in the sent mailout/email. Email Contents can be entirely manually entered, Mailout Templates can be used and Insertable Fields are also available.
To manually enter Email Contents, select Email Contents and enter the required information.
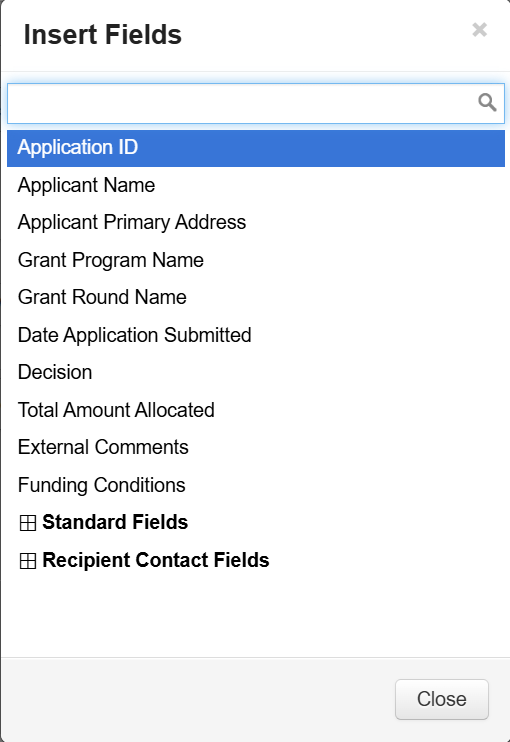
To use insertable fields, select Insert Fields.
Select the required Field.
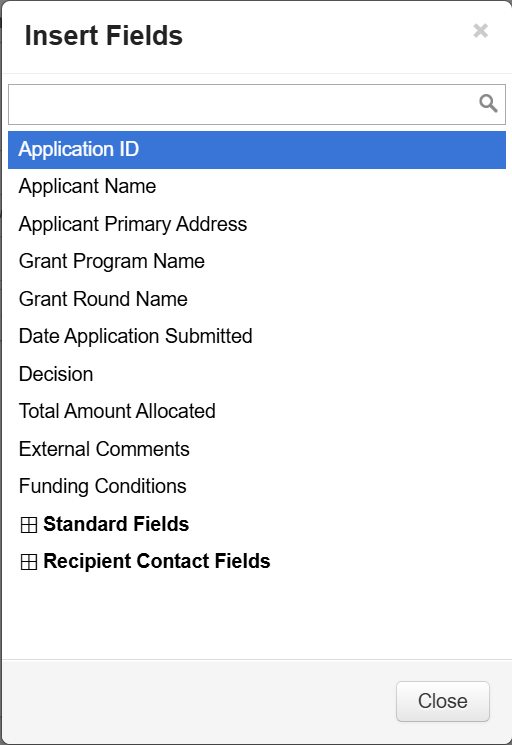
The available options will depend on the type of email/mailout being sent. Ony fields that exist within the applications or contact card will be available.
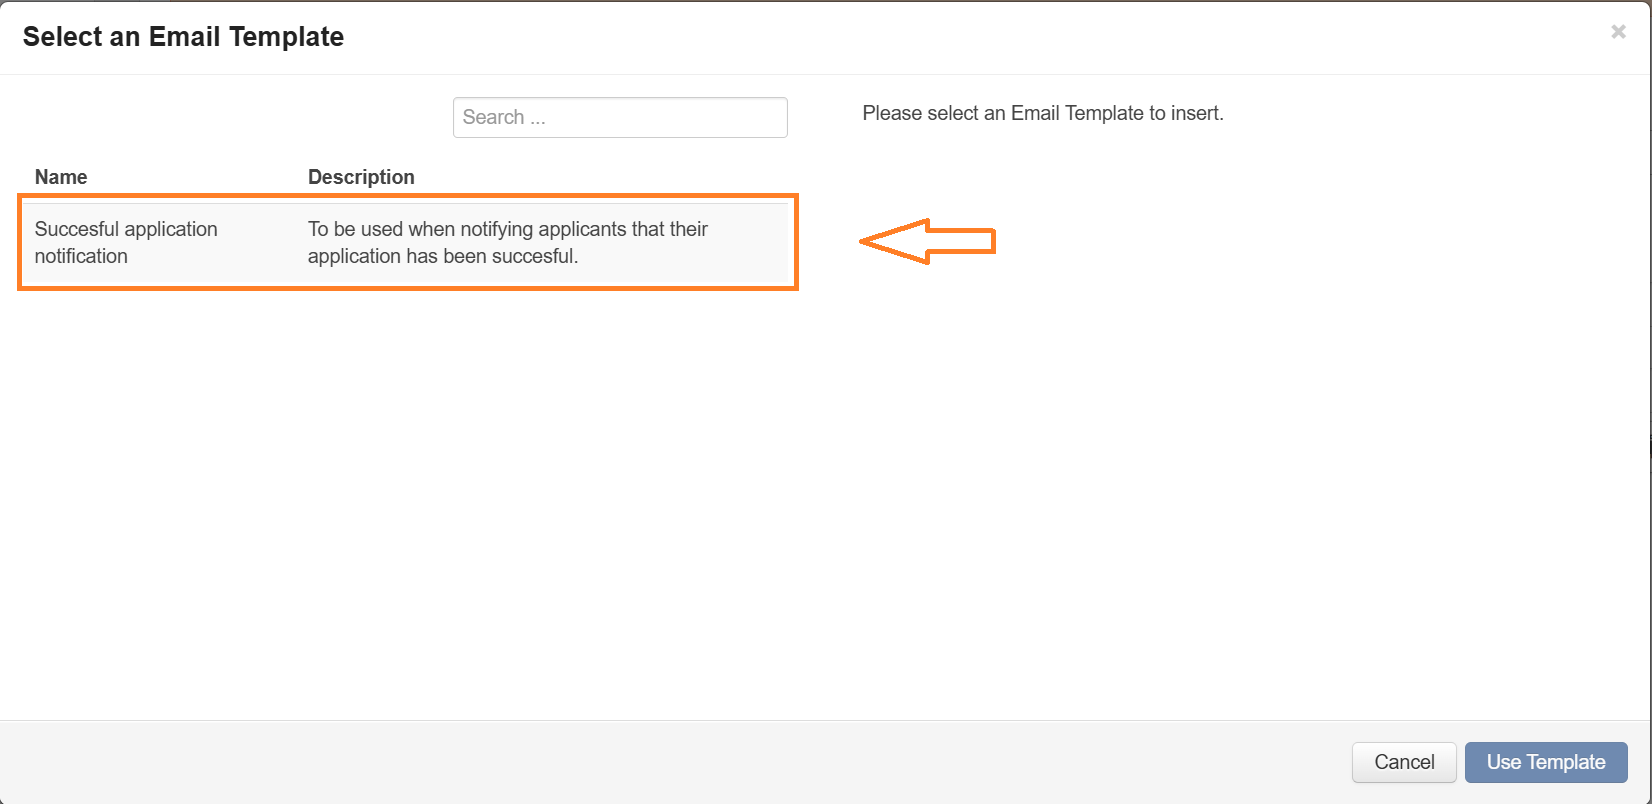
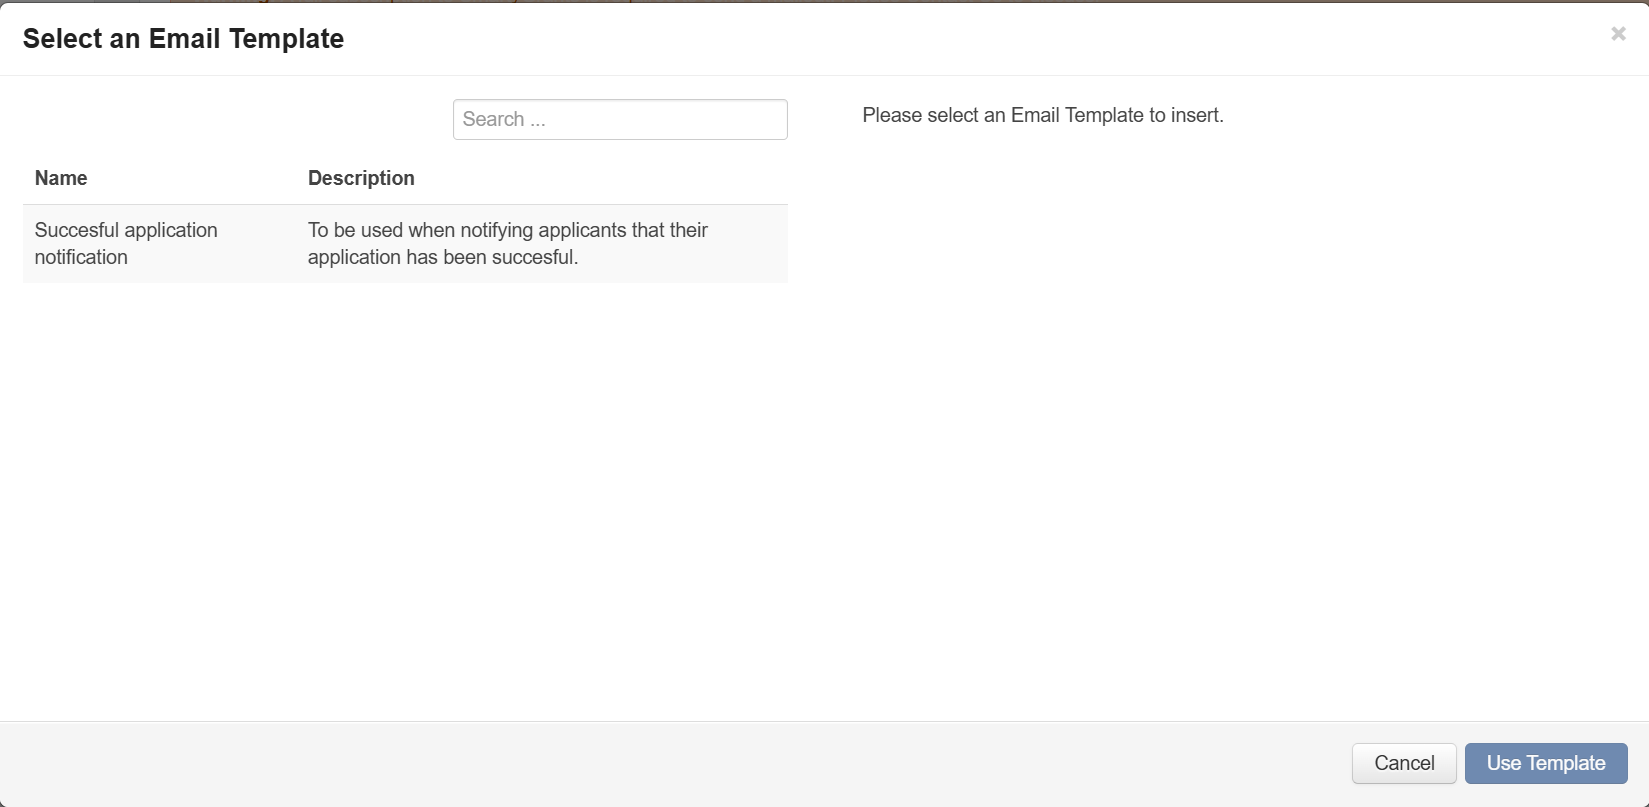
To use a Mailout Template, select Insert Template.
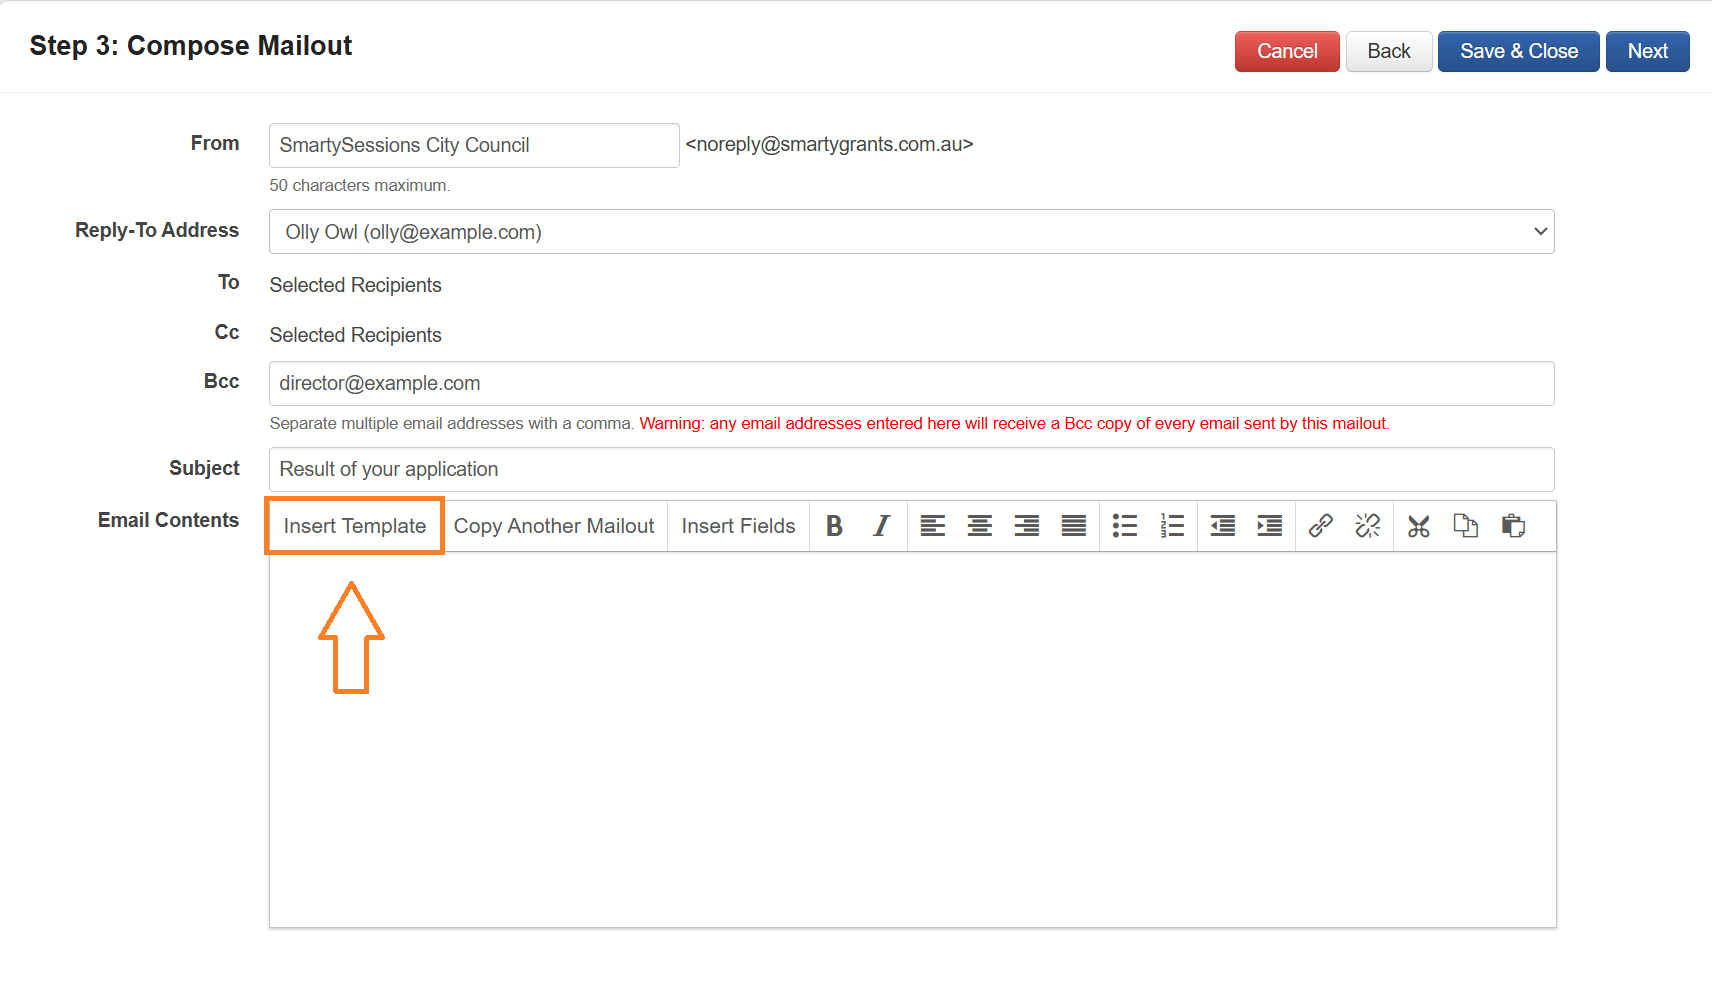
Select the Mailout Template to be used.
Step 4- Choose Attachments
There are two types of attachment types available.
Standard attachments - any standard file attachment file.
Select Browse and select the file/s you wish to attach.
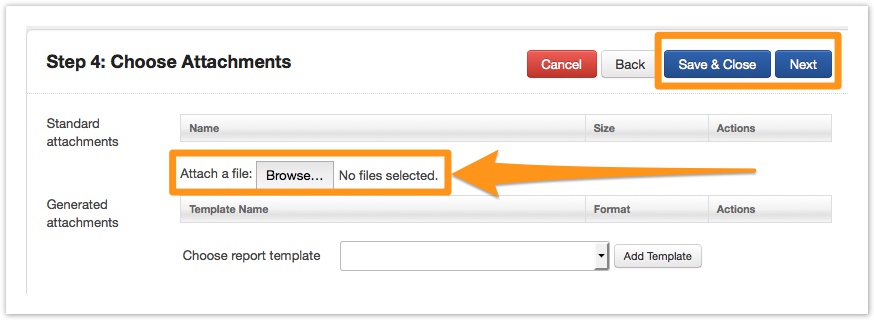
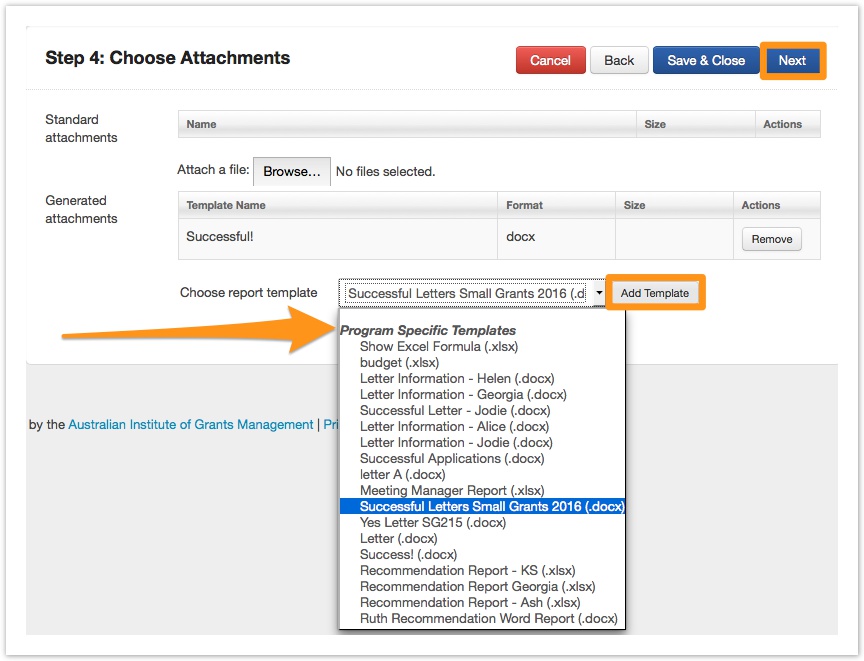
Generated Attachments - is a generated SmartyGrants report template:
You may use any custom report template. This template will generate the report fields specific to each application you have selected and will be attached as a single file to each e-mail of the mailout.
For example - you may select a 'successful letter' template you have created. This successful letter would create a successful letter for each of the applications you selected and will be attached to each e-mail. You will be able to preview what this attachment/report looks like in the next step.
To select a report template from the dropdown menu, select Add Template.
You can choose the format of your mailout before sending

Once all attachments are added, select Next.
For more information on creating and cutomising report templates see Reports and Correspondence.
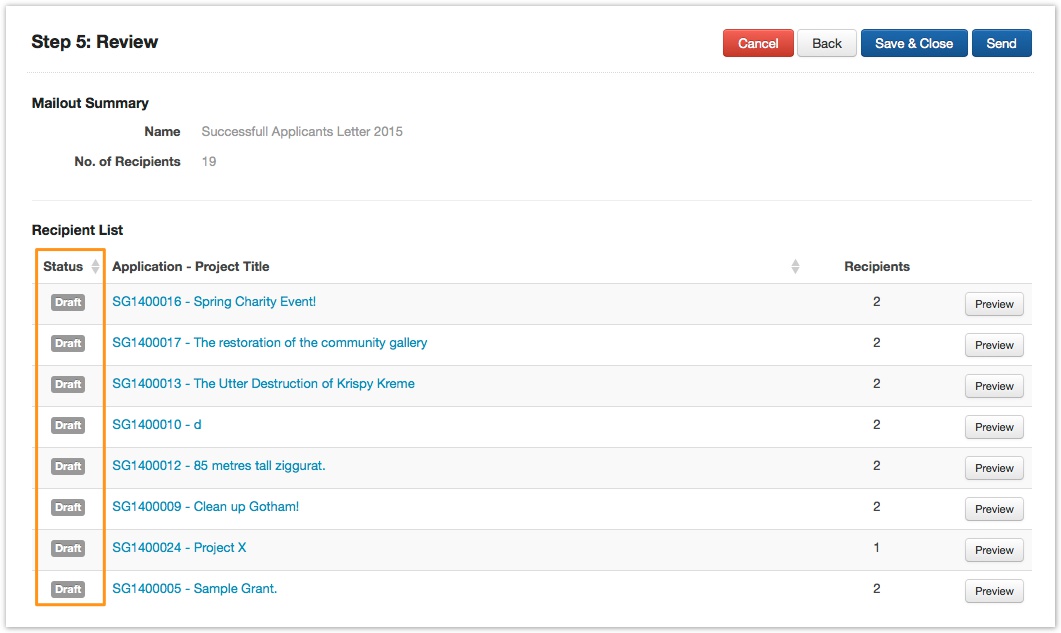
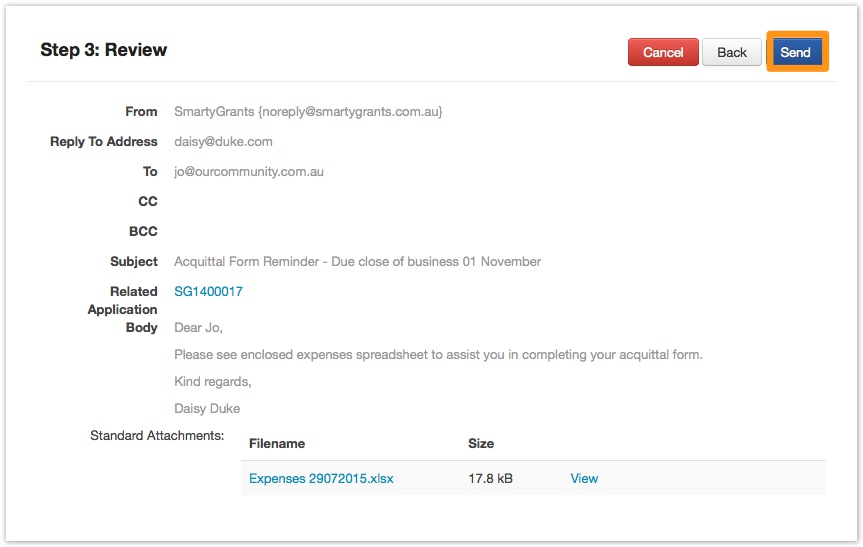
Step 5 - Review
At this point in the process an email has been drafted and you have an opportunity to preview the email contents before you send.
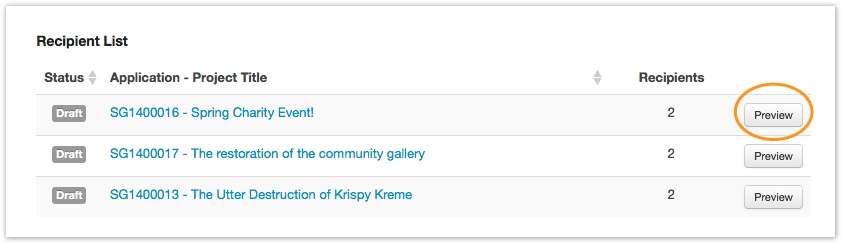
If you have added attachments you may preview the e-mail. To do so, select Preview .
To view a standard attachment, select the attachment's link.
To view a report you may have added, select Generate.
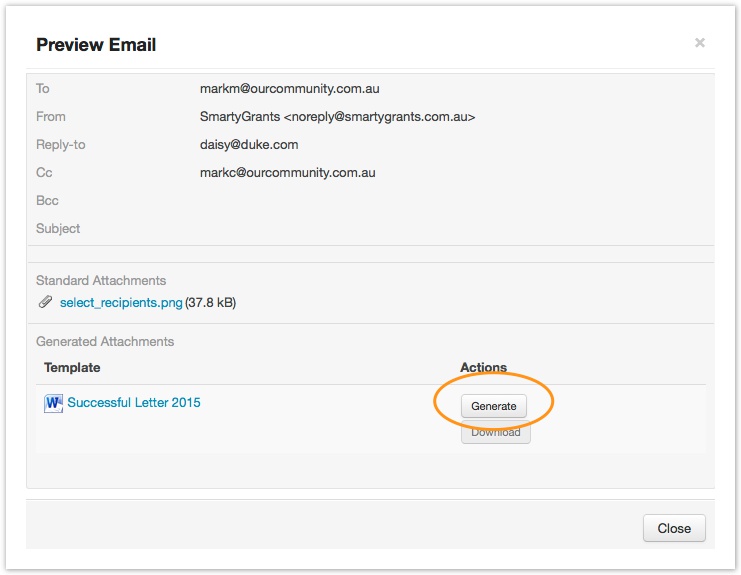
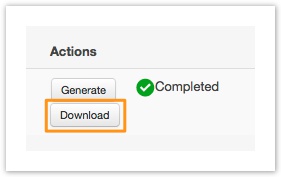
Once the report has generated, select Download. This will open the report attachment up in Word or Excel.
Please note, if you receive an error after you select generate, there is an issue with your report template. You will need to revisit your template in the reporting section and amend your template to run correctly. See Templates and Rules for more information.
Select Close to close the preview.
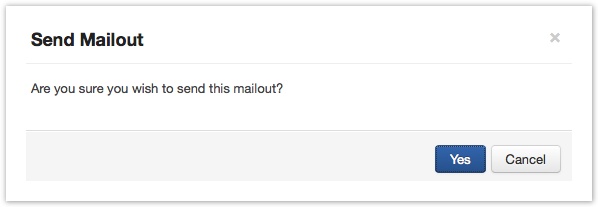
Once you have reviewed your mailout and you are happy to send, select Send in the top right hand corner and then select Yes to confirm. If you are not ready to send it yet, or wish to come back to it another time, select Save and Close to save a Draft Mailout.
You will be able to monitor if your Mailout was successful by checking the number of emails with the Sent status and by reviewing the number of recipients in successful status.
Remember there may be one or more recipients per application on a Mailout depending on how many contact types have been selected and if you have chosen any "Cc" or "Bcc" recipients.
Step 6 - Confirmation
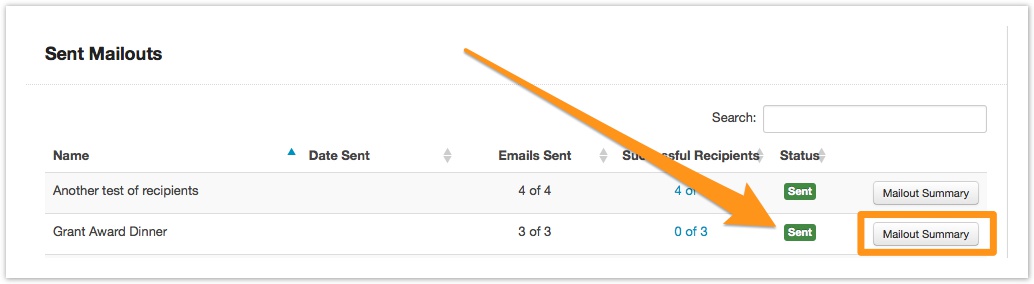
You will see a copy of the entire mailout under the Sent Mailouts section from the List of Mailouts home page. A copy of the correspondence sent will be attached to the application as a file note, as well as a file note in the contact directory.
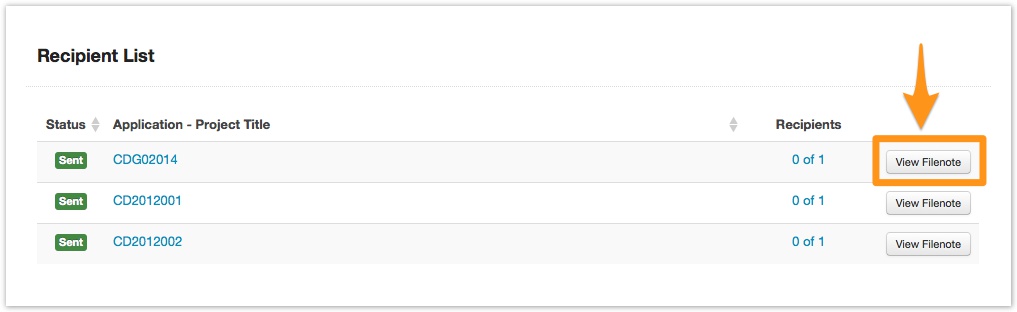
To view the file note, select the Mailout Summary button.
Then select View Filenote.
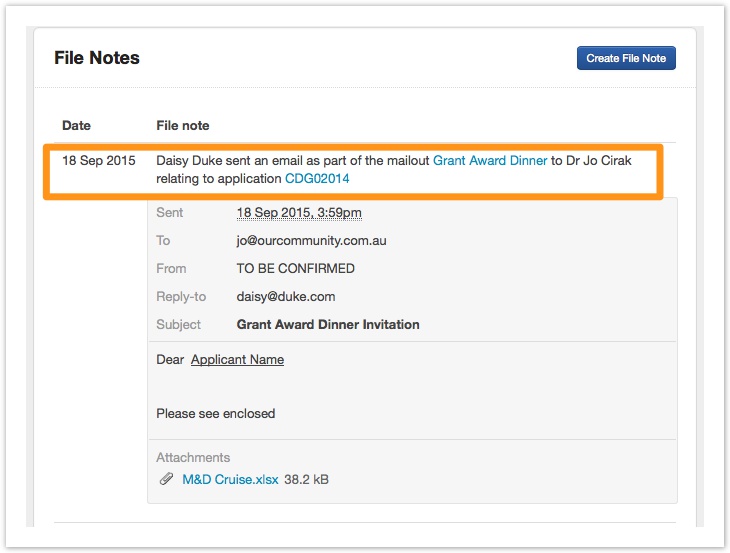
The file note displays which user sent the mailout, the date the mailout was sent, and the mailout name which also hyperlinks back to the summary page.
Send Email
Send Email is a function that allows you to send a single email to a recipient from the contacts tab of an application or a contact card in the contacts directory.
If you would rather send a bulk email to many applicants you can do this using the Mailouts function.
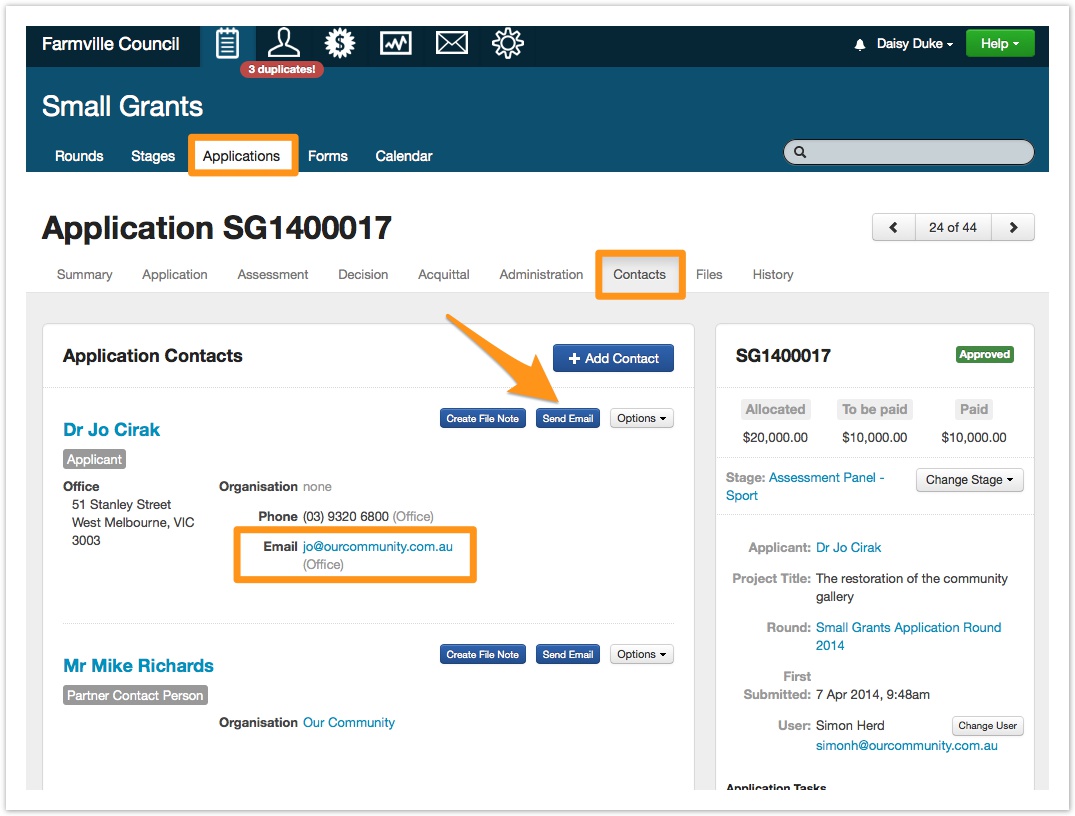
If you are using the Contacts tab of the application form, select Send Email.
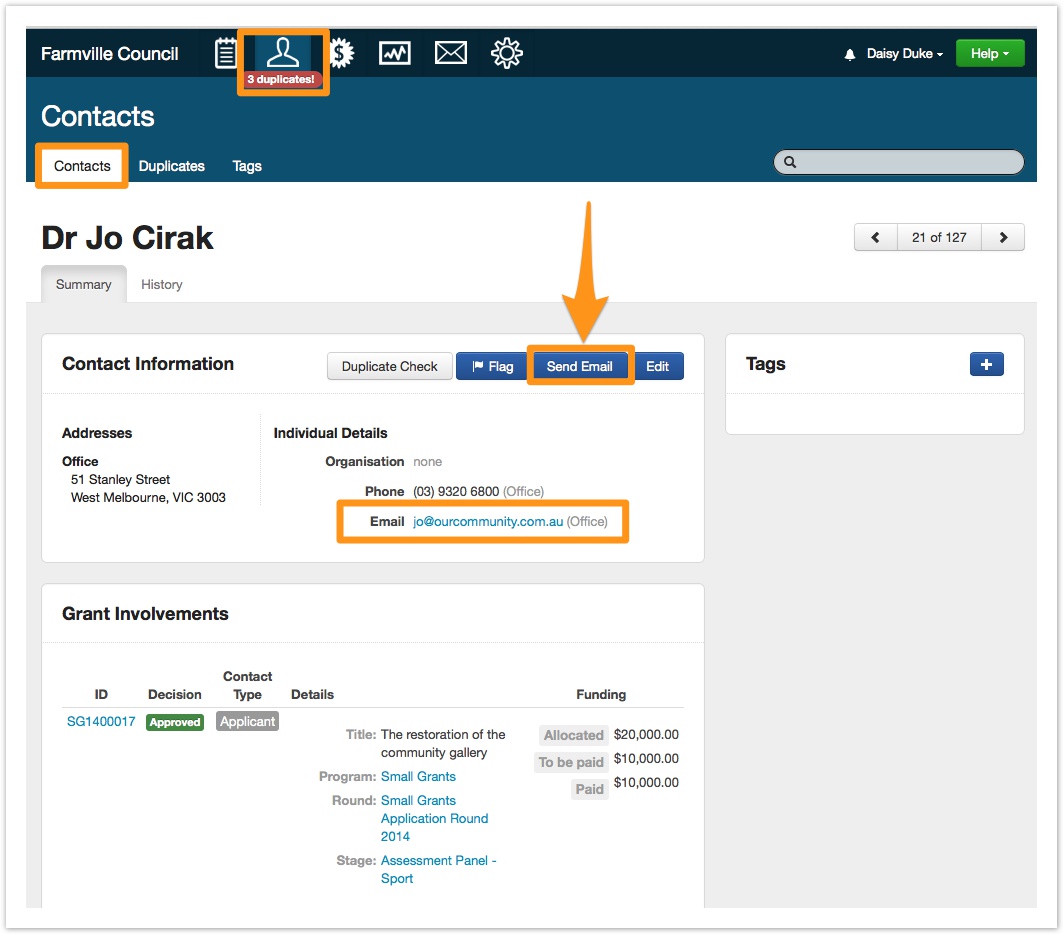
If you are sending an email from the Contacts directory, select the Send Email button within the contacts card.
Step 1- Compose email
To send email, begin by confirming the response in the From field. The recipients inbox will show the contents of this field as the sender of the email. The default response populated will be the name of the SmartyGrants instance the email is being sent from. To edit, select the From field.
Enter the From details as required. If the default response that has been populated is sufficient, no action required.
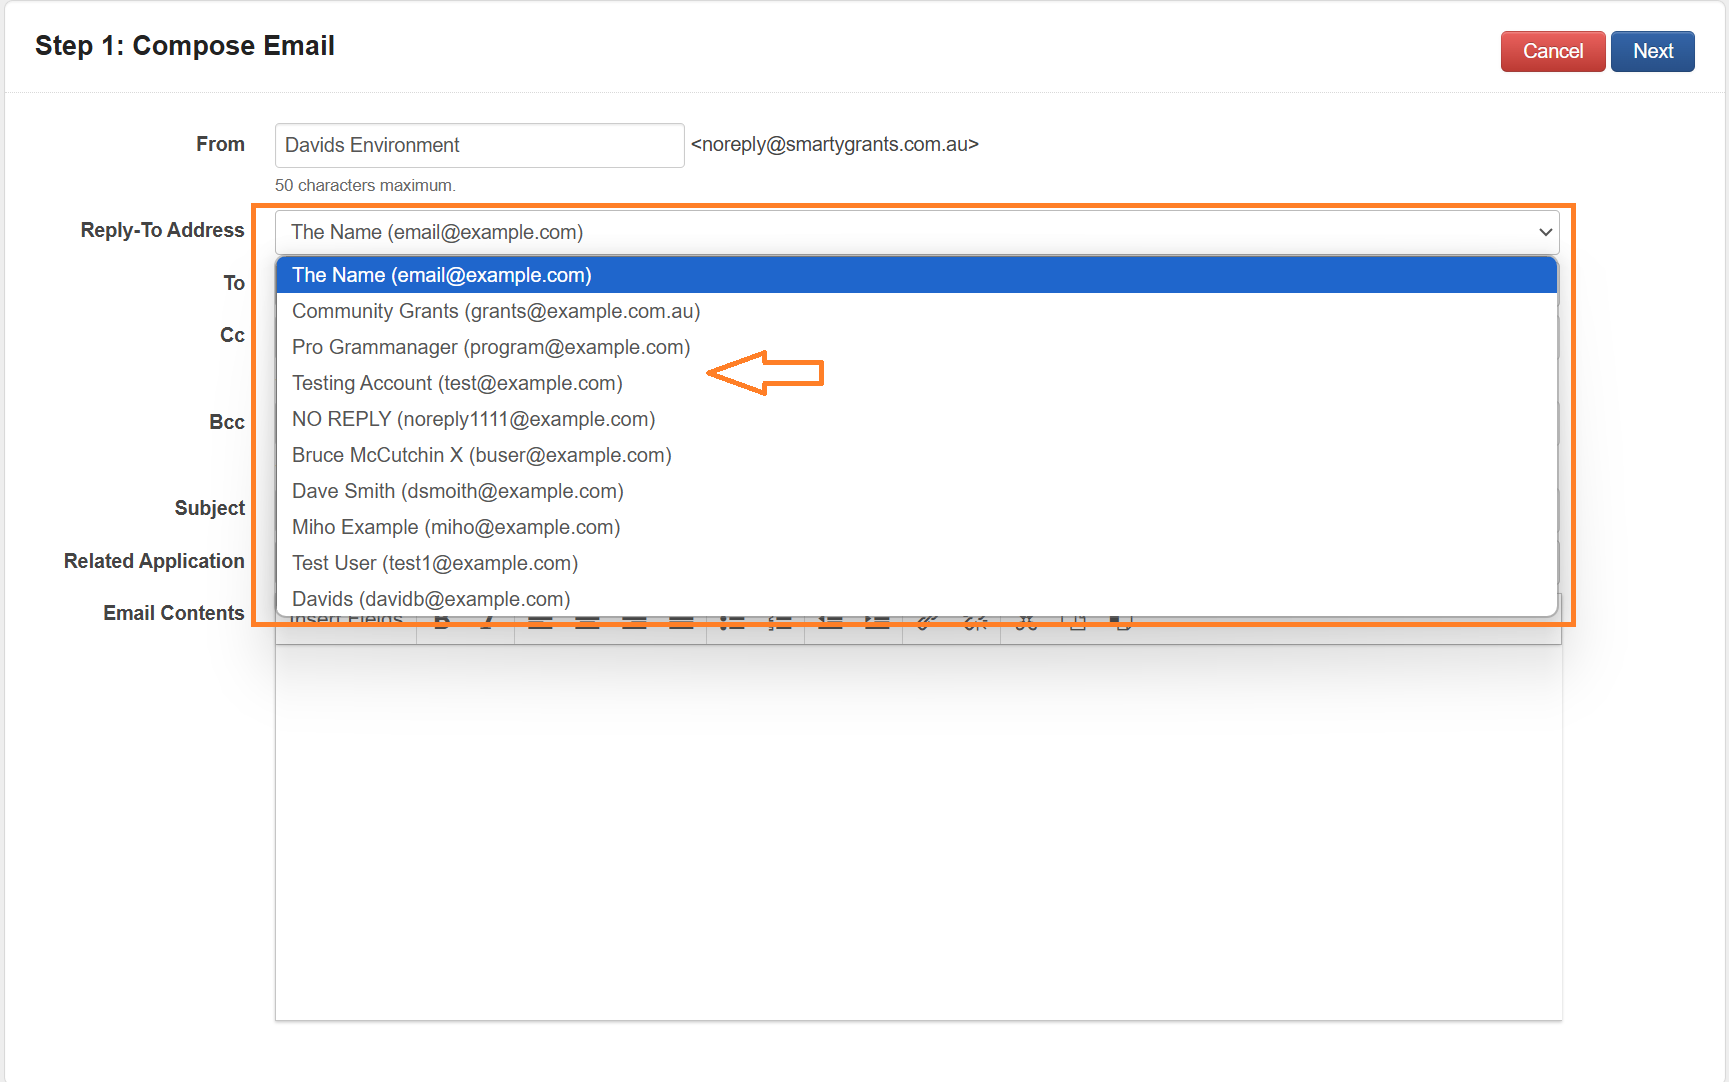
Reply-To Address will default to the username (email address) of the user who is logged in and sending the email. To edit the Reply-To Address, select the Reply-To Address dropdown.
Select the required Reply-To Address from the options available in the dropdown list.
Select the To recipient.
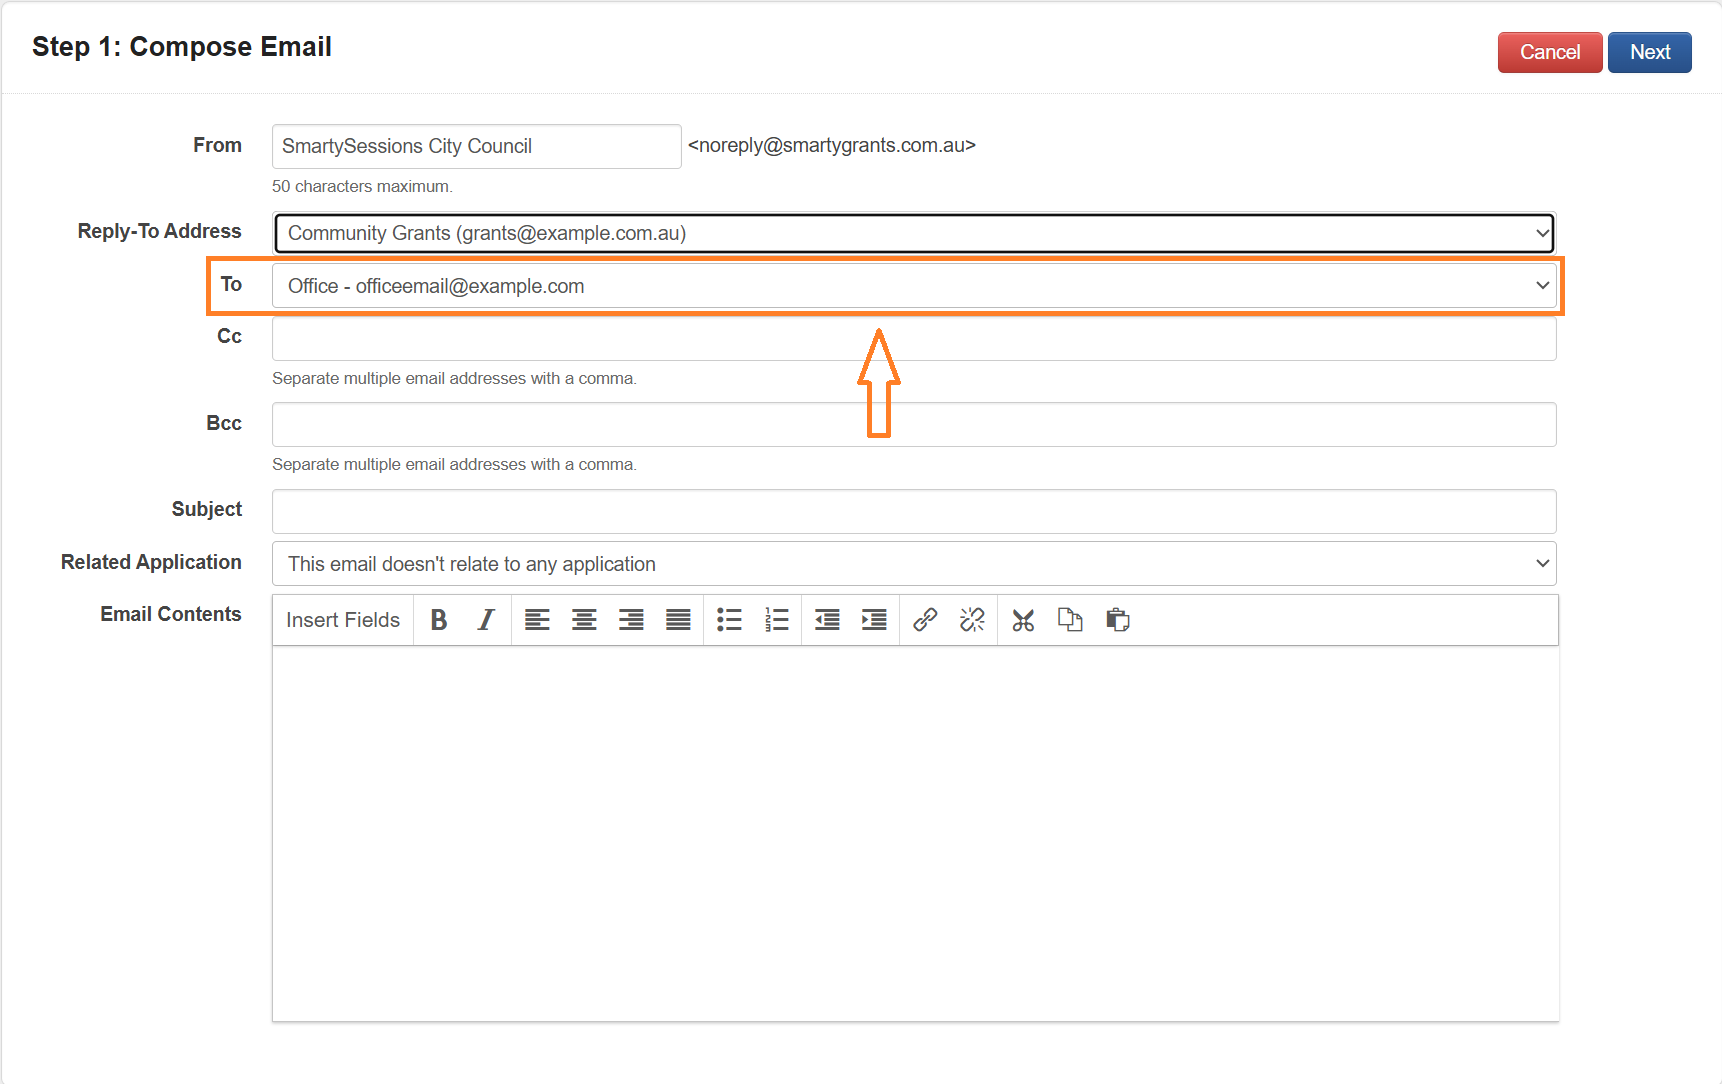
Select the To recipient from the options available in the drop down. Note that the options displayed will be all available email addresses from the contact card (if sending via the contacts directory) or all available email addresses for all contacts linked to an application (if sending the email via the application’s contacts tab).

Cc and Bcc fields can be entered manually. Select Cc or Bcc field/s.
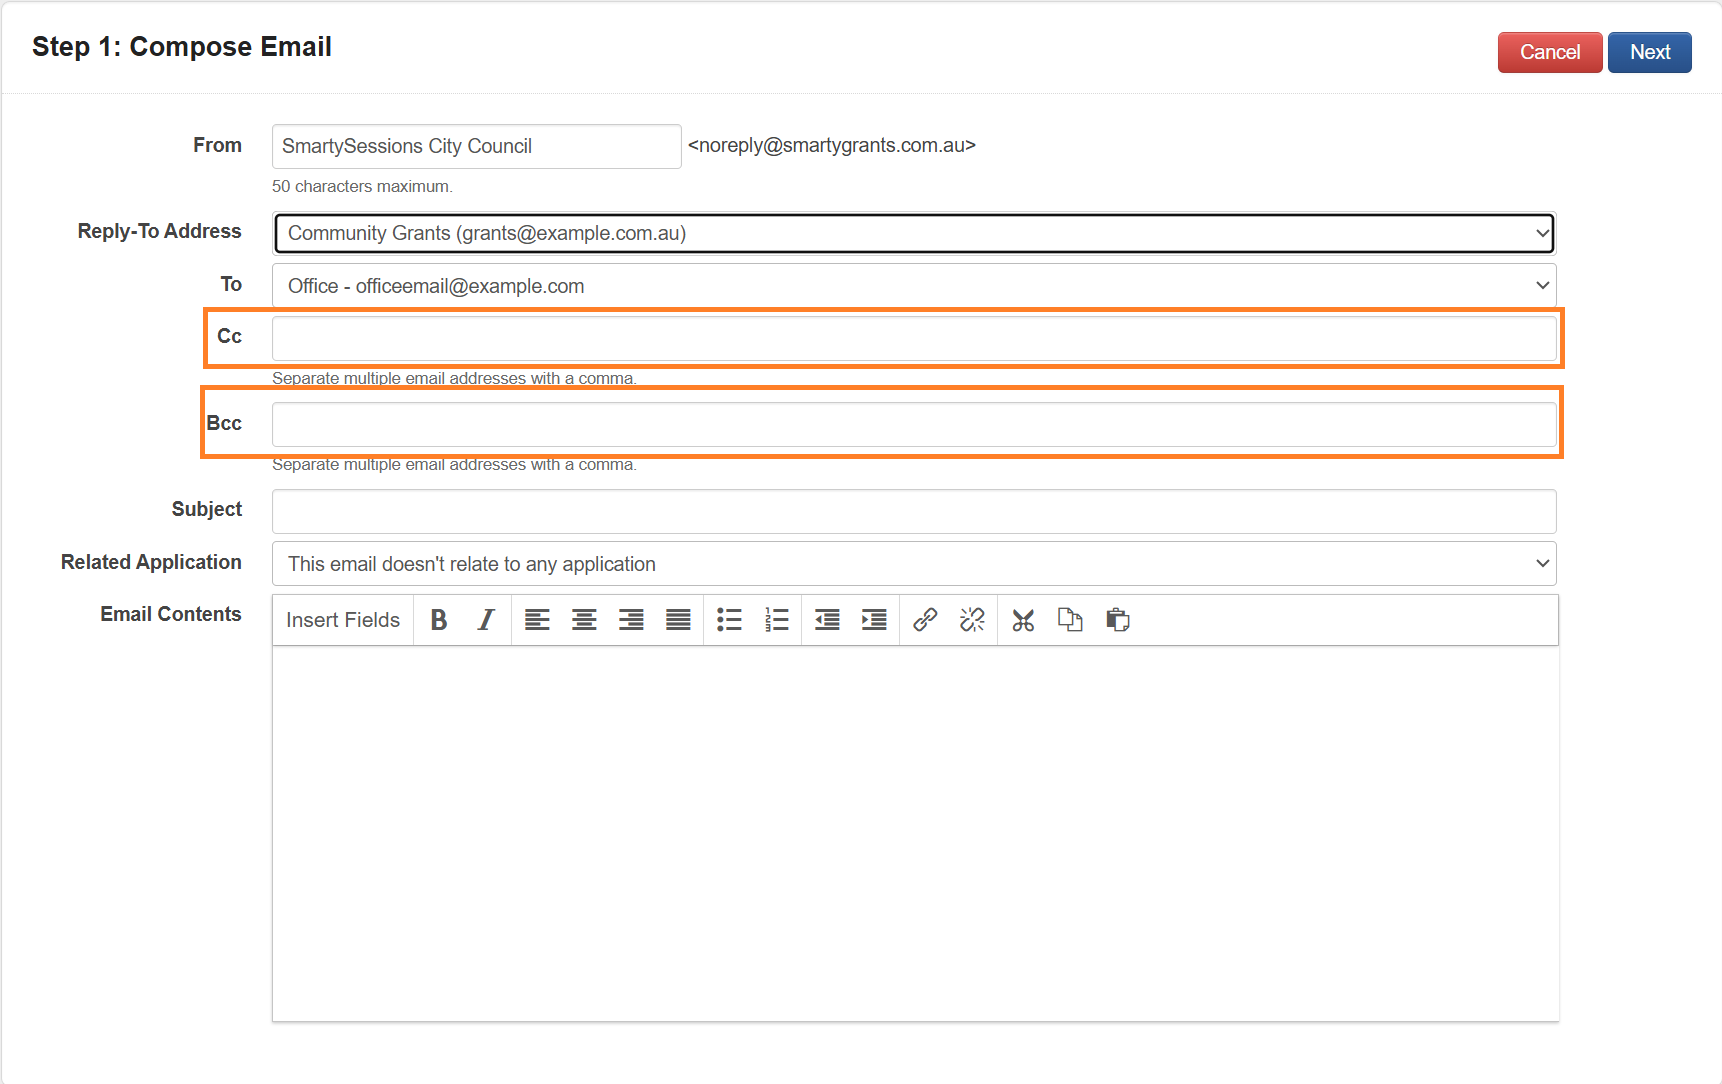
Manually enter the full email address of the required Cc or Bcc recipient/s. Note that multiple email addresses may be entered seperated by a comma.
Select Subject.
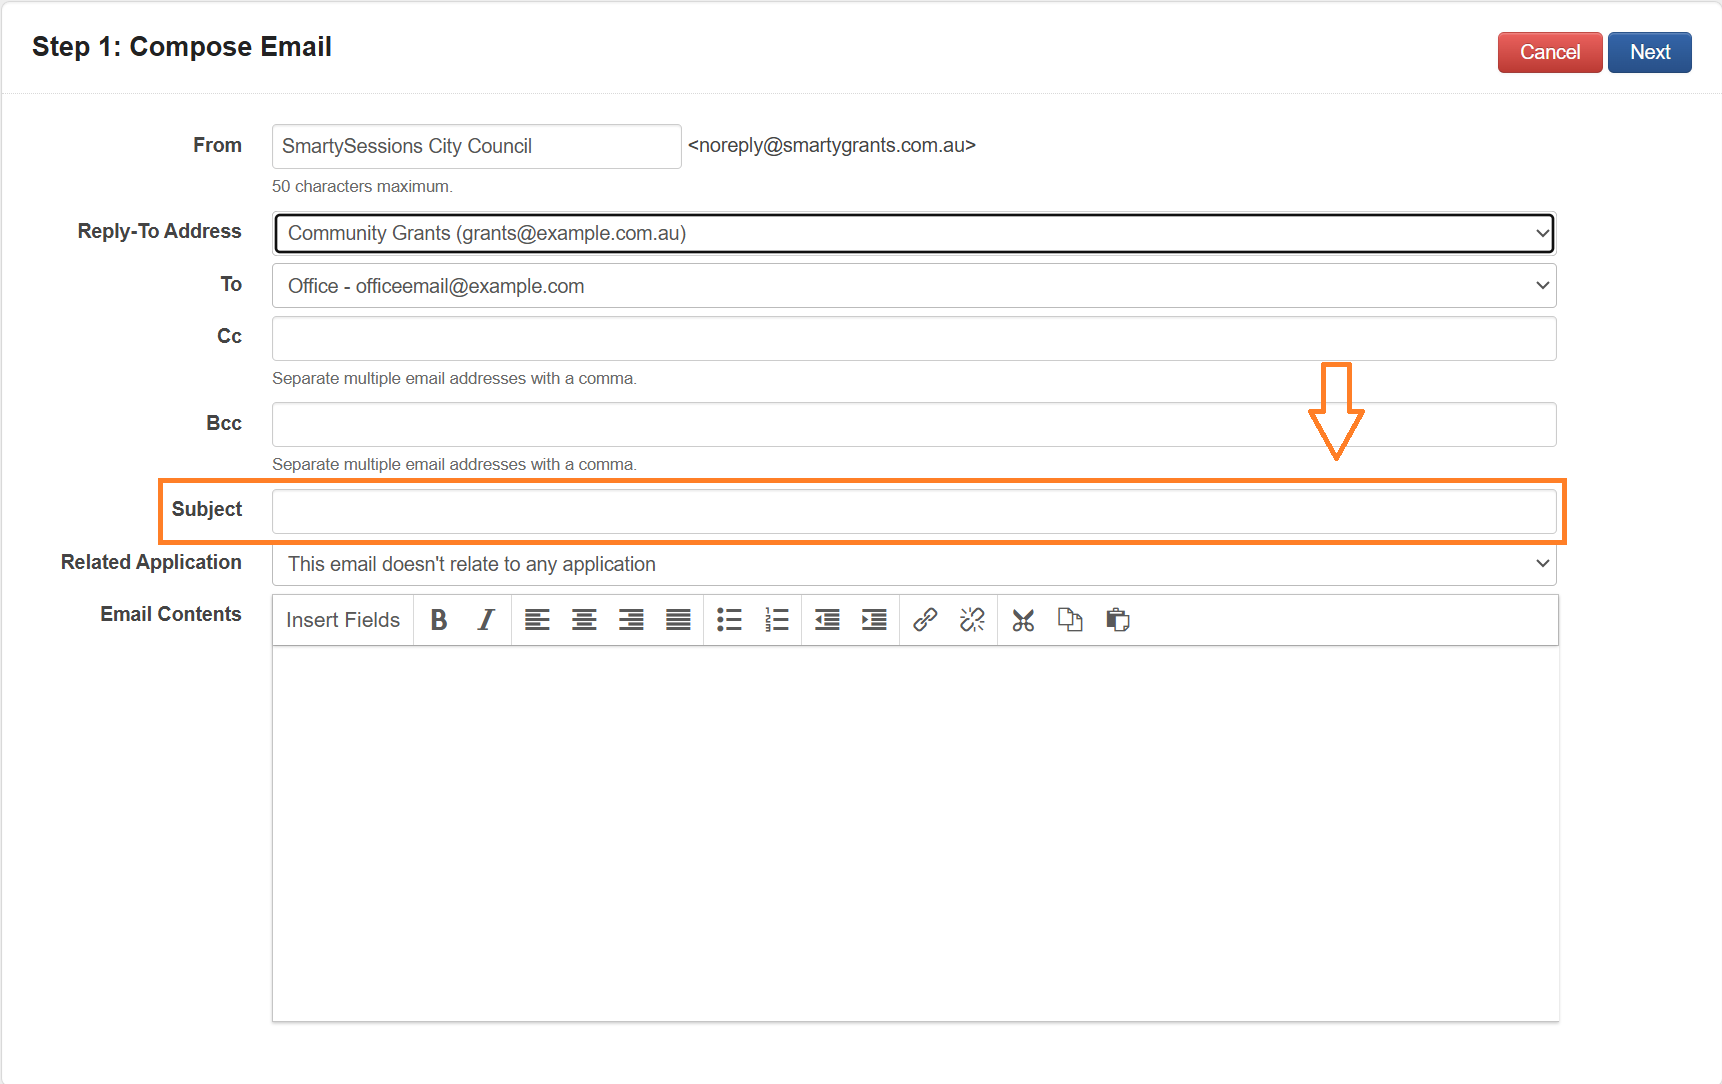
Manually enter the required Subject. This will be displayed to recipients in the subject line of the received email.
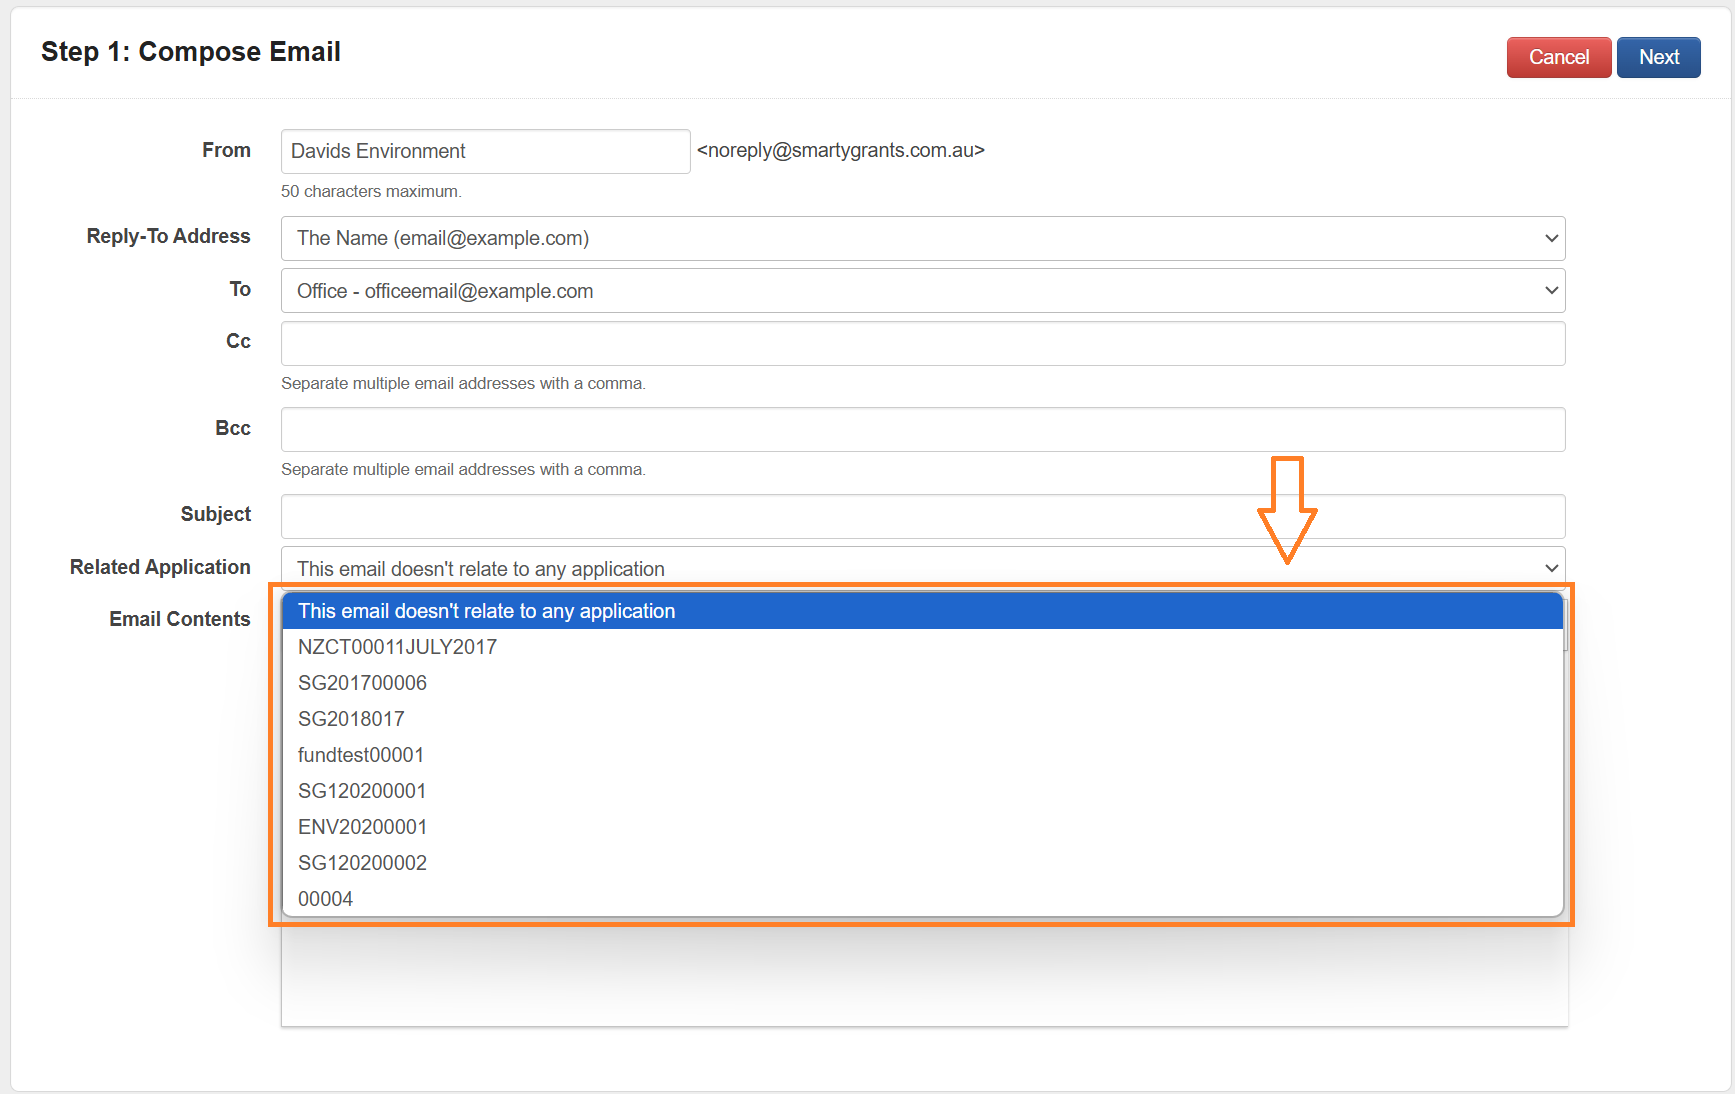
To relate the email to a submitted application, select the Related Application drop down.
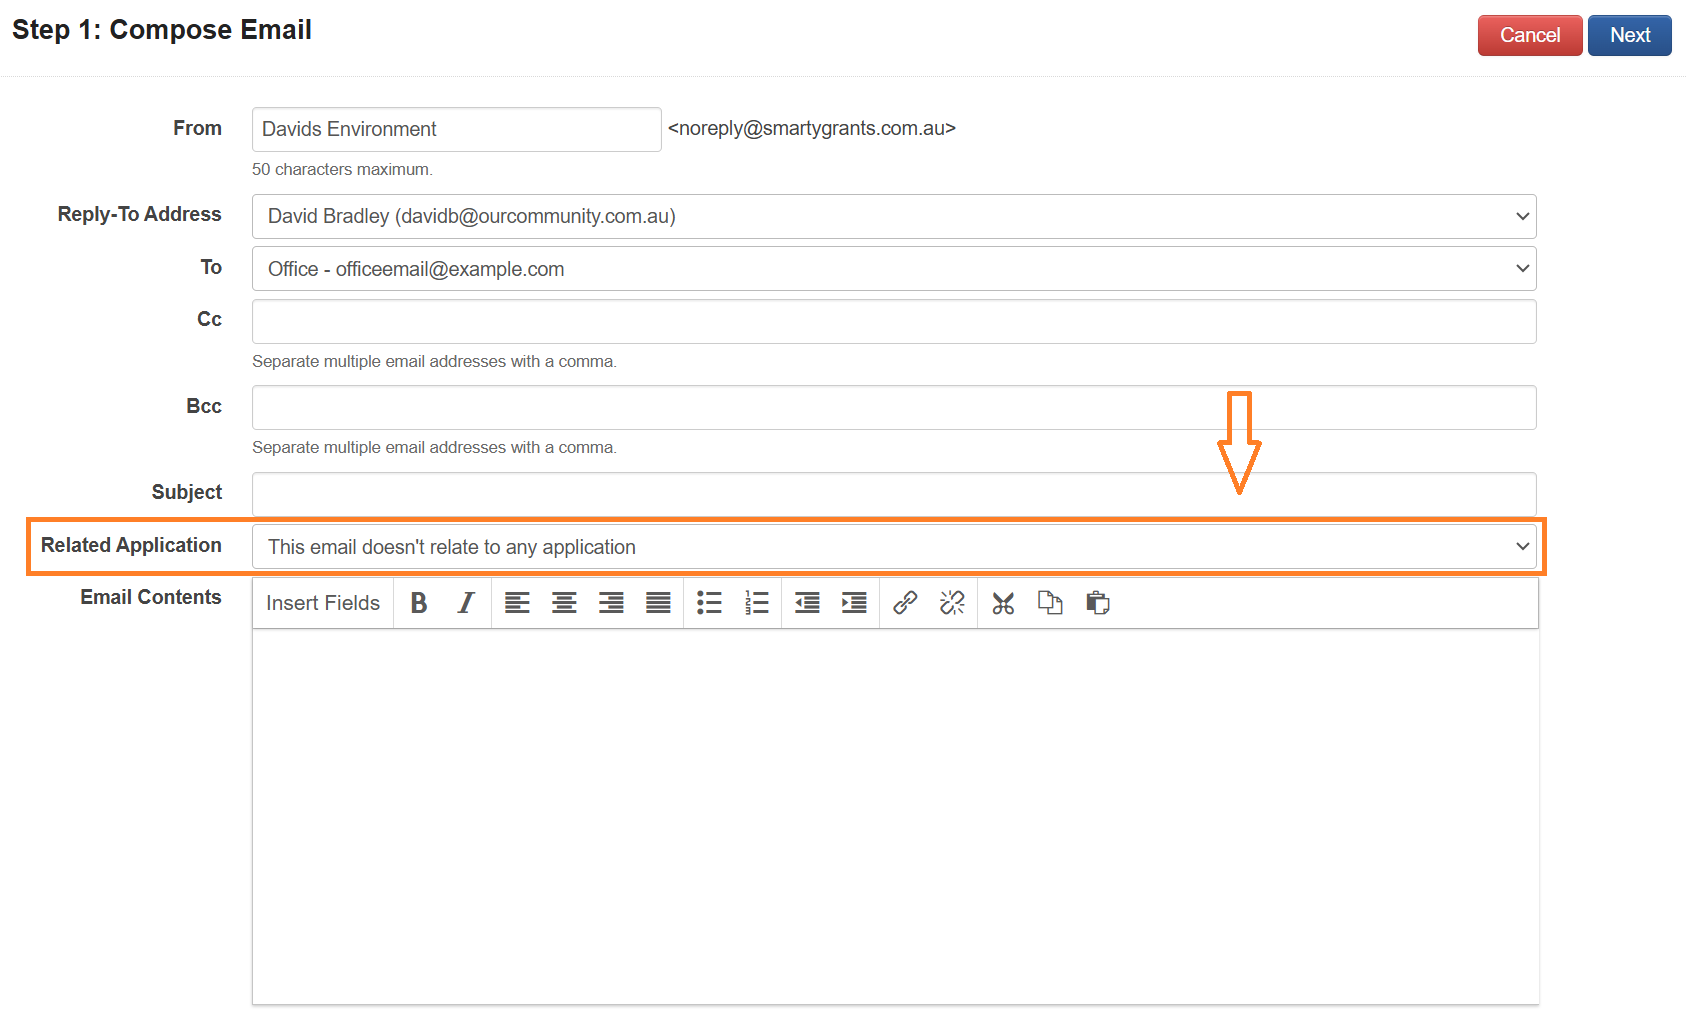
By default, emails sent to a contact card/via contacts tab of an application will populate with “This email doesn’t relate to any application”. If the email does relate to an application, select the Application from the drop down list.
Select Email contents.
Compose the email as required. Email contents uses the same functionality as for Mailouts. Please see Step 3 - Compose Mailout above for more details.
Step 2 - Choose Attachments
To add an attached file to your email, select Browse and select a saved document. Select Next to move to the next step.

Alternatively if you have a report created within your program you can upload this to your mailout. Select Add Template and choose the report template you would like to include in the email.
Please see Create a template for instructions on how to build a template.
Step 3 - Review
Once you have selected your recipients, composed your email and added any attachments select Send Email to review your email before sending.
If any adjustments are required, select Back. This will allow you to go back through the steps above and make any required changes. If you are happy with your email select Send.
Only select Send after you have reviewed your email and you are happy with the contents. Once you select the Send button your email will be sent to the recipients.
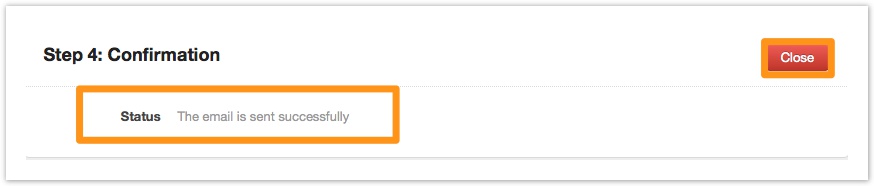
Step 4 - Confirm
You will receive a successful status once the email has been sent. Select Close to close the window.
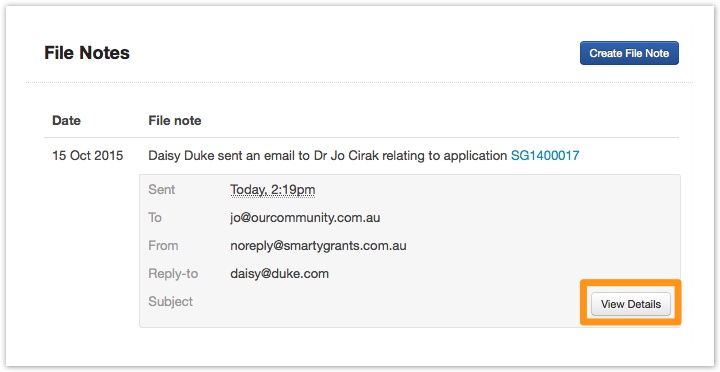
SmartyGrants will keep a record of this email in the contacts tab of your application under the file note option (if you linked the application in Step 1) or within the file note section of your contact card in the contacts directory.
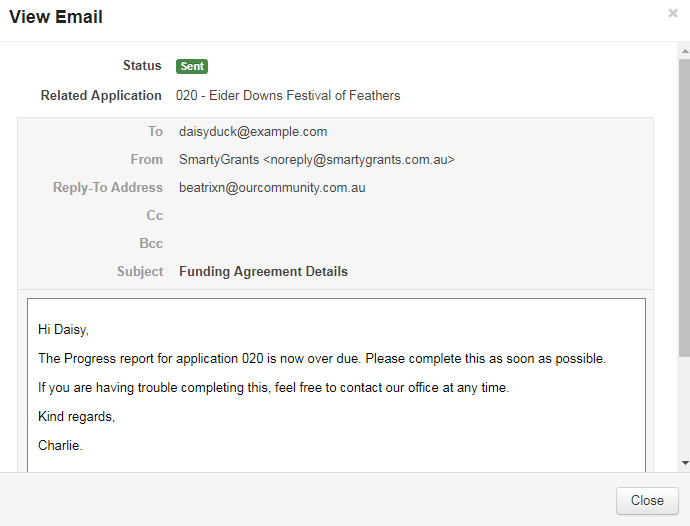
To view more information in relation to the email sent select View Details.
Check contact directory for list of sent individual emails
A page in the contact directory provides a list of all "single emails" sent via a contact. From this page you can view information about the mail out including the subject of the email, the date sent, the email recipients and email status.

Recipients sent. This will show you the recipients of this single mailout. If you click onto the hyperlink showing 1 of 1, it will bring up the following pop-up.
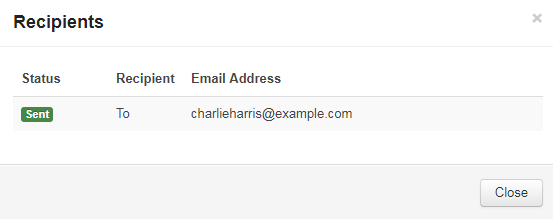
To recipient: Clicking on the To Recipient will take you through to the contact directory contact card, to view all of the contact information, including grant involvements, for that particular contact
View details: Clicking on the view details button will bring up a summary of the email sent, which will include the email contents.
Re-Send Failed Mailout
If a mailout fails you have visibility of this in the Mailouts home page under Sent Mailouts. You can update incorrect email addresses for contacts and resend failed mailouts following a few simple steps:
To identify which emails have failed, select Resend Mailout from the mailouts home page.

This will take you through to the Mailout summary page where you can see which emails have failed by checking the email status. All failed emails will be displayed at the top of the list.
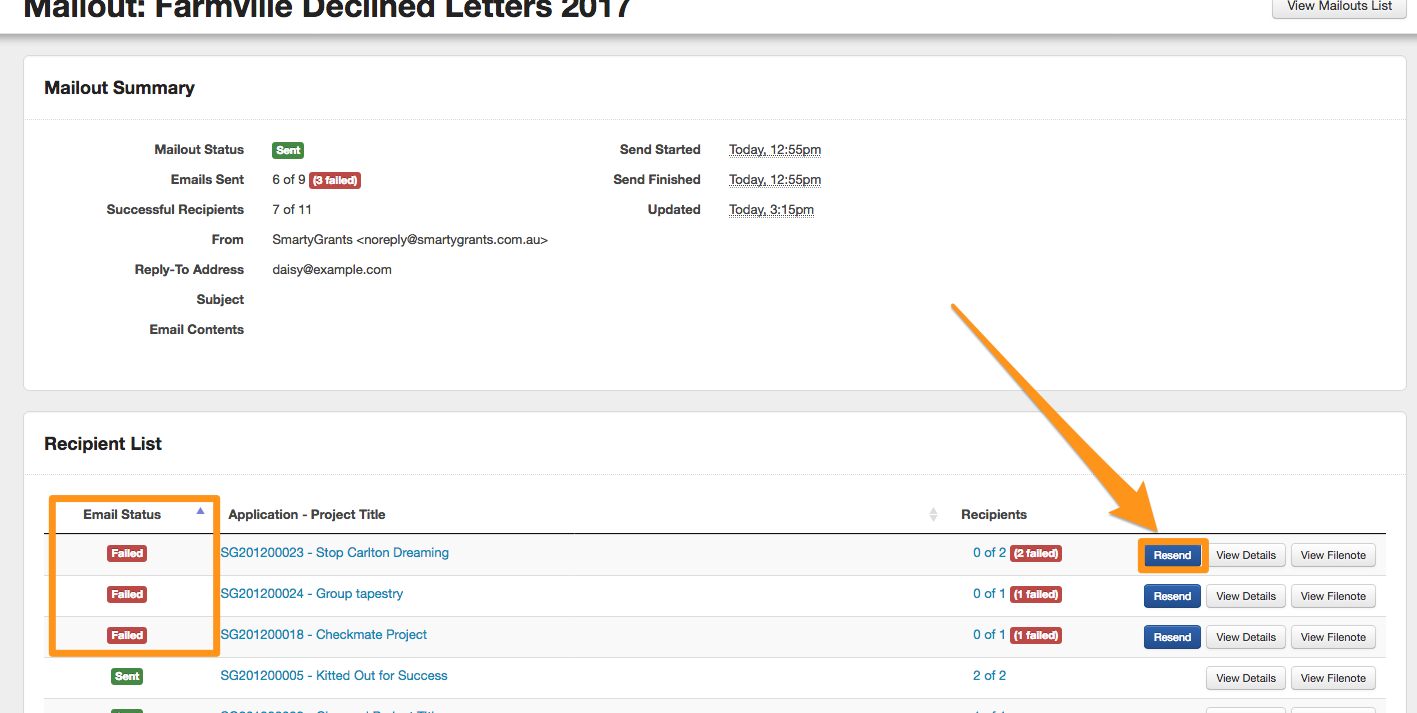
To see if an edit to a contact's email can be completed, select Resend. If the contact information next to an email address is blank this contact is a User. A User's email address can only be updated via an email request to SmartyGrants by the user.
The User will need to contact the SmartyGrants Support Team to make this change
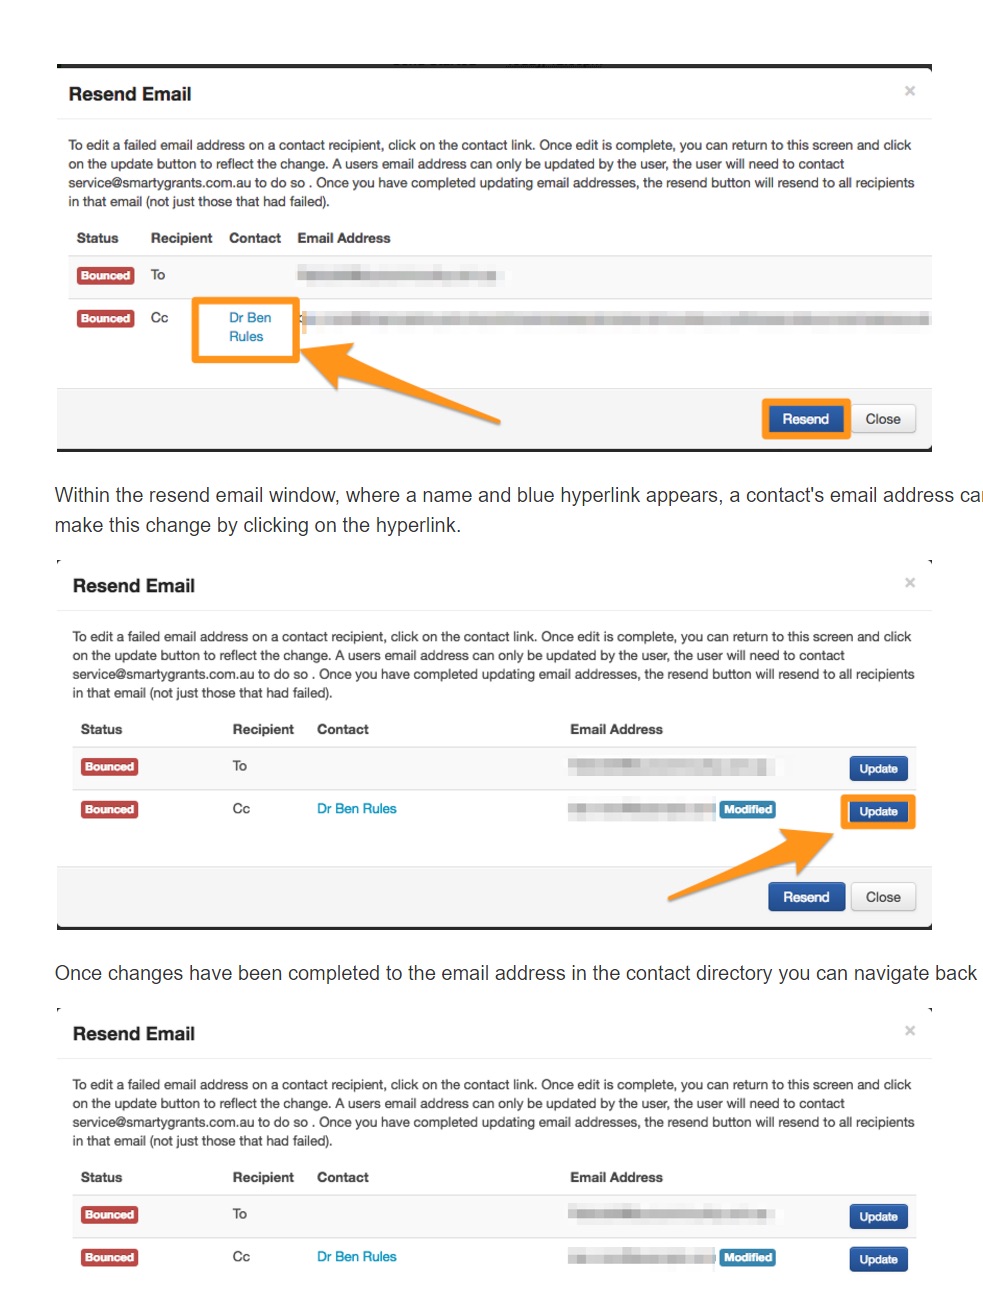
Within the resend email window, where a name and blue hyperlink appears, a contact's email address can be changed via the contact directory. To navigate directly to the contact directory, select the contact’s name.
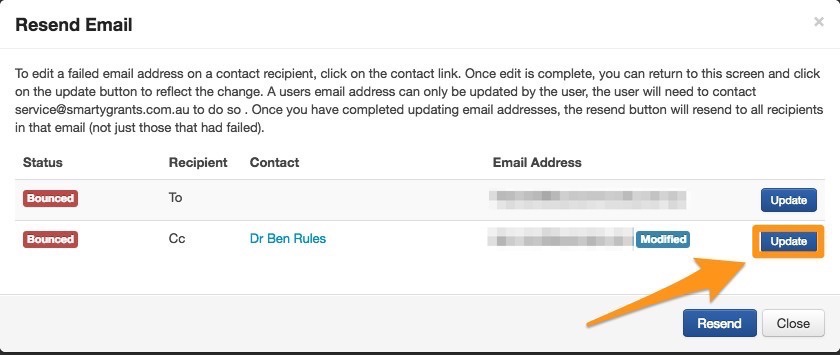
Once changes have been completed to the email address in the contact directory you can navigate back to your mailout and select Update to reflect the change.
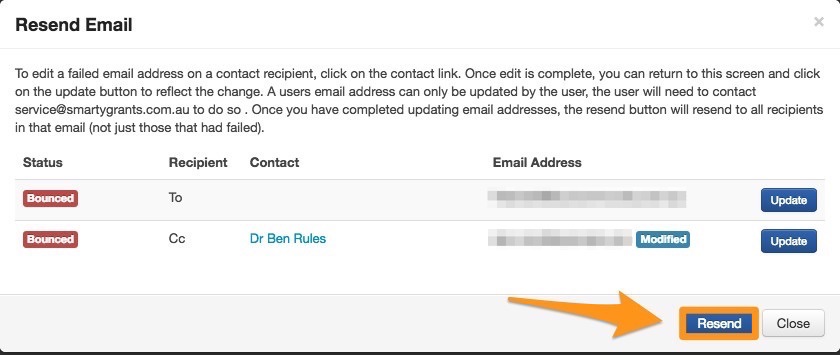
Selecting Resend will resend to all recipients in that email, not just the failed ones.
Important
SmartyGrants will attempt to send mailouts to all recipients and generate all attached report templates for 2 hours. If it is unable to send a mailout to any recipient or generate a report, the entire mailout will be delayed while it attempts to resolve the issue/s. After 2 hours, SmartyGrants will send the mailout regardless of the issue/s and those mailouts that were causing issues will be then assigned the 'Failed' status (details of statuses below).
Download Mailout Summary Reports
A mailout summary can be downloaded that lists either your Draft or Sent mailouts. There is also a Mailout Summary download available for each individual mailout.
List of Mailouts
Select the Mailouts icon.
Select Draft or Sent.
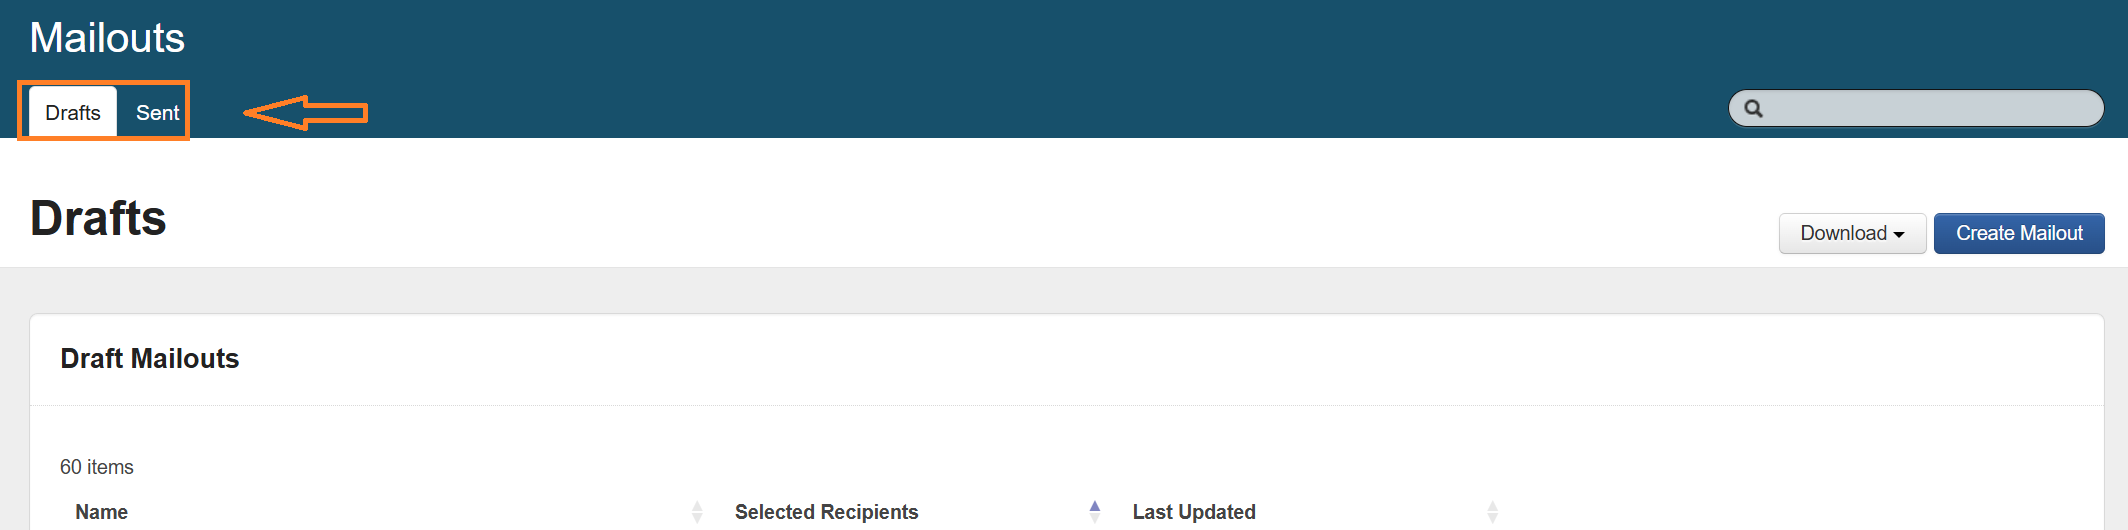
Select Download.
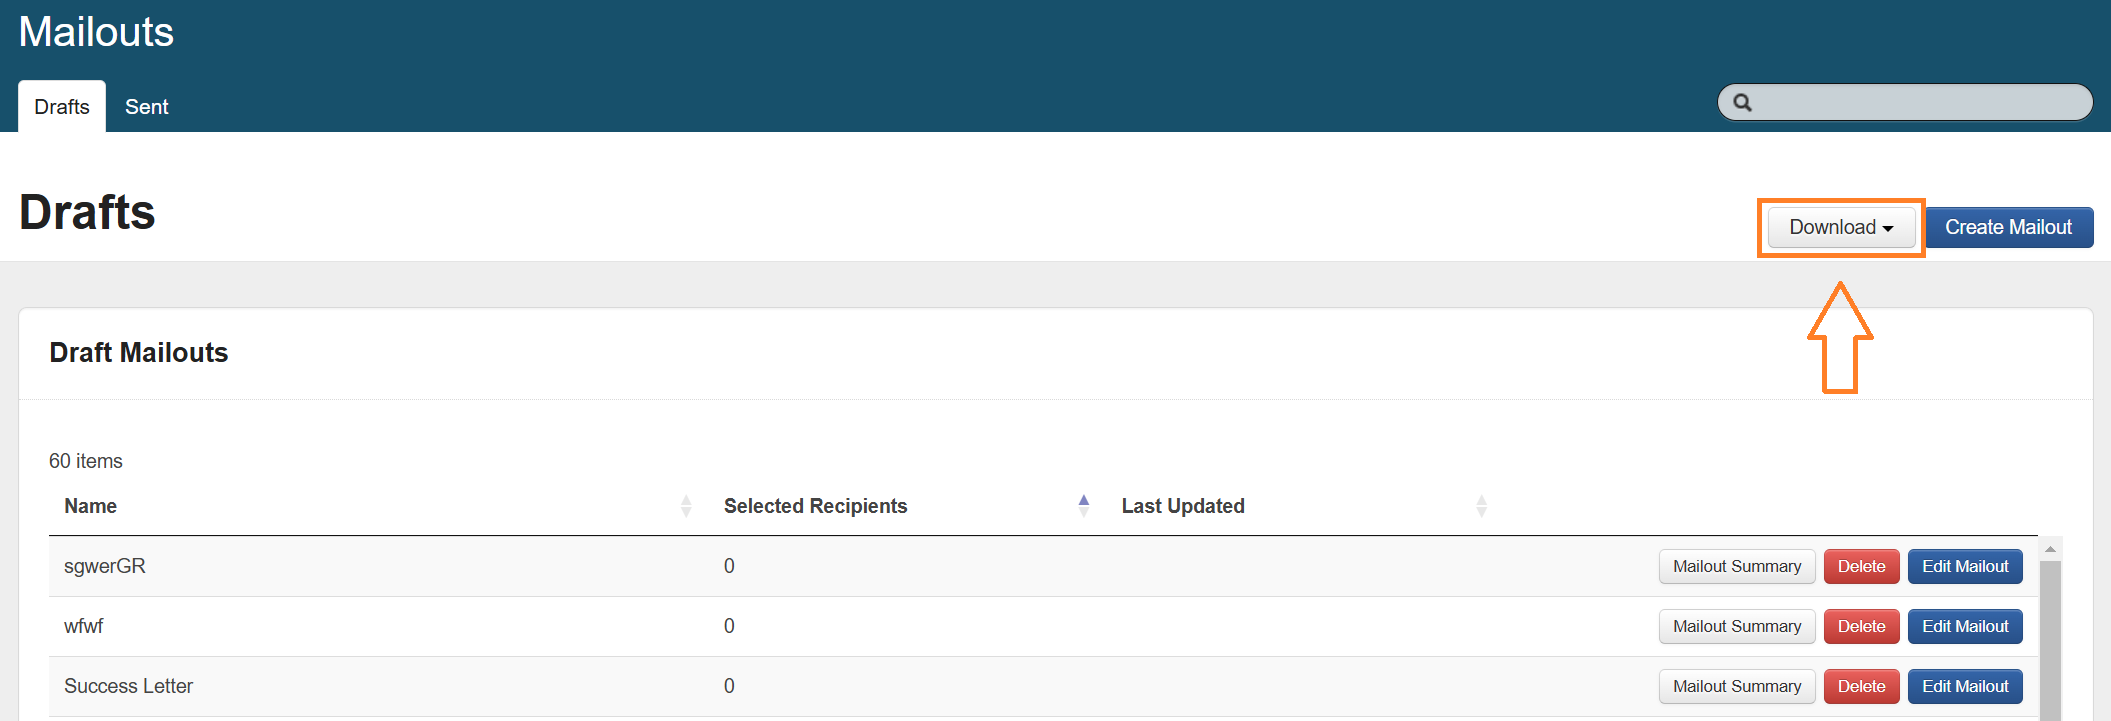
Select Draft Mailout Summary.
This will then download an Excel workbook that contains a sumary of the requested information.
Note that the steps are the same for both Draft and Sent mailouts.
Draft Mailout Summary includes:
Mailout name
Number of emails
Number of recipients
From address
Reply-to address
Bcc address
Subject
Attachments (file names)
Send Mailout Summary includes:
Mailout name
Date send started
Date send finished
Number of emails sent
Number of recipients sent
Mailout status
From address
Reply-to address
Bcc address
Subject
Attachments (file names)
Individual Mailout Summary
On the list of mailouts page, select Mailout Summary.
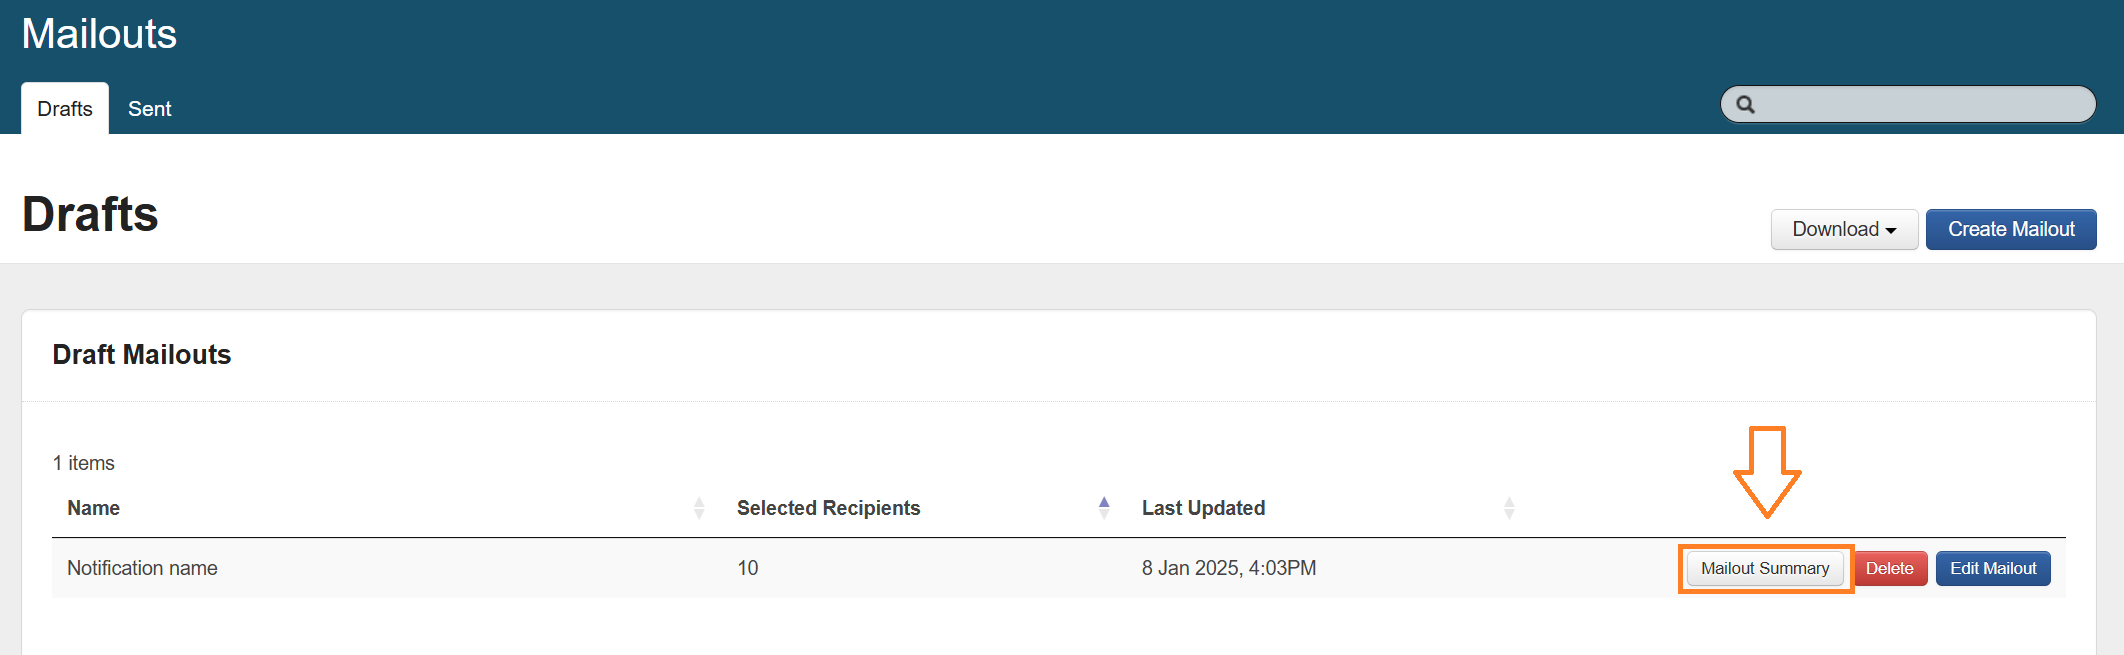
This will display a full summary of the mailout.
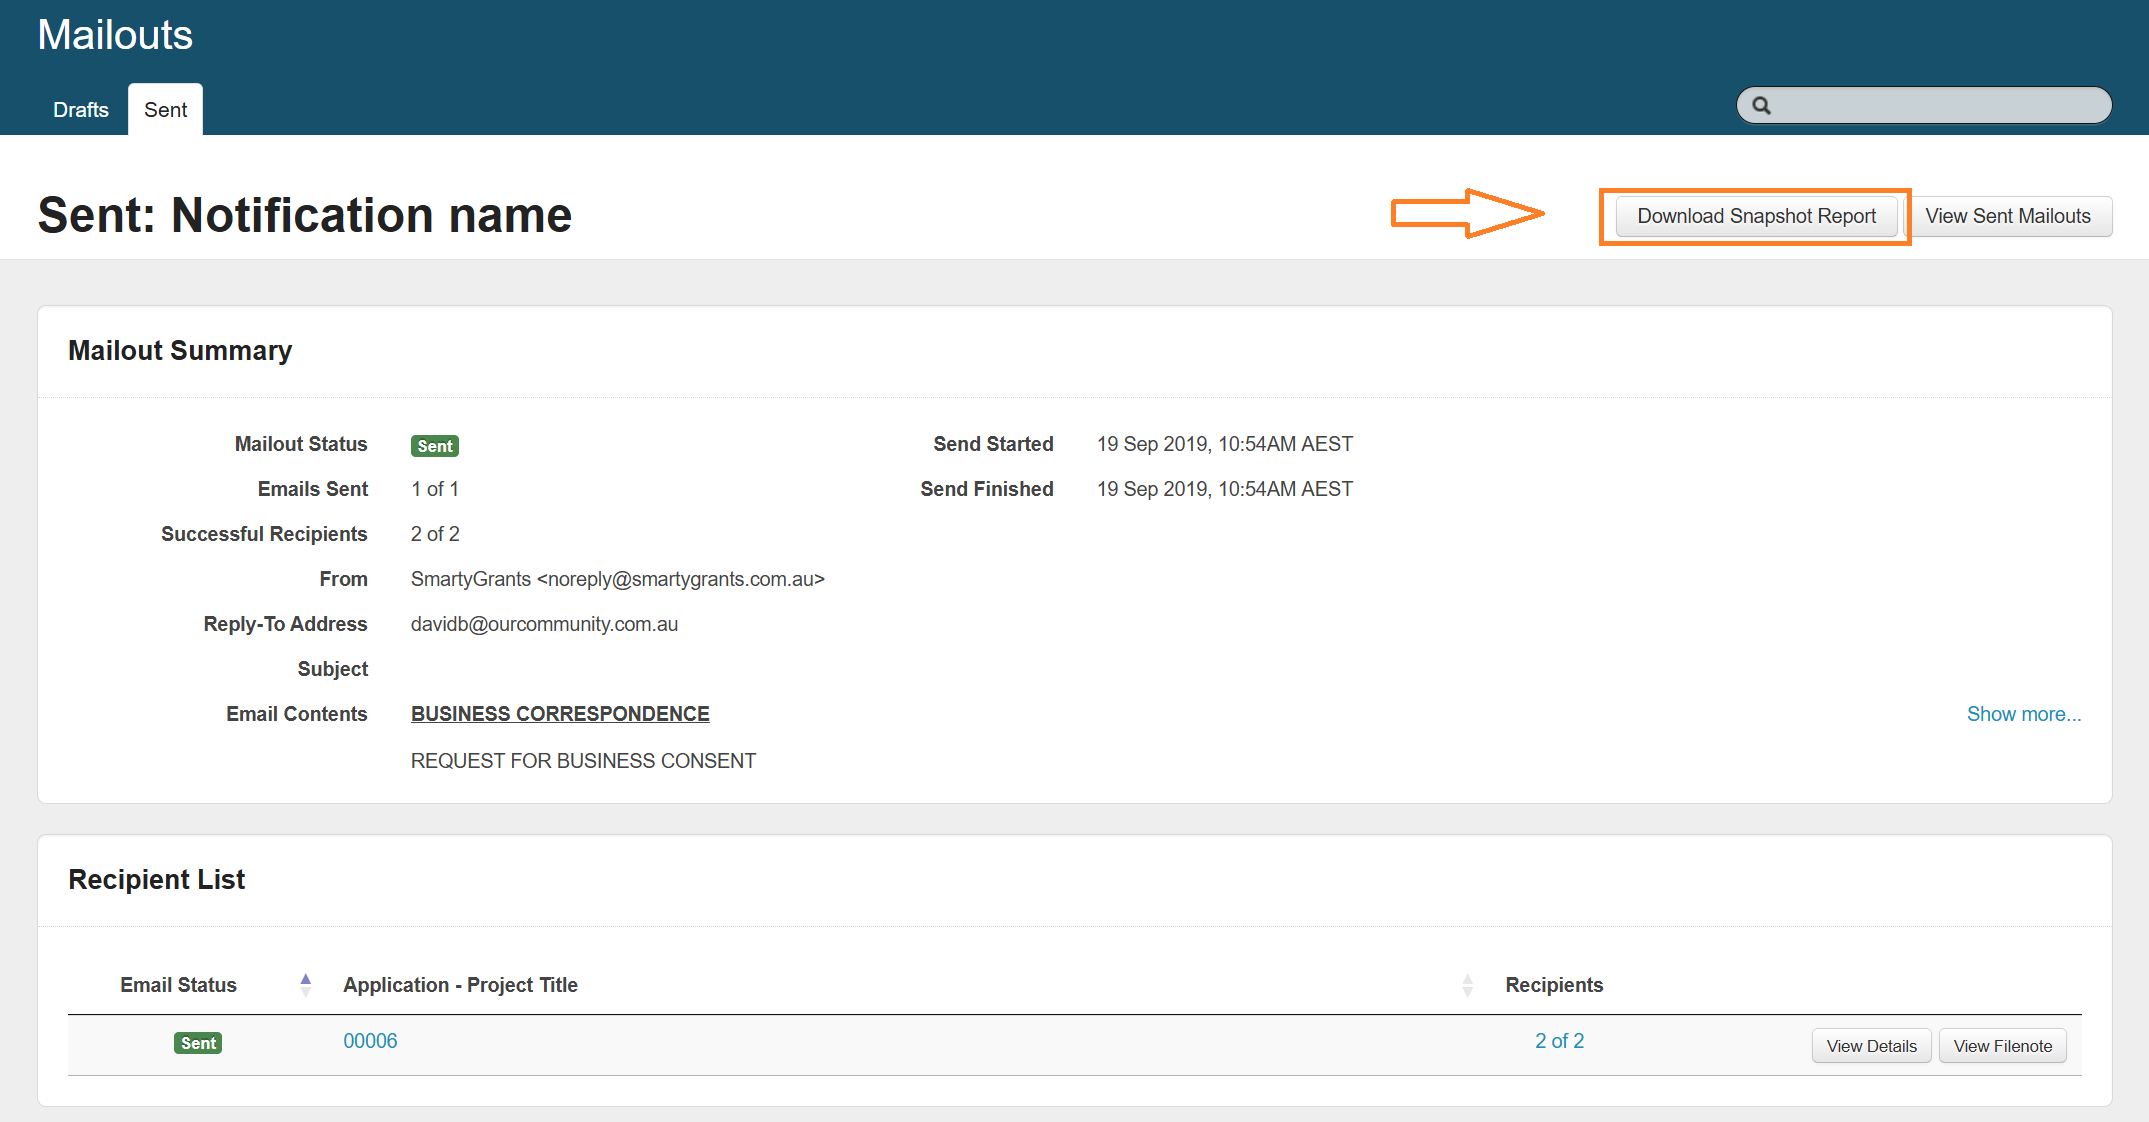
For sent mailouts, you also have access to a summary in Excel workbook format. To access this:
From the mailouts screen, select Sent.
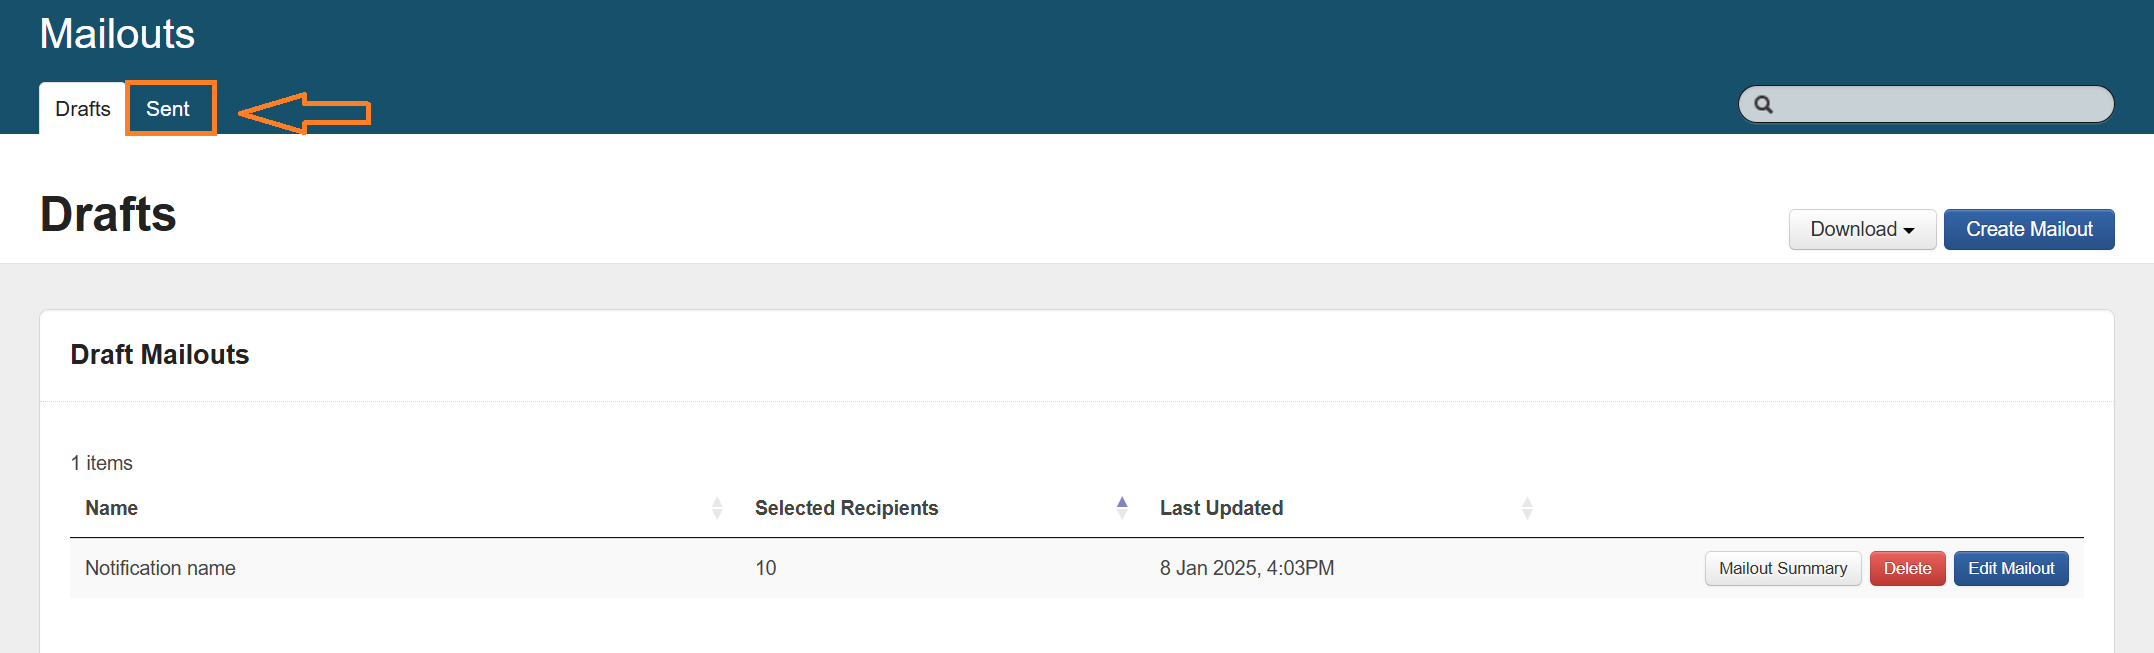
For the mailout you would like to download the snalpshot report, select Mailout Summary.
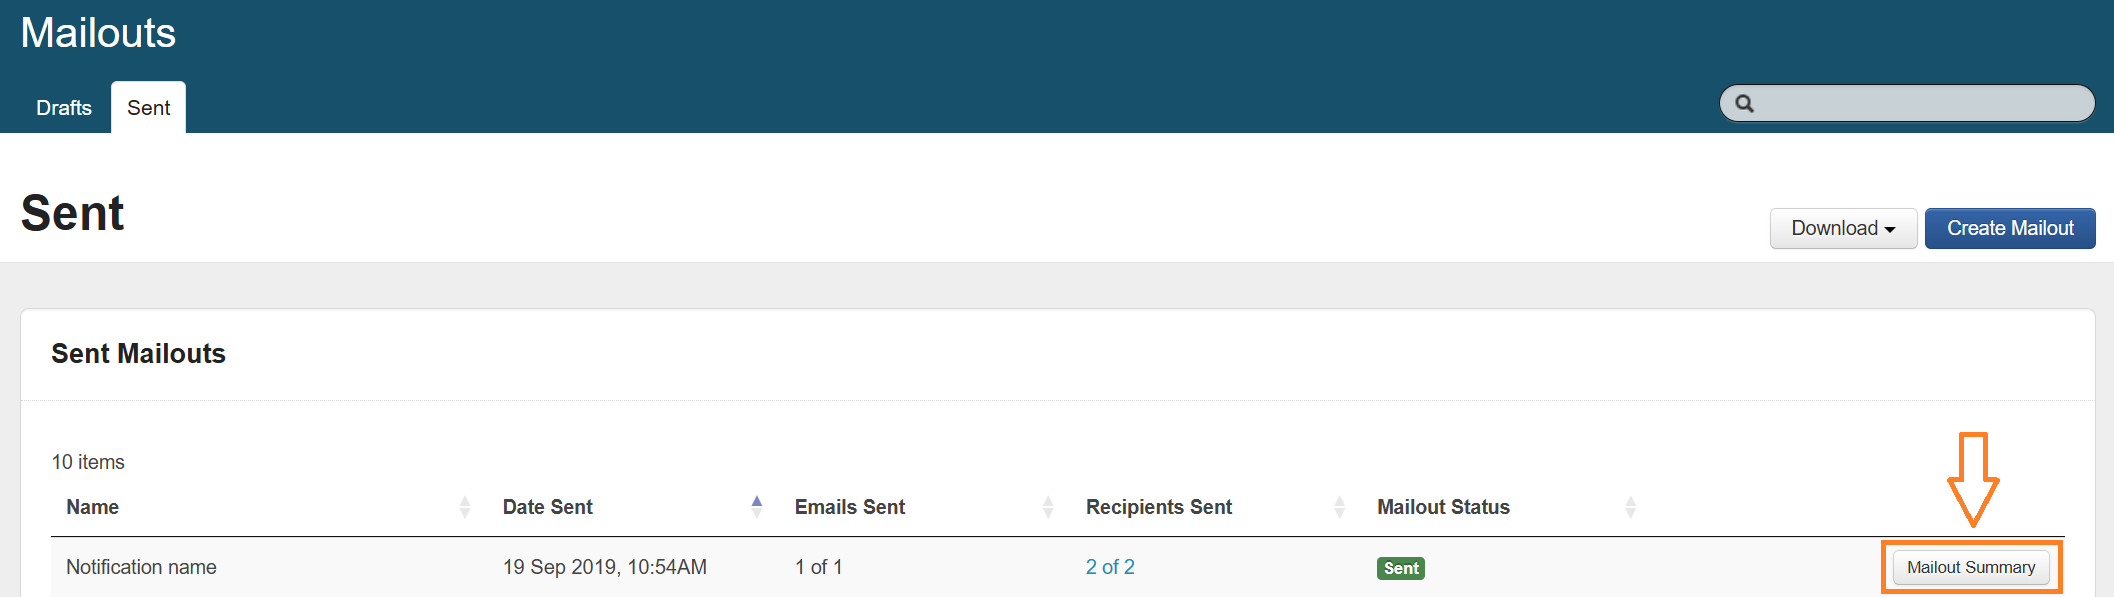
Select Download Snapshot Report.
Mailout summary
Mailout name
Date send started
Date send finished
Number of emails sent
Number of recipients sent
Mailout status
From address
Reply-to address
Subject
Attachments (file names)
Email summary
Email status
Related Application
Number of recipients sent
Recipient summary
Recipient status
Related application
Recipient type (To or Bcc)
Recipient address
Mailout Statuses
When sending a mailout, SmartyGrants will display a variety of statuses. This table describes what each status means and what the system is doing to display the status it is displaying.
User Interface Statuses | |||
|---|---|---|---|
Mailout | Email Recipient | Notes/Comments | |
Draft | Draft | Unsent | This is an internal status, displayed only within SmartyGrants. Mailout is in the process of being created. The mailout and all emails will show as Draft, while the recipients will show as Unsent, through to sending the mailout in Step 6 in the Create Mailout process. |
Sending | Processing Ready | Unsent | This is an internal status, displayed only within SmartyGrants. SmartyGrants is in the process of generating the report attachments through the reporting engine. Emails are Processing at Step 6 in the Create Mailout process, until report attachments are processed and ready, status is then update to Ready and SmartyGrants will attempt to send the mailout. |
Sending Sent | Ready Sent | Queued Deferred Soft Bounced | SmartyGrants has received notification back from the mailout system that there has been a temporary problem with a recipient. The mailout system will continue trying to send to the recipient - the user does not need to do anything. The user should continue to monitor the page for updates. SmartyGrants still considers these emails and recipients as Sent. Note: realistically, only mailouts with a high volume of emails and recipients would start to receive callbacks from the mailout system while still in the process of sending. Most mailouts will move quickly from Sending (Processing, to Ready, to Sent) to Sent, and then the email system will start sending callbacks. It is not likely that many users would see the Mailout status of Sending for very long. |
Failed | Failed | Unsent | SmartyGrants has been unable to call up the mailout system or never made it to the point of calling the mailout system. Possible reasons include email system is down or reporting engine is down or reports could not be generated or a combination of these. |
Sending Sent | Failed | Bounced Invalid Rejected | SmartyGrants has received notification back from the mailout system that there has been a problem with a recipient. The mailout system will stop trying to send to these recipients and the mailout will have failed. Possible reasons for this are that the email address is incorrect, the email address is no longer active or these is a problem with the email account of the recipient. |
Sent | Sent | Sent | SmartyGrants has not received an error notification back from the mailout system. As with standard email processing (Outlook, Gmail), an email is sent, but SmartyGrants does not capture a response unless something goes wrong. |
Mailout Templates
Pending System Update: Mailout Templates will be available pending a system update scheduled for 29 January 2025.
Mailout templates can be created by users who have access to the Mailouts function (Administrators, System wide - Program Manager and System wide - Standard User). These templates can be used to compose a mailout.
Create Mailout Template
To create a Mailout Template;
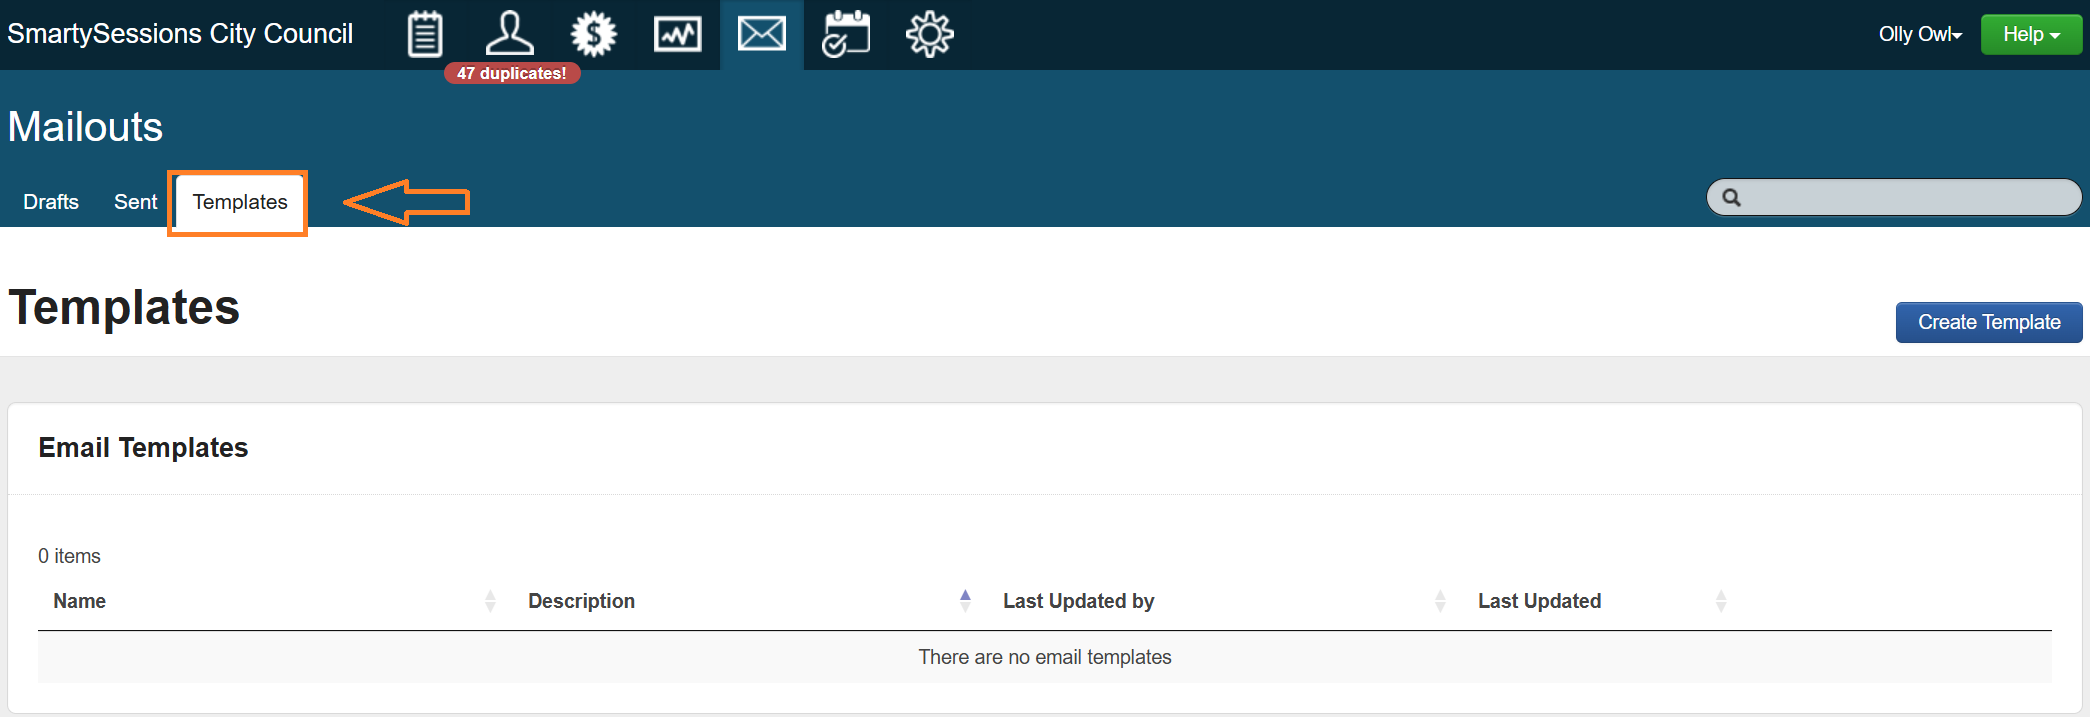
Select the Mailout icon.
Select Templates.
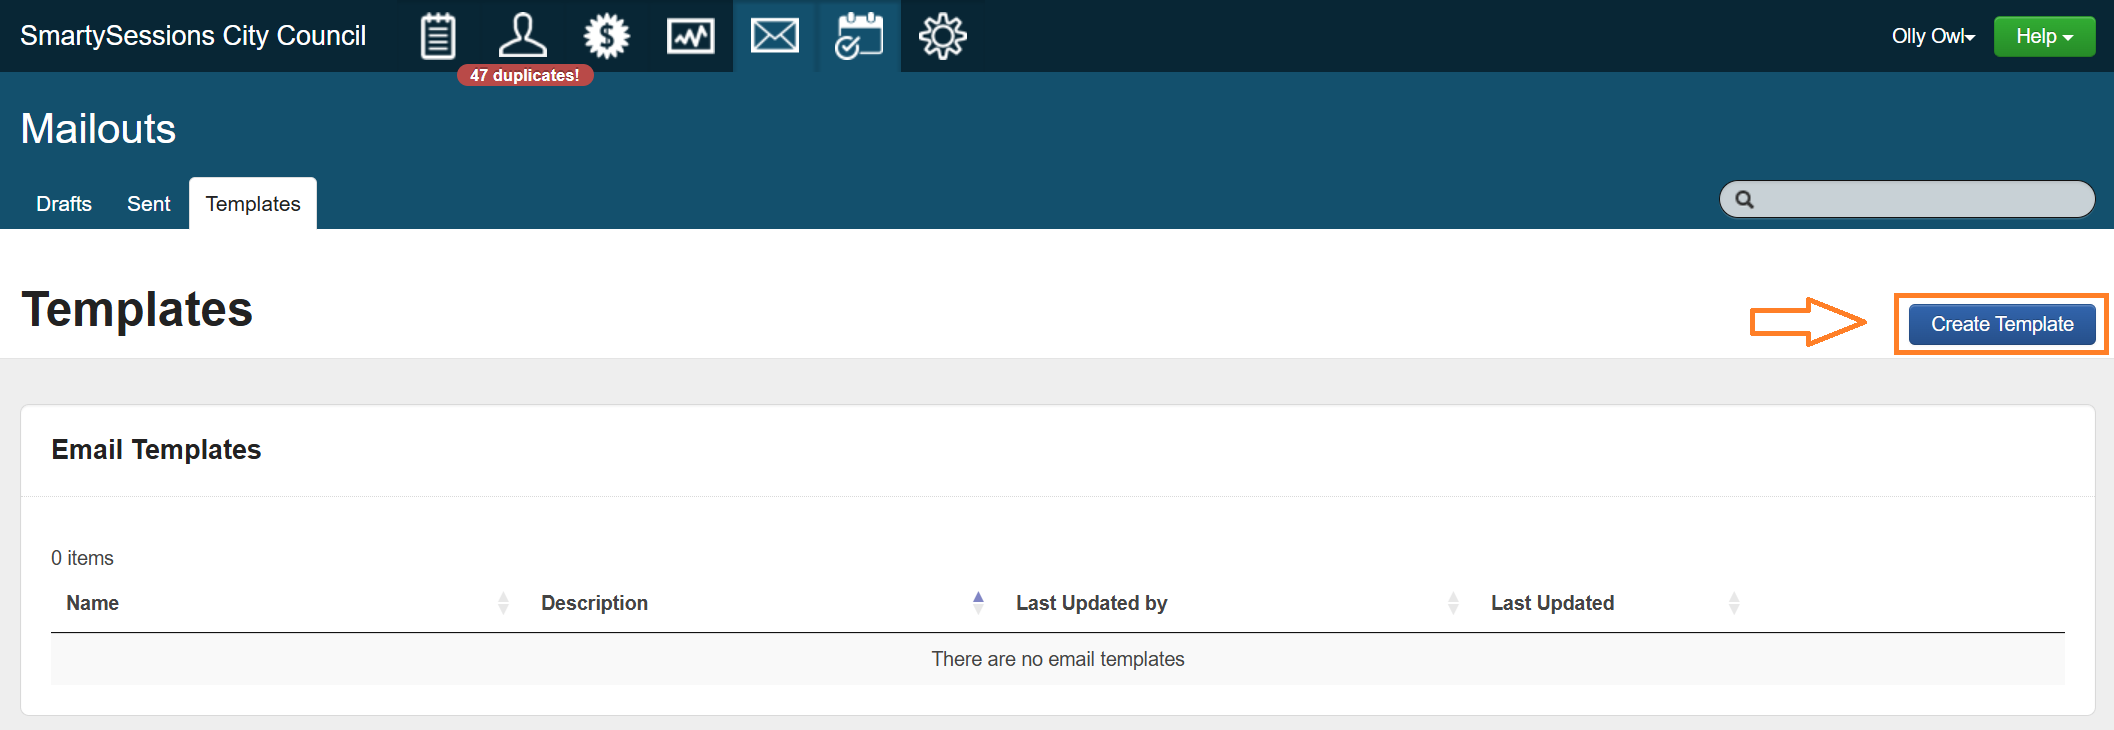
Select Create Template.
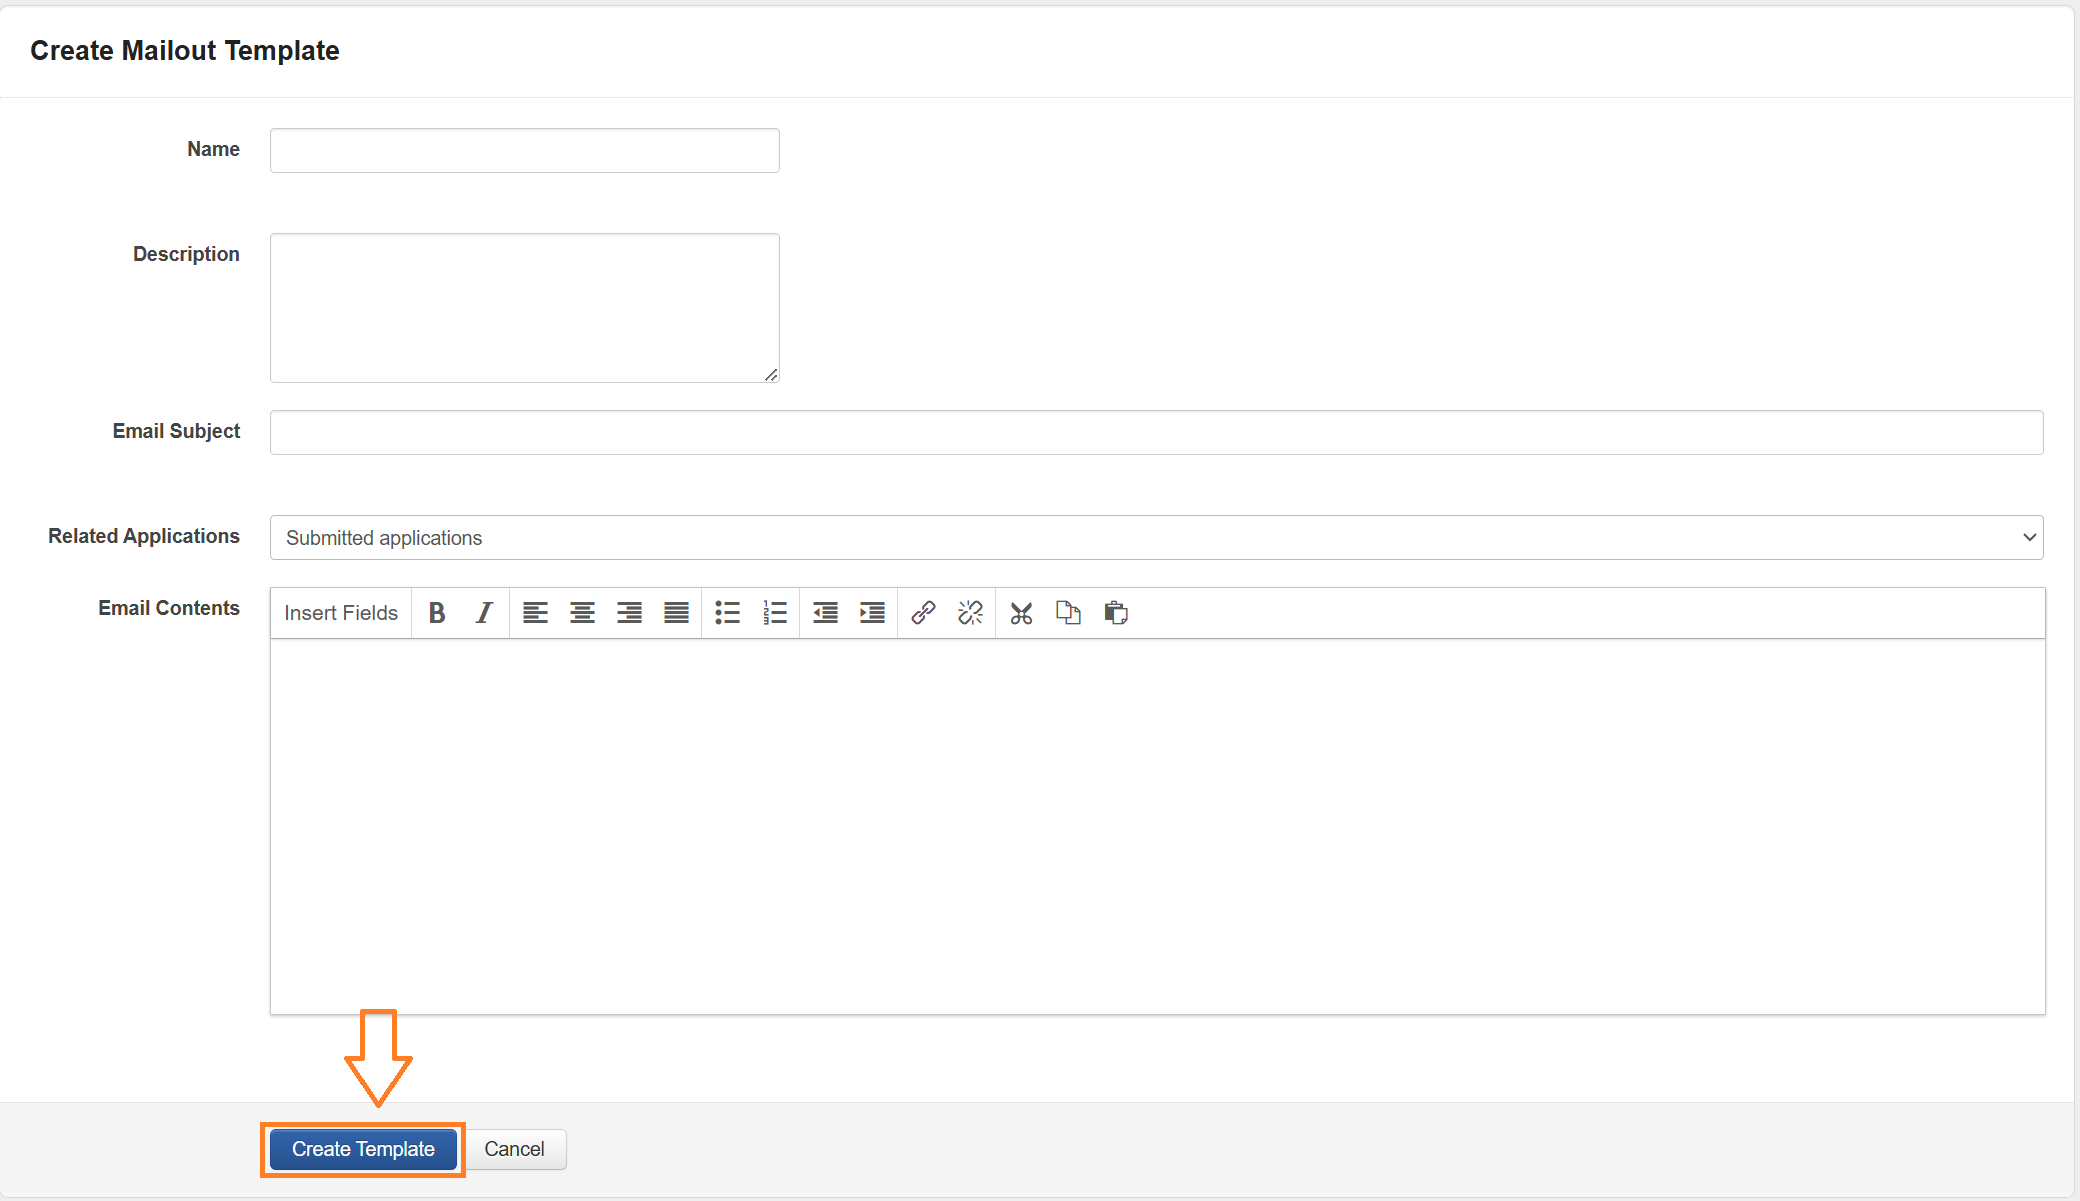
Complete the fields highlighted below.
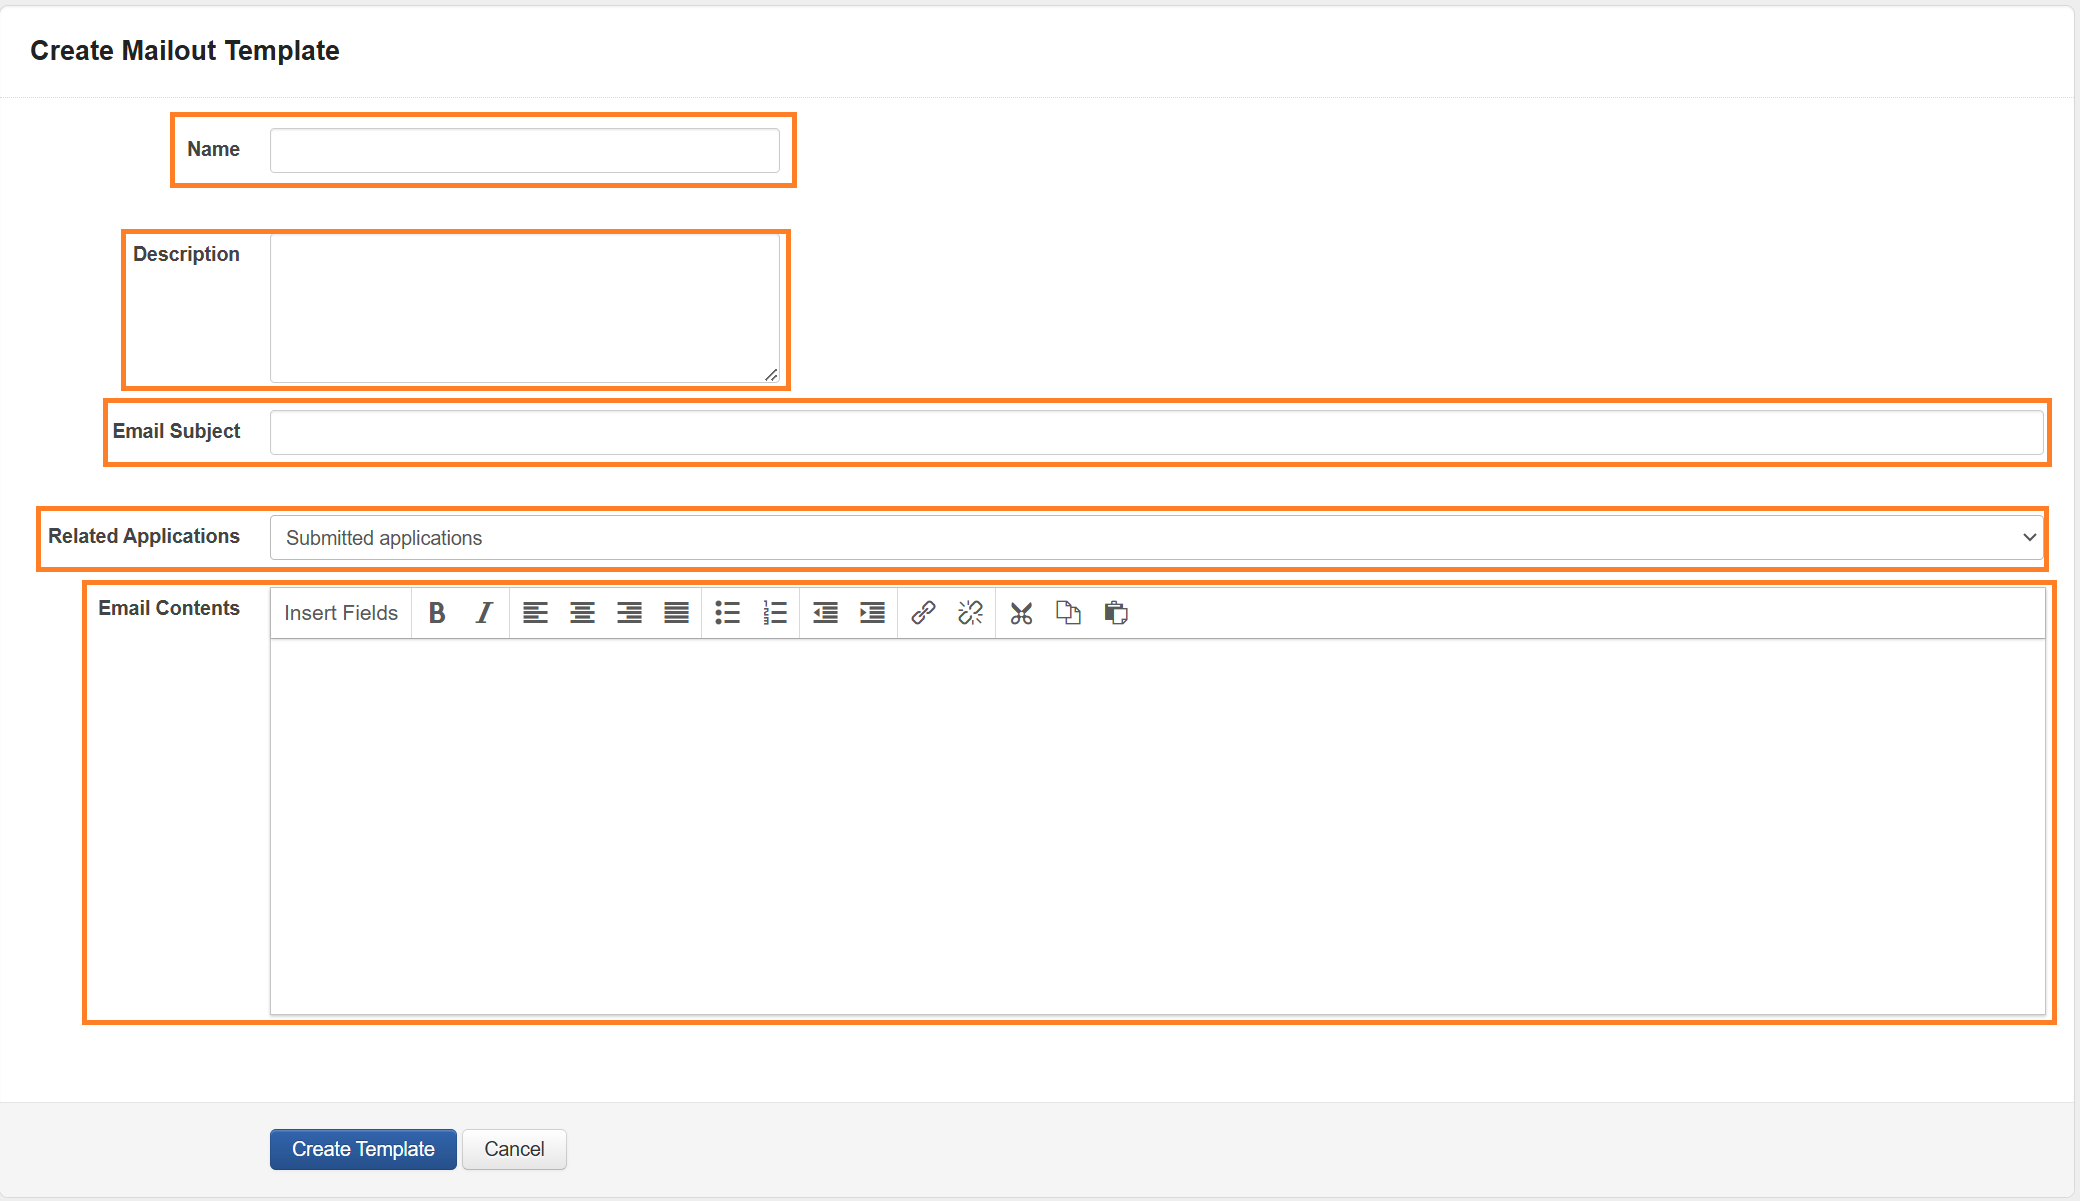
Name: the name of the template. This will be displayed when selecting the Insert Fields option in Step 3 - Compose Mailout of the mailout creation process.
Description: a description of the Mailout Template. This is also displayed when selecting the Insert Template option when in Step 3 - Compose Mailout of the mailout creation process. This should clearly describe the purpose of the mailout template.
Email Subject: the subject line that will be included in the sent email.
Related Applications: select the required option based on the purpose of the mailout. The avaiable options are:
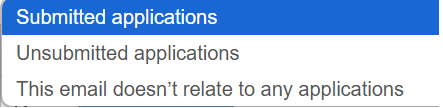
Submitted Applications - templates can include insertable fields for data that can be found in a submitted application. For example, contact field and standard field responses.
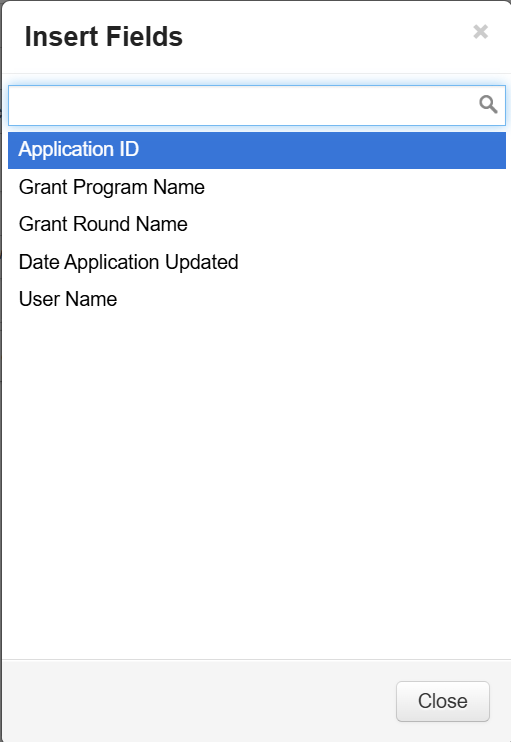
Unsubmitted Applications - templates can only include insertable fields for data that can be found in an unsubmitted application. For example User Name, Application ID etc.
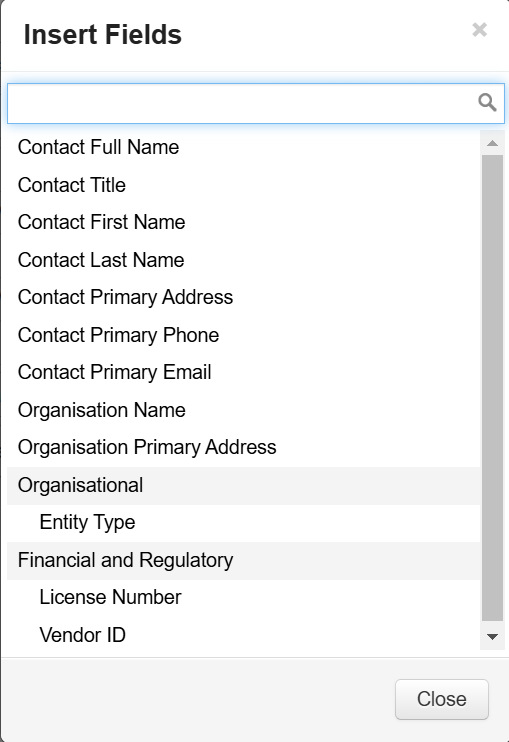
This email doesn’t relate to any applications - templates can only include insertable fields for data that can be found in the Contacts Directory. For example Contact Full Name, Contact First Name etc.
Email Contents: - enter the contents of the template here. Include any insertable fields as required considering the insertable fields that can be used based on the Related Appliation option selected.
A warning will be displayed if a template is selected for a maiout/email that does not match the Related Applications originaly configured in the mailout template. For example, if a mailout template’s related applications is configured as Submitted Applications, and the mailout is being created for Unsubmitted Applications, the system will display a warning mentioning any Insertable Fields that can not be used in the mailout/email.
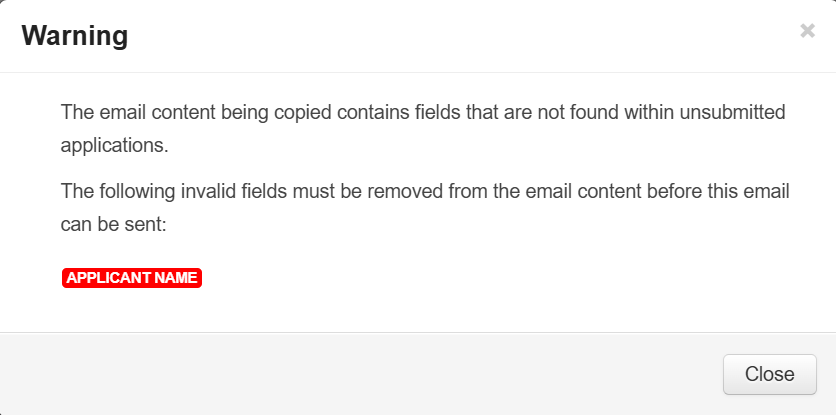
The user will need to edit the Email Contents and remove any conflicting Insertable Fields before they can continue.
Once all of the fields have been completed. Select Create Template to save the template and make it available for use.
Templates can be edited once inserted into the Email Contents field when creating a mailout/email.