Conditional Logic

Looking for something more interactive?
Access SmartySkills
Conditional logic is a feature available for use when building forms and allows whole section/s or page/s to become enabled or disabled dependent on the answer to a choice question.
The most common example of conditional logic is the basic "Yes/No" question often featured on a paper-based form.
If an applicant answers "Yes" to a question, they might be directed to answer further questions in the form. However, if they answer "No" they may be instructed to skip a series of questions that are no longer relevant to their individual situation.
The SmartyGrants form editor allows users to employ conditional logic. You can choose to allow applicants to skip certain questions - or compel them to answer certain questions - based on their response to a previous question.
Using conditional logic
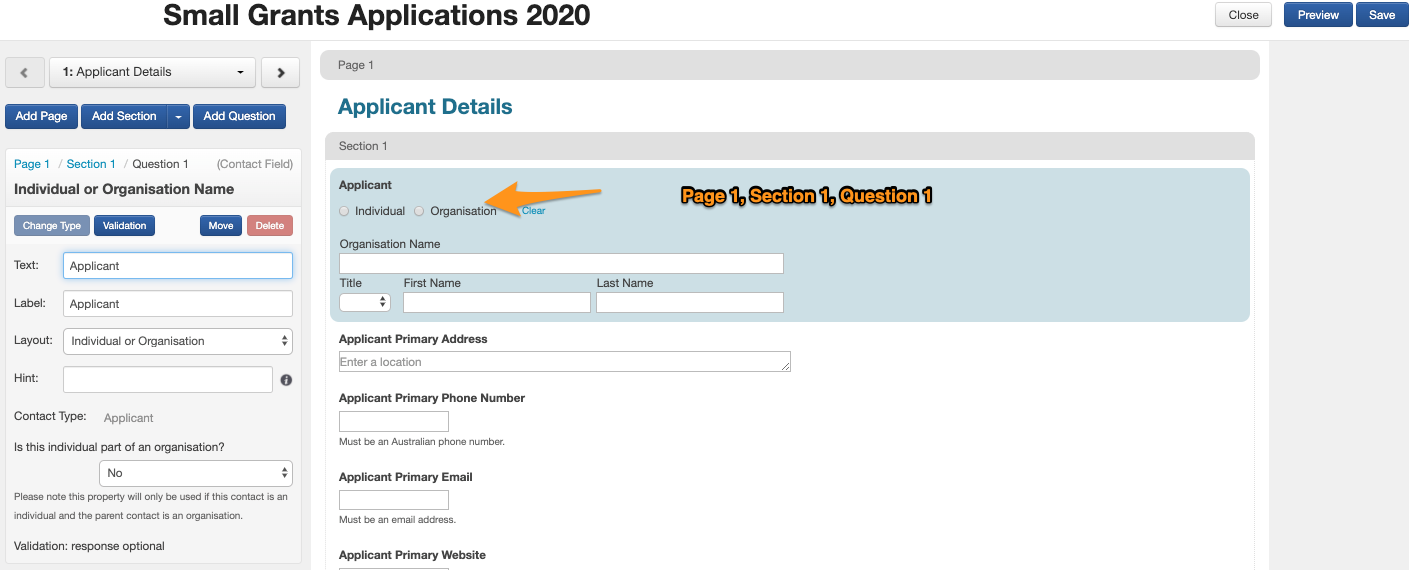
In the example below, we have used the question relating to an Applicant - they need to select whether they are an individual or an organisation (Page 1, Section 1, Question 1). Dependent on their answer, we then want to enable a specific section of the form for them to complete (for example, Page 1, Section 2).
Set a Section or Page to 'Conditional'- Base on a Single Response
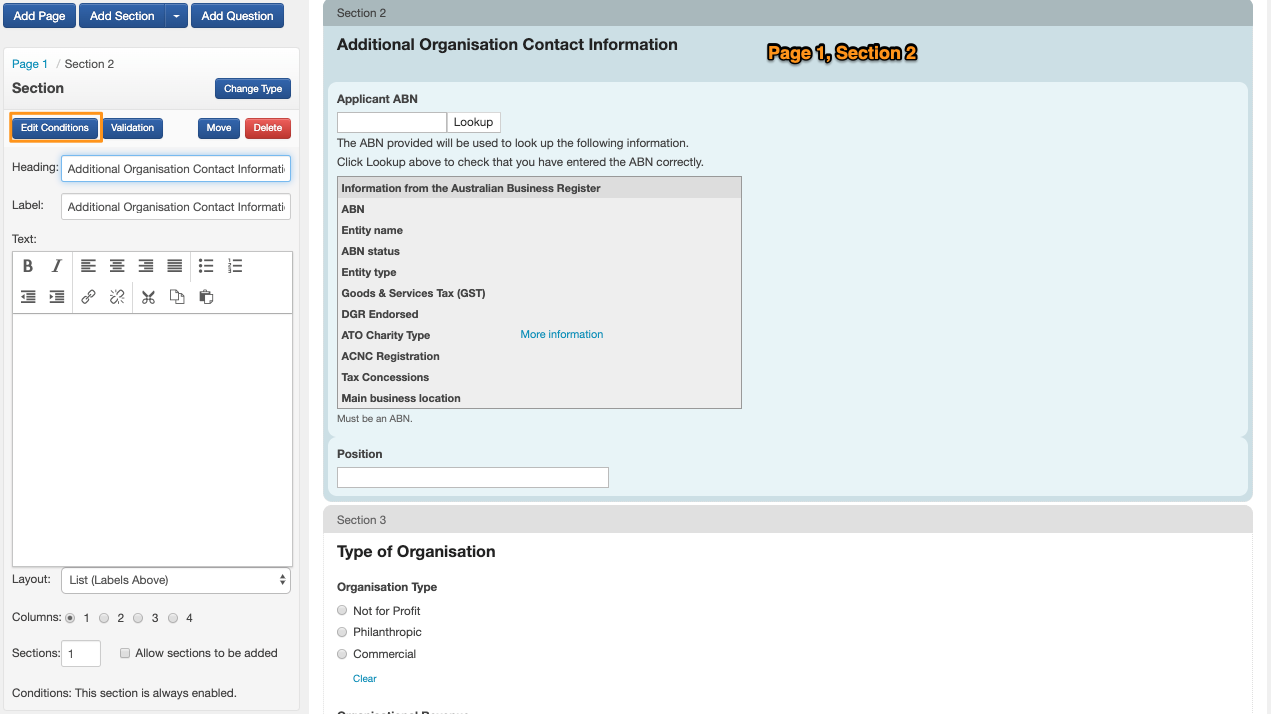
1.Select the page or section you wish to make conditional (click on the grey page or section bar). 

2. To the left of screen you will then see the control panel settings. Click on the 'Edit Conditions' button in the top left of the control panel. 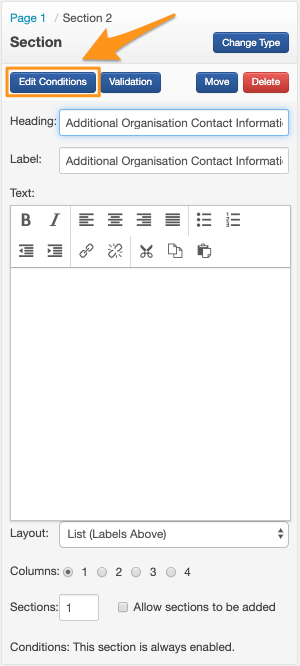
3. Choose to either Enable or Disable the section or page. In the example below we have chosen the enable condition.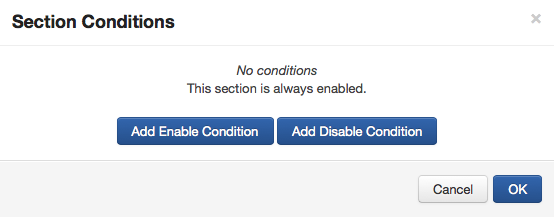
4. A set of compatible choice questions will appear in a drop down box (If nothing appears here, there have been no choice questions created previous to the section/page you are trying to apply the condition for). Select the Question you wish to base the conditional logic on. In the example below we have chosen the Page 1, Section 1, Question 1 (which is displayed as "1-1-1Applicant"). 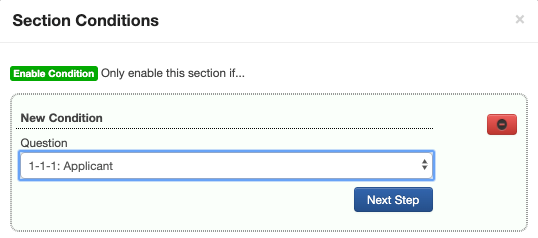
5. Click on Next Step.
6. The choices available for that question will appear. Tick which option you want your page or section of conditional logic to be enabled or disabled by and click Add (in the below example, we have chosen 'Organisation' as the enable option). You can add multiple choices if necessary, please note this is OR logic, not AND logic. When you are finished click on the OK button. This will now apply the set logic.
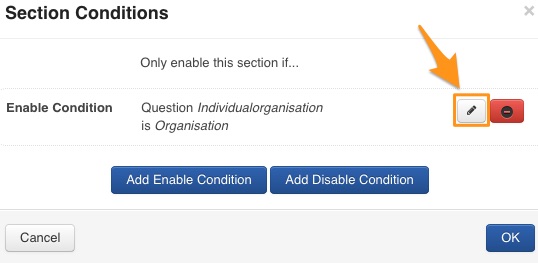
7. Once the condition has been applied, the Select Condition window will display the current conditions applied to the page or section. To edit them, you may click the Pen button, to delete you can click the red Minus button. 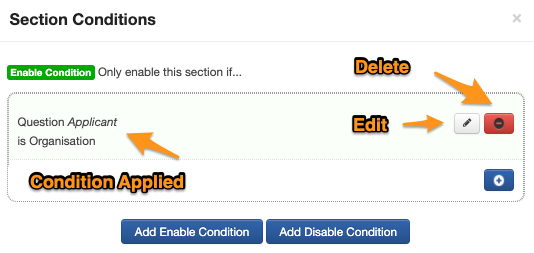
Standard fields and conditional logic
Important
A Standard Field in a page or section that is conditional can result in the response to that Standard Field being deleted upon the submission of the form. This will happen if the condition is not met and the Standard Field within the page or section is set to ‘Editable’. As the condition is not met, and therefore a response is not entered into the Standard Field, the ‘blank’ response to this Standard Field will be submitted. As this response is blank, then the Standard Field will be updated to a blank response, deleting any response to that Standard Field that was previously there.
SmartyGrants conditional logic is set up for the use case where if some condition is not met, the user does not qualify for/need to answer some questions and therefore those answers are not recorded. The current (expected) behaviour when standard fields are placed into a conditional section – when those standard fields already contain data from a form or from the standard fields tab – is as follows:
Standard field data is DELETED in a conditional section when:
“read only” is NOT enabled; and
the conditional section is NOT enabled/shown.
Standard field data is NOT deleted in a conditional section when:
“read only” IS enabled; or
the conditional section IS enabled/shown.
The following scenario demonstrates why standard fields behave this way when used in conditional sections:
There is a question in an application form that says: “Are you a registered charity?”
On answering “Yes”, a conditional section is enabled asking for charity details.
The applicant fills out the charity details in the conditional section, and then submits the form…
A few weeks later, the form is re-opened for the applicant, as it has been discovered that the applicant organisation is in fact not a registered charity.
The applicant then returns to the form, and selects “No” – as they are not a registered charity, and then re-submits the form without further changes…
On re-submission of the form, those charity details in the conditional section are deleted. Assessors and other users will not come across the charity details when reporting on the data, filtering on the data or viewing the data in a form or on the standard fields tab. There is no question when viewing the standard fields tab as to whether the organisation is a registered charity, because the charity details are no longer listed.
Using conditional logic on number and currency questions
Applying conditions to Number and Currency questions is done the same way as applying conditions to a choice question. For more detailed description of the first five steps of this process, please see 'Using conditional logic on choice questions' above.
1. Select the page or section you wish to make conditional.
2. Click on the 'Edit Conditions' button in the top left of the control panel.
3. Choose to either Enable or Disable the section or page.
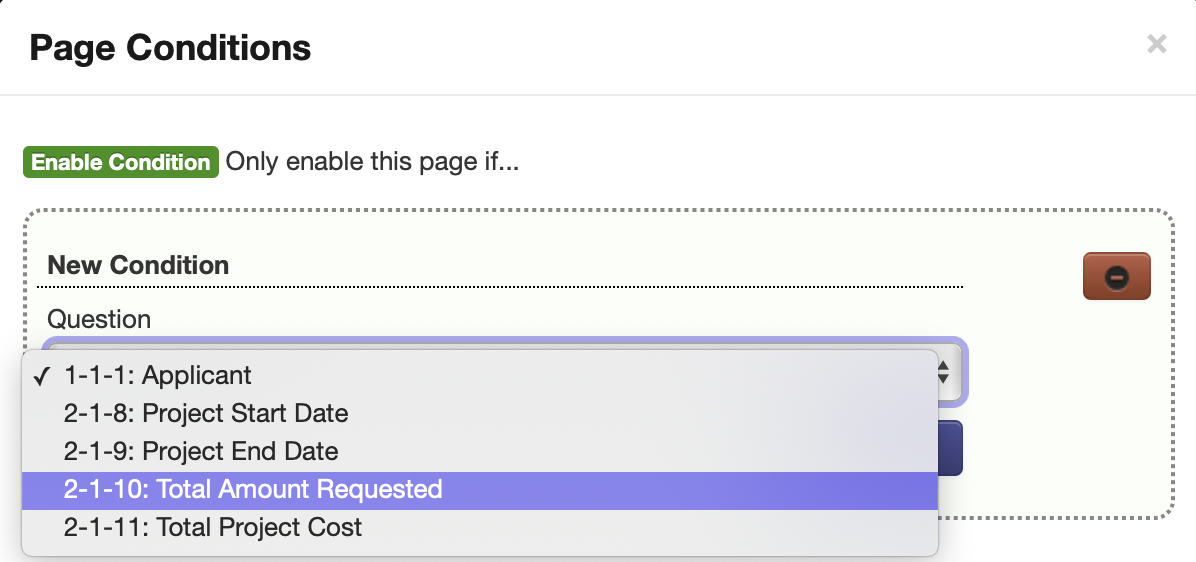
4. Select the Question you wish to base the conditional logic on. In this example we have selected Page 2 Section 1 Question 10: Total Amount Requested (2-1-10)
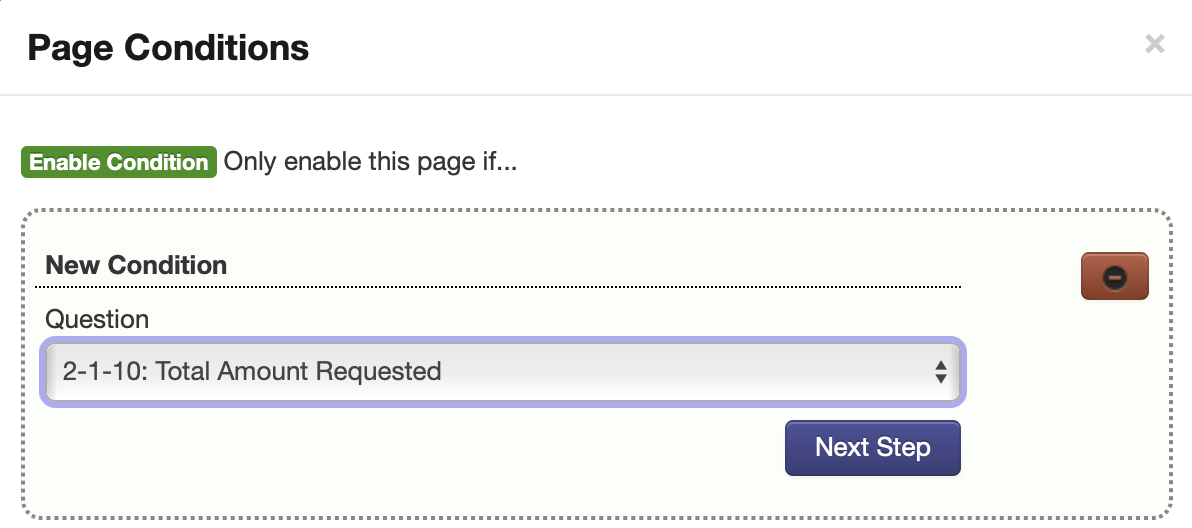
5. Click on Next Step.
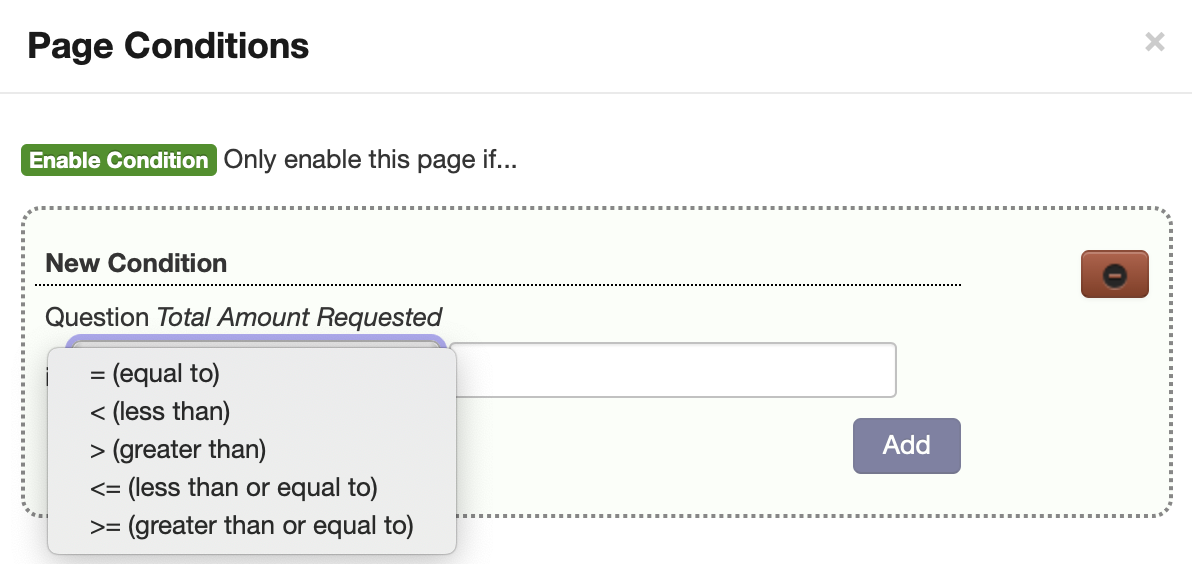
6. The choices available for that question will appear. Select which option you want your page or section of the conditional logic to be enabled or disabled by, and set the required value/amount, then click Add. For a number/currency question you will be able to chose from these options and any value/amount (including negative numbers) that you wish.
= (equal to) Only responses exactly equal to the set value/amount will trigger the conditional logic
< (less than) Only responses less than the value /amount, not including the set value/amount, will trigger the condition
> (greater than) Only responses more than the value/amount, not including the set value, will trigger the condition
<= (less than or equal to) Responses less than the value/amount, including the set value, will trigger the condition
>= (greater than or equal to) Responses greater than the value/amount, including the set value, will trigger the condition
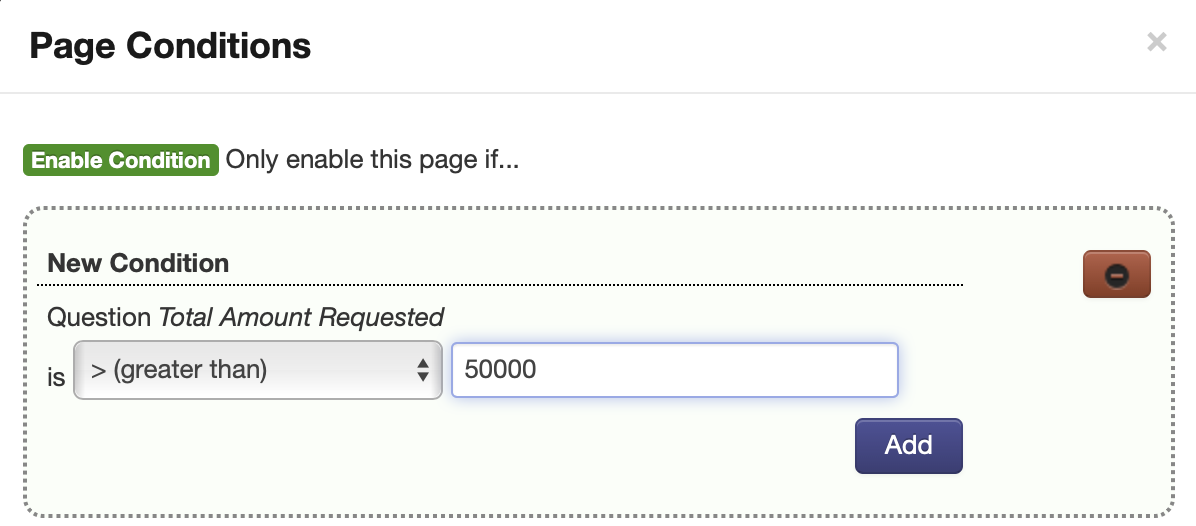
In this example we have selected > (greater than) and set the value at 50,000. Any responses to the Total Amount Requested field over 50,000 (e.g 50,001 or 50,000.10 if using 2 decimal points) will enable or disable the section or page, depending on the type of condition applied.
7. Once the condition has been applied, the Select Condition window will display the current conditions applied to the page or section. To edit them, you may click the Pen button, to delete you can click the red Minus button.

Using conditional logic on date questions
Applying conditions to Date questions is done the same way as applying conditions to a choice question. For more detailed description of the first five steps of this process, please see 'Using conditional logic on choice questions' above.
1. Select the page or section you wish to make conditional.
2. Click on the 'Edit Conditions' button in the top left of the control panel.
3. Choose to either Enable or Disable the section or page.
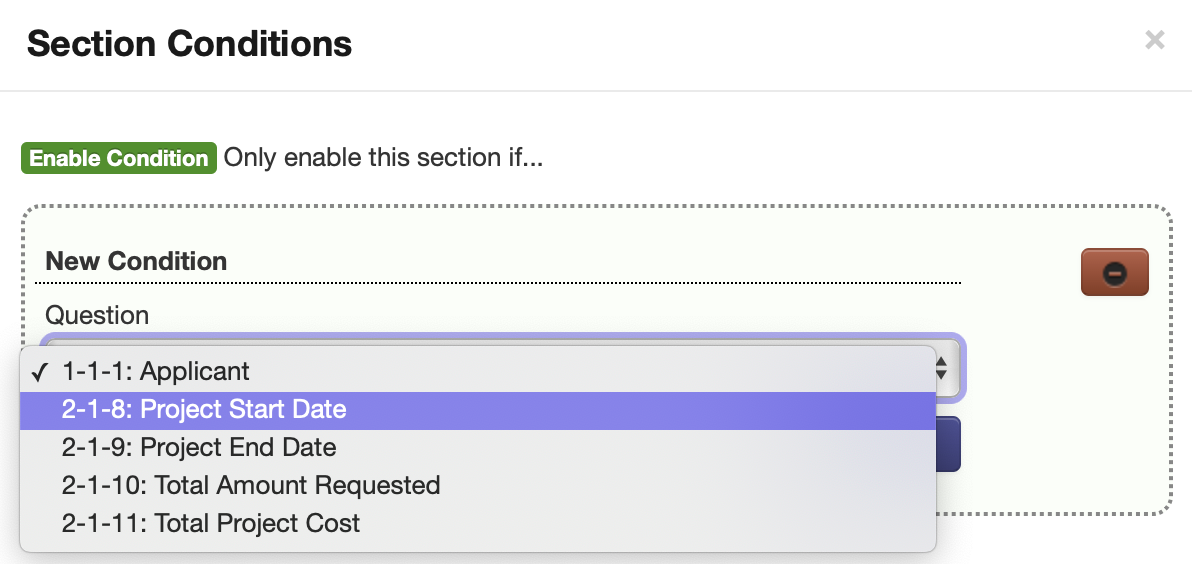
4. Select the Question you wish to base the conditional logic on. In this example we have selected Page 2 Section 1 Questipn 8: Project Start Date (2-1-8)
5. Click on Next Step.
6. The choices available for that question will appear. Select which option you want your page or section of the conditional logic to be enabled or disabled by, and set the required value/amount, then click Add. For a date question you will be able to chose from these options and any date that you wish.
= (on) Only responses exactly equal to the set date will trigger the conditional logic
< (before) Only responses before the date, not including the set date, will trigger the condition
> (after) Only responses after the date, not including the set date, will trigger the condition
<= (before or on) Responses before or on the date, including the set date, will trigger the condition
>= (after or on) Responses after the date, including the set date, will trigger the condition

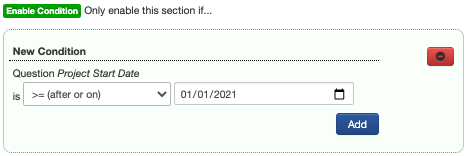
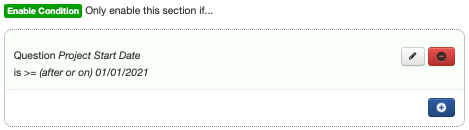
In this example we have selected > (after or on) and set the date at 01/01/2021. Any responses to the Project Start Date field after or on 01/01/2021 (e.g 03/01/2021 or 25/06/21) will enable or disable the section or page, depending on the type of condition applied.
7. Once the condition has been applied, the Select Condition window will display the current conditions applied to the page or section. To edit them, you may click the Pen button, to delete you can click the red Minus button.
Using conditional logic on values in choice questions
1. Select the page or section you wish to make conditional.
2. Click on the 'Edit Conditions' button in the top left of the control panel.
3. Choose to either Enable or Disable the section or page.
4. Select the Question you wish to base the conditional logic on. In this example we have selected Page 1 Section 2 Question 4: Single Choice Question (1-2-4)
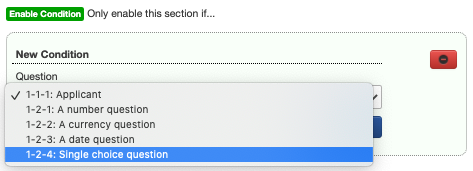
5. Click on Next Step.
6. The choices available for that question will appear. Select which option you want your page or section of the conditional logic to be enabled or disabled by, and set the required value/amount, then click Add. For a Basic Single Choice question you will be able to set the response that will trigger the condition (in this case '1000'), or the value (also '1000' in this example).
= (equal to) Only responses exactly equal to the set choice, or set value/amount, will trigger the conditional logic
< (less than) Only responses less than the set choice or set value/amount, not including the set value/amount, will trigger the condition
> (greater than) Only responses more than the set choice or set value/amount, not including the set choice or value, will trigger the condition
<= (less than or equal to) Responses less than the set choice or value/amount, including the choice and set value, will trigger the condition
>= (greater than or equal to) Responses greater than the set choice or value/amount, including the choice and set value, will trigger the condition
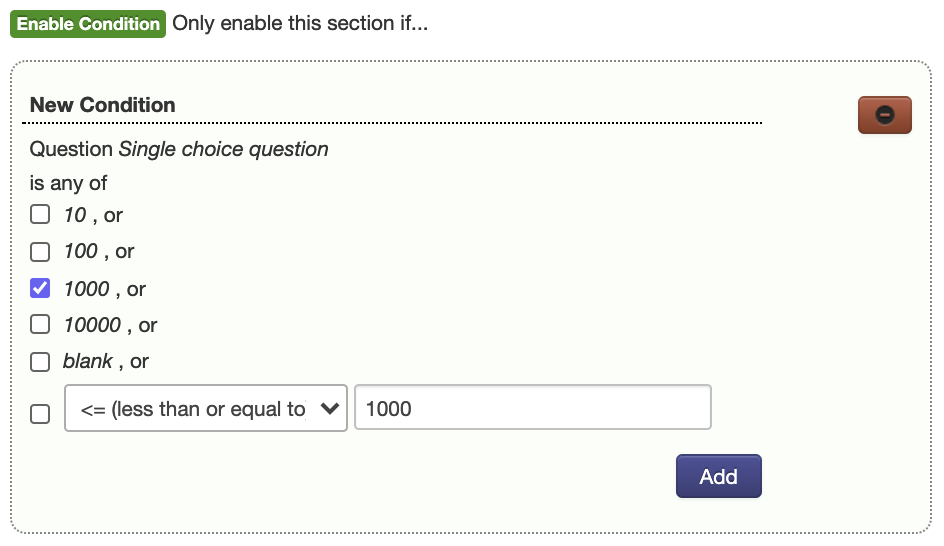
In this example we have selected the choice '1000' and <=(less than or equal to) and set the value/amount at 1000. Any responses to the A Choice Question field, either selecting '10', '100' or '1000' will enable or disable the section or page, depending on the type of condition applied.
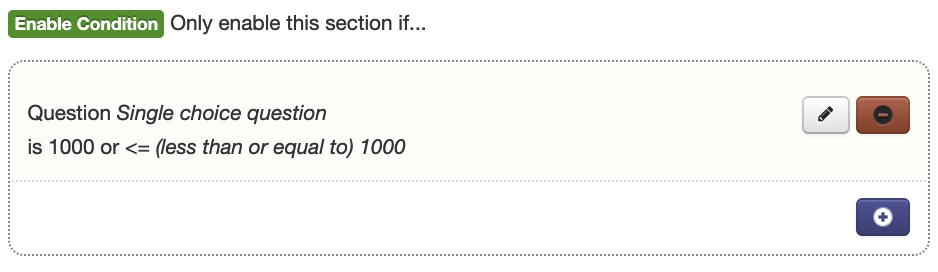
7. Once the condition has been applied, the Select Condition window will display the current conditions applied to the page or section. To edit them, you may click the Pen button, to delete you can click the red Minus button.
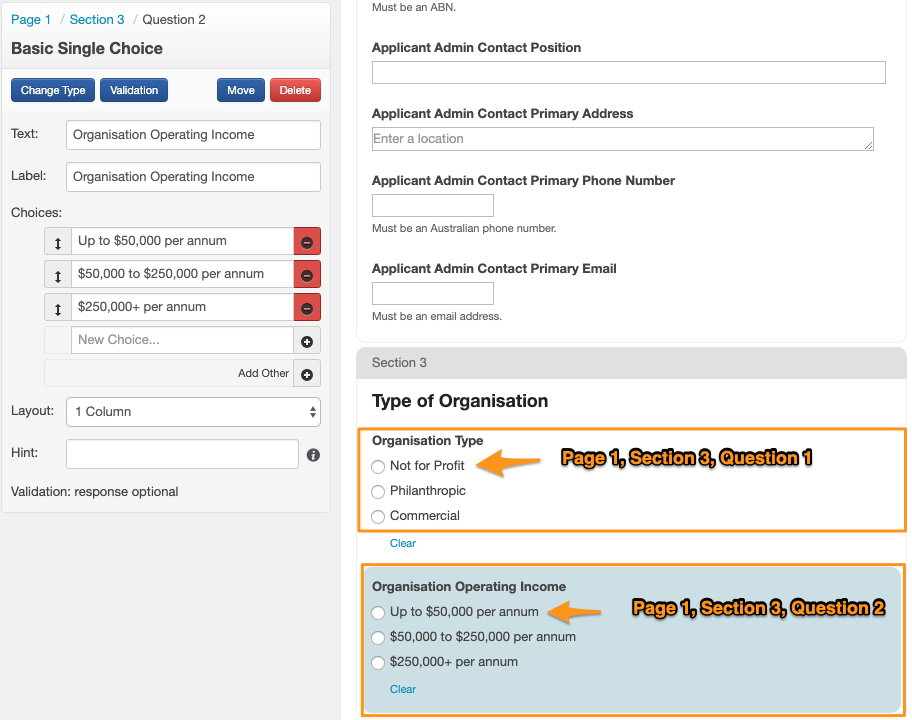
Set a Section or Page to Conditional using multiple responses including AND or OR functions
In this next example, we will show how to enable a section or page (in this case a page) based on an applicant selecting multiple responses. In the form we are asking for the applicant's organisation type and their organisations annual operating income. Should the applicant respond that they are a Not for Profit OR that they have an operating income of less than $50,000 per annum they will then have access to a budget information page which has been tailored for these types of organisations.
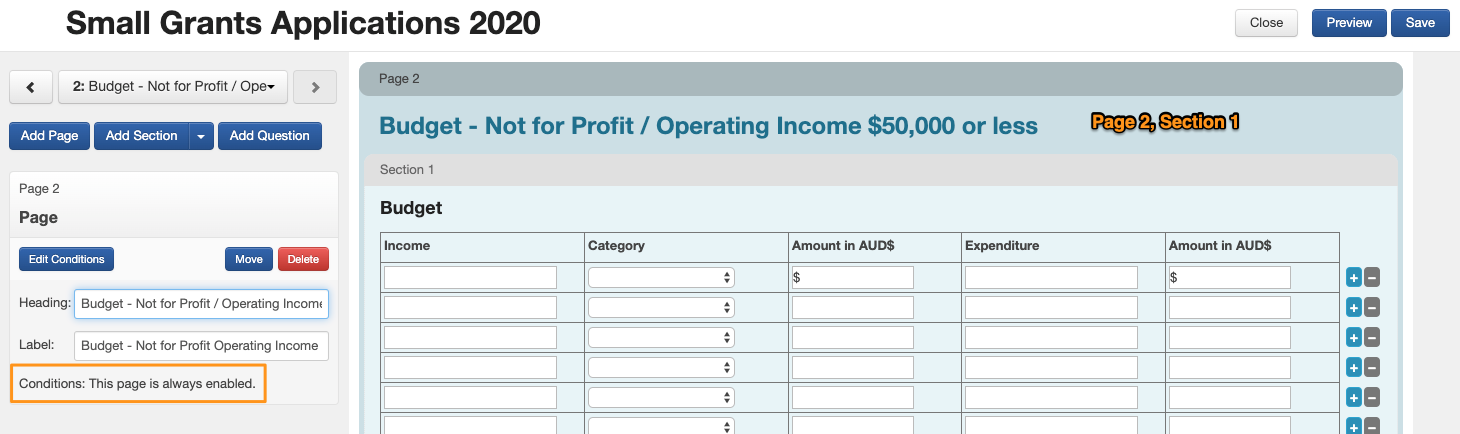
1. Select the page or section you wish to make conditional (click on the grey page or section bar)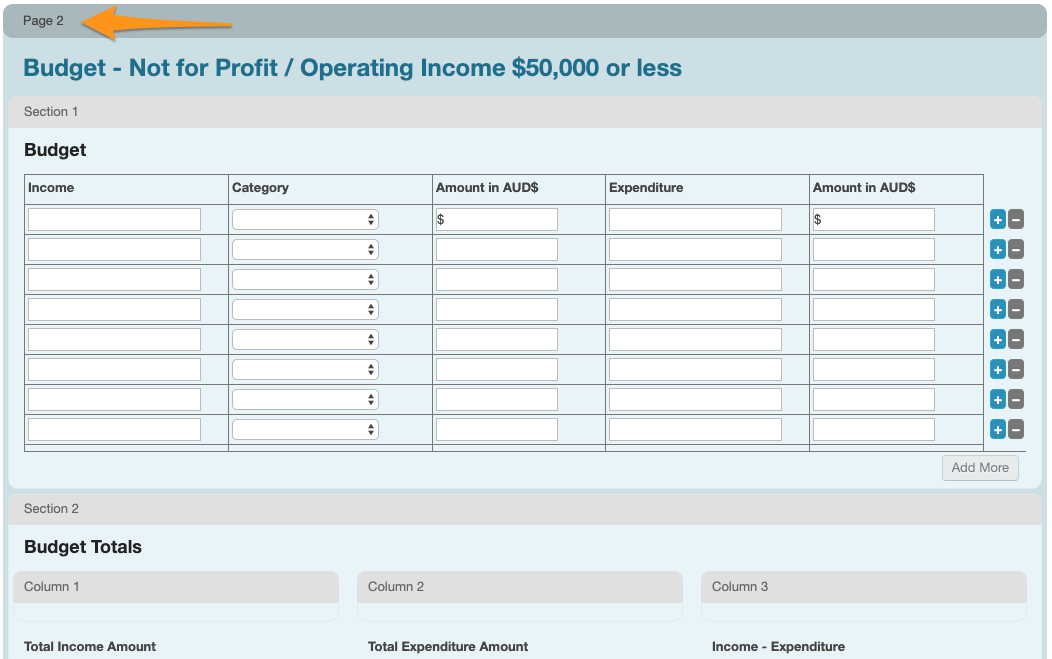
2. To the left of screen you will then see the page or section settings. Click on the 'Edit Conditions' button in the top left control panel. 
3. Choose to either Enable or Disable the section or page. In the example below we have chosen the enable condition.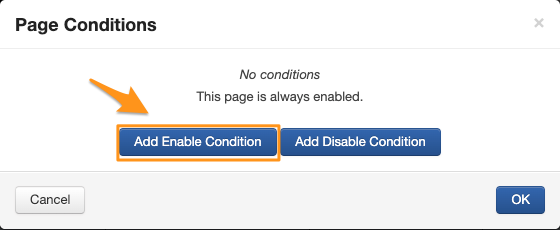
4. A set of compatible choice questions will appear in a drop down box (If nothing appears here, there have been no choice questions created previous to the section/page you are trying to apply the condition for). Select the Question you wish to base the conditional logic on. In the example below we have chosen the Page 1, Section 3, Question 1 (which is displayed as "1-3-1: Organisation Type").
5. Click on Next Step
The choices available for that question will appear. In this example I would like the page to be enabled if the applicant is a Not for Profit OR their operating income is less than $50,000. For the first option, I will tick the box 'Not for Profit'. and click the Add button.
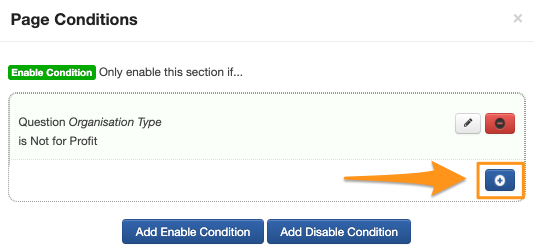
6. The system will display that this Enable Condition has been applied to the page or section.
7. At this stage I am able to add another condtion by clicking the Add Enable Condition or Add Disable Condition however, in this example, I want this page to be enabled if the applicant selects either 'Not for Profit' in Question 1-3-1 Organisation Type OR 'Up to $50,000 per annum' in Question 1-3-2 Organisational Revenue OR if they select both responses. To do this I am going to 'nest' the conditions together.
To do this, I will start by clicking the blue + button
8. The system will then display the existing condition and give the option to make this an AND of an OR condition (system default is set to OR). I confirm that I would like to use the OR option. I will then need to define the question I want the second condition applied to, in this example Question 1-3-2: Organisational Revenue
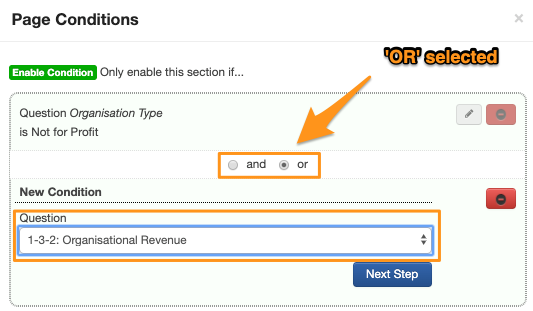
9. Then click Next Step.
10. I will now need to define the response that the system will apply the condition to, in this example it will be 'Up to $50,000 per annum.
11. I then click Add and this conditional has been applied.
The system will then show me the conditions that have been applied to this section or page.
Important: Optional Show/Hide on Conditional Sections/Pages
It is optional whether a conditional section or page is shown or hidden from those filling out the form - this is controlled from the form settings.
Both of these options are outlined below. Please note: by default, new forms will be set to 'hide' content that is not applicable. Forms that are copied will maintain the current settings of that form.
Show: content that is not applicable due to response to conditional question
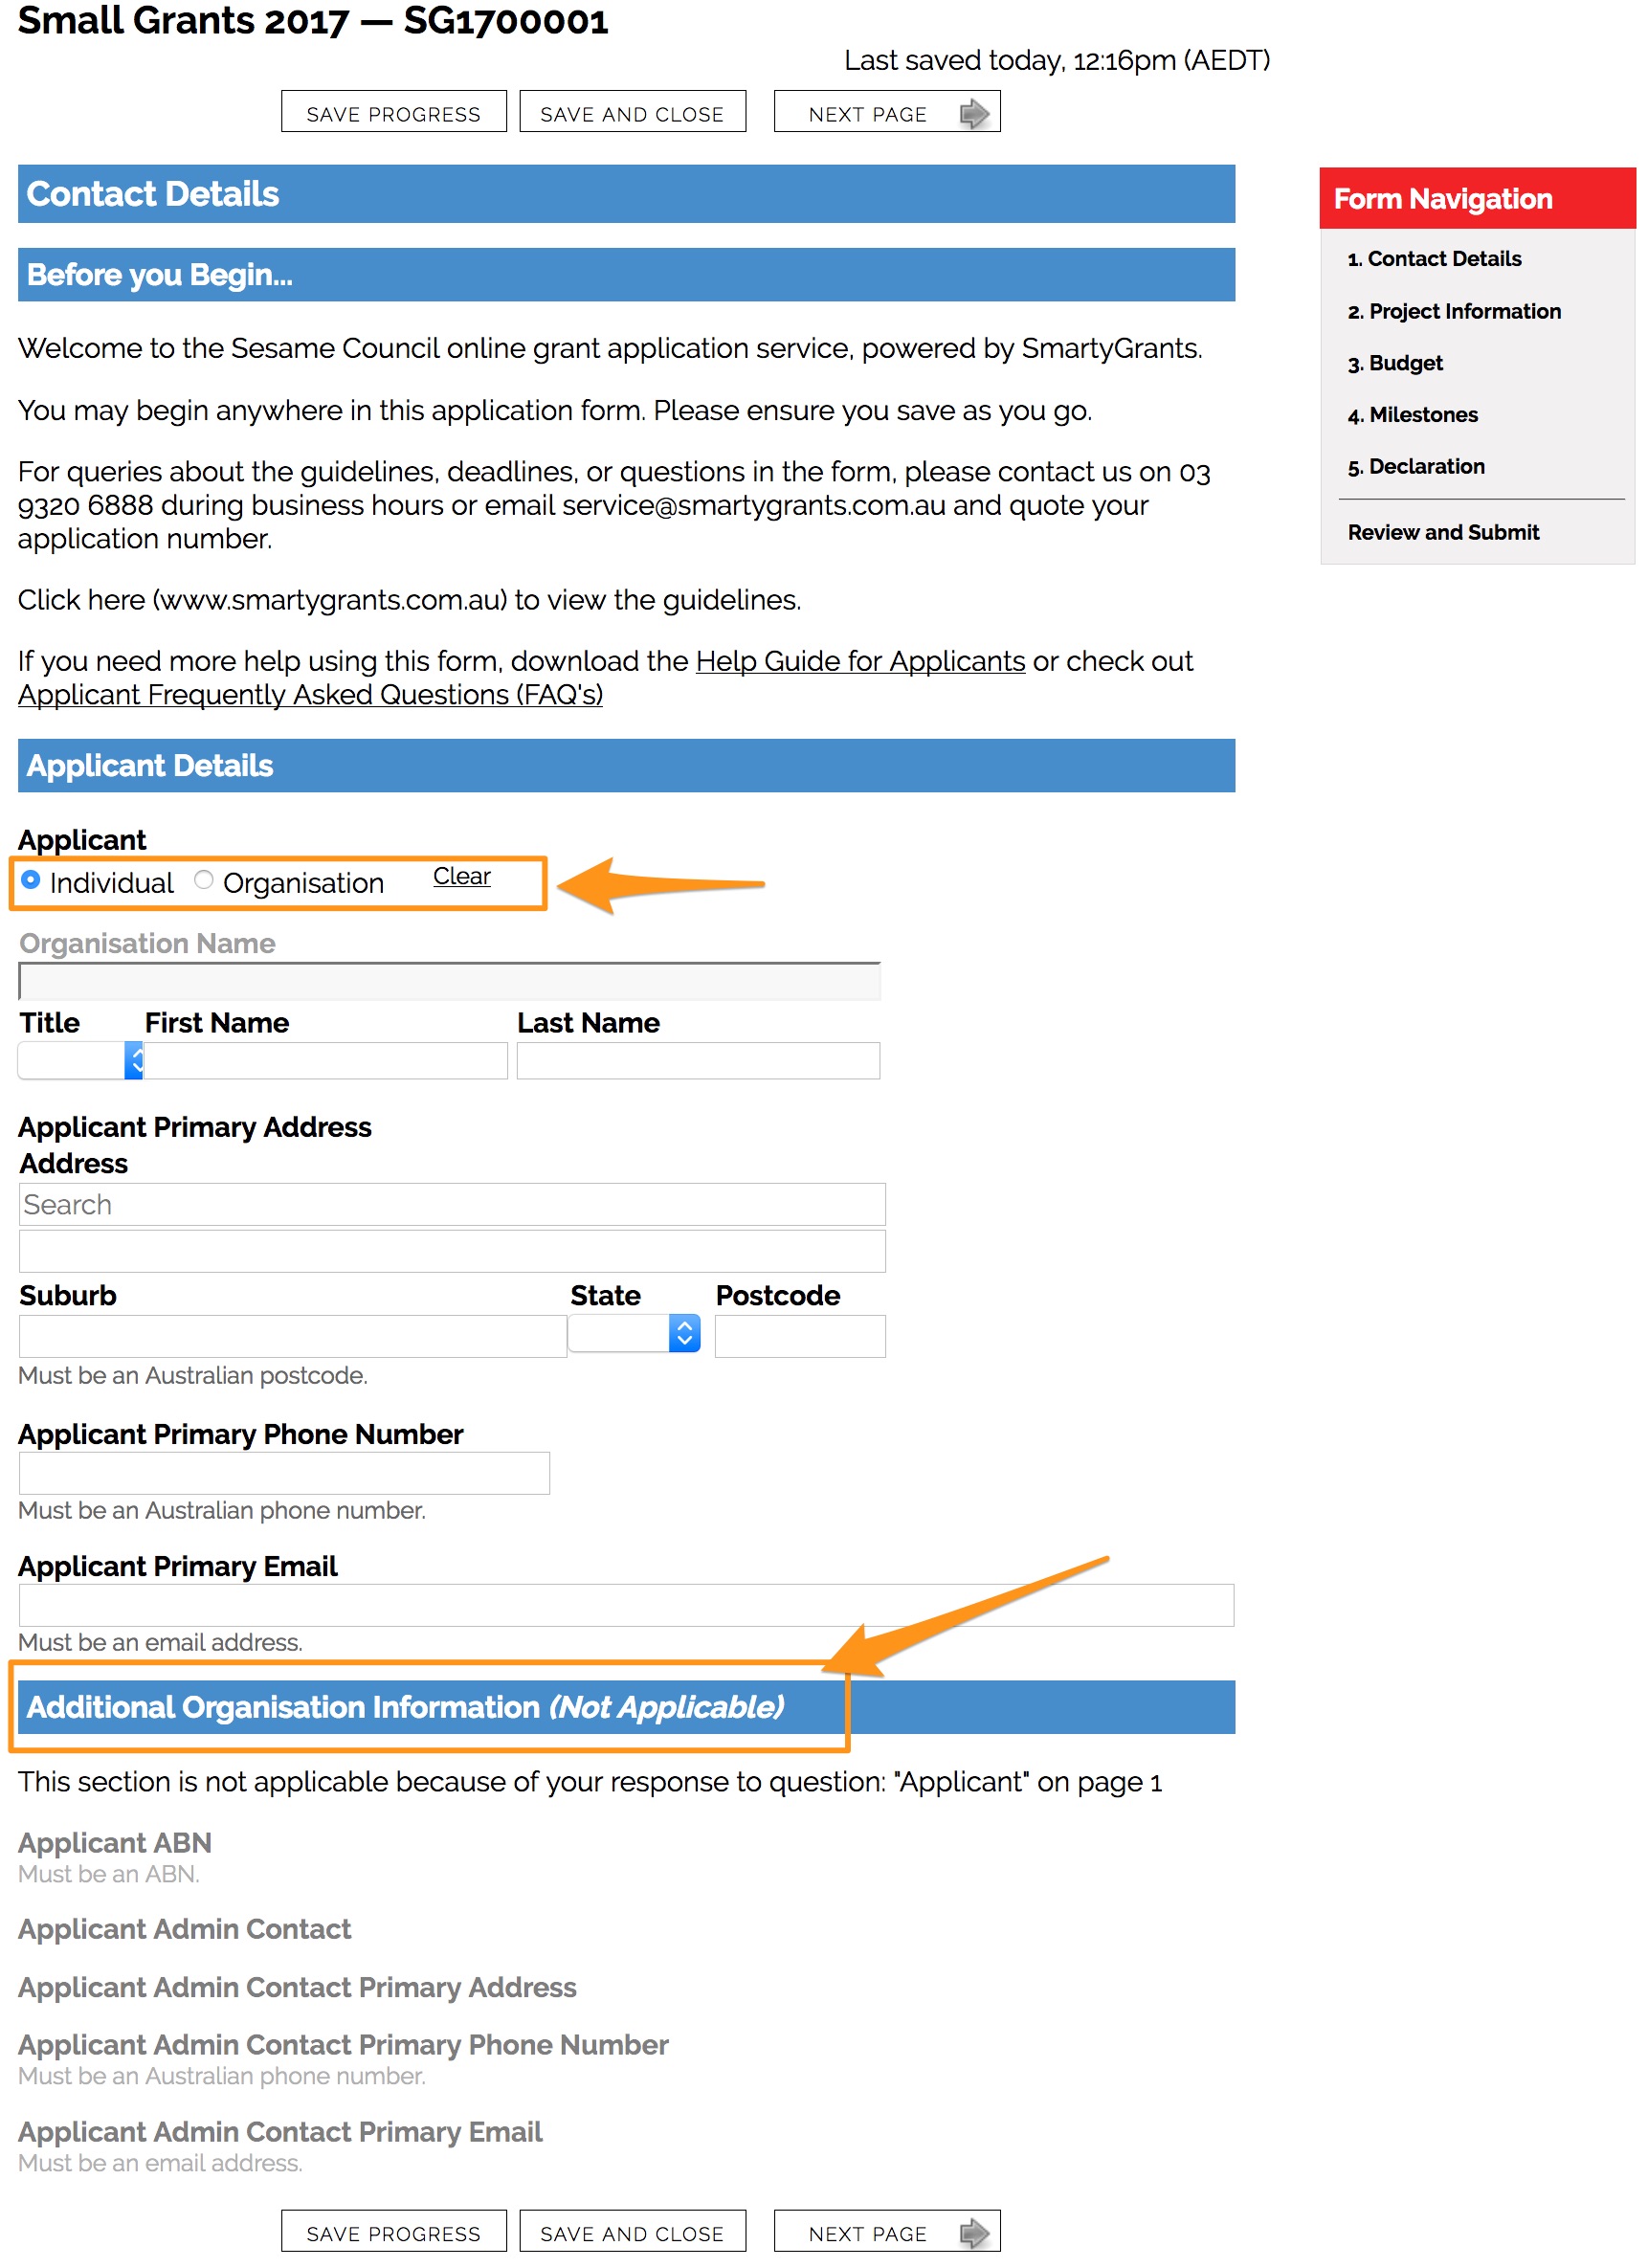
The user completing a form will see all sections and pages within a form whether they are conditional or not. The response they provide to your conditional choice question decides which pages/sections are enabled/disabled. Any section or page that is disabled is greyed out but still visible and will not be enabled for completion. Pages are still listed in form navigation if they are not applicable, however, the page is not selectable. See the example below:
Hide: content that is not applicable due to response to conditional question
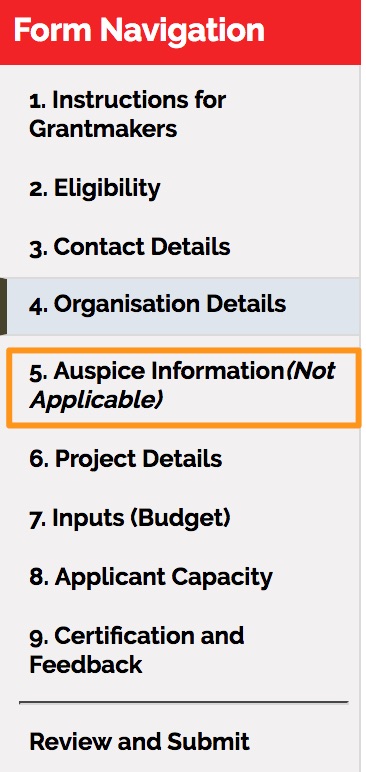
The user completing a form will not see any disabled sections or pages, unless they become enabled. The response they provide to your conditional choice question decides which pages/sections are enabled/disabled. Note that pages are still listed in form navigation if they are not applicable, however, the page is not selectable. See the example below:
Using Standard Fields and /or Contact Fields and Conditional Logic
The same Standard fields and Contact fields can only be used once in a form. If you are using Conditional Logic as a way to manage 1 form for several different streams, ALL common questions across the streams (eg: address, applicant name, phone numbers, project titles etc… ) should be asked outside of the conditional logic. Then a choice question on the form can determine which page/section of the form need to be answered that are specific to the individual stream.
Important: Using Standard Fields in a Disabled Section
Disabled sections are designed such that any responses that are in them are considered blank. If you put standard fields in conditional sections, they will be set to blank once disabled.
If you set up a section that is disabled when the form is opened (or an enable condition), then the standard fields will pull through as blank.
Editing a condition that has already been applied
You can edit the conditional logic by selecting the relevant section or page and selecting edit conditions from the control panel (on the left of the screen). You can then select the pencil to edit the condition option.
Testing your conditions?
All forms before being published or used to collect data should be tested first. If you are applying conditional logic to a form, it is strongly advised that you test the form first. Ensure you test all your relevant scenarios to ensure that the set conditional behaviour is working for you. See Test Round / Testing a Form to learn how.