Funding and Payments
The SmartyGrants funding and payments module allows you to enter your funding sources and budget allocations across financial periods.
When you record your final decision in SmartyGrants you have the ability to allocate funding amounts, and to define which budgets those amounts are being drawn from. You also have the ability to allocate funding across multiple financial periods and from multiple budgets.
The funding section of SmartyGrants gives you a quick snapshot view of your budgets, and the payments you have allocated, scheduled, approved and/or paid, returned or cancelled. All of this information can also be compiled into reports using SmartyGrants' reporting area.
Funding Set-Up
Please Note: Only Administrators can perform the steps included in the Funding Set-Up and Archiving Budgets and Funding Sources sections below.
The first thing you need to do is enter your SmartyGrants account and set-up your financial periods, funding sources and budgets:
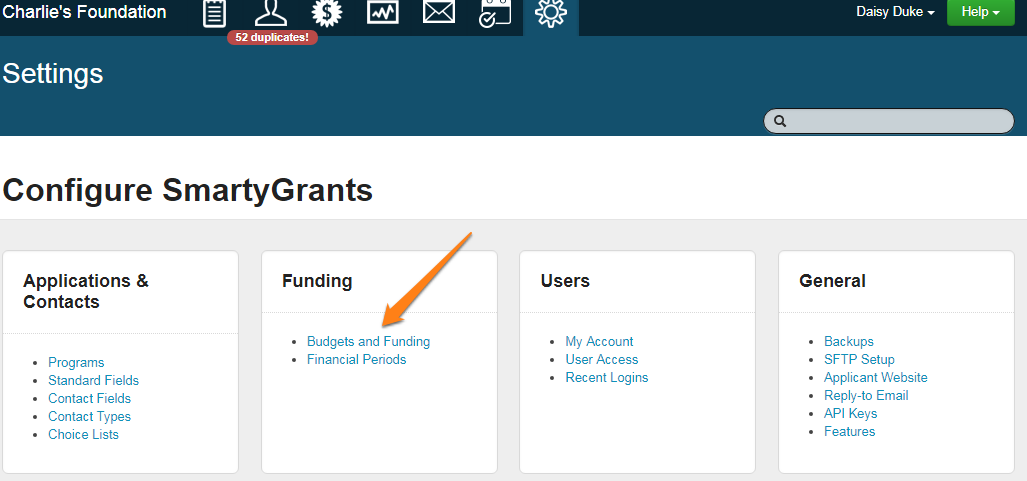
Go to 'Account Settings'
Chose link from 'Funding' column.
There are two sections you need to fill in:
Budgets and Funding
Each budget has a funding source, and can span one or more financial periods.
A funding source is, for example, a fund or foundation that provides money towards a budget. Each budget can have one funding source.
Financial Periods
A financial period might be the standard Australian financial year (July 1 to June 30) or the calendar year (January 1 to December 31). Alternatively your organisation might manage its grants budget on a quarter-by-quarter basis (January 1 to March 31; April 1 to June 30).
Click on 'Budgets and Funding' or 'Financial Periods' to set these sections up. More detail on each of these sections is featured below.
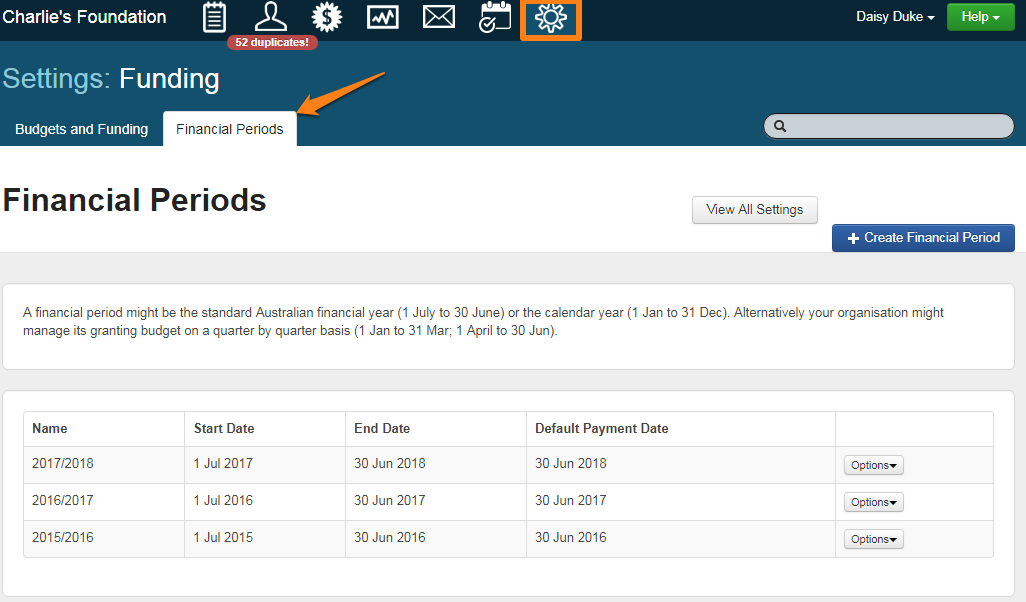
Financial Periods
A financial period might be the standard Australian financial year (1 July to 30 June) or the calendar year (1 Jan to 31 Dec). Alternatively your organisation might manage its granting budget on a quarter by quarter basis (1 Jan to 31 Mar; 1 April to 30 Jun).
Go to your Account Settings and click on the 'Financial Periods' link.
Click on 'Create Financial Period'.
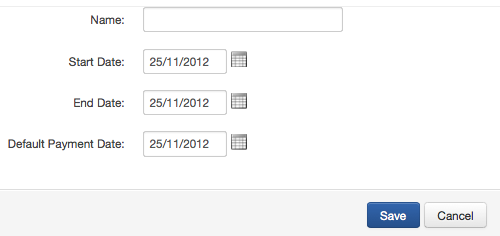
Give your financial period a Name - for example: "2012/2013" or "2012"
Enter a 'Start Date' and an 'End Date' of your financial period.
Enter a Default Payment Date. Ideally, this date should relate to when the next set of payments will be made for your next grant round. This date is not fixed and can be amended at any time.
It is important to maintain consistency when naming your financial years. All of your budgeting information will be used for reporting.
Budgets and Funding Sources
A funding source is (for example) a fund or foundation that provides funding towards a budget. Each budget can have one funding source.
Go to your Account Settings and click on the Budgets and Funding link
Click on 'Create Funding Source'.
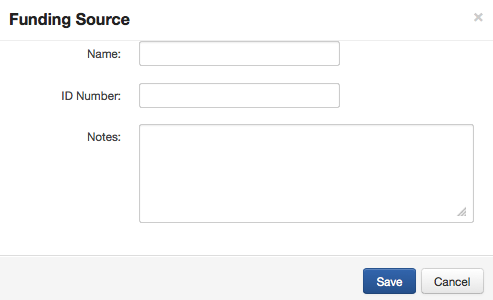
You need to enter a Funding Source Name.
If you wish to, you can give your funding source an ID number. This can be helpful if you use codes or ID numbers for your financial reporting.
Click Save. You will see that this funding source is now added to your funding source list. The next step is to create budgets for each of your funding sources.
Budgets and Budget Allocations
A budget has a funding source, and can span one or more financial periods.
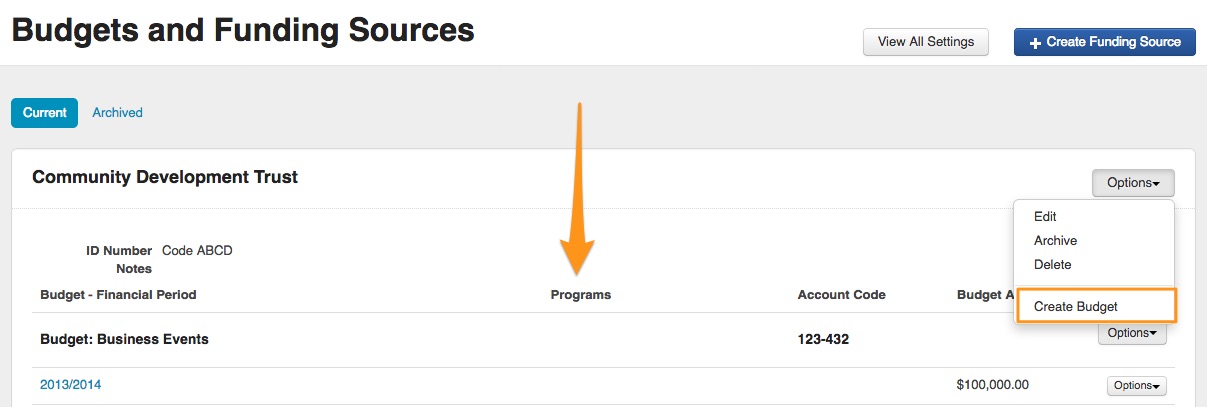
Go to your Account Settings and click on the Budgets and Funding link
Click on the grey 'Options' button under the relevant funding source, and then click on 'Create Budget'.
Enter a Name for your budget - for example: 'Small Grants', or 'Arts & Humanities' and an optional Account Code.
Choose which funding source this budget will be related to and click 'Save'.
You will see that this budget name is now added to your funding and budgets list.
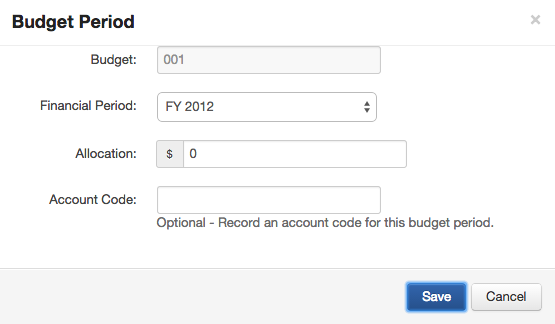
The next step is to add an allocated budget amount and financial period to your budget. To do so, click on the grey 'Options' button next to the relevant budget name and click on 'Create Budget Allocation'.
Select the Financial Period, Allocation and optional Account Code, then click Save. The amount that you enter relates to the budget amount for your whole financial period.
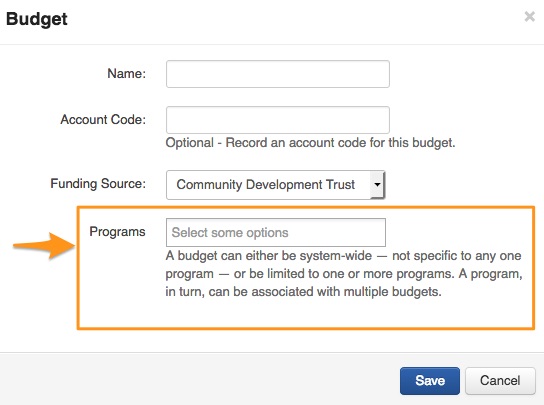
Linking Programs to Budgets
A budget can be linked to single or multiple programs.
'Program specific - program manager' users will also see any linked budget/s for their program in the funding overview area, if no budgets have been specified for their program they will not have access to the funding overview icon, however, will be able to allocate funding out of budgets they have access to.
Linking a budget to a program can be done when editing or creating a budget.
Program specific, program managers will only have access to view budgets for programs they have access to when specified. If no Programs are specified they will not have access to the funding overview icon.
If a budget/s is linked to a program then only those budget/s will appear when a user allocates funding within that program (i.e. budgets accessible across all programs will not appear). All other budgets are still made available across other programs. In other words,
Program Specific users will see all budgets when allocating funding UNLESS a program has been assigned to a budget. If you want to restrict what budgets people can see/have access to in every program you have to assign programs to all budgets.
Once you have entered all of the above information, your Budget set-up is complete.Click here for more information on how to allocate these funds to applications
Click here for information on Reporting on budgets and payments
Archiving Budgets and Funding Sources
Budgets and Funding sources can be archived at any time. To archive:
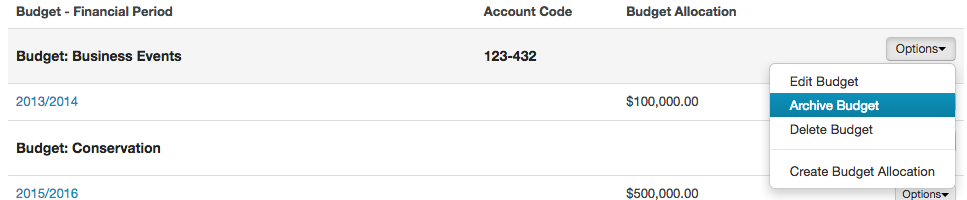
Go to the Account settings and click on Budgets and Funding.
Select the options button next to the Budget or the Funding source you wish to archive, and select 'Archive'.
Please note: when a budget is archived it is not possible to add a funding allocation to that budget. When a funding source is archived it is not possible to add a funding allocation or a new budget.
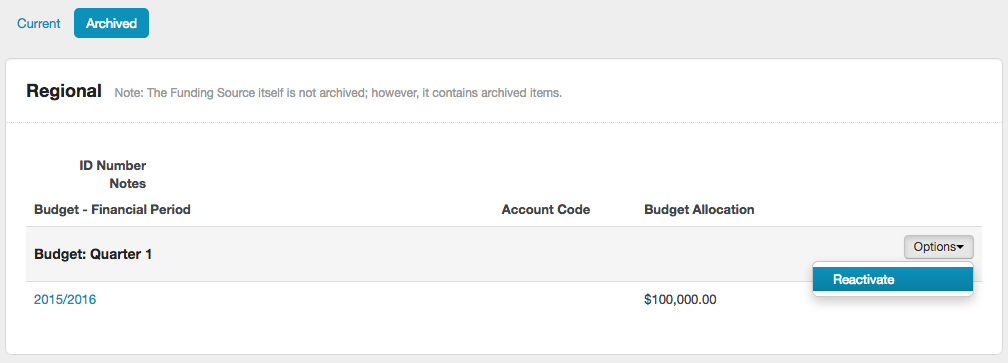
You can reactivate a budget or funding source at any time.
To do so, click on the 'Archived' tab under the settings for Budgets and Funding.
Select options next to the budget or source you wish to reactivate and select 'Reactivate'.
Recording Decision
A decision needs to be recorded in the system before you can add a fund allocation.
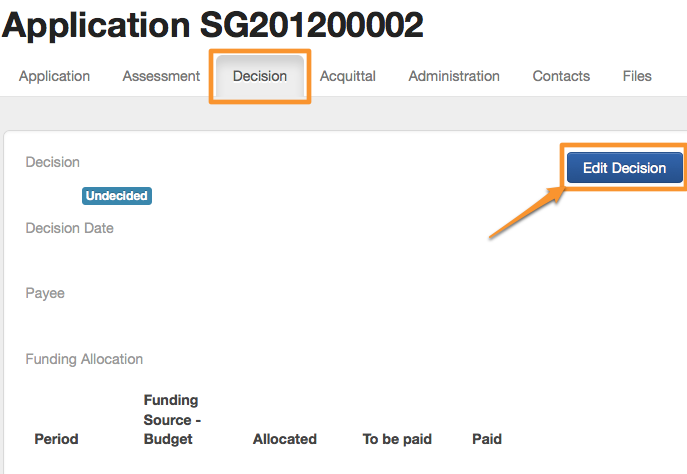
Go to the relevant application. Click on the Decision tab.
Click on 'Edit Decision'.
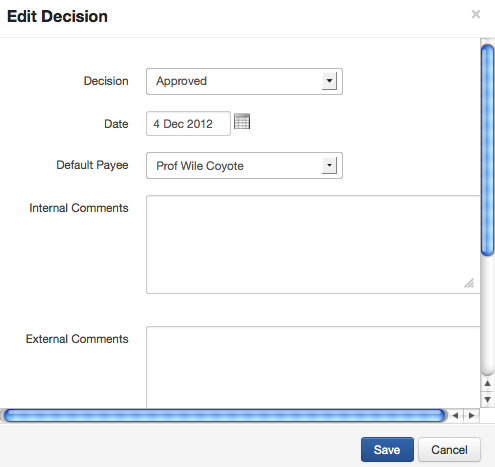
Here you can choose whether the application is now Withdrawn, Approved or Declined, as well as the date the decision was made.
Select the default payee (ie: the person to receive the funds).
At this stage you can also add any internal or external comments, as well as any funding conditions that may apply. When you are happy with your entry, click Save.
Allocating Funding Amount
Now that you have marked your decision, you are ready to allocate the funding amount to your successful applications. The funding amount is the entire amount of money you plan to fund applicants from each of your budgets.
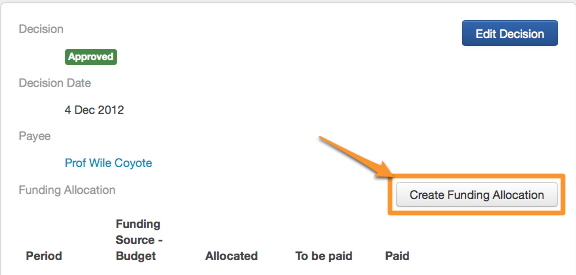
Go to the relevant application. Click on the Decision tab.
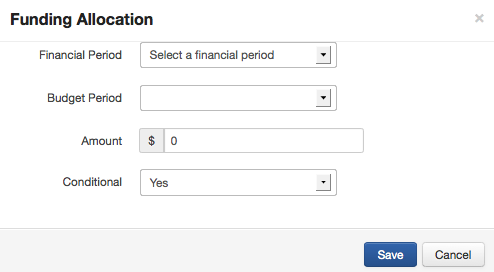
Click on the blue 'Create Funding Allocation' button.
You will need to select which Financial Period the payment relates to, as well as which Budget Period and type in the whole Amount this applicant will be funded. You will also need to select whether this funding is conditional or not. When you are happy with your selection, click Save.
Allocations can be deleted as long as a payment has not been recorded.
Approve and Record Payment
When you are ready to approve and make a payment you need to visit the Decision tab on the relevant application. Your allocated funding amounts will appear on the page.
Over on the right hand side you will see an Options button. To approve the payment click this button and click the Approve option.
Payment approval limits can be set by an Administrator for a system wide or program specific user. For more information on how to set this up please see Financial Delegation Users

If the payment amount exceeds a financial delegation amount set by an administrator the user will see the following notification.

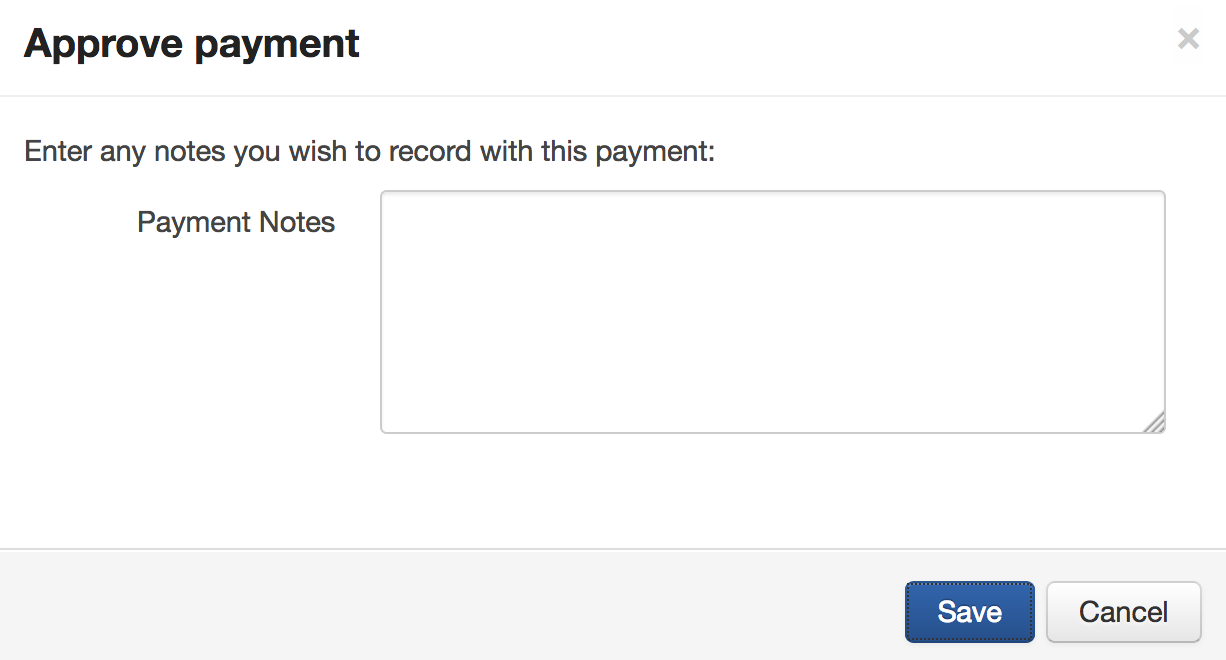
If no financial threshold has been set or does not exceed limit an "Approve Payment Window" will appear.
If the funding allocation was conditional, the system will prompt you to verify that any stated funding conditions have been met. After you have entered notes explaining how these conditions have been met, click Save.
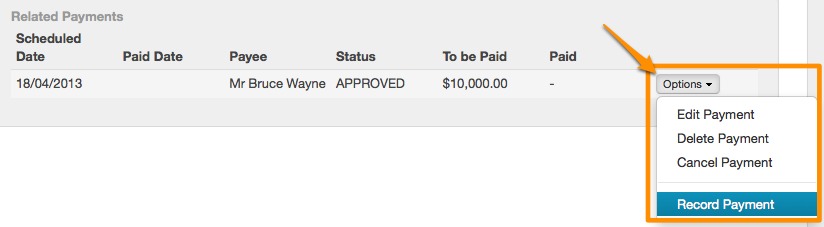
Once the payment has been marked as approved, you will see its status is also marked as approved. You can return to this page at any time and record that the payment has actually been made. When you are ready to record the payment, click back into the Options button and choose Record Payment.

A window will appear, in which you can amend the payment date and enter any payment notes you wish to record. Once you are done, click Save.
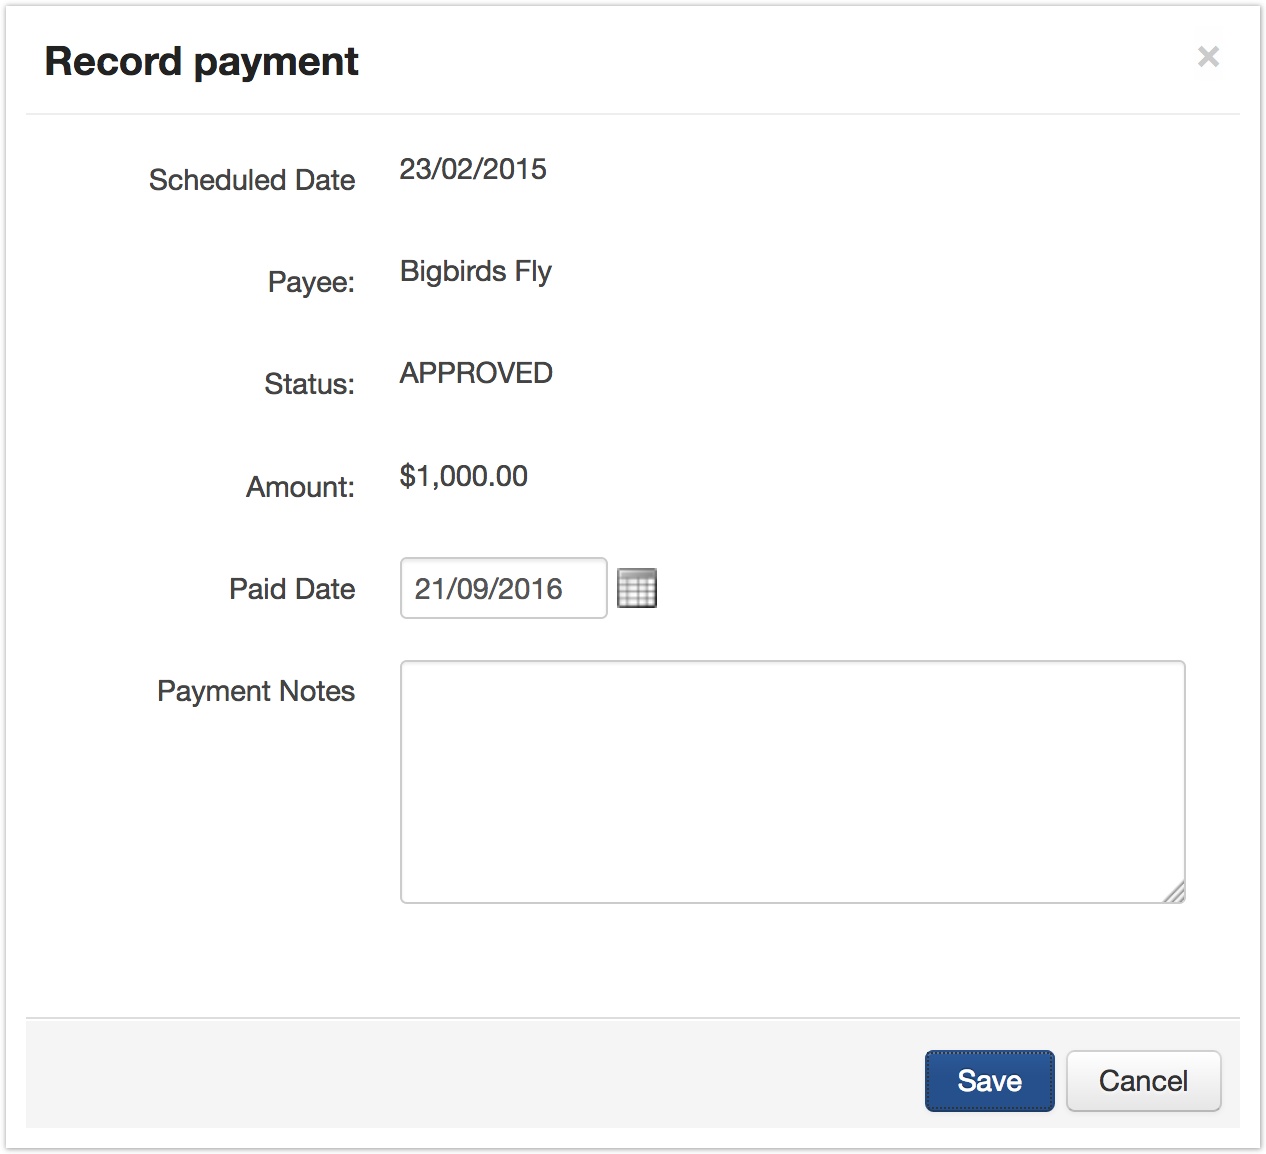
You will then see that the payment status is now listed as "Paid".

This payment status is also noted in the application toolbox, note the definitions of what each of the payment status' mean.
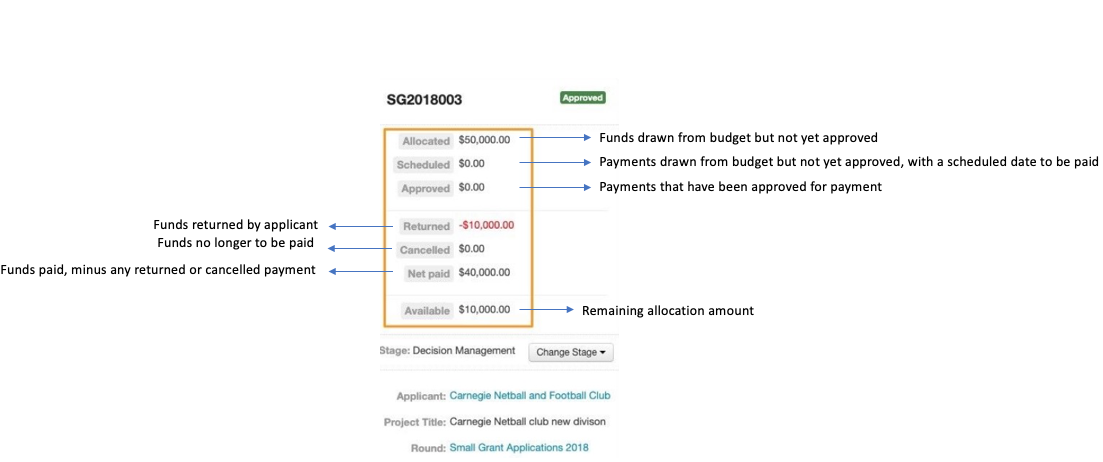
The 'Approve Payment' stage included in this process provides you with a way to double-check what you are doing and ensure that when you are reporting on making final payments, you do not "pick up" applications that are waiting on further information - for example, the provision of an acquittal.
Approve and Record Payments Through Funding Area
Once a funding amount has been allocated, you can also approve and record your payments through SmartyGrants' funding area.
This can be helpful if you are marking several applications at the one time, and gives you a quick snapshot of all payments - no matter their status. You can also filter these payments by financial period.
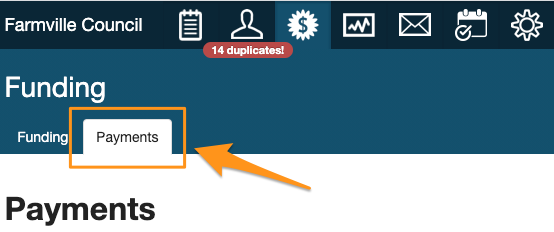
Click on the Funding icon

2. Click on the Payments tab
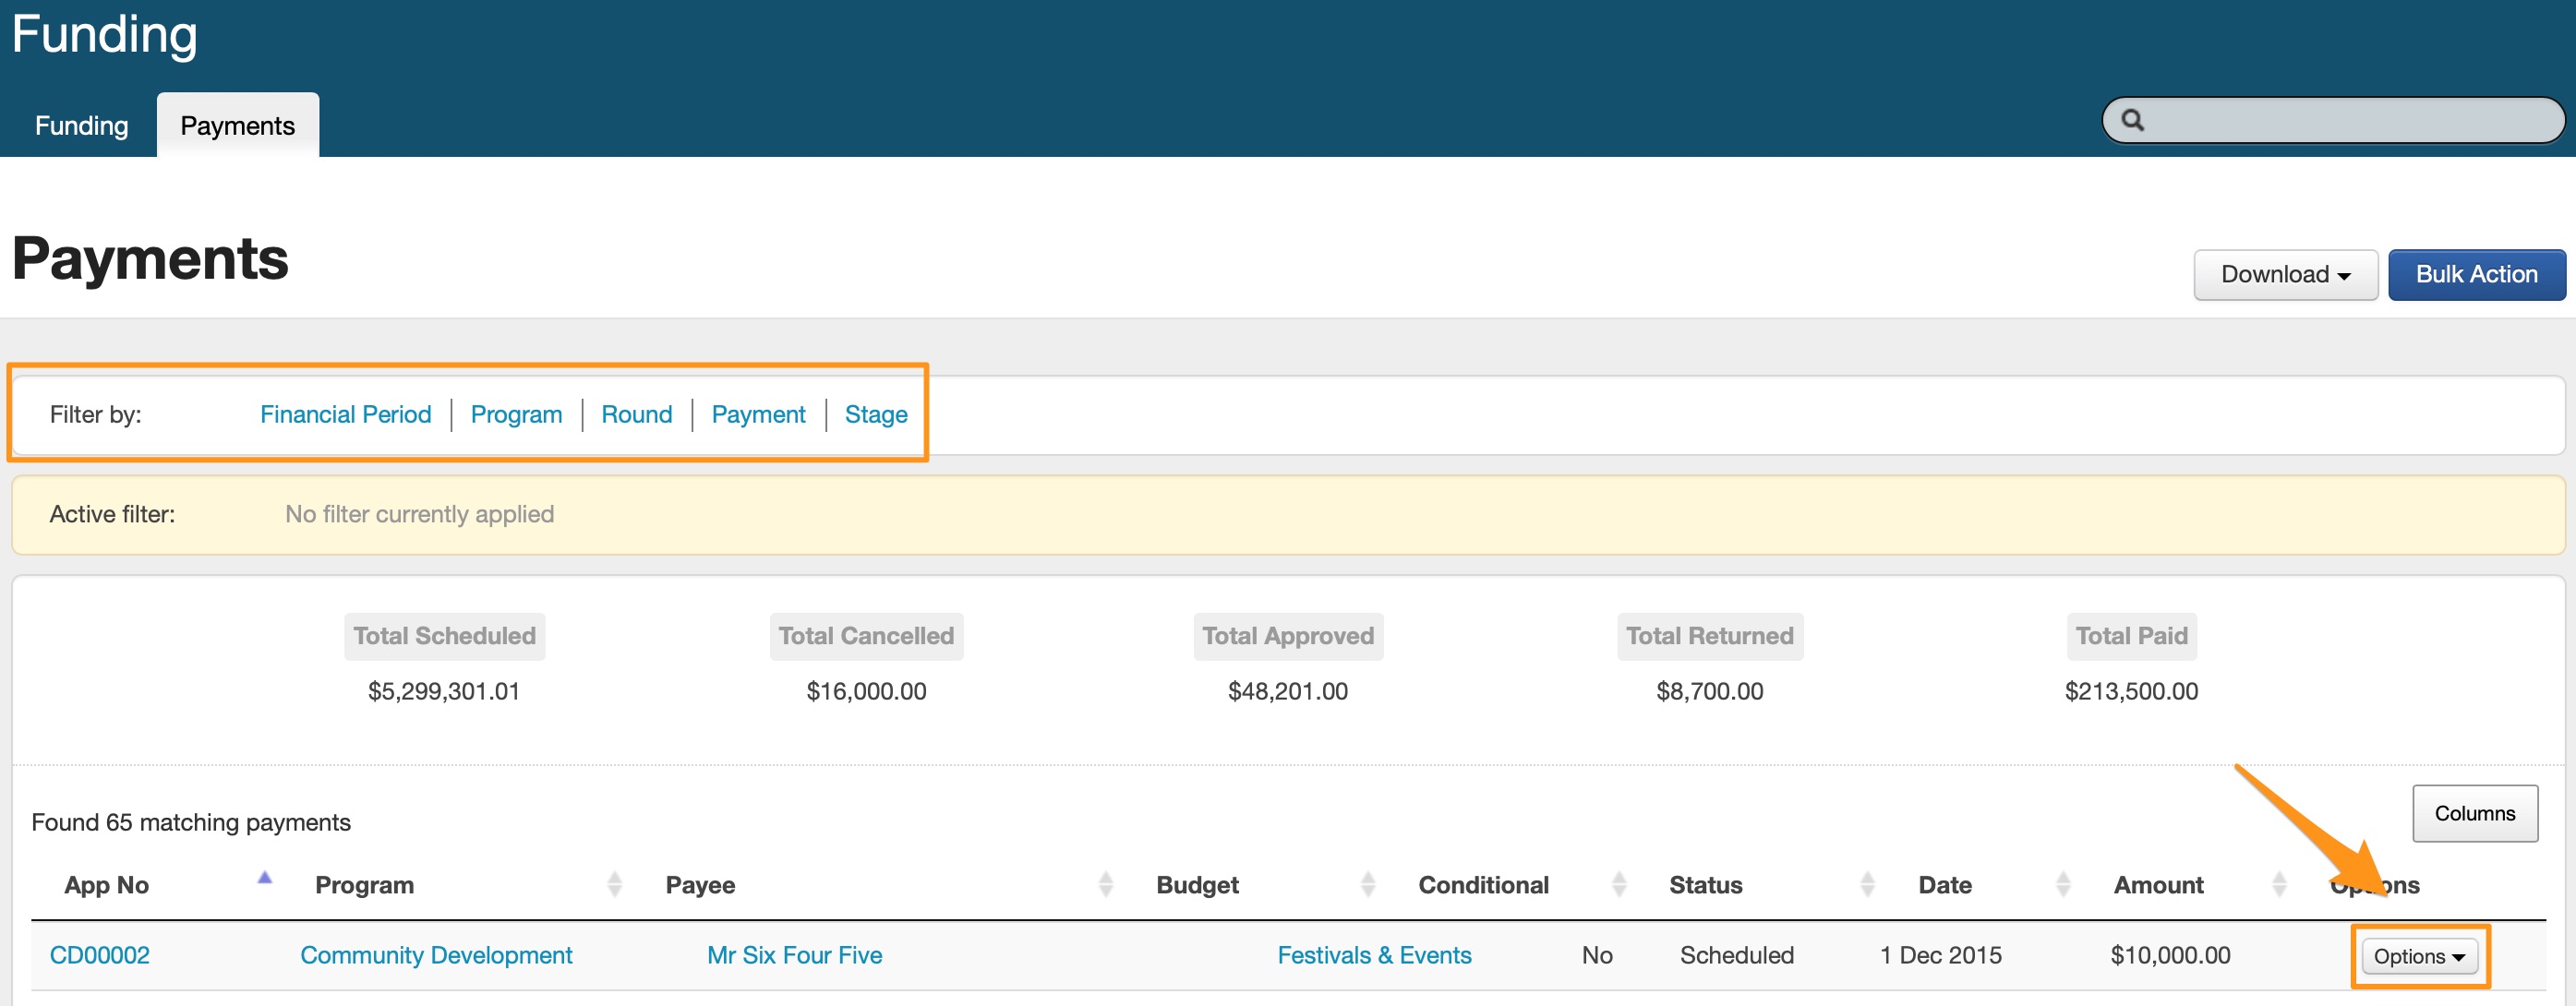
3. Click on Options against the relevant payment, here you can choose to approve, edit and record payments.
Record a returned payment
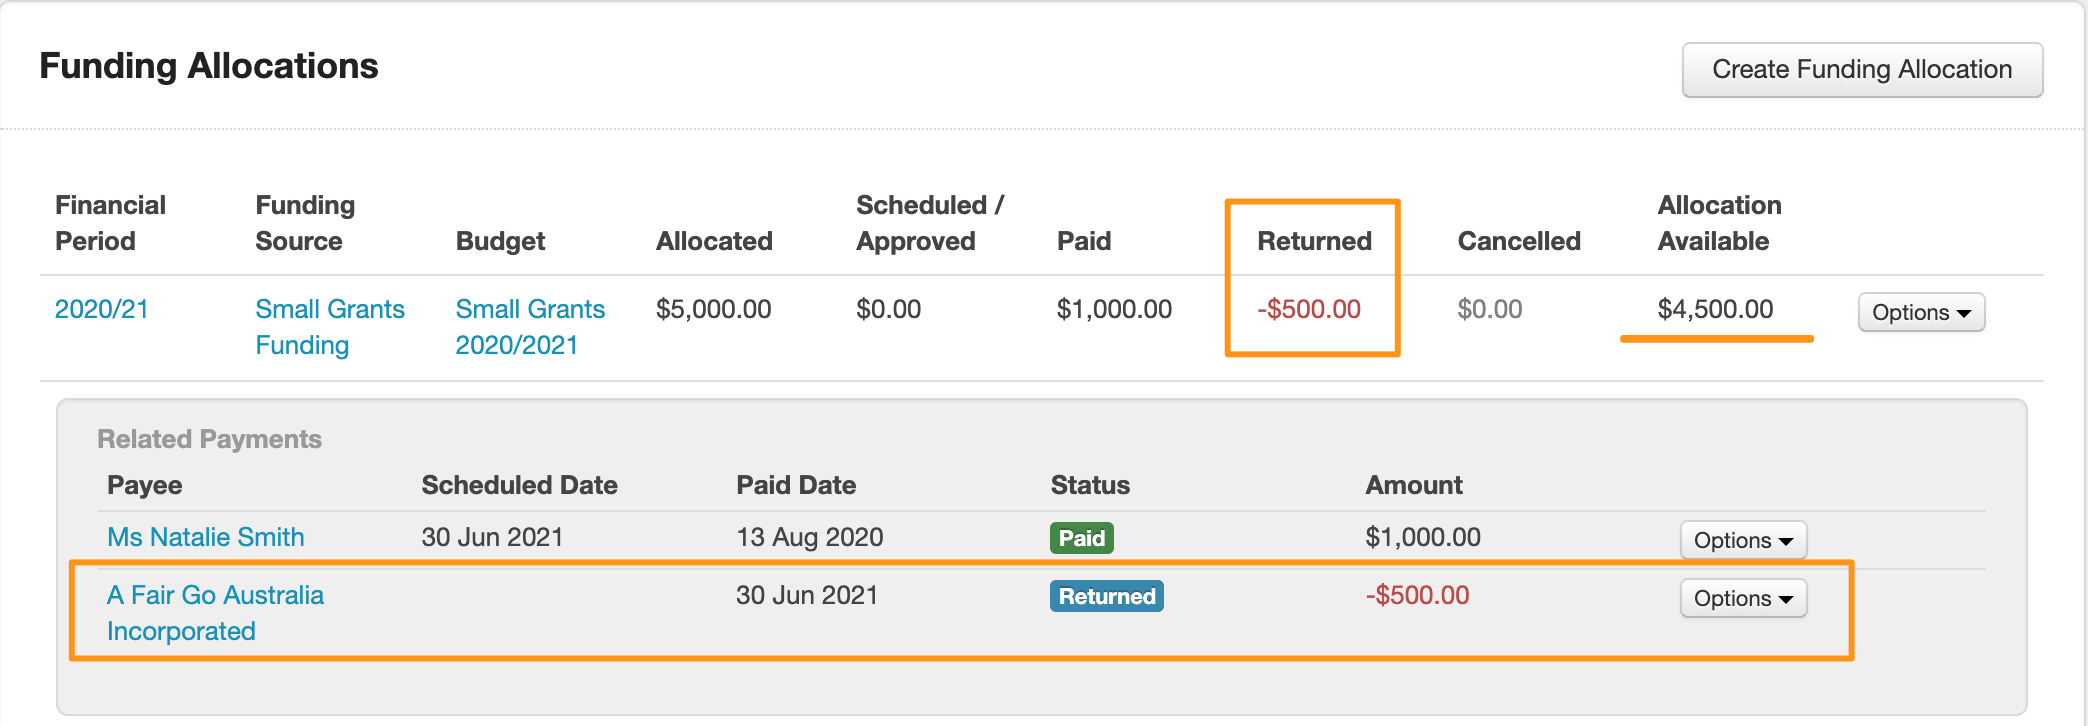
From the Decision tab of the application, select Create Return from the options against the relevant Funding Allocation.
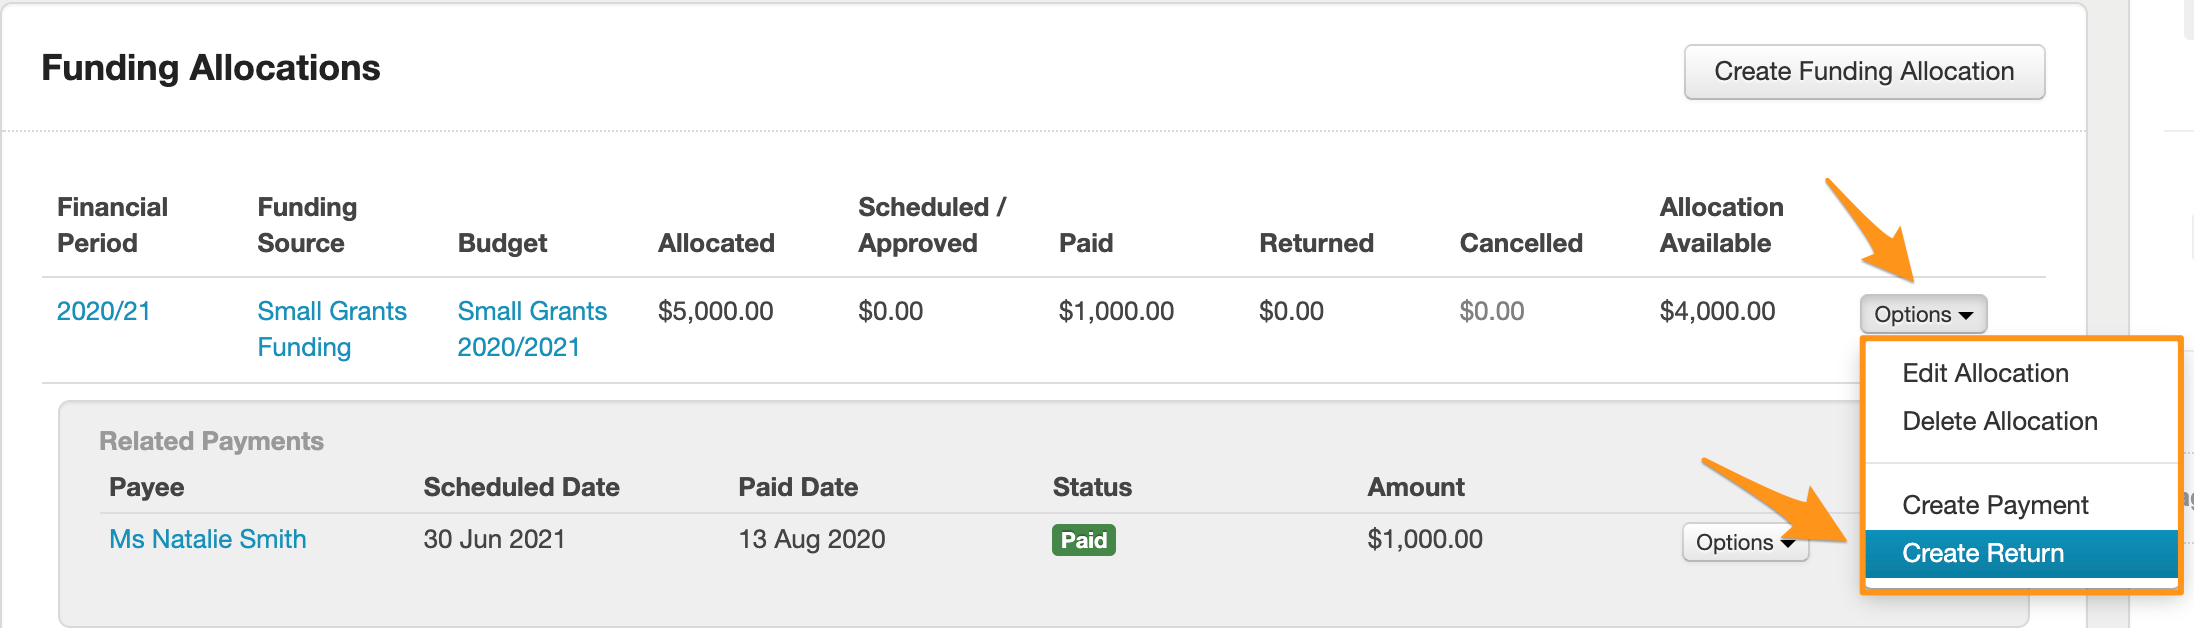
Enter details of the returned payment, the system will automatically assign the Returned status.
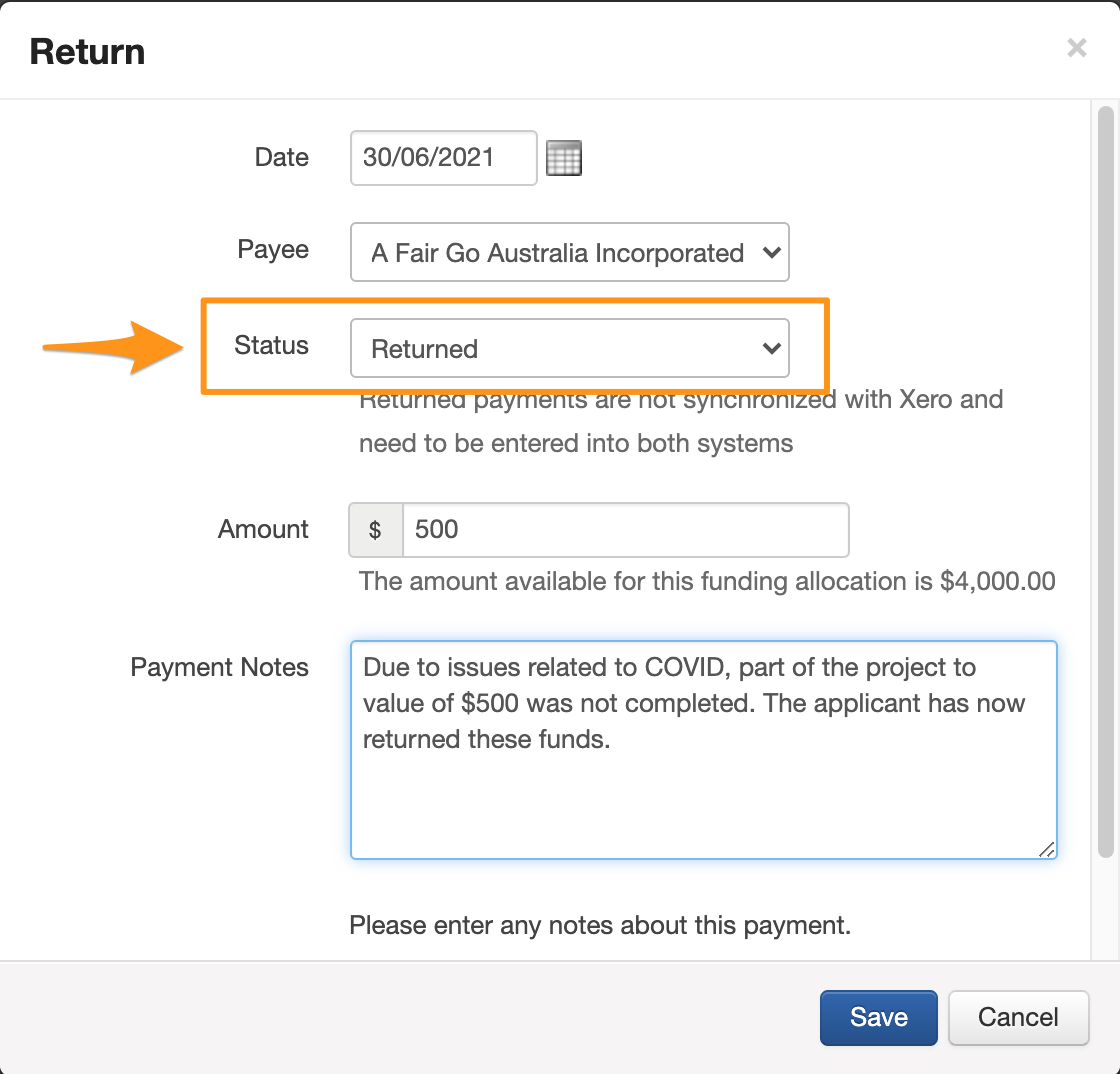
The amount returned will be recorded beneath the paid line. The Allocation Available will now reflect the difference between the paid amount and what has been returned.
Cancelled Payments
To cancel a payment, select Cancel Payment from the options drop down for the relevant payment
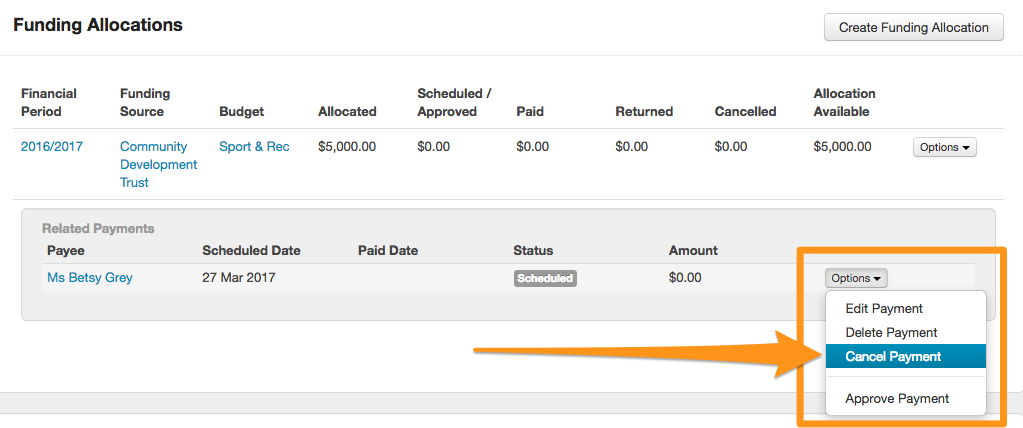
Record an explanation for why the payment is being cancelled and click on Save to confirm.

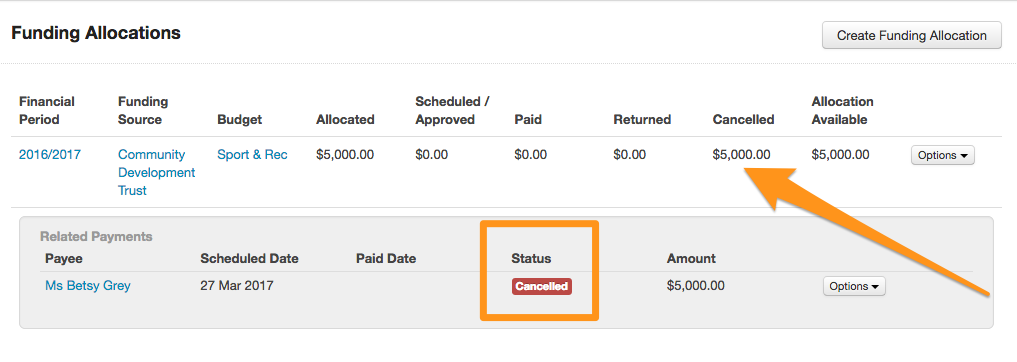
The status of the payment will now be marked as Cancelled and the Paid amount will reflect that a payment has not been made.
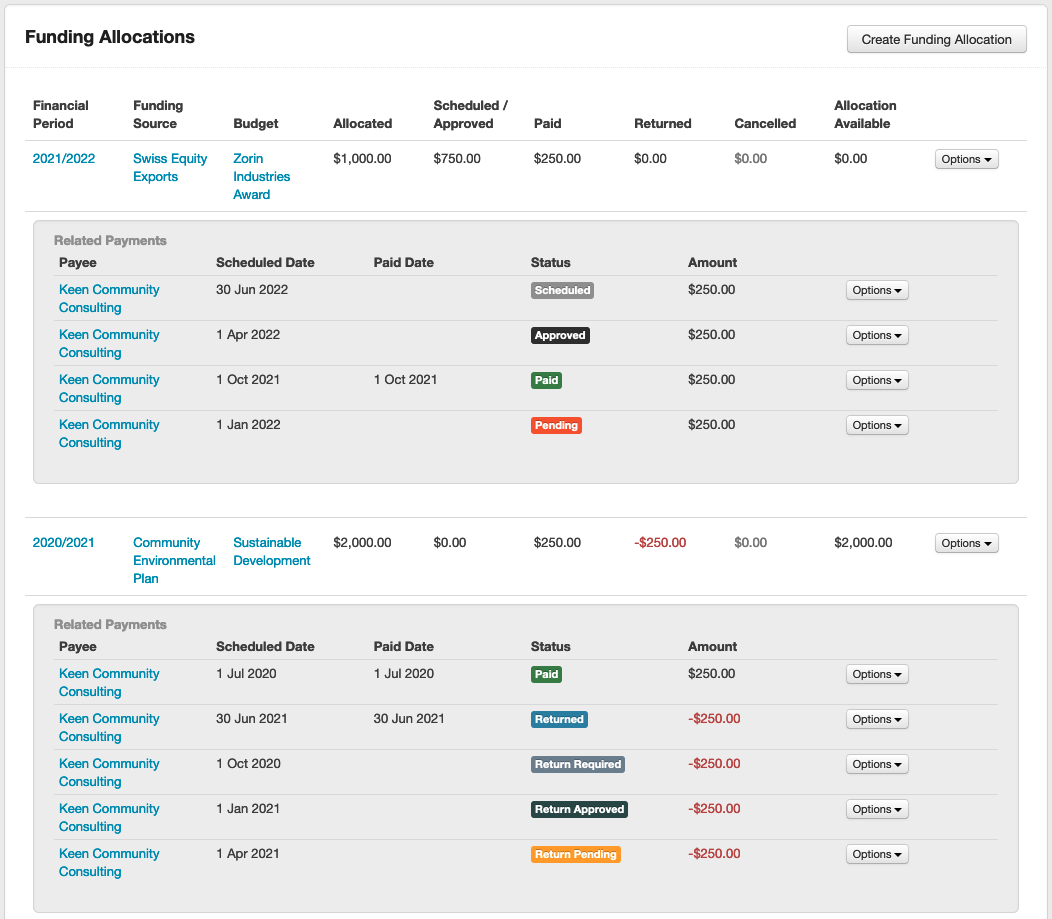
Additional Payment Statuses
At the account level, the SmartyGrants Support Team can enable additional payment statuses for manage users at your organisation. You can contact the SmartyGrants Support Team to have these additional statuses enabled. Each status can be independently enabled/disabled. The additional statuses that are available are:
Pending (this status is used between the "Approved" and "Paid" statuses).
Return Required (this status is used after selecting "Create Return").
Return Approved (this status follows the "Return Required" status).
Return Pending (this status follows the "Return Approved" status. The "Returned" status follows after).
Here is an image of all the statuses on various payments:
Other customisations that are available:
At your request, the team can also disable the "Approved" payment status on your account. This means that "Scheduled" payments can be changed directly to either "Pending" or "Paid" depending on your configuration.
The following areas of your account will be impacted by the new payment statuses:
The decision tab (new statuses will be shown as pictured above).
Reports will show the new payment statuses (i.e., when reporting on payment status).
The payments area at account level (and filter options) will show/refer to the new payment statuses.
The applications filter at program level (and filter options) will show/refer to the new payment statuses.
The following areas of your account will not be impacted by the new payment statuses:
The funding overview at account level (note: pending payments will be included in the "Scheduled/Approved" column on this page).
The side panel at application level.
Filtering Payments
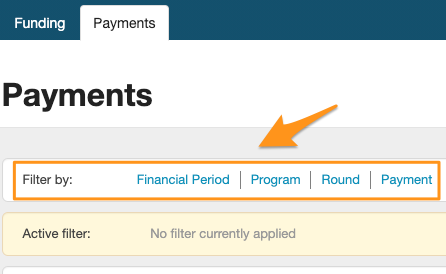
Users with access to Funding and Payments are also able to filter the Payments list. The filters that are available are . . .
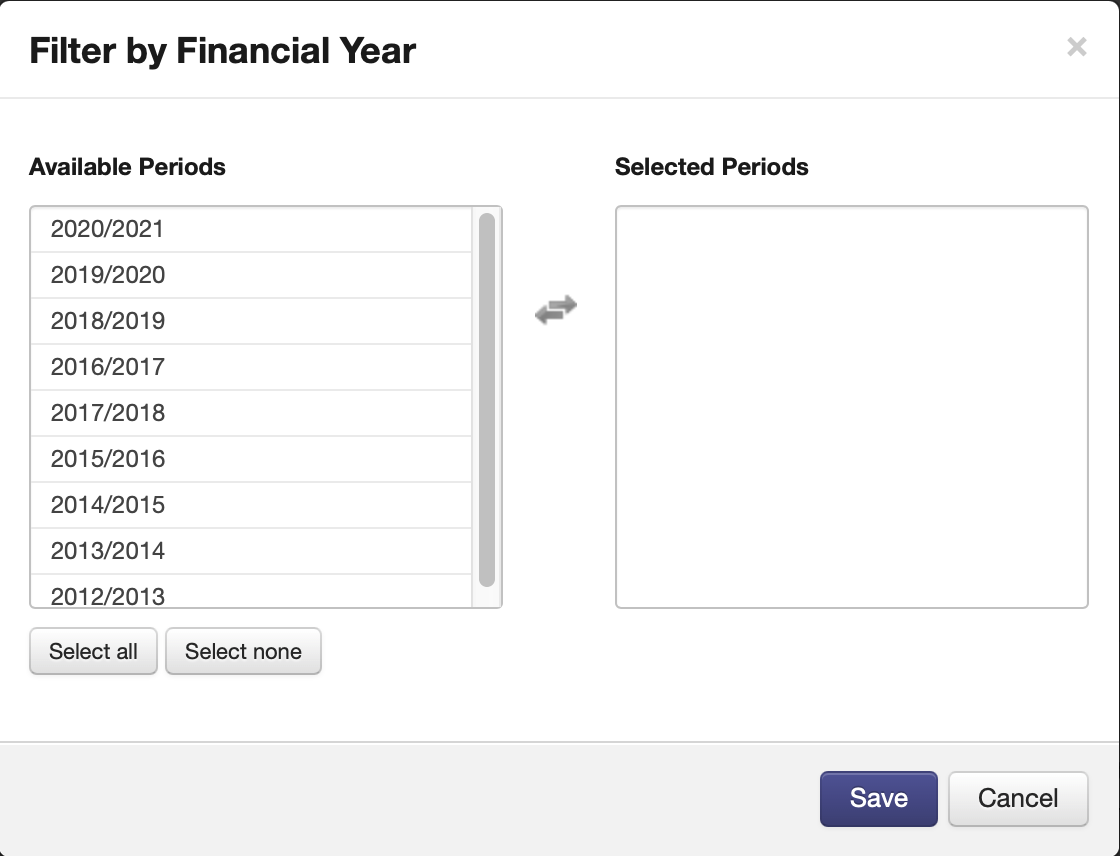
Financial Period - allows the User to see all payments that have been created for one or more selected Financial Periods
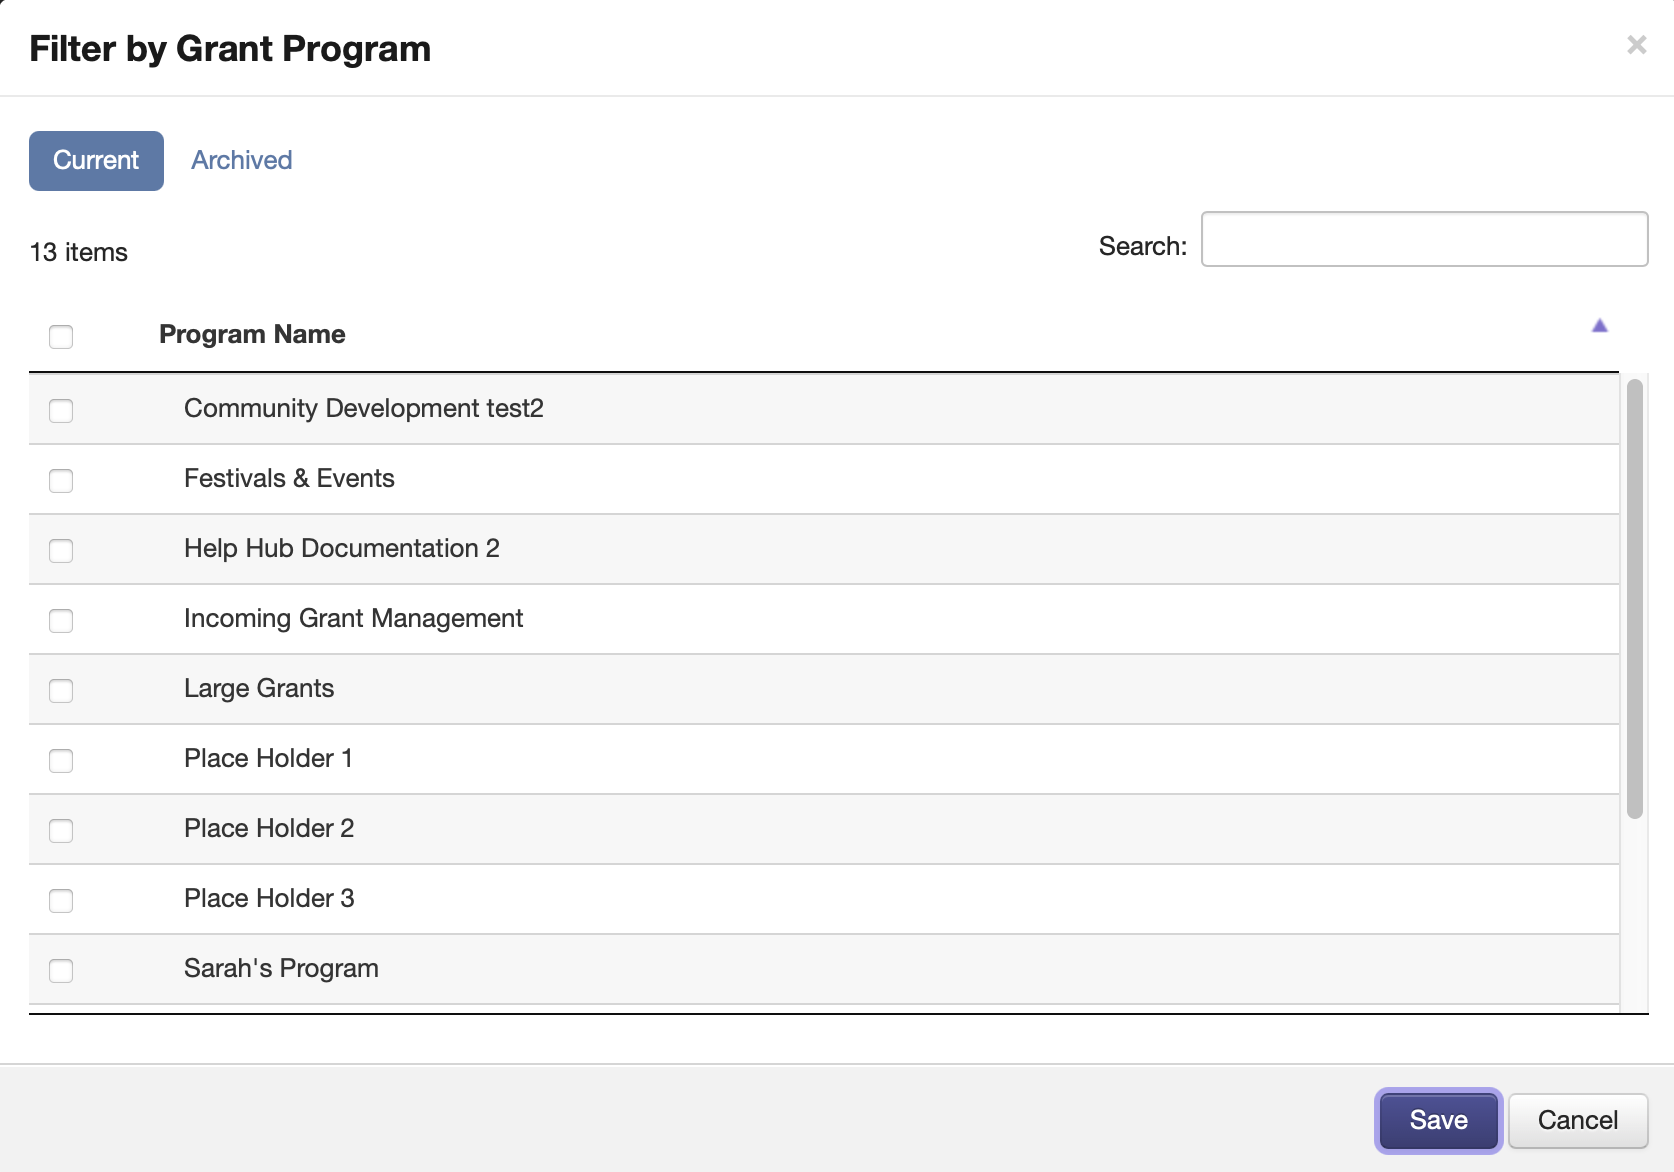
Program - allows the User to see all payments that have been created for one or more selected Programs
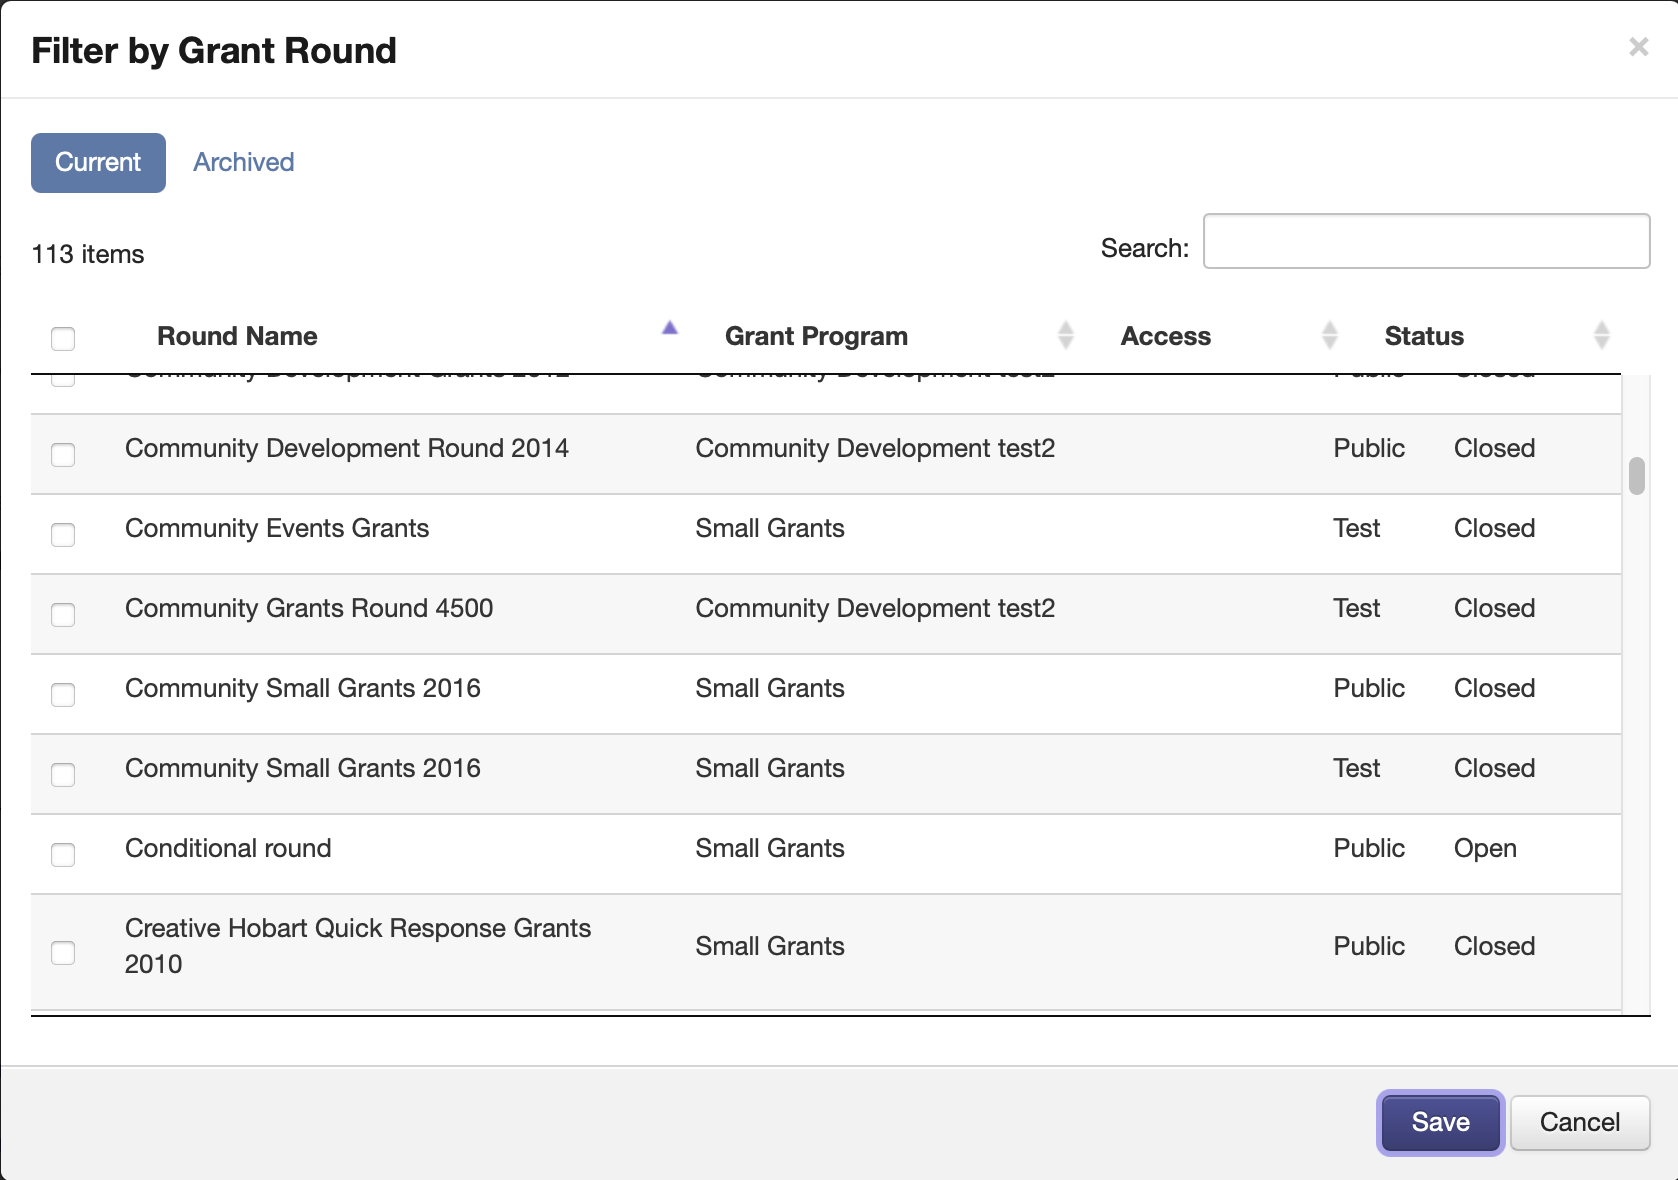
Round - allows the User to see all payments that have been created for applications in one or more Rounds
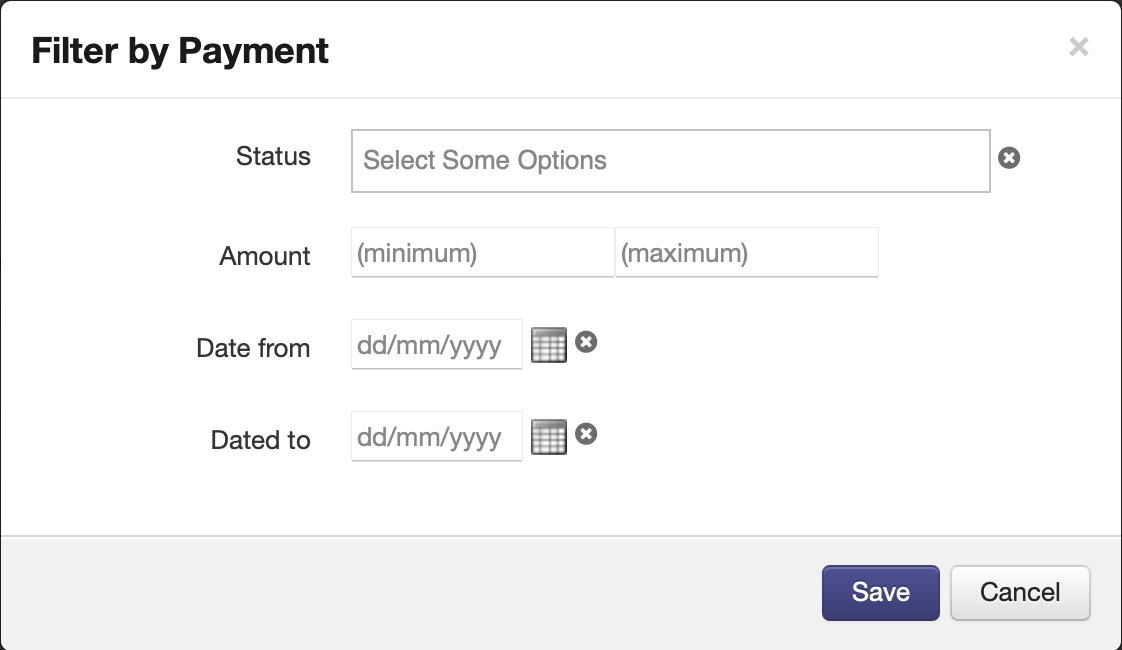
Payment - allows the User to filter by payment status, minimum or maximum amount and date created (before or after a specified date)
To apply a filter to your Payments list please follow these steps . . .
Navigate to the Funding and Payments screen by clicking the 'Funding and Payment' icon at account level

Once in the Funding and Payments screen, click on the 'Payments' tab
The available filters, as listed above, are shown at the top of the screen above the 'Active Filter' box which will initially be empty until a filter has been selected and applied
Select the required filter and choose from the options available.
Once you have selected the required information, click the 'Save' button and the filter will be applied.
Bulk Action - Change Payment Status
Users with access to Funding and Payments are able to utilise a Bulk Action to change the status of a payment. This function is available from the Payments tab under the Funding and Payments icon.
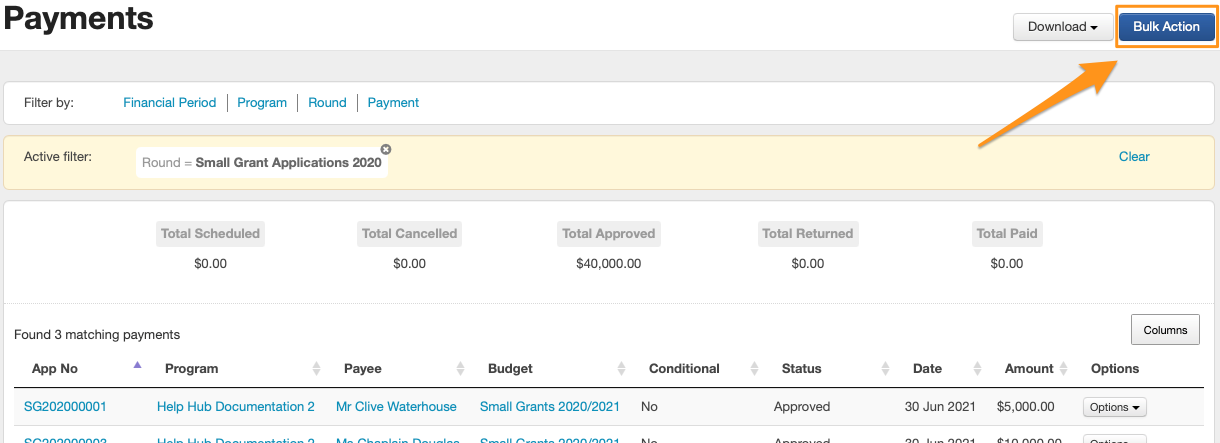
As with all Bulk Actions, the first step is to apply filters to your Payments list. In this example the round filter has been applied.
Once you have applied the requred filters and have the payments you would like to action, please follow these steps.
Click the 'Bulk Action' button in the top right hand corner of the screen
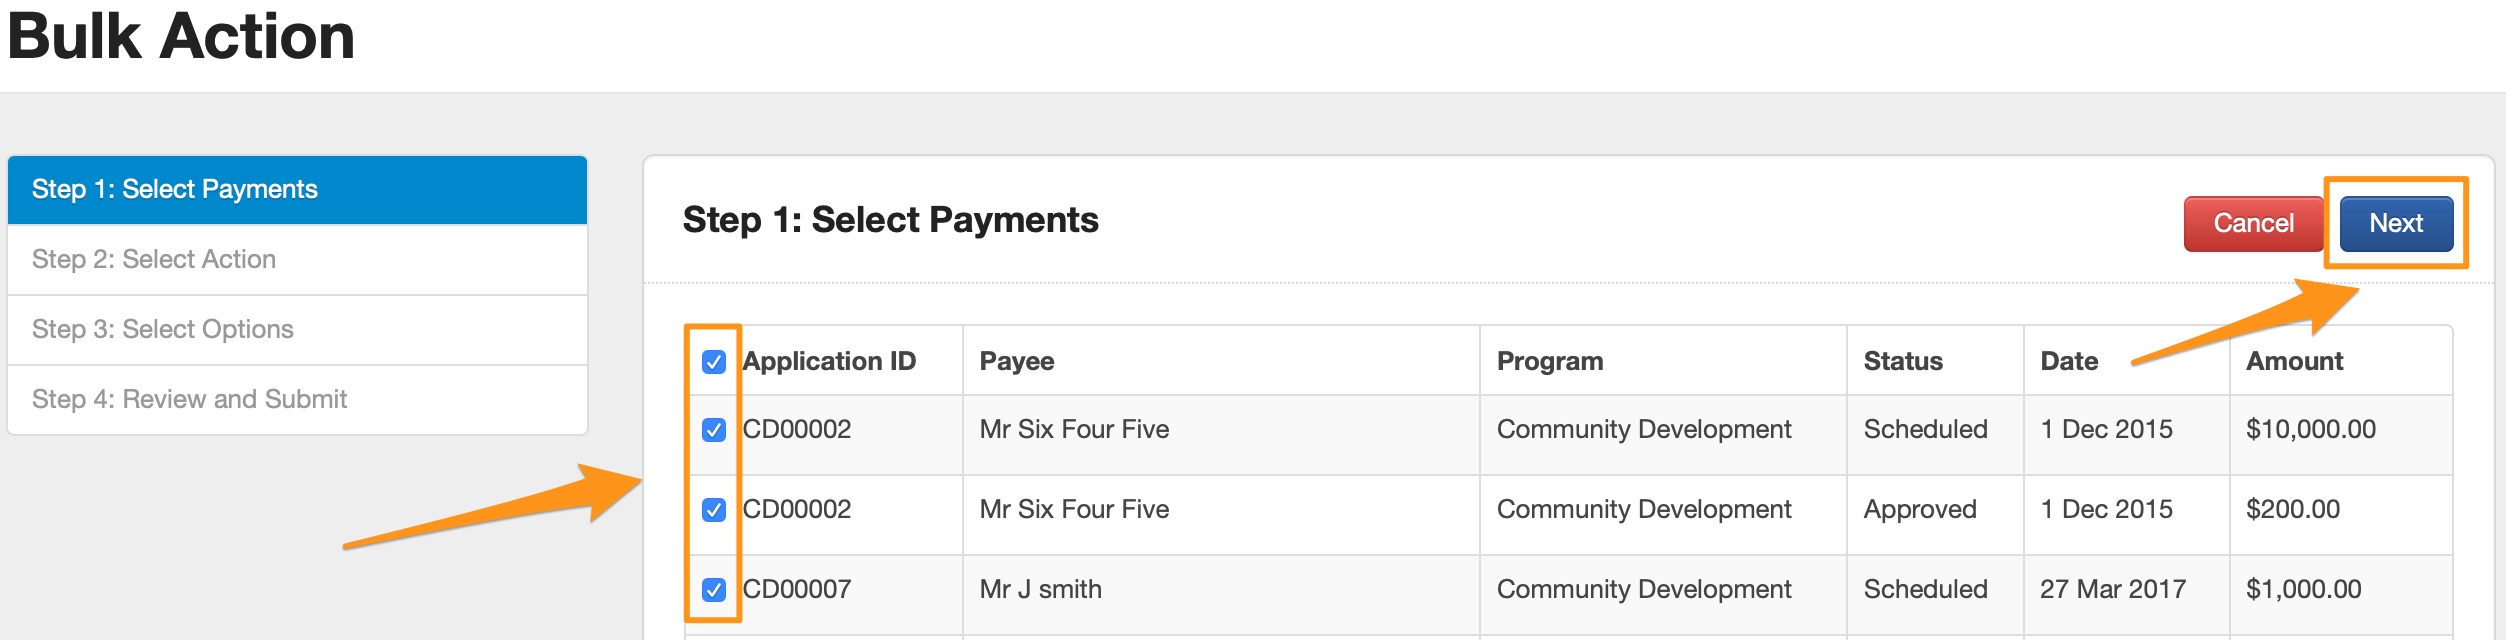
Once you have clicked the 'Bulk Action' button, you will then see Step 1 of the Bulk Action process which is to confirm the Applications that will be actioned in the Bulk Action. You are able to deselect any Applications that you may not want to have included in the Bulk Action by clicking the blue box to the left of the Application itself. Once you have confirmed all the Applications that are selected are correct, click the 'Next' button in the top right corner of the screen.
You will then be prompted to select which Bulk Action you would like to apply. Currently only one Bulk Action is available for Payments and it is the 'Change Payment Status'. Clicking the radio button to the right will select this Bulk Action. Clicking the 'Next' button will take you to the next step.

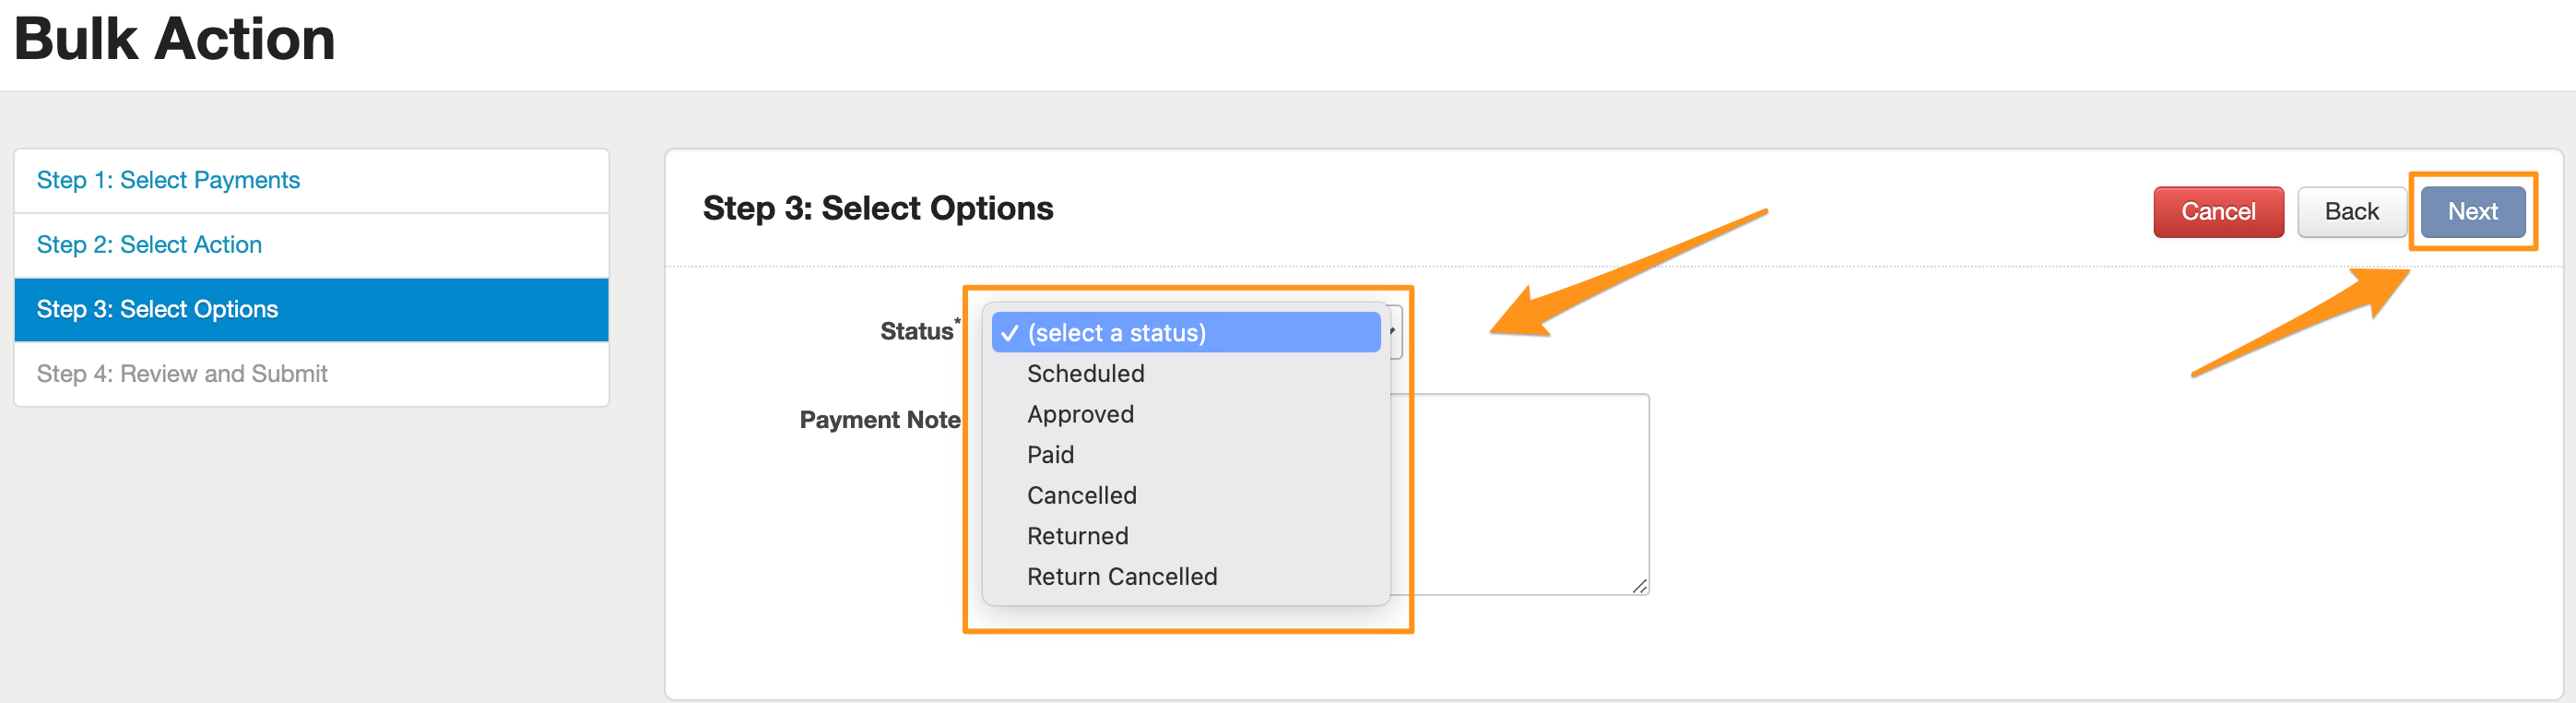
Next, you will select the Status that you would like the Bulk Action to change from the dropdown list. You are also able to enter any Payment Notes that may be required in the field below the drop down list. When the Status has been selected, and any Payment Notes added, click the next button in the top right hand corner.
You will then be taken to 'Step 4: Review and Submit'. You will be given a summary of the changes that the Bulk Action will make. Once you are satisfied that this is correct, click the 'Submit' button in the bottom right corner.

When using the 'Change Payment Status' bulk action you will have the ability to 'skip' a status. When recording a payment on an individual application, the payment will start with the status 'Scheduled', then 'Approved' and then finally 'Paid'. It is important that you are aware of this as payments may need to be approved by another person. Please consider this when formulating your payment recording process.
Reporting
When it comes to reporting, there are two different parts of the SmartyGrants application in which you can find budget and payment information.
Funding and Payments Area
As funding allocations and payments are made on applications, the information is also fed through to the Funding and Payments Area.
This area will give you a summary of funding and payment information, with the option to filter by Financial Period.
Click on the Funding icon

You will automatically be taken to the Funding Overview tab.
This tab provides you with an overview sorted by Financial Period, which will include all funding sources and related budgets for each funding period. It will also display your original budget, how much has been allocated, and how much is remaining.
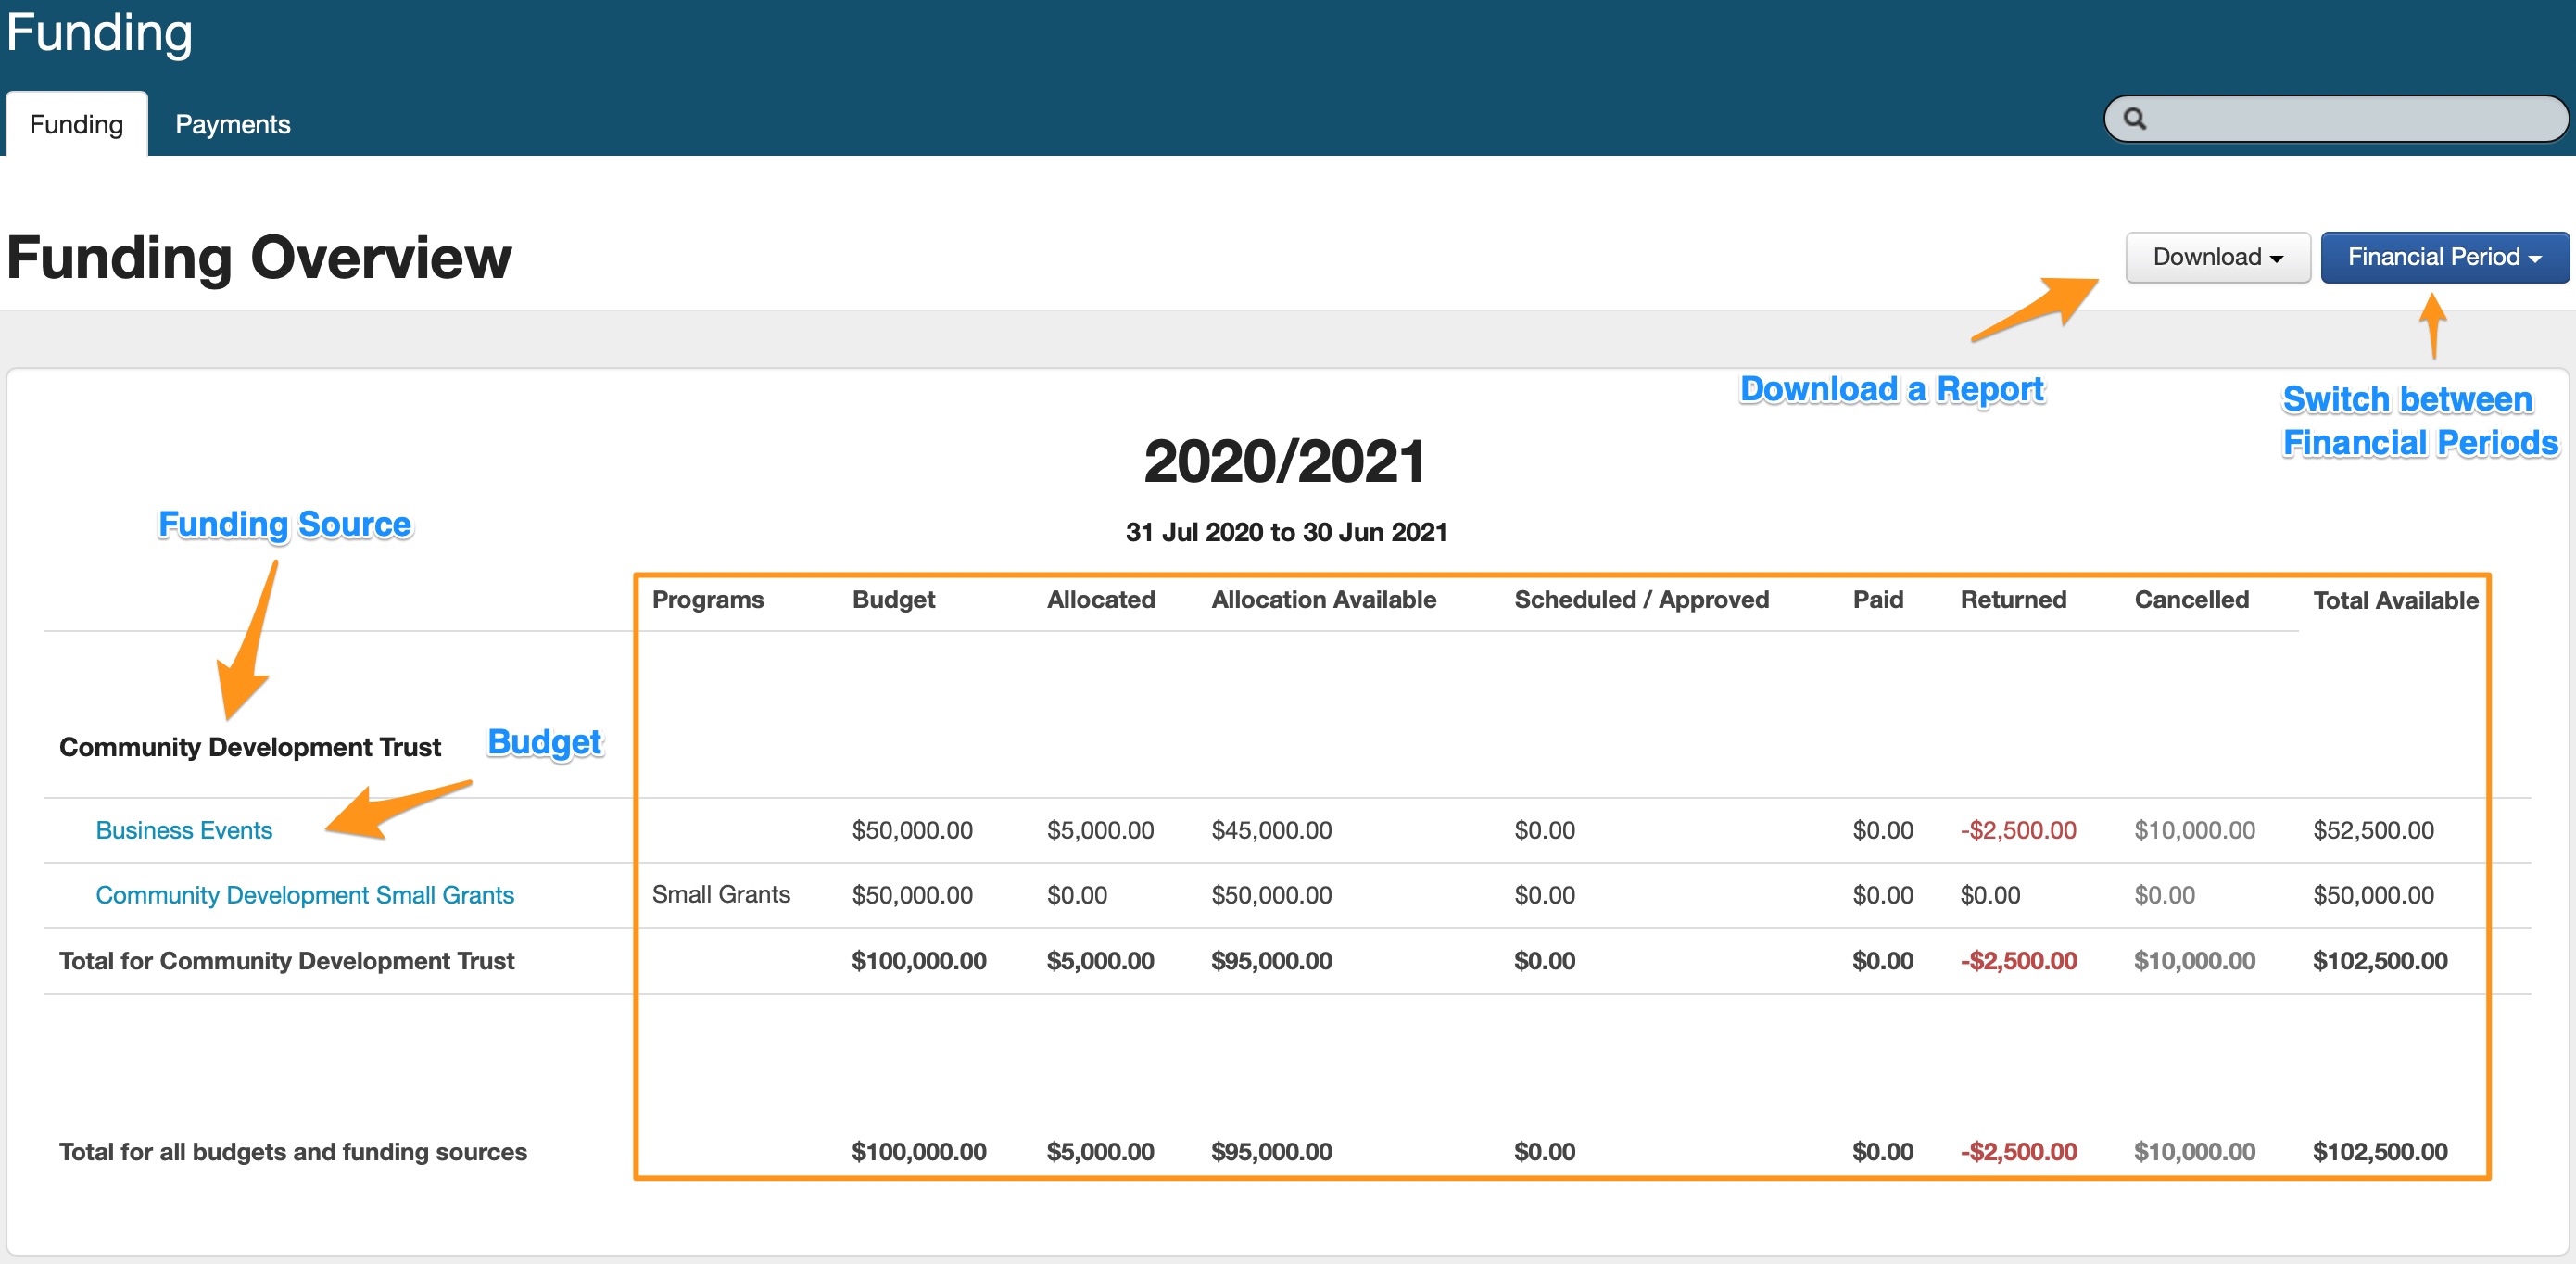
From this page you can export funding allocations into an Excel Spreadsheet. Click on Download and then select the current Financial Period, or All Financial Periods generate a report. You are also able to download a Funding Overview snapshot report from the Download button.
For a further breakdown of each budget (highlighted in blue), click on the budget. This will give you a listing of all applications that have been funded out of that budget financial period, and how much money has been allocated, scheduled/approved, paid, returned and allocation available for each application against that budget.

From here you can click on the Options button to edit or delete an allocation. You can also export this information into an Excel Spreadsheet. Click on Download and then select the current Financial Period, or All Financial Periods generate a report of funding allocations for this budget.For an overview of all allocations either Scheduled, Approved, Paid, Cancelled or Returned, click on the Payments tab. Through this tab you can also filter payments by Financial Period, Program, Round, Payment or Stage and can click on Options to change the status of allocations from "Scheduled" to "Approved" and to "Paid", you may also "Cancel" a payment.
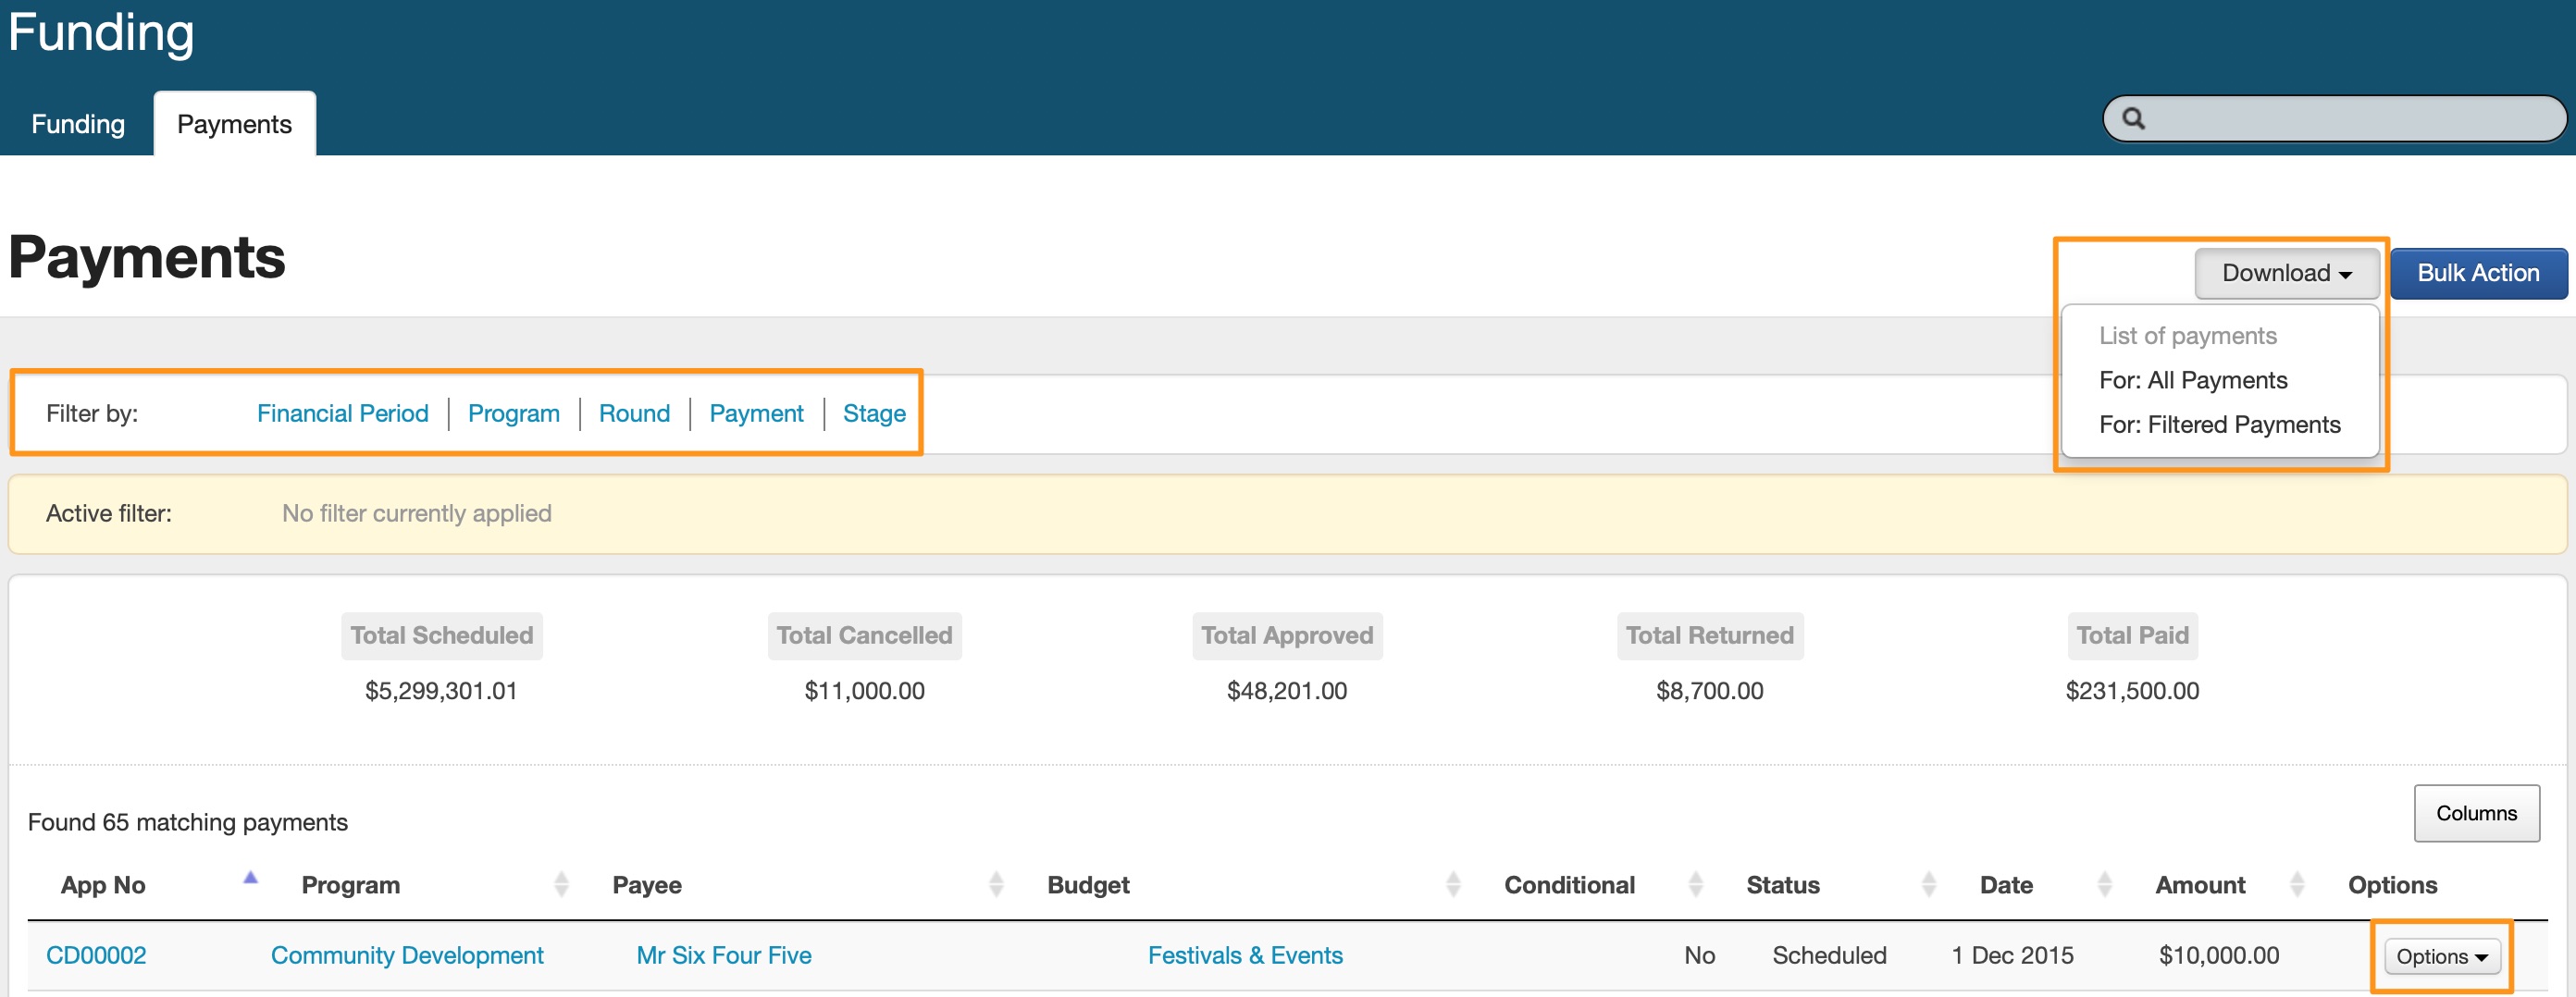
From this page you can also export this information into an Excel Spreadsheet. Click on Download List of Payments to generate a report.
Reporting Area
The second area in which you can find budget and payment information is in the Reporting Area.
Any information recorded in your Budgeting and Payments sections can be the subject of a report.
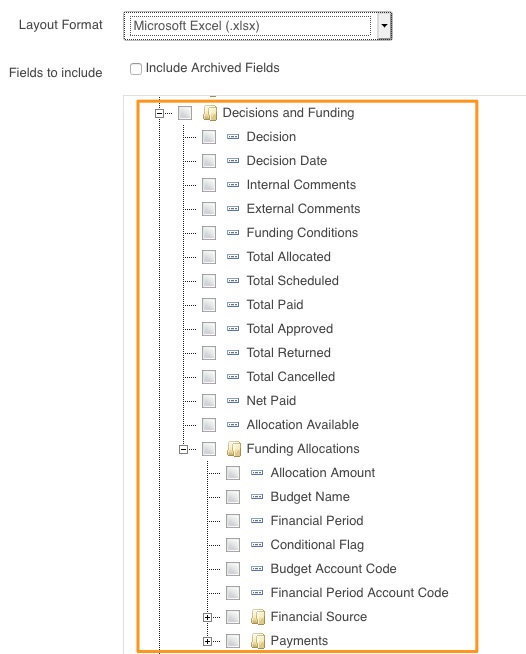
To customise a particular report you can create a template.
For more information on how to create templates and run reports see: Reports and Correspondence
Xero Integration
SmartyGrants currently has a Xero (online accounting software) integration. See integration's for more information.