Add Users
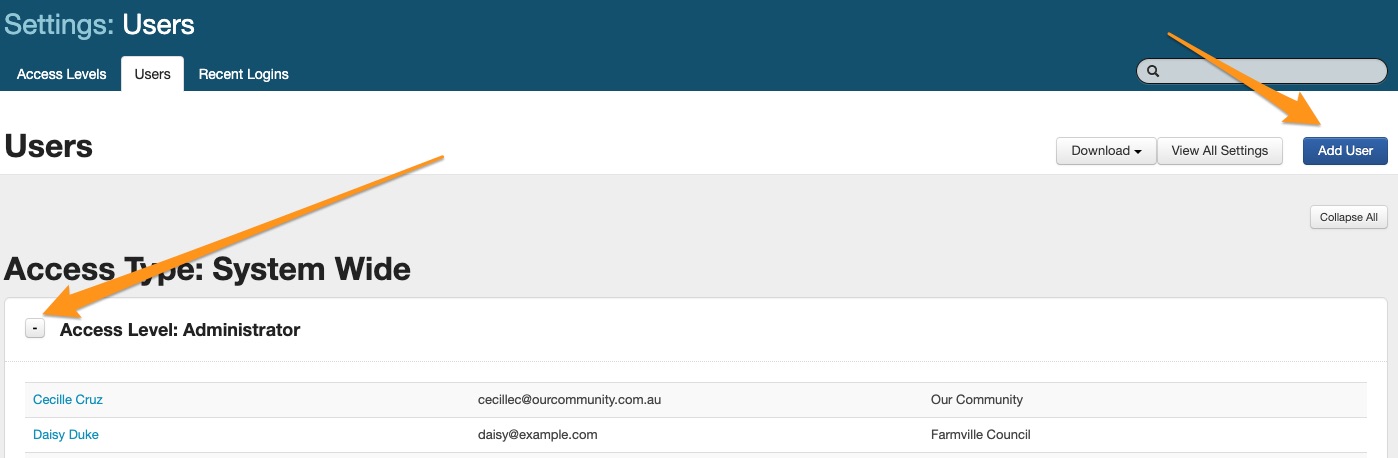
Go to Account Settings / Users
- Click the Account Settings icon at the top of screen.
- Click the blue User Access tab
- Select the blue Add User button

- Enter the user's name, email address and organisation
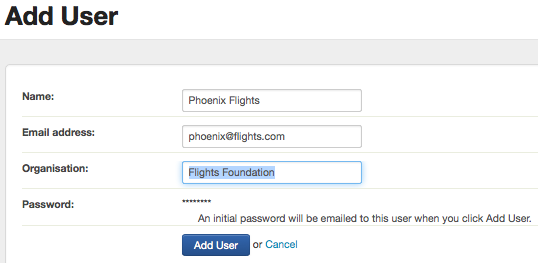
Unique User E-mail Address
Please note that each user should have their own unique e-mail address. User logins should not be shared. This ensures that a correct audit log is kept within the account and an Administrator can remove access for a particular person. For example: a general e-mail box account 'info@grants.com.au' should not be set-up for multiple users.
- Click on Add User (The user receives an automatic e-mail with username and password details). Your user is now successfully Added, however, you now need to assign there user access levels.
- You will then see some extra access options appear on screen, users are automatically assigned to 'No Access' until you assign a different access type.
Select the access type you wish to assign your user and click on Update Access Type (see User Types & Access Levels for more information).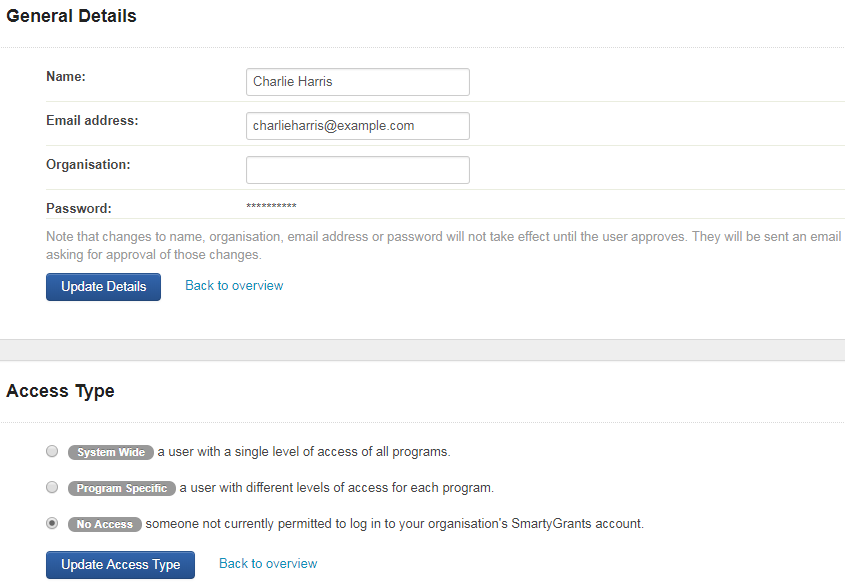
- Dependent on what access type you choose another window will appear - window options are different for each access type. For example;
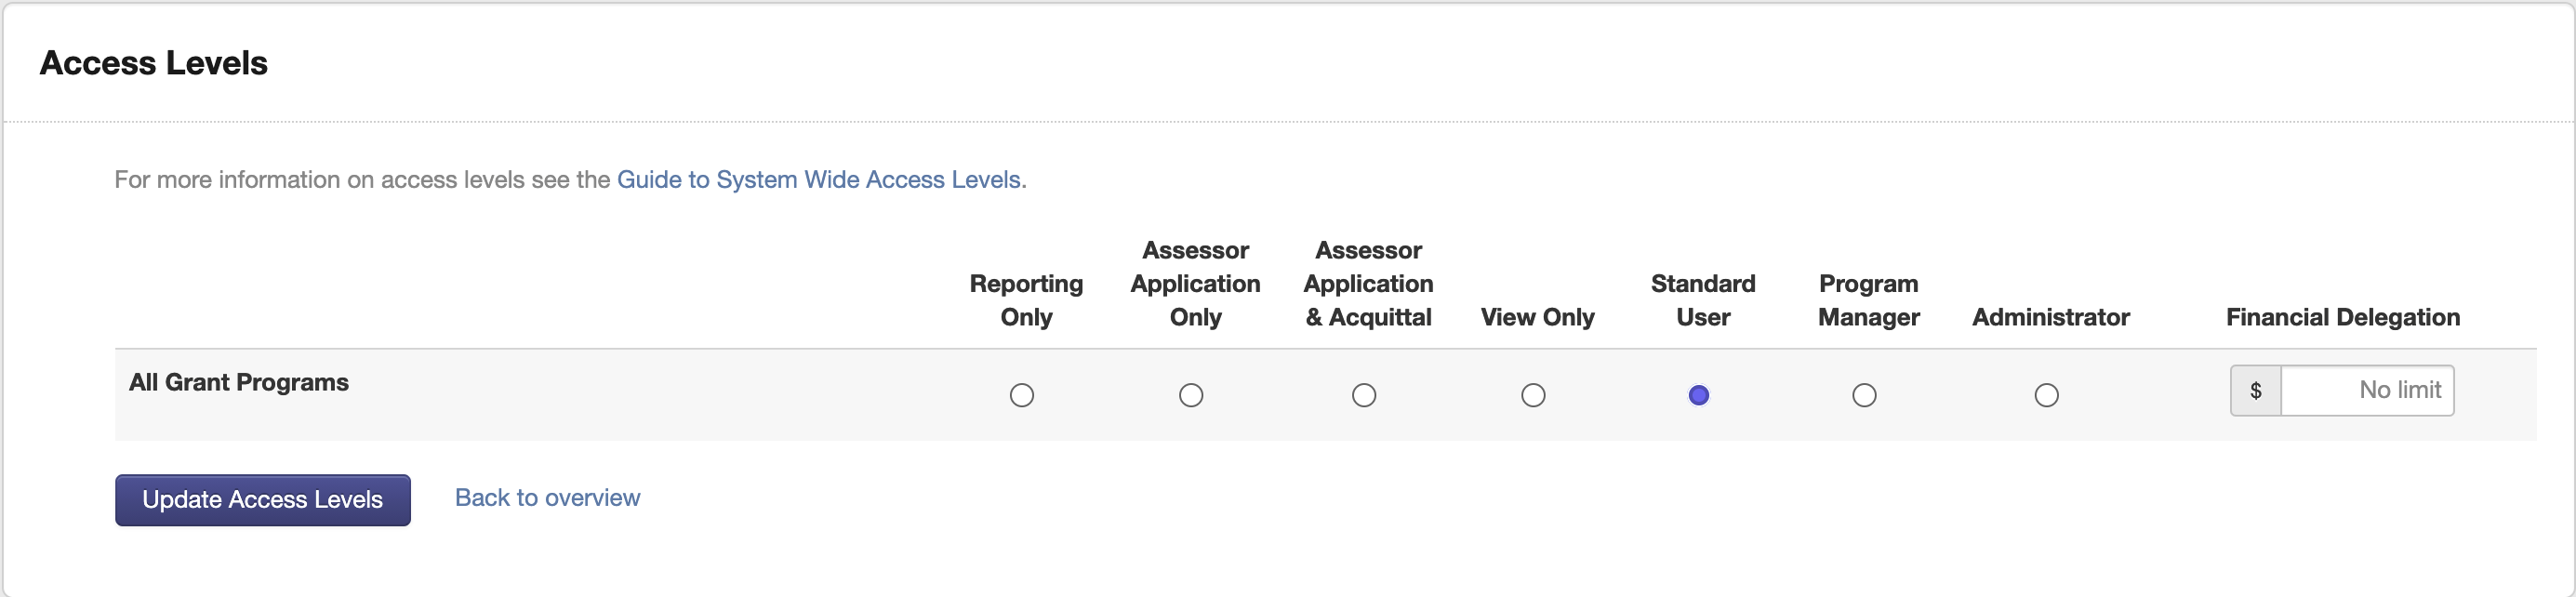
System Wide:
Program Specific:
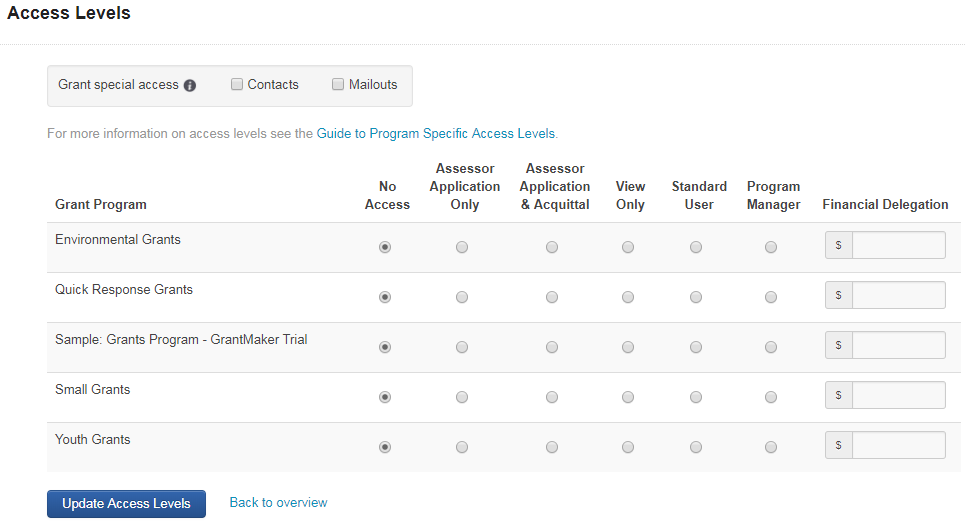
- Select the relevant choices for your user and click on 'Update Access Levels' button, you user set-up is now complete (for further details on access levels see User Types & Access Levels).
- You may go back in to the users tab at any time and amend, the access type and level.