Snapshot download, Importing contacts and other Bulk Updates
There are two ways to extract data out of the contact directory area:
Contact Snapshot Export
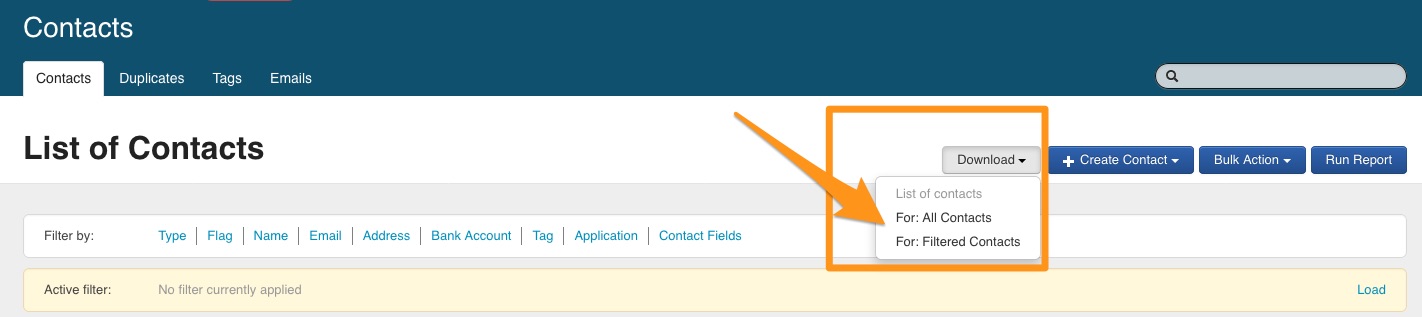
For a quick snapshot export you can use the 'Download' option in the contact directory. Apply any necessary filters in the Contact Directory, click on the All Contacts or Filtered Contacts for an excel spreadsheet.
Contact Templates / Reports
You may apply 'Bulk Update' when you wish to action one of the following operations on a group of contacts (more than one):
Importing contacts from existing applications
If you have existing applications in the system that have not had the contact records added to the Contact Directory, when the application form was submitted, because you did not use ‘contact fields’ when you were building you application form, it may still be possible for these records to be generated, after the fact. As we are talking about submitted applications form/s, you will need to contact the SmartyGrants Service team to help facilitate these changes. Contact the SmartyGrants Support Team - the team will need to know the exact form/s that needs to be amended.
You can help them by providing the form id (see below) and asking for "enable override" to be applied to that form.
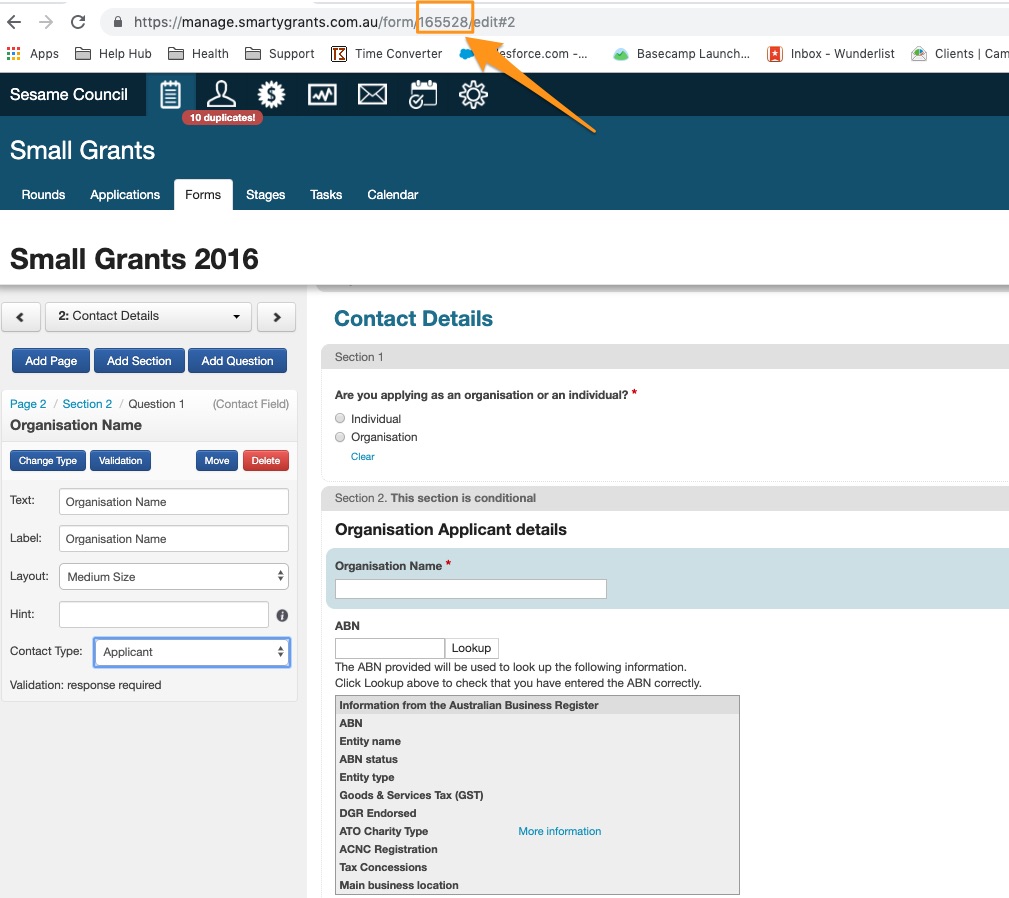
Once the service team have "enabled override" on your form/s, you need to edit the existing application form/s attached to the grant round/s.
To edit these forms you will need to select the question in the canvas area of the form select each of the contact questions you wish to create contact records for and select which ‘contact type’ you want it.

There may be some occasions, for example, where you may have used a short text question instead of using a ‘persons name’ this conversion is not possible. If something like this has occurred, or you are not sure how to change your form to reflect correctly talk to the service team about any other potential manual option. Ensure you save the form as you edit.
Once you have selected a contact type for each of the contact questions you wish to create contact records for, and have saved your form, you will see an orange warning at the top of the screen. This explains that the form has now become a working copy (this is because there are applications submitted using this form), to officially apply these changes you need to 'Review & Apply' the changes. It is important that you are 100% happy with the changes made as this change will effect all applications that have been submitted using the existing form.
Contact the Service Team again to advise you have now made the amendments, reviewed and applied your changes and the team can manually generate the contact records.
Merge Duplicate Contacts
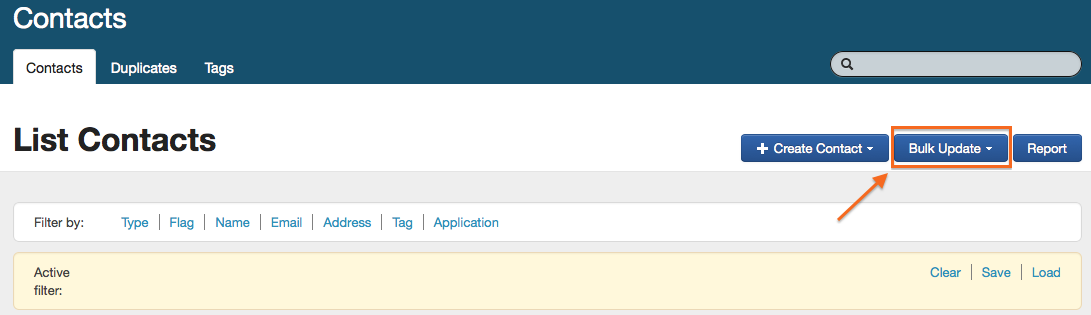
To apply your bulk update go to the Contact Directory filter screen. Apply the filters necessary to obtain the list of contacts you wish to apply an operation to. Click on the Bulk Update button in the top right hand side of screen and select the operation you wish to action.

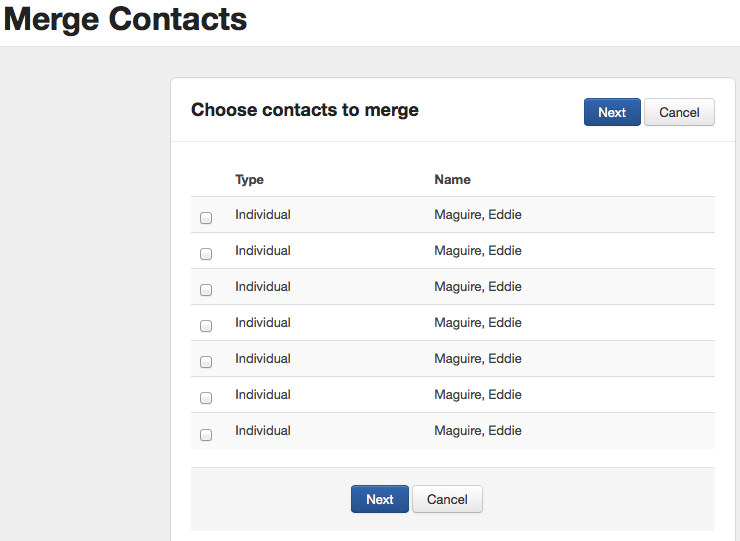
Tick the boxes next to the contacts you wish to merge together and click on the next button.
See Merging duplicate contacts for more information.
Export to Excel
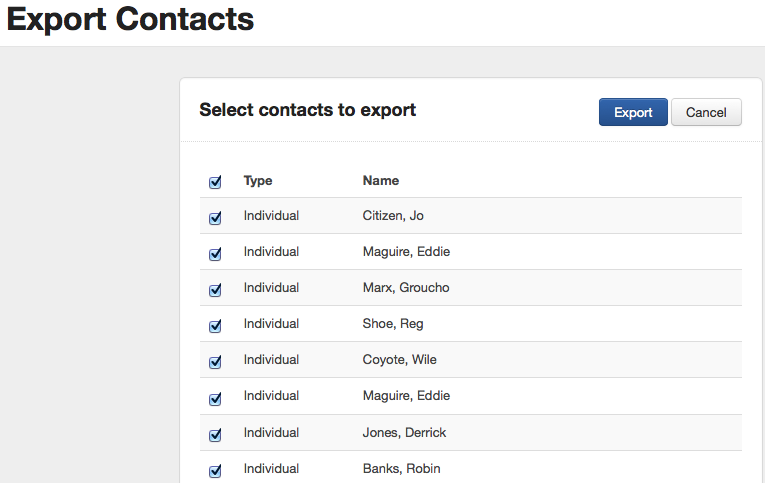
To apply your bulk update go to the Contact Directory filter screen. Apply the filters necessary to obtain the list of contacts you wish to apply an operation to. Click on the Bulk Update button in the top right hand side of screen and select the operation you wish to action.
Select the contacts you wish to export and click on the blue Export button.
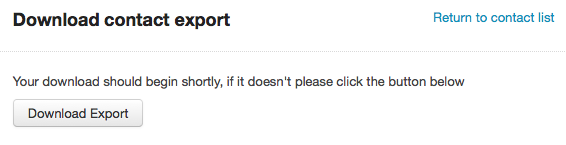
Your download will begin and your file should open. If it does not download, click on the Download Export button.

Adding and Removing Tags
Tags can be added and removed in Bulk from the contact filter screen. You may want to apply a filter to a number of contacts with similar attributes then add a Tag to those contacts at once. You may wish to apply a filter then add a Tag using Bulk Action and Add Tag.
In the below example I have applied a filter to find all organisations that have the word "club" in their name. For more information on how to use a filter please see Create/View/Filter/Edit contacts
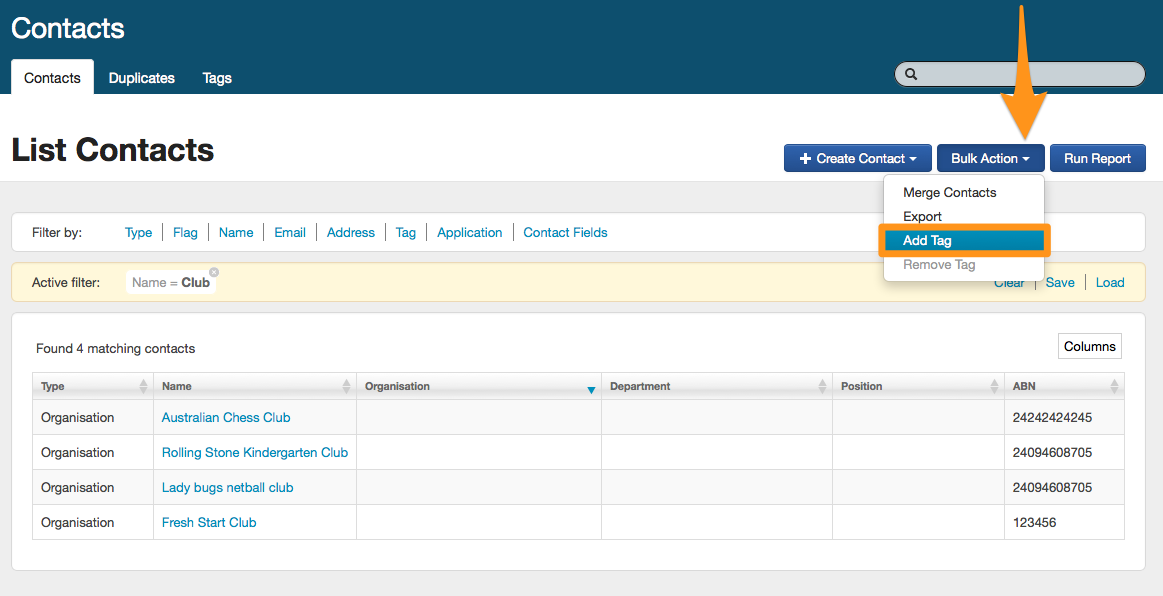
You then name the Tag and save this name by selecting Add Tag

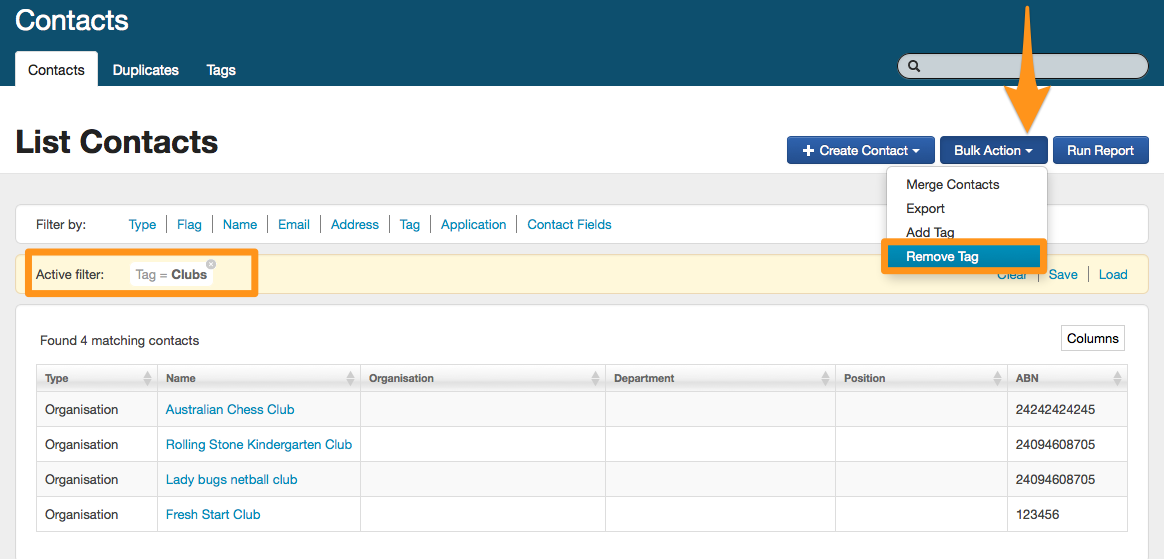
Once this Tag has been saved, the Tag will be applied to each of the individual contacts.
To remove a Tag in bulk you need to apply a filter first in the contact filter screen then choose Bulk Action and Remove Tag.
Please note that even if a Tag is added in bulk, you can still remove a Tag individually from a contact card, by clicking on the white cross on the tag itself and the tag will disappear