Record Decisions & Funding Amount

Looking for something more interactive?
Access SmartySkills
Record Decision
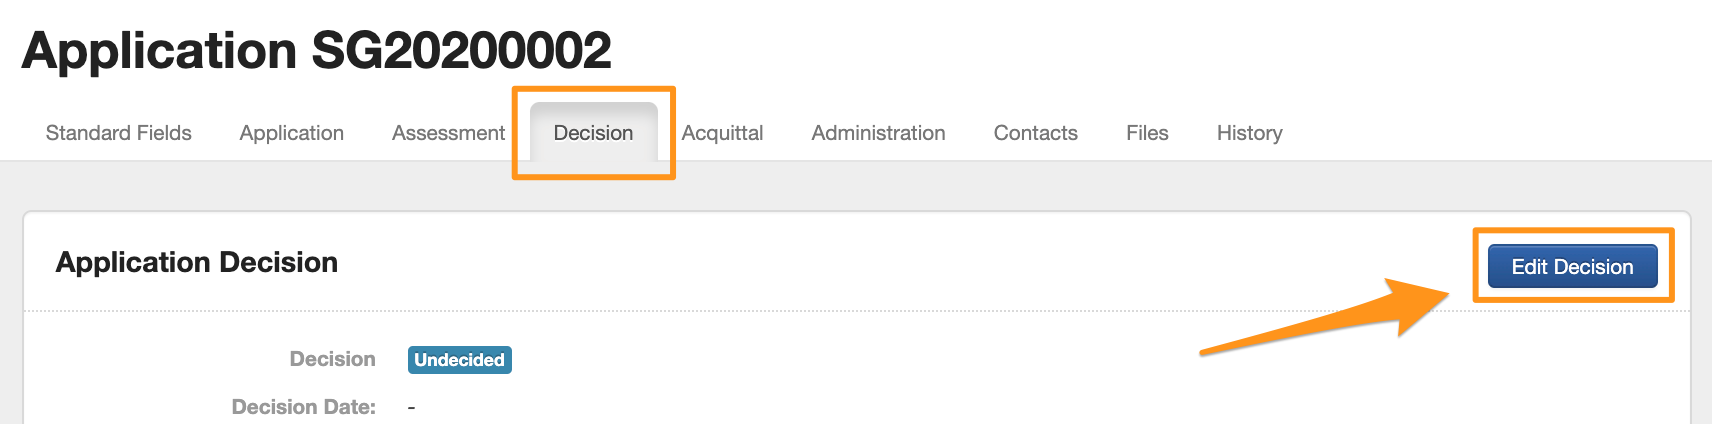
Go to the Application and click the Decision tab.
Click the Edit Decision button to the right.
Select the Decision status (either Undecided, Withdrawn, Approved or Declined), enter a date other than today if necessary, select who the default payee of the funds will be, enter any required comments and any funding conditions that may apply (For example: a progress payment not being made until an acquittal report is received).
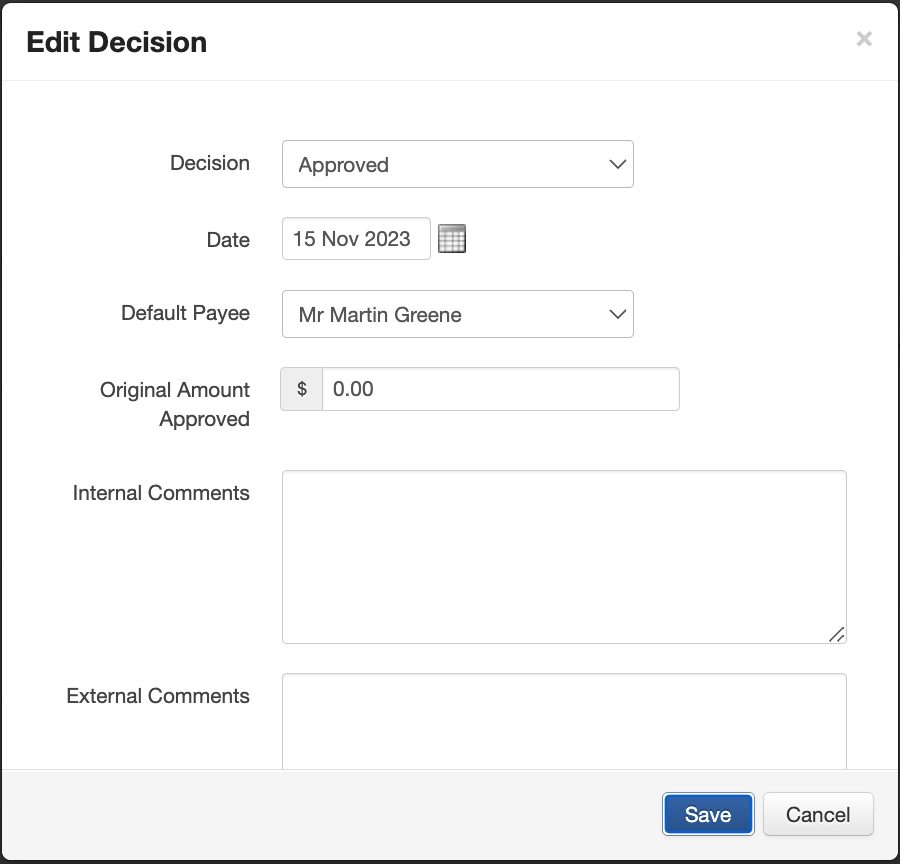
Click the Save button.
The Decision is now updated, and the changes are reflected on the Decision summary.
Bulk Update
Note that the action of recording a decision can be done in bulk (more than one application at a time). See Bulk Action Options for more information.
Original Amount Approved
To assist with managing variations, an Original Amount Approved field is available in the Decision tab that can be updated when recording changes related to funding. Read more about the Original Amount Approved field here.
Allocate Funding Amount
1. In the decision tab, click on the 'Create Funding Allocation' button.

2. Enter the funding allocation details, select the financial period, the funding source, budget, amount, select whether the funding is conditional and record any notes that may be required.
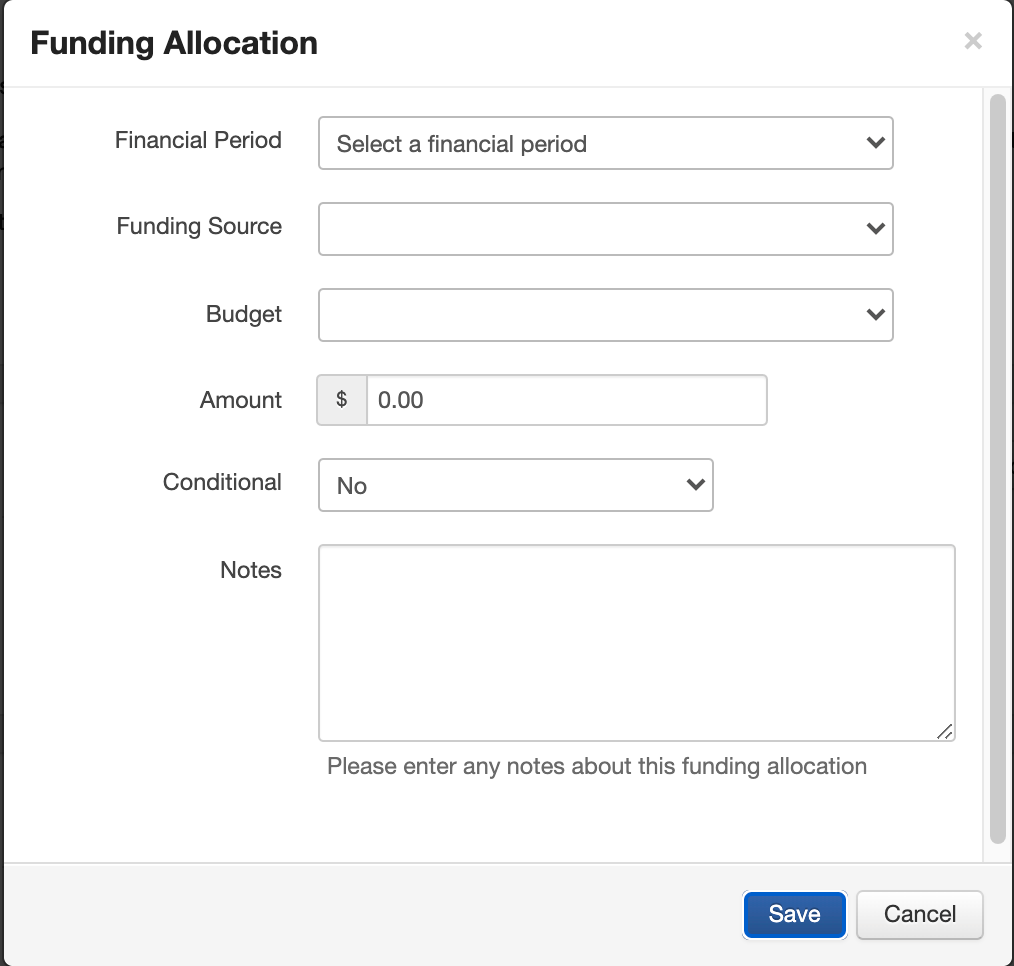
Note: You may add as many funding allocations as you wish. (For example: you may be funding the application $20,000, $10,000 from one budget adn $10,000 from the other OR $10,000 from the 2012 financial period & a second payment in 2013 of $10,000). Enter each funding allocation separately.
3. The system will then automatically create a payment underneath the Funding Allocation. A summary of each allocation you Save will be added to the Decision tab screen.
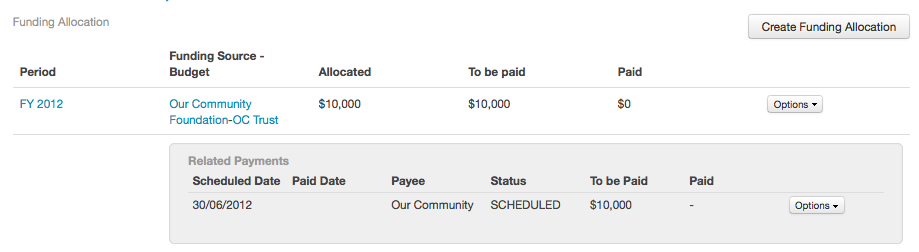
By adding funding allocations this simply allocates the funding. You can then approve the funding allocations and record payments.
To learn more see Approve & Record Payment information below.
Approve & Record Payment
When you are ready to approve and make a payment you need to visit the Decision tab on the relevant application.
Your allocated funding amounts will appear on the page. Over on the right hand side you will see an Options button. To approve the payment click this button & click the Approve option.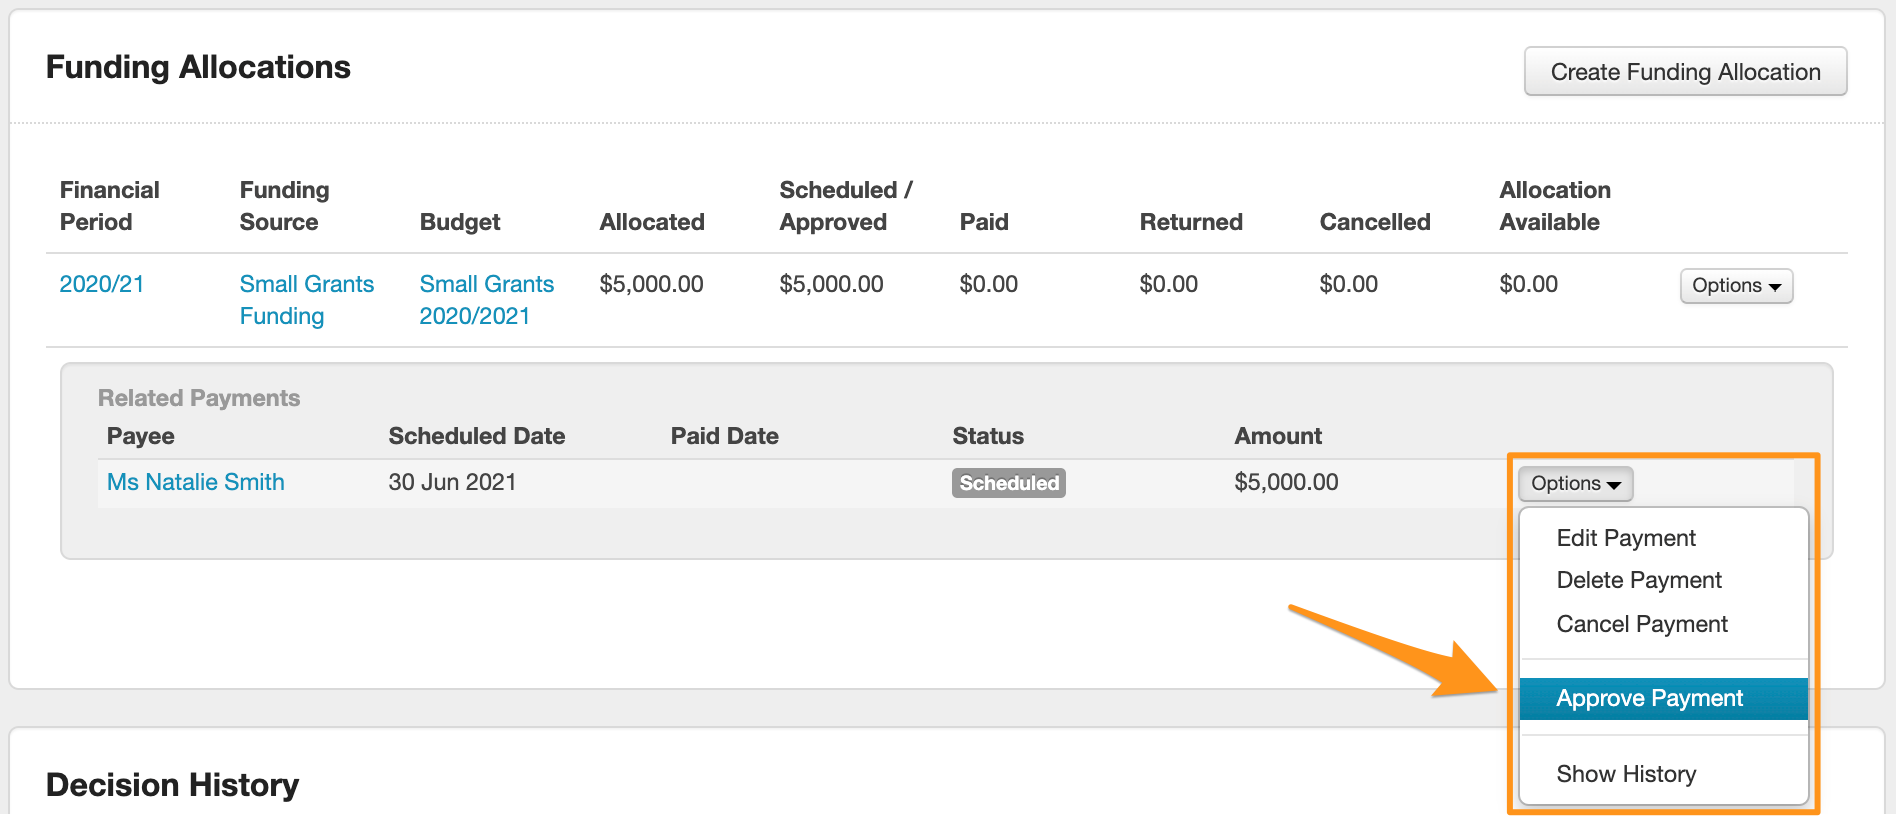
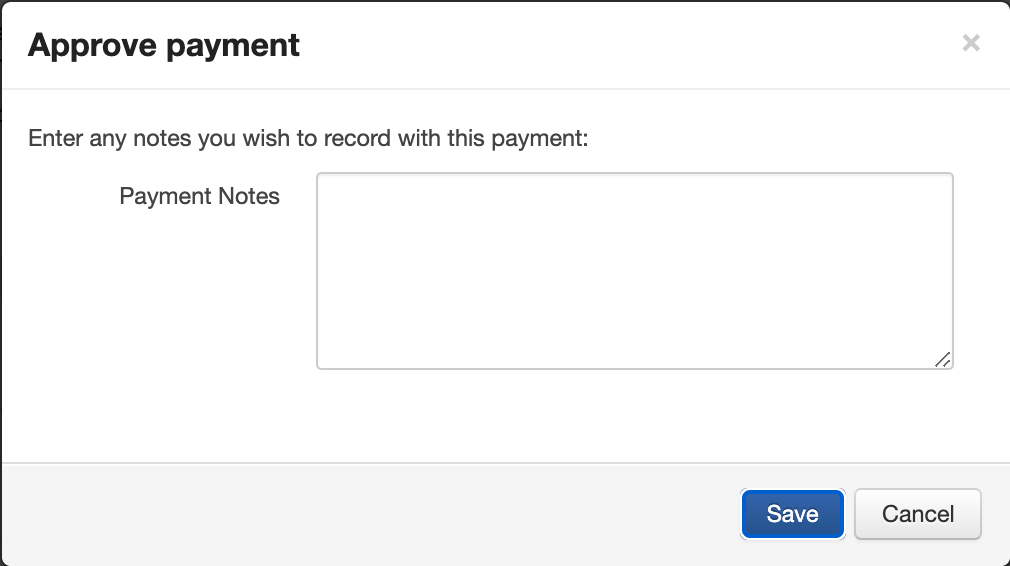
An approve payment window will appear and ask you to verify that any funding conditions have been met (if you said the funding allocation was conditional). Enter any relevant notes explaining that the funding conditions have been met and click on Save.
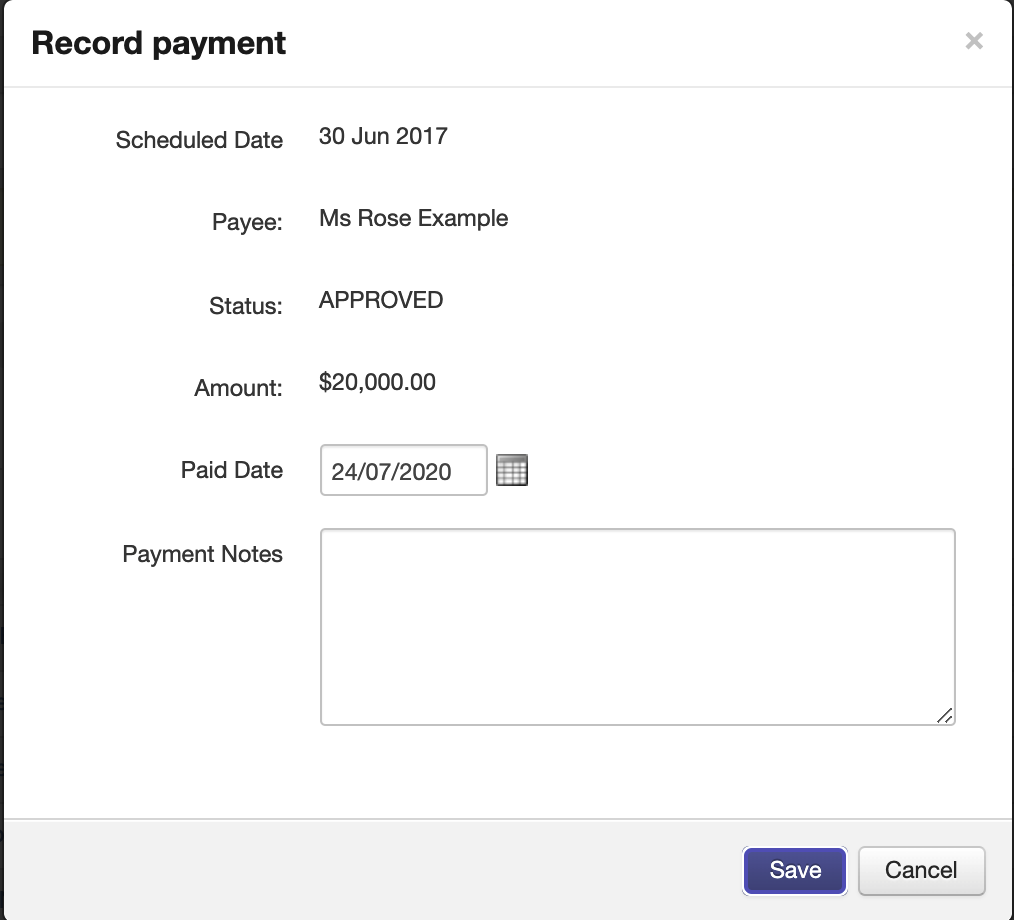
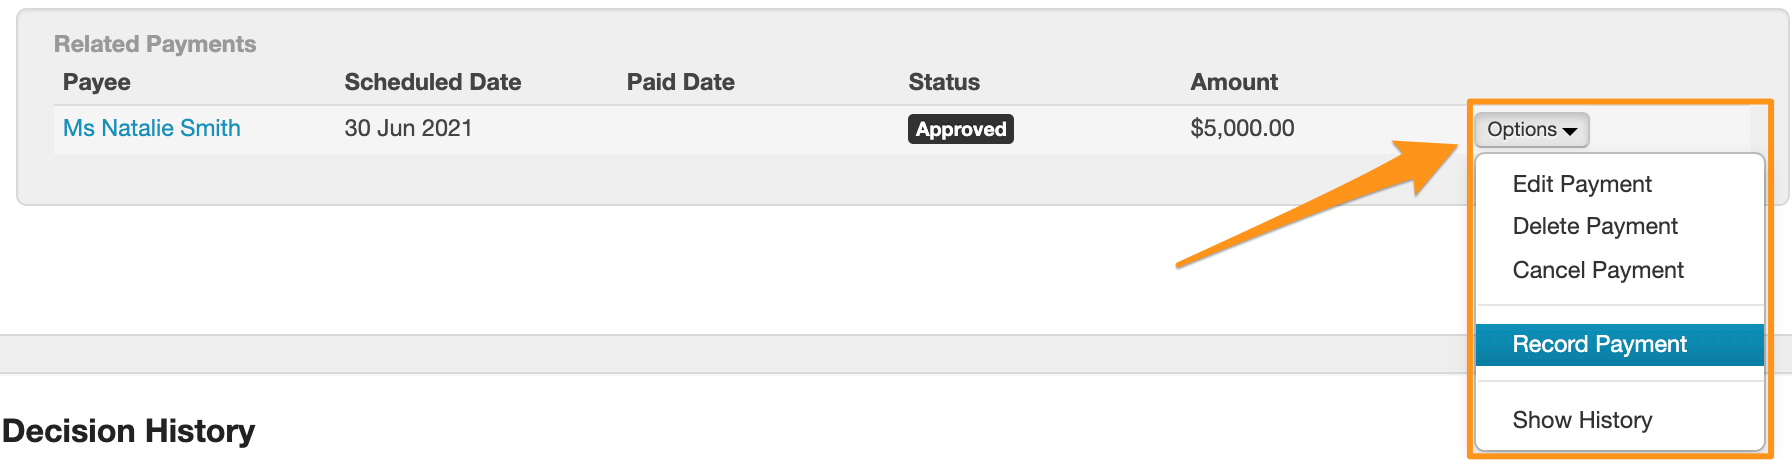
Once the payment has been marked approved you will see the Status is now marked approved. You can come back to this page at any time and click here to record that the payment has actually been made. When you are ready to record the payment, click back into the Options button and choose Record Payment.

A window will appear, you can amend the payment date and enter any payment notes you wish to record, then click on Save.
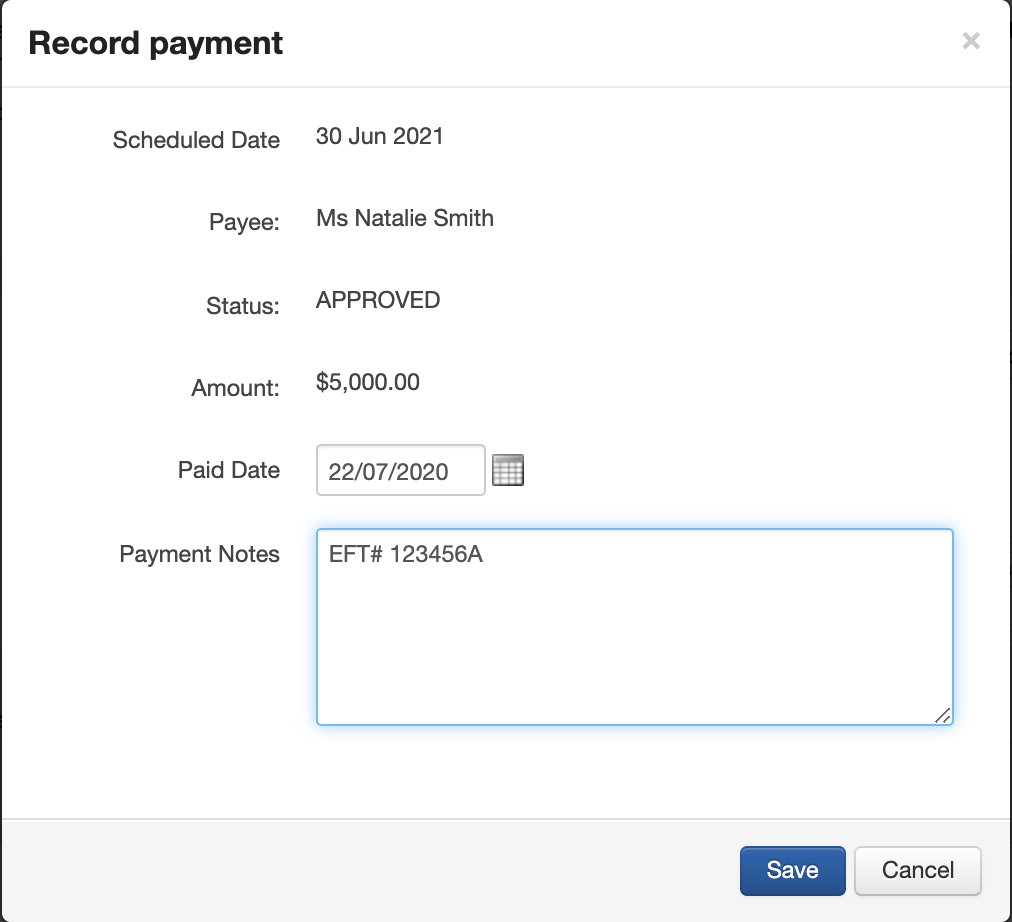
You will then see that the Status has moved to Paid.
This is also noted in the Application toolbox: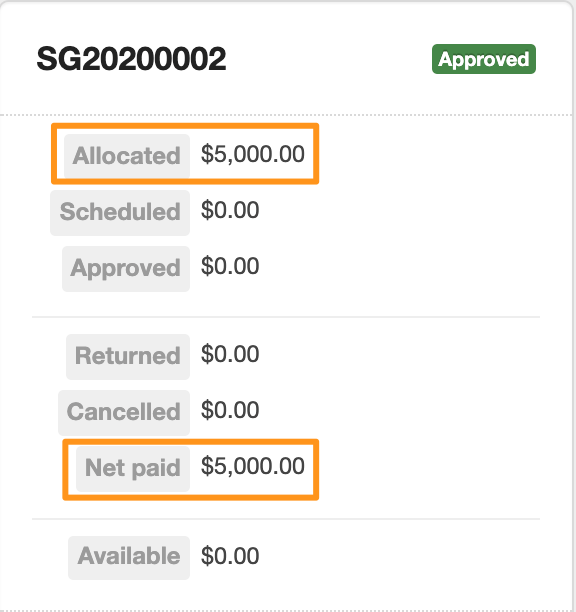
Approve and Record Payments through Funding Area
Once a funding amount has been allocated you can also approve & record your payments through the funding area of SmartyGrants. This can be helpful if you are marking several applications at the one time, opposed to going into each application separately. This gives you a quick snapshot of all payments no matter what their status is & you can filter these payments by financial period.
Click on the Funding icon

Click on the Payments tab
To filter by financial period click on the blue link labeled Financial Period, select the periods you wish to view and save.
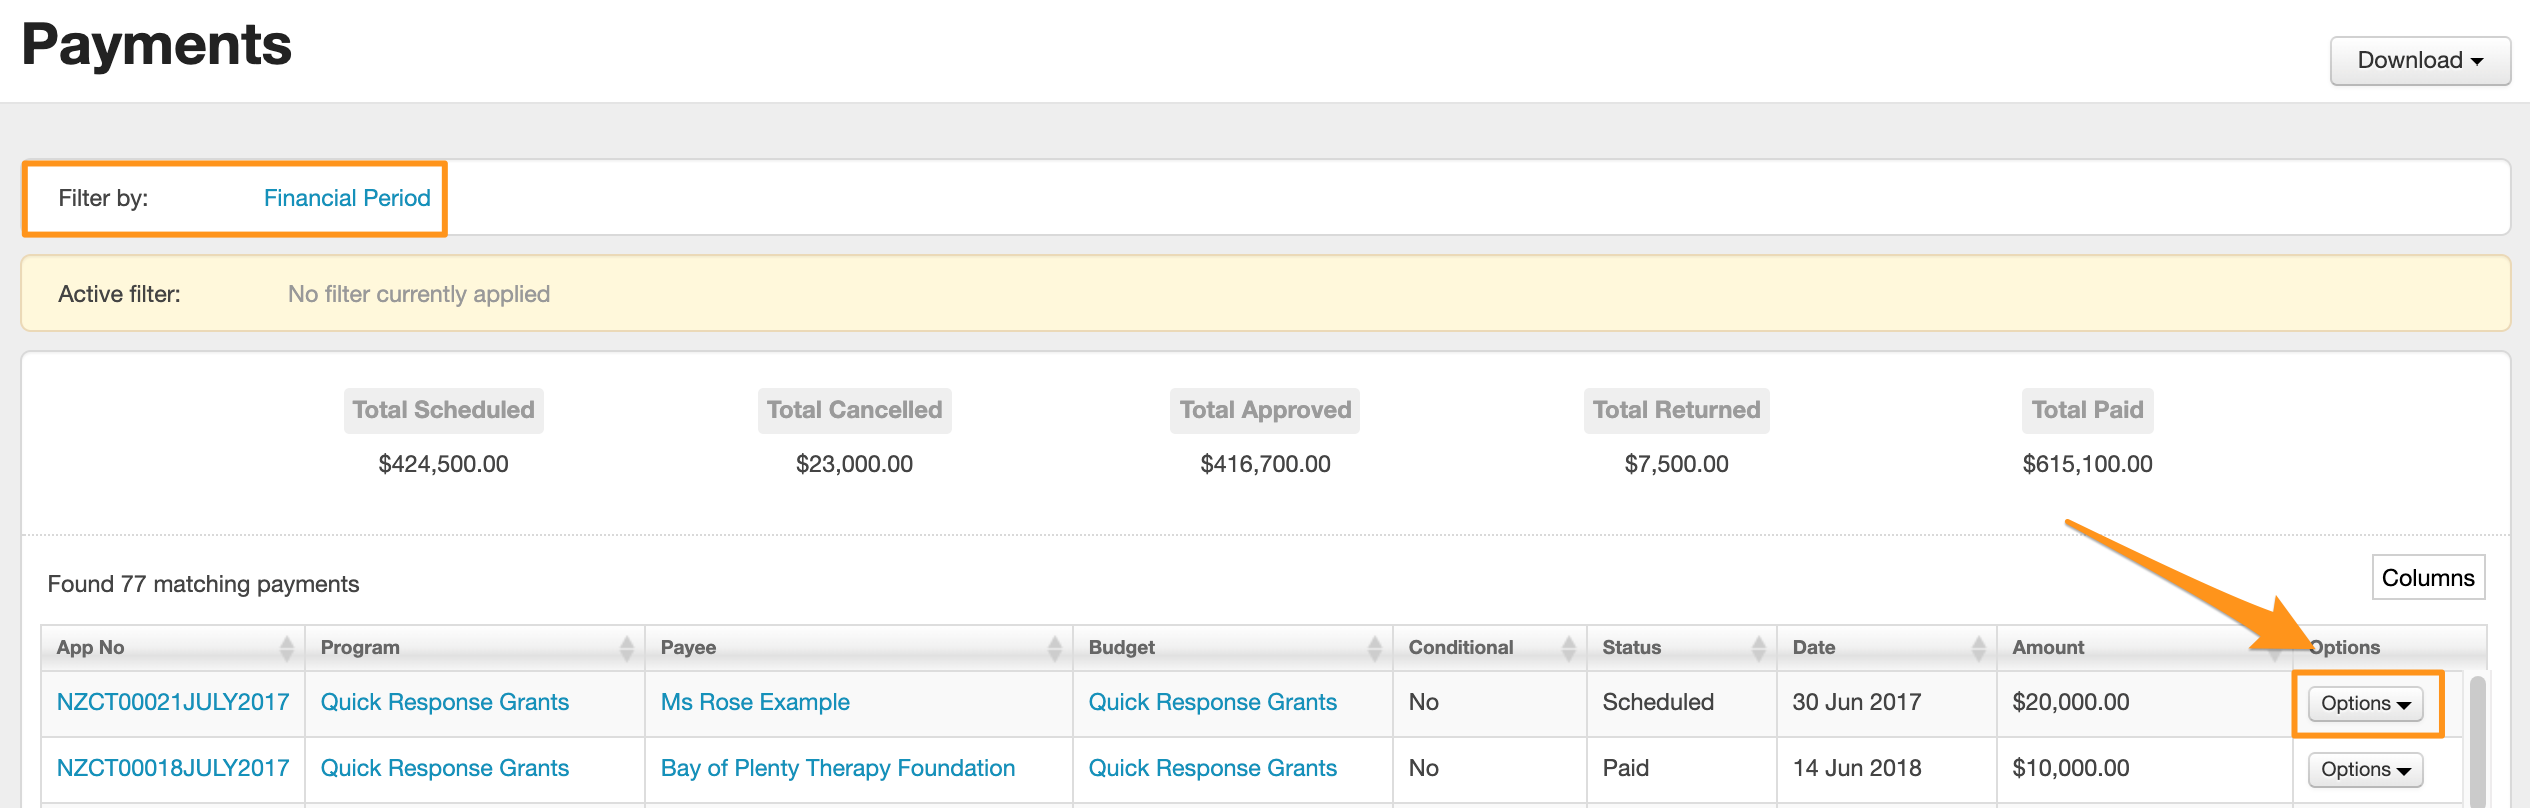
Click on Options against the relevant payment, here you can choose to approve a scheduled payment or record an approved payment. You are also able to edit, delete or cancel payments.
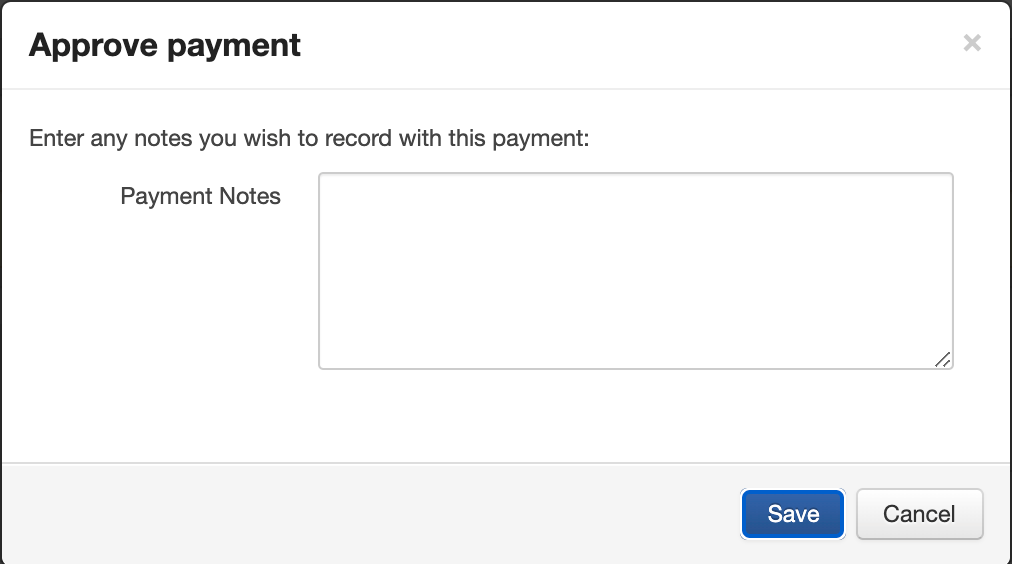
To approve a schedule payment, click on the options button next to the payment you wish to approve.

Select 'Approve Payment' and record any notes that you may require.
To record an approved payment, click on the options button next to the payment, as shown above, and select 'Record Payment'. Enter any payment notes that may be required