Create a Grant Round

Before you can create a new grant round, you’ll need to do so within the Program page. If you haven’t yet created a program, you can do so with help from our Create a Grant Program page.
Create a new round
Select the program from the Program page.
Select the blue + Create Round button to be taken to the Round Settings page.
Important: On the Round Settings page, all fields marked with a red asterisk * are response required fields. You will not be able to save the round unless there is a response in these fields.
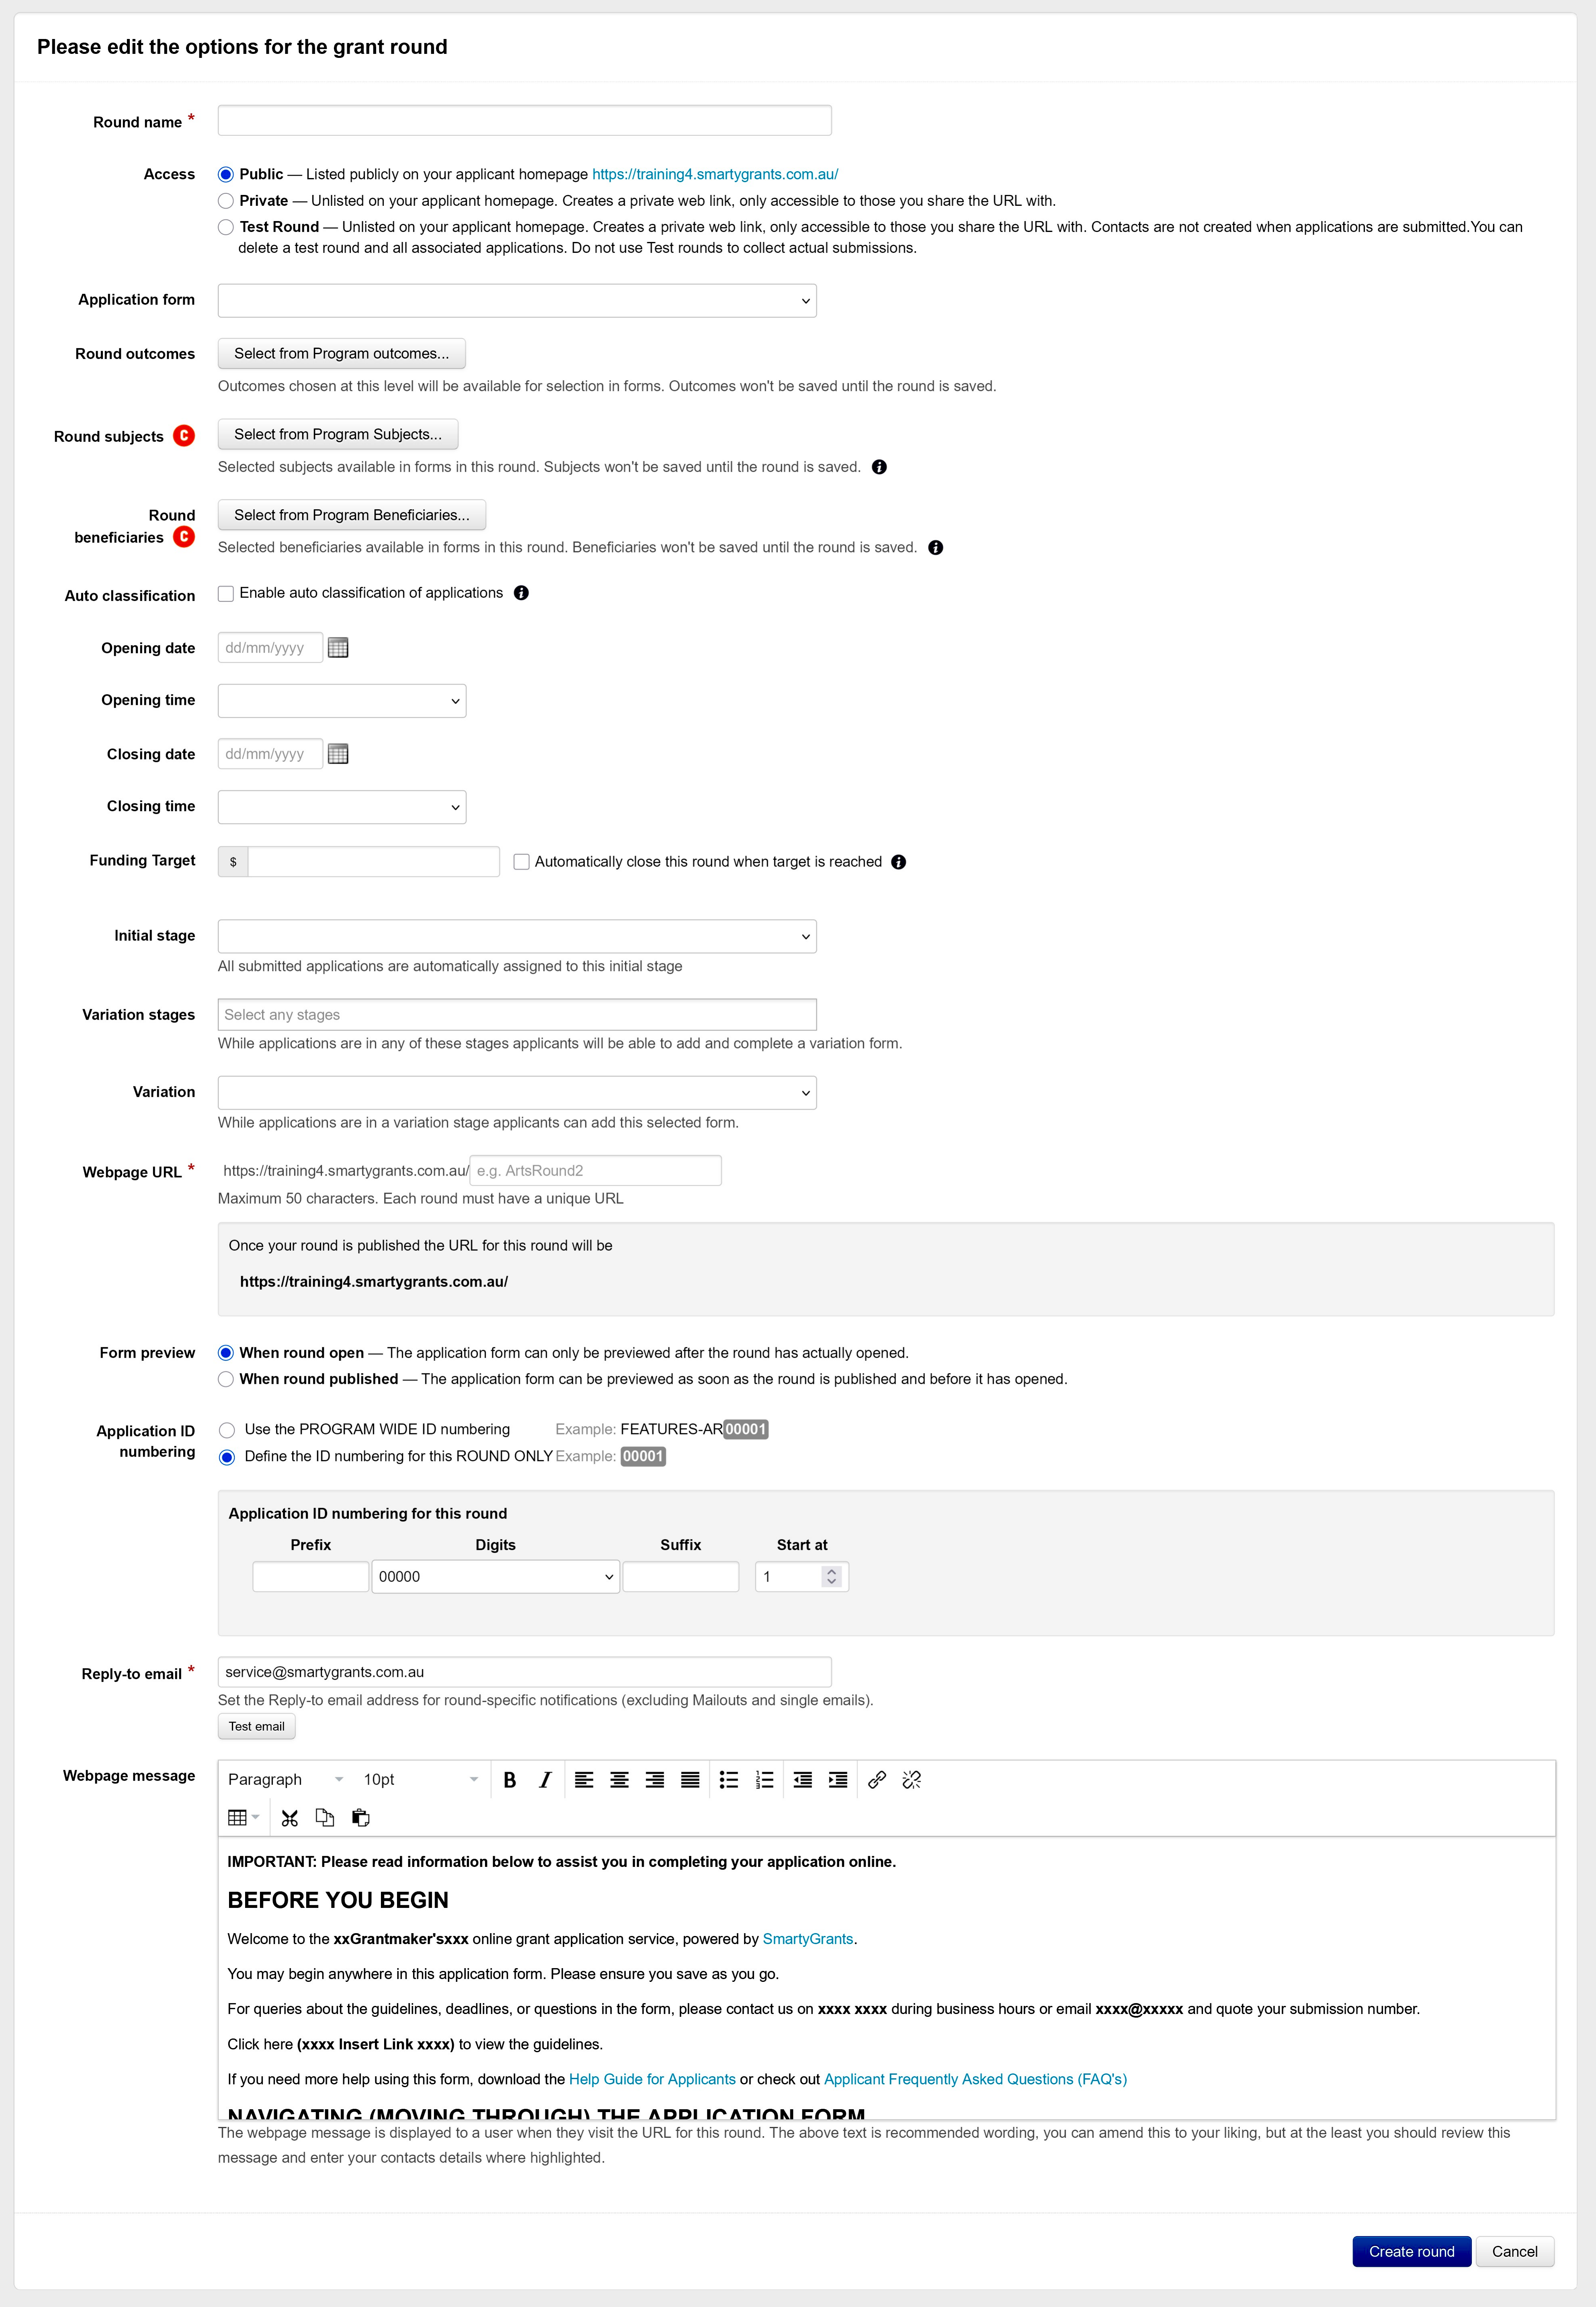
Round name
Enter the name for your round.
Important: The Round name you choose will be visible to applicants.
Round Access
Set the required Round Access type.
Public - Listed publicly on your applicant homepage.
Private - Unlisted on your applicant homepage. The round’s Webpage URL will only be accessible to those you share that URL with directly. You might use this feature for running invitation-only rounds via sending the URL to the invited applicants.
Test round - Unlisted on your applicant homepage. The round’s Webpage URL will only be accessible to those you share that URL with directly. Do not use test rounds to collect actual submissions.
Contacts are not created when applications are submitted to test rounds.
Unlike the other round types, you can also delete a test round and all associated applications.
To learn more about running a test round, see Test Round / Testing a Form.
Application form
If you have already created an Application form, please select it now. If you have not created an application form, you’ll be able to create the round; however it can’t be published until an Application form has been selected. For detailed information about creating Forms, see Create an Application Form.
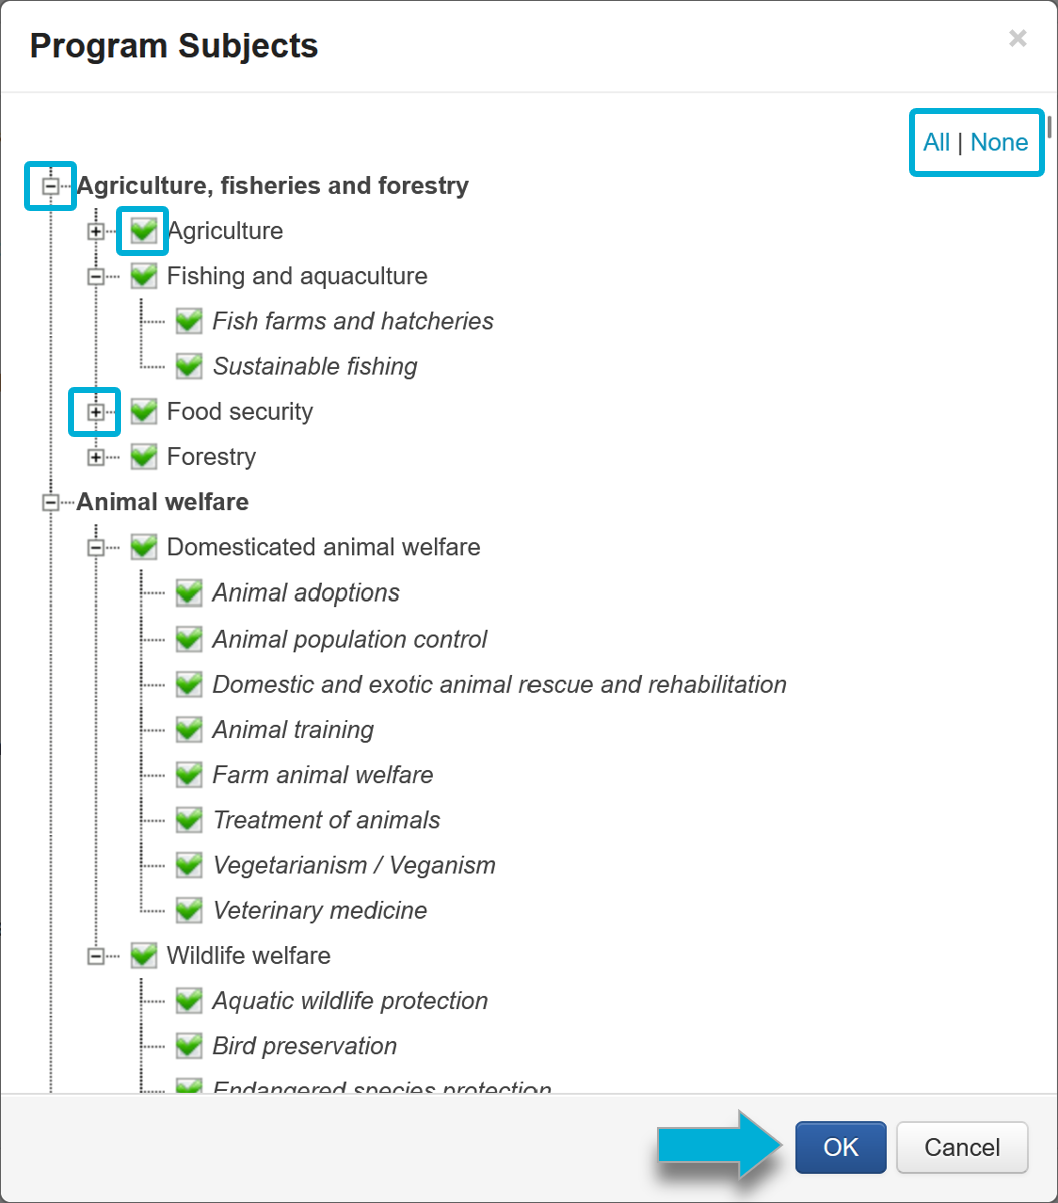
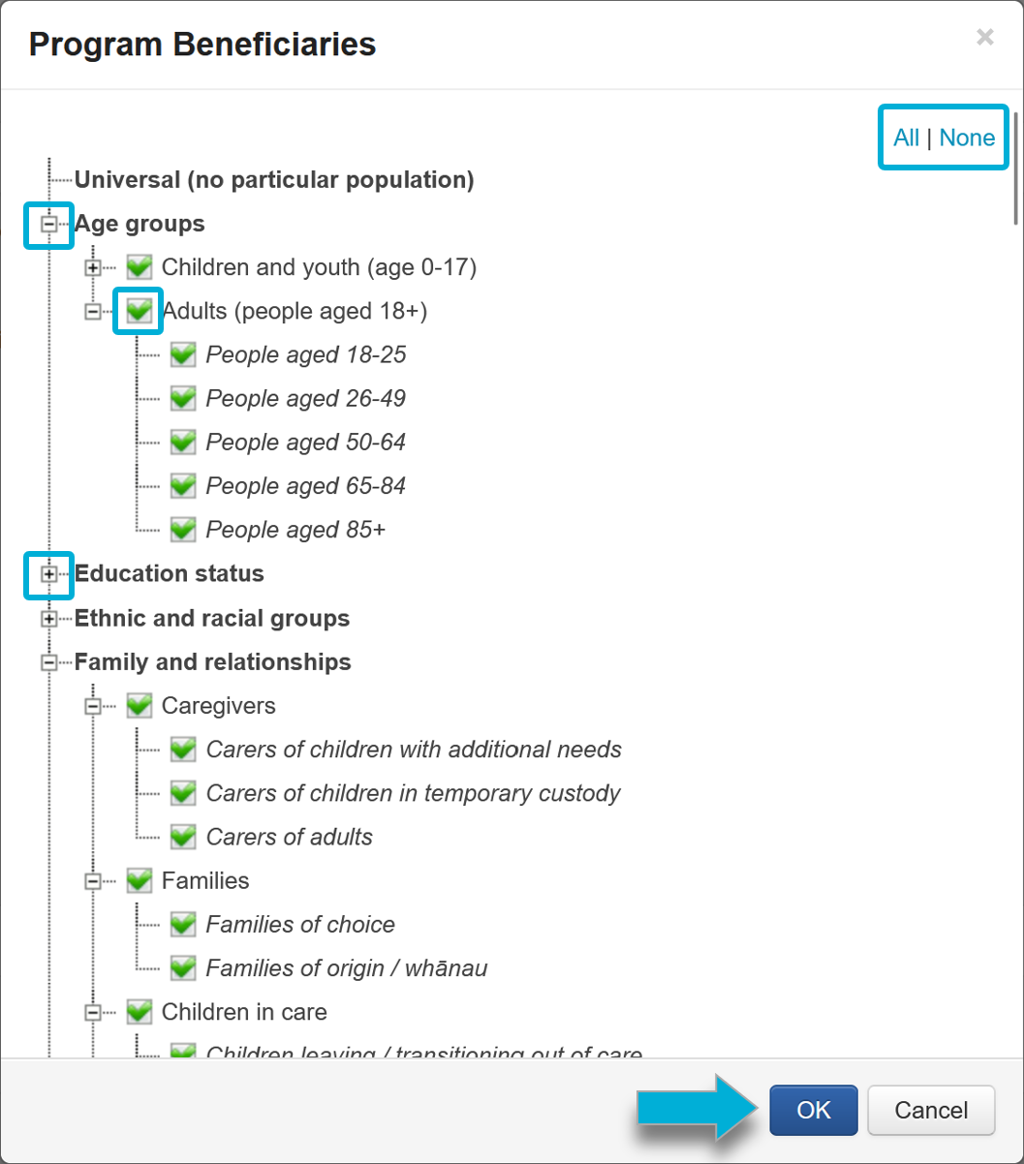
Round Subjects and Round Beneficiaries
If you are using CLASSIE fields within your program, you’ll have the ability to select Project Subjects, and Program Beneficiaries. To further refine the fields available at the round level:
To enable or disable Project Subject fields:
Next to Program Subjects, select the Select Subjects button.
To add all Project Subject fields, select All.
To remove all Project Subjects, select None.
Selecting the - or + buttons next to a category will either minimise or expand the category.
Check the boxes to confirm which subject fields to use. You can select either individual selections or whole categories at once.
Once your selections have been made, select OK.
To enable or disable Program Beneficiaries fields:
Next to Program Subjects, select the Select Beneficiaries button.
To add all Project Subject fields, select All.
To remove all Project Subjects, select None
Selecting the - or + buttons next to a category will either minimise or expand the category.
Check the boxes to confirm which subject fields to use. You can select either individual selections or whole categories at once.
Once your selections have been made, select OK.
Info: If you have the Outcomes Engine enabled on your account, you’ll also be able to customise which Program Outcomes relate to this specific grant round. For more information on the Outcomes Engine, see here.
Auto classification
If you’d like to enable auto-classification of applications, tick the checkbox beside Auto classification.
Info: Auto classification is a feature available to Australian and New Zealand accounts only. To learn more about Auto classification, read more here.
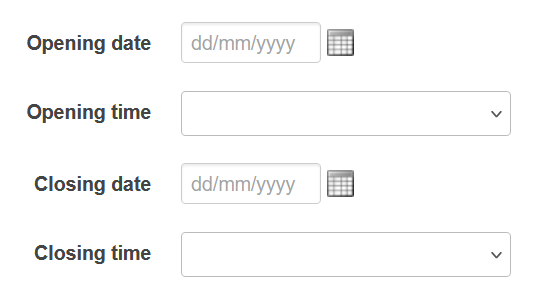
Opening date & time, closing date & time
Select an opening date and time for the round, and if relevant, a closing date and time. Applicants will not be able to submit an application past the closing date and time set unless you as the funder allow them to.
Funding Target
If you are using a Funding Target (optional), enter the funding target amount here. You can also set the round to close once the target has been reached.

Warning: We strongly discourage using a Funding Target until you are familiar with what the target means for both your round and your applicants. This feature can prevent applicants with in-progress applications from submitting. Our Funding Target documentation has more information on this feature.
Initial stage
Select the Initial stage for this round. All applications received in this round will be automatically assigned to this Stage and its associated Tasks. Note that you will need to create a Stage in the Workflow tab of the program to see any stages appear in this list.
Variations
If you have Variations enabled on your account, and as part of your grant program you’d like to give applicants the ability to request a variation on their own through the portal, you can also set the Variation stages and the form for the Variation request. Note that you will need to create a Stage in the Workflow tab of the program to see any stages appear in this list.
Info: To learn more about the Variation process, you can review our documentation here.
Webpage URL
Enter a unique identifier in the Webpage URL. This is used to create the direct link to your round on your applicant site. Note that this identifier must be unique; identifiers cannot be used more than once.
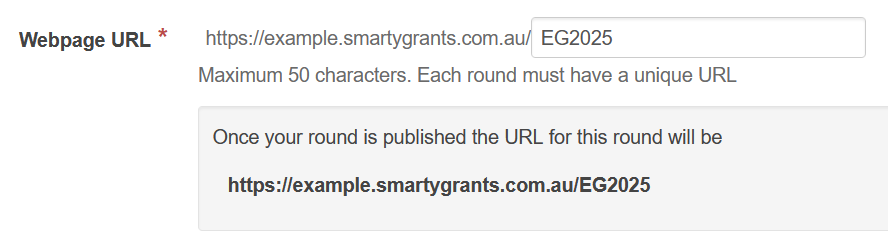
A round link is comprised of two elements: Your applicant site (example.smartygrants.com.au / example.smartygrants.co.uk), and the webpage URL that you set here. Combined they form the complete link that will send applicants to that round.
We recommend that the webpage URL be short and distinct. You could consider using numbers to represent a time period, and/or use a naming convention so you can easily identify the round.
E.g:
A round named Environment Grants 2025 could set EG2025 as the webpage URL. The page to this direct round would be https://example.smartygrants.com.au/eg2025
An ongoing round named Community Grants could set CommGrants as the webpage URL. The page to this direct round would be https://example.smartygrants.com.au/commgrants
A round named Alumni Scholarships Fund 2025-2027 could set AlumniS2527 as the webpage URL. The page to this direct round would be https://example.smartygrants.com.au/alumni2527
Form Preview
Choose when you want applicants to preview your application form.
When round open: Applicants can only preview the application form after the round is open.
When round published: Applicants can preview the application form as soon as the round is published (which could be before the round is open).
Application ID numbering
Set the Application ID numbering scheme for this round:
Use the PROGRAM WIDE ID numbering: Follow the numbering convention set at the program level.
Define the ID numbering for this ROUND ONLY: Enter in a custom numbering convention specific to this round.
Info: To understand more about Application IDs and the numbering scheme feature, you can see Set Round Application ID.
Reply-to email
Enter the Reply-to email if different from the reply-to email set at the program level. For more information on the reply-to email, see our Reply-To Email page.
Webpage message
Update the Webpage Message to reflect the details relevant to your round. This message will be seen by applicants when they navigate to the round URL.
Create round button
When you’re happy with the settings outlined above, select the Create round button.
Now that you’ve created a new round, this round will first be in an Unpublished state. This state gives you the opportunity to tweak any settings before publishing your round.
If you wish to make any changes to the settings, you can select the Edit button from this screen.

Publish your round
When you are ready to make the round webpage publicly accessible, select the red Publish Now button.
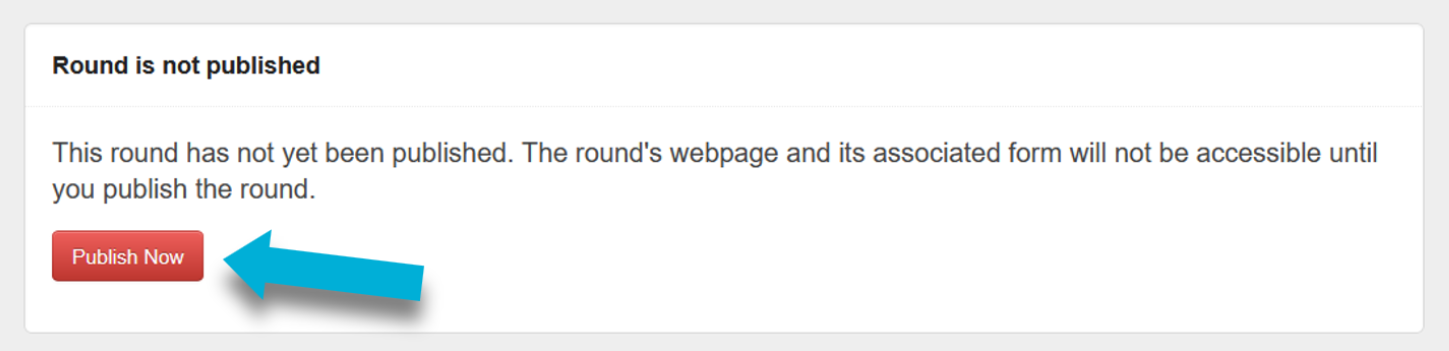
Important: Publishing a round does not automatically open your round for applications. A round will only open after the round open date and time has passed.
Note: If you do not see a Publish Now button, this is likely because you have not yet added in an initial application form. You’ll need to create and then add an application form to publish a round.
Warning: If your application form does not include a Contact Field using the Applicant Contact Type, then a warning will be displayed when publishing the round. The system will not prevent the round from being published; however, it is strongly recommended that your application form be amended to include the Applicant contact type. Not using this Contact Type will cause certain features of the system to not work correctly.

Publicise your round
To learn more about sharing this grant round with applicants, you can review our Publicise your Grant Round page.
Warning: Do not share a private round’s web page link anywhere other than directly with selected applicants. If shared on social media, your organisation’s website, or similar, you may start receiving applications from the general public.