Tasks
Tasks have been designed to help manage your grants process. They are a useful way of ensuring you and your team are completing all necessary actions within your grants cycle. Tasks can be assigned to individuals or multiple users. You can also set a 'trigger' which will decide when a task will be applied.
Task Types
There are 2 types of tasks available to create, once-off and recurring.
1. Once-off tasks:
A task that applies once. It can have one or multiple assignee/s (users to complete a task) and can apply to none, one or multiple applications.
Once-off tasks can be created via the tasks tab, or in bulk via the application filter screen bulk action.
2. Recurring tasks:
A task that applies more than once. A user needs to define a trigger that enables a task to be automatically created based on certain conditions, including default assignee/s.
Recurring tasks can be created via the tasks tab or the workflow tab. Once you create a recurring task, you will see that it now appears in the recurring templates tab under the workflow tab. This means your task will continue to operate based on its settings until the template is deactivated (can be done through the template options).
Linked Form/s
You can link a form when creating a task. A linked form becomes available to your assignee/s to complete.
If multiple forms are selected, an assignee can select which of those form/s to complete.
If no linked form selection is made, no assessment forms are available for an assessor only user to fill out. The assessor only user will be able to review the application form only.
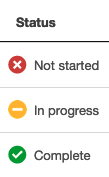
By default, the status of the task will be updated when the linked form is in progress or submitted. This means that when the assignee adds the form and saves it, the status of the task will update to "in progress". Once they have submitted the form, the task will automatically be updated to a "complete" status. You are able to deselect this option when creating the task should you wish the status to only be manually updated.
Note: If 'Form A' is linked to two separate tasks on the same application but assigned to the same assessor, both tasks will be recorded as 'complete' or 'in progress' (where the 'update task status when linked form is in progress and submitted' is selected).
Important: A linked form can only be changed if the previous linked form has not been added to applications. You can update your task template to update the linked form, you can also use Bulk Action on the tasks tab to update the linked form.

Assigning Tasks
You can nominate who the Task is to be assigned to by default (when the task is applied automatically and for each recurrence). This can be modified later.
Tasks can be assigned to one or more users. When selecting the user/s to assign to the Task, they are grouped within the drop down by User Access Type:
Administrators
Program Managers (both system wide and program specific)
Standard Users
Assessors
You cannot assign a Task to a 'View only' or 'Reporting only' user as they are only able to view data within the system, not action a task.

You can type and search for users, select each user individually or select the user grouping e.g. if I select Assessors, it will add every Assessor listed. You can deselect users as required.

Tasks for one or many
When assigning users, you can assign multiple users and define that either all users must complete the task, or any of the users may complete the task.

If all assignees must complete the task, an individual task will be created for each assignee and they must each complete their individual task for the overall task to be completed.
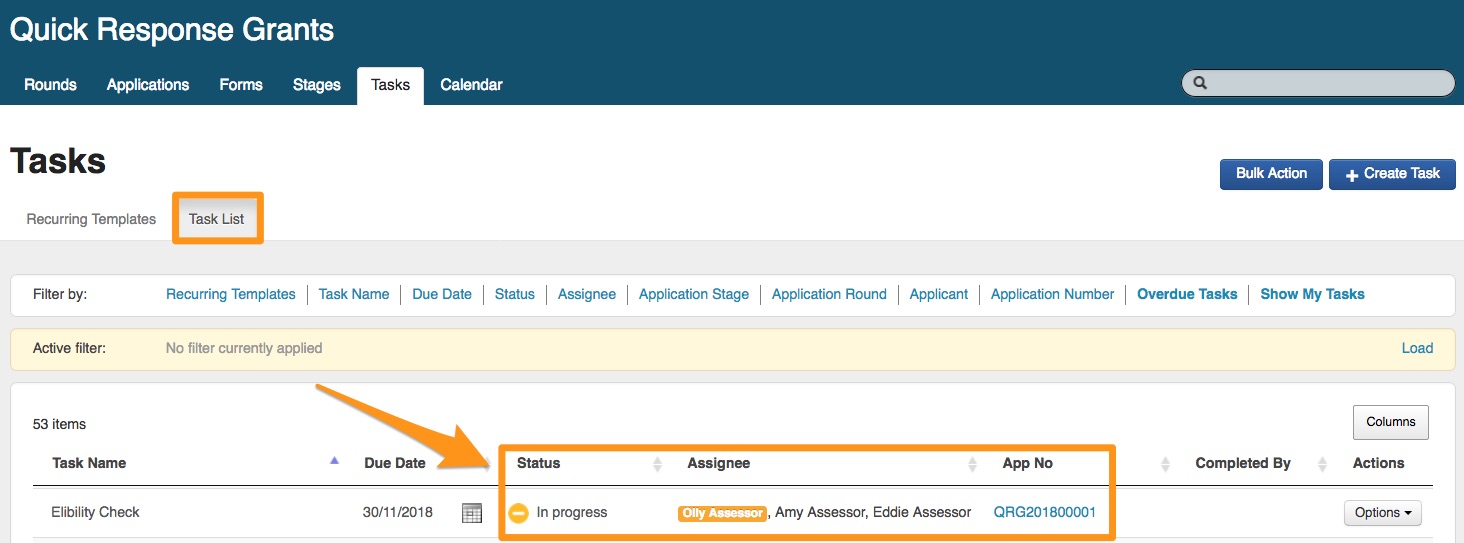
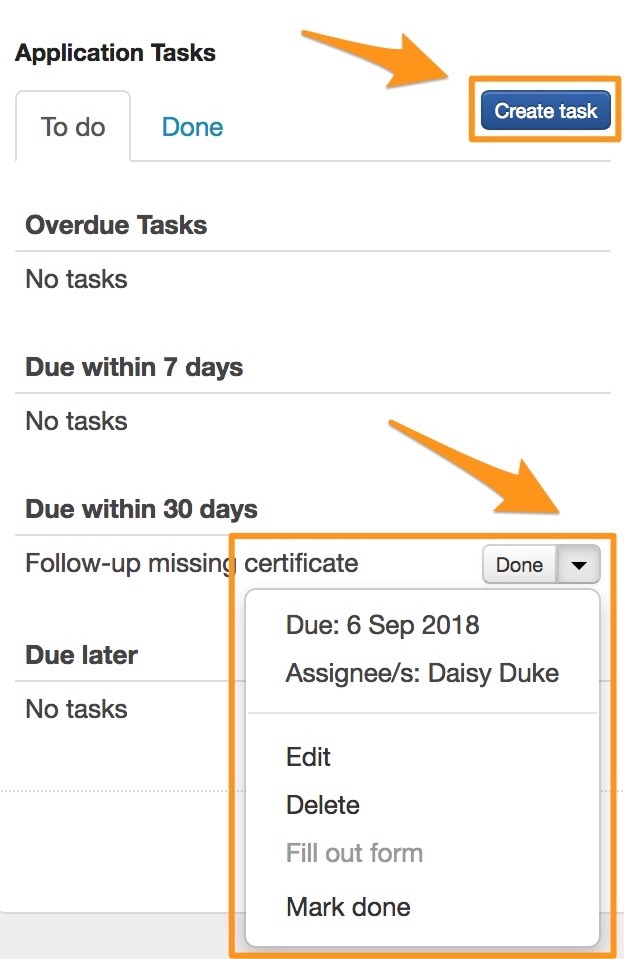
If any one of the assigned users can complete the task, then a single task is created that can be completed by any one of the assignees. This option will show all assignees listed against the task, and if an assignee marks the task in progress or begins filling in a linked task form, that assignee will be highlighted on the task. This means that the other assignees know the task is already under way. In the image below, Daisy Duke has marked the Eligibility Check task as "In Progress" (by opening the linked form, or manually depending on the task settings), which is why her name has been highlighted in orange.

Email Notifications (Reminders and Assigned)
All task email notifications are batched to be sent at 5am (AEST) everyday by default, however there are two other options you can select.
You are also able to select 'Send email now' or 'Don't send email' as seen below:
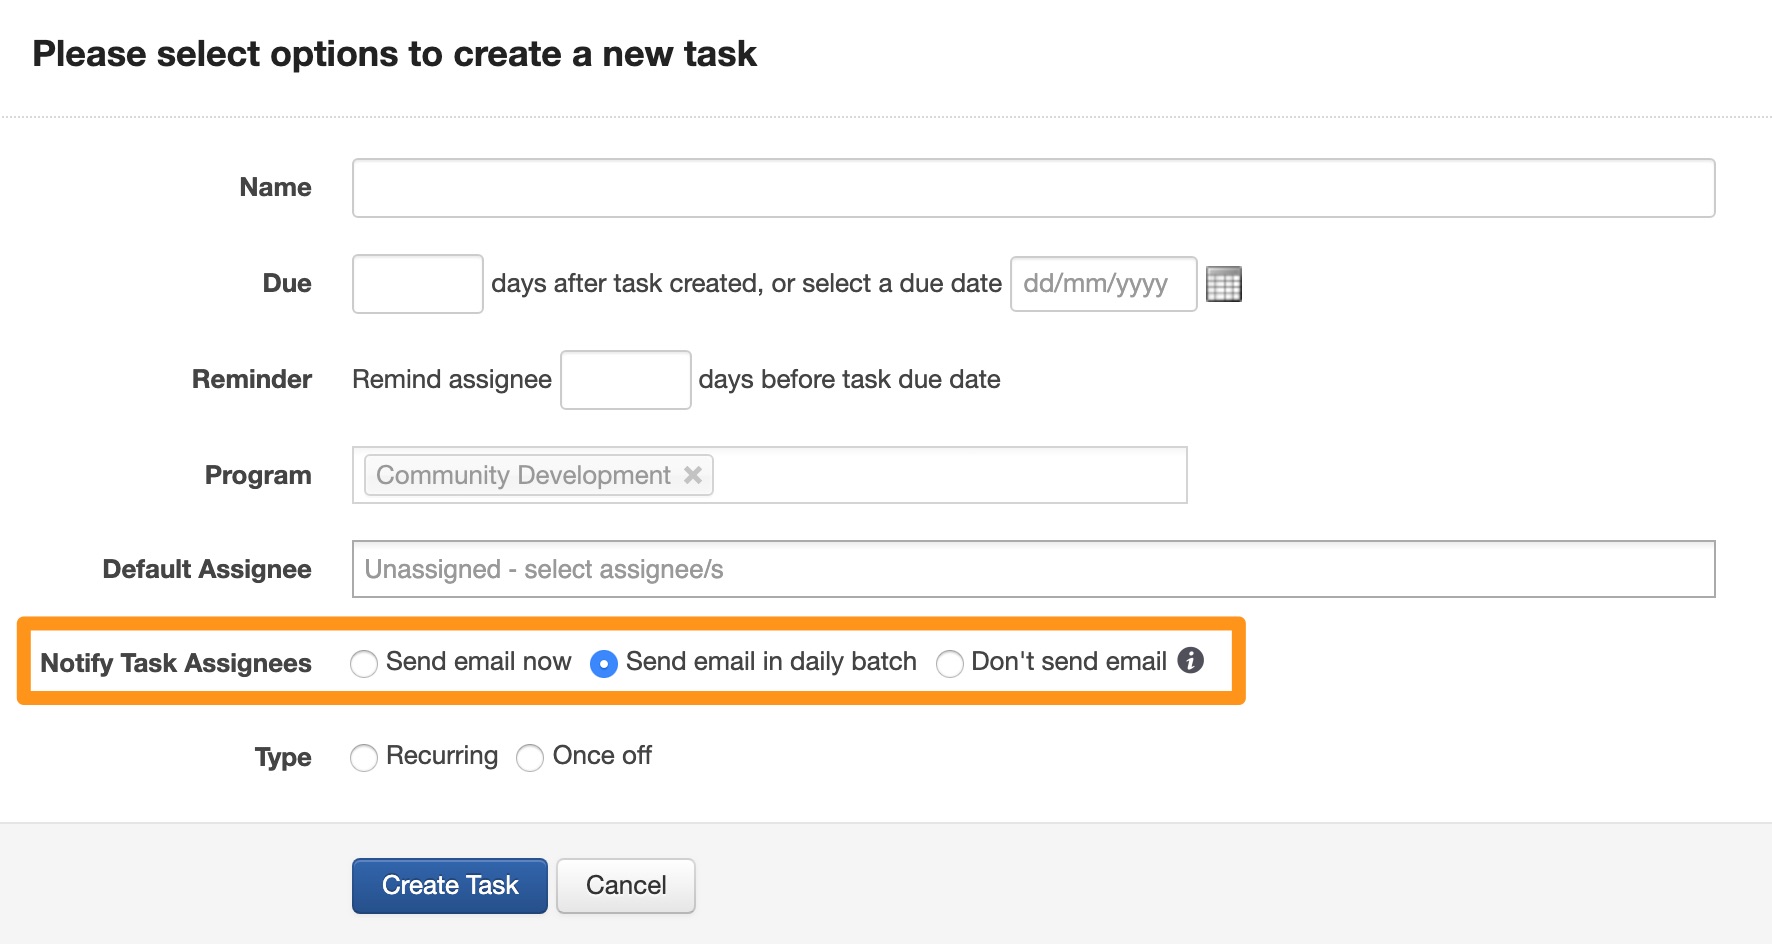
Send email now: selecting this option will send the notifications in batches delivered in 10 minute intervals. For example, if you create a task at 10:41am then the notifications will be sent in the batch sent at 10:50am.
Don't send email: selecting this option will not notify the assignee that a task has been assigned to them. They will still see the task in their task list but will not be emailed the notification.
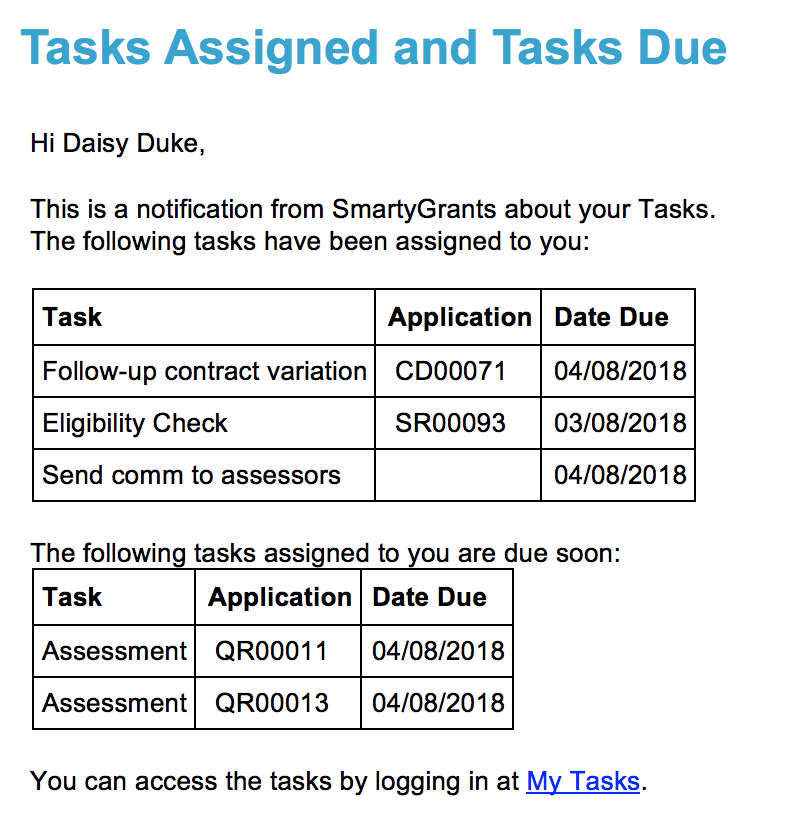
If you choose any option to send an email, an email will be received by the assignee to summarise:
Any tasks that are assigned to them
Tasks are due soon
An example is provided below:
Where can I create tasks from?
On an individual application (from the right hand side summary tool box)
As a bulk action from the Application tab or the Tasks tab
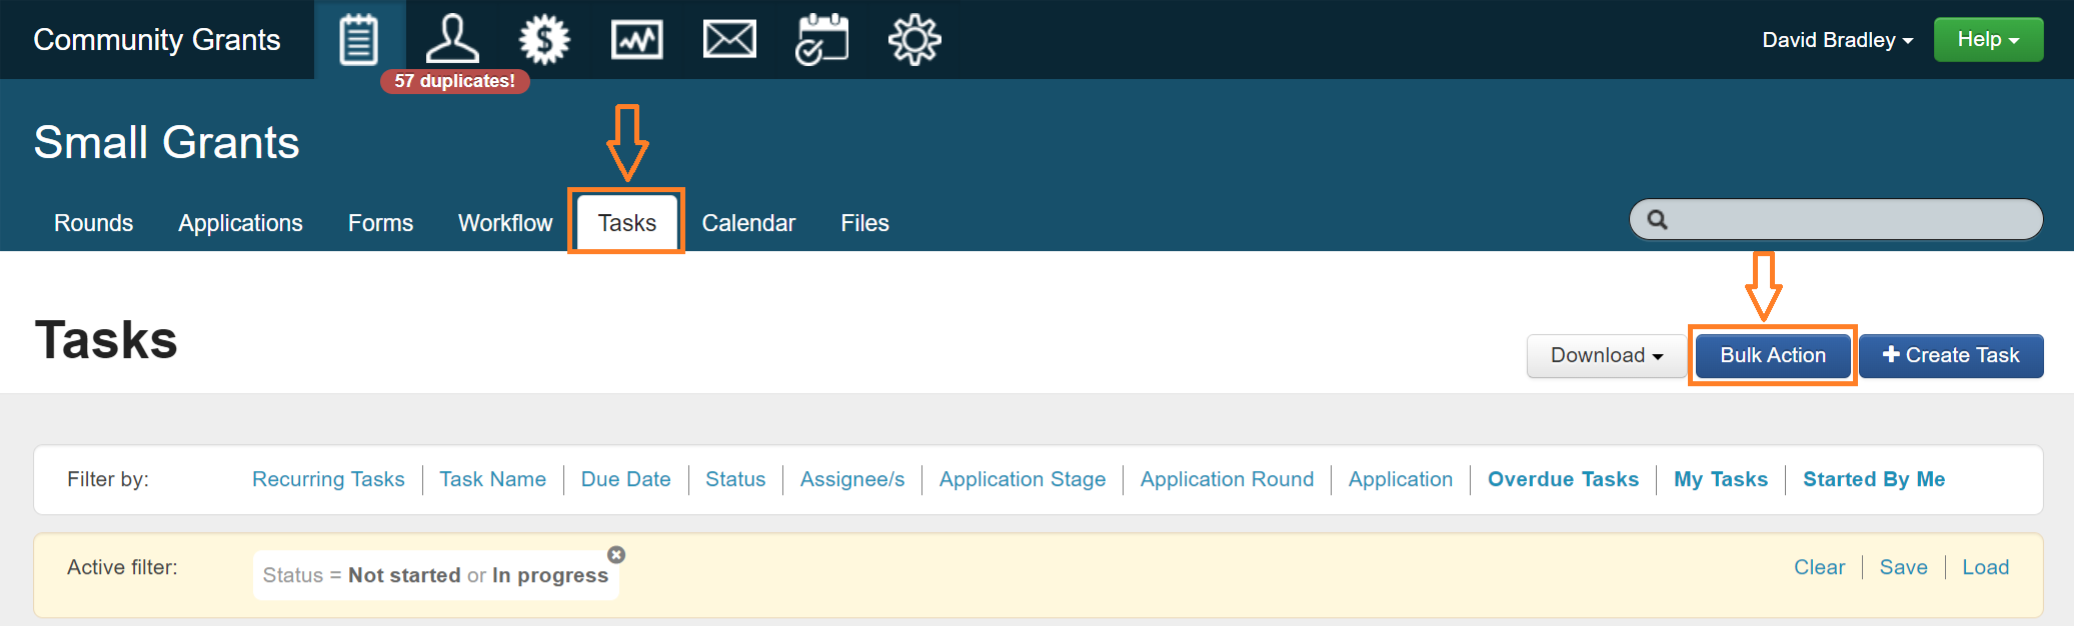
1. Tasks Tab
Click on the tasks tab in the relevant program
Select the 'Create Task' button on the right hand side

A task creation window will appear. Select your relevant options and then click on 'create task'.

Note: Once off tasks will appear on the 'task list' tab (and if applicable to an application, also when viewing an application). Recurring tasks will create a recurring template, available on the 'recurring template' tab under the workflow tab. If the task is instantly applicable it will be available on the 'task list' tab. Alternatively, the task will appear on the 'task list' tab once triggered.
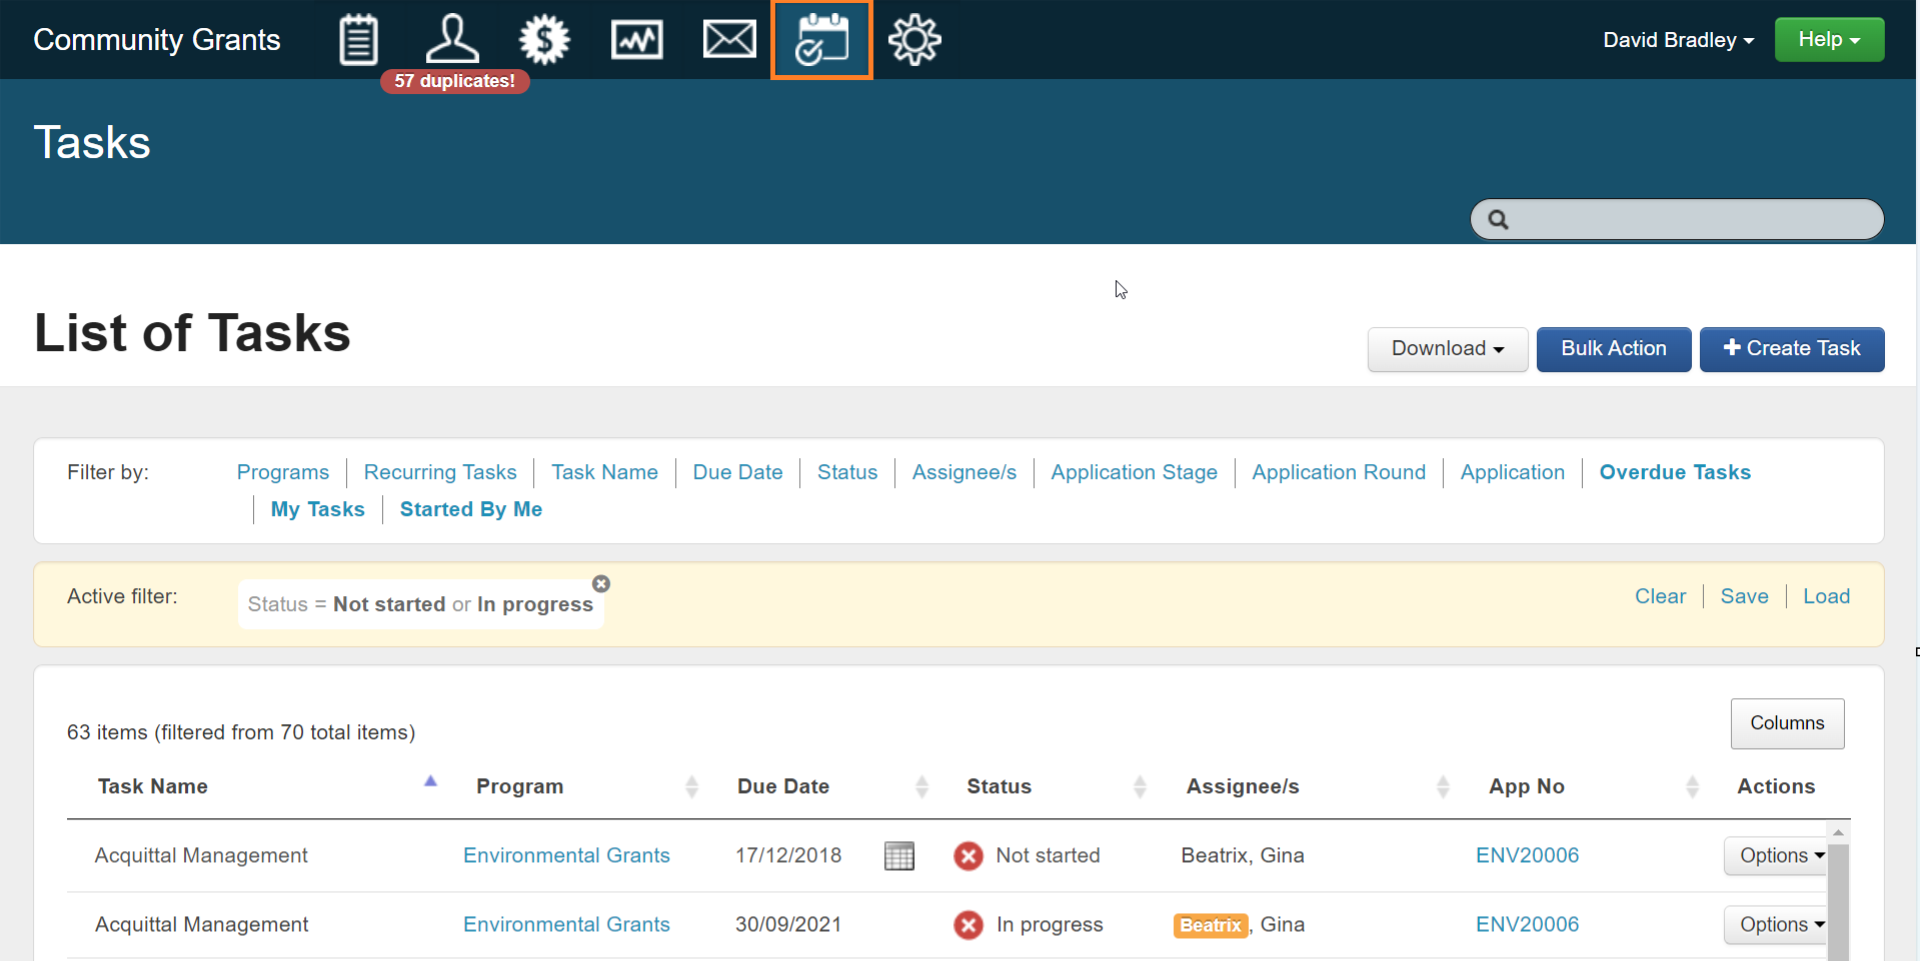
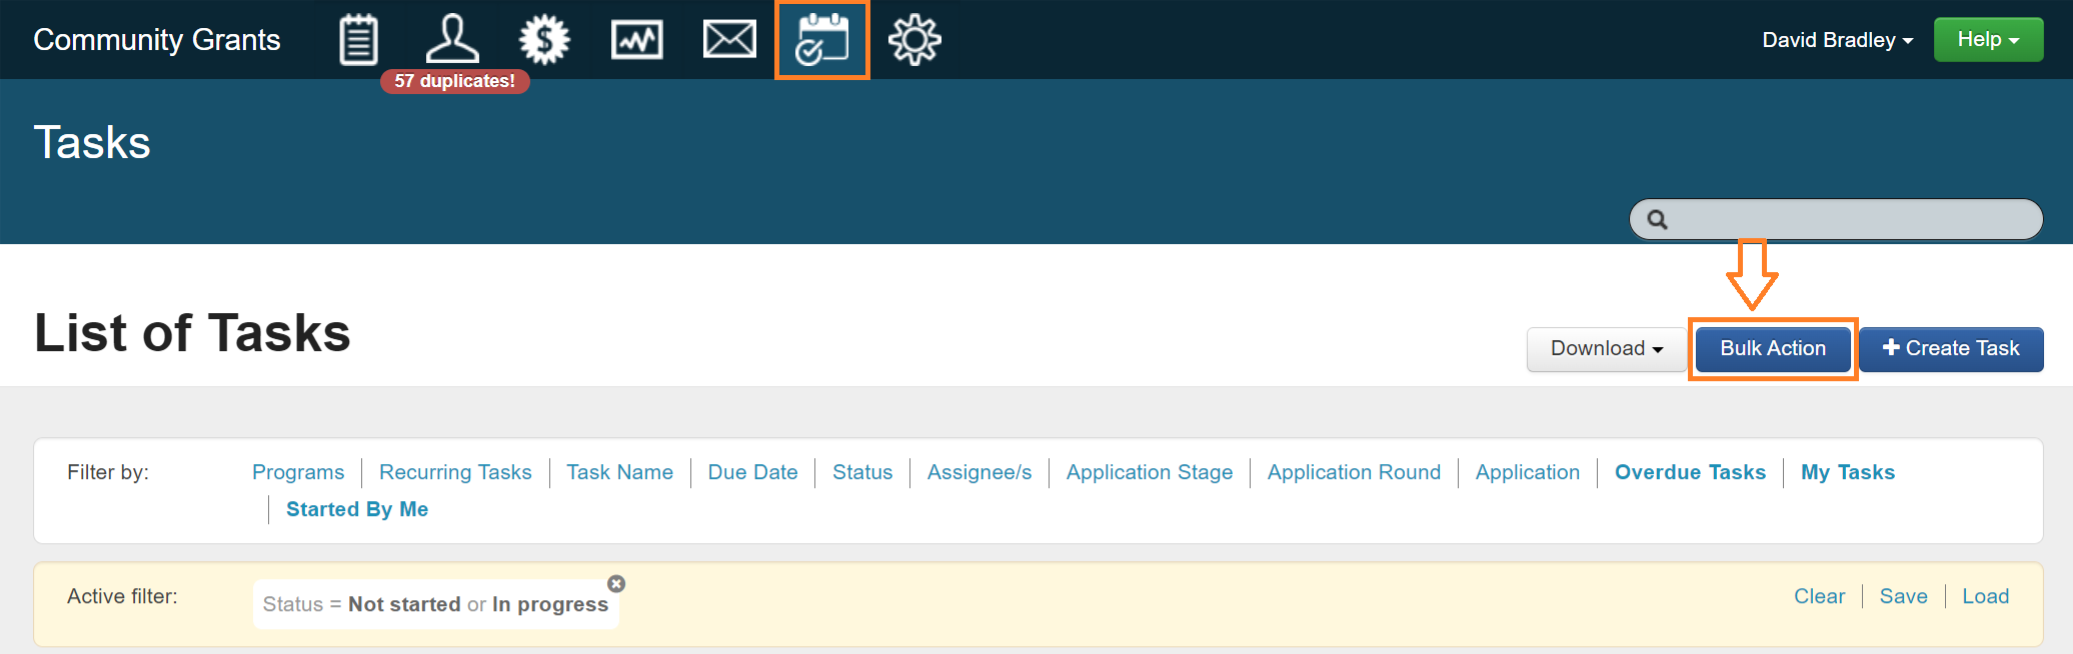
2. Tasks Icon
Click into the tasks icon
Click on the create task button
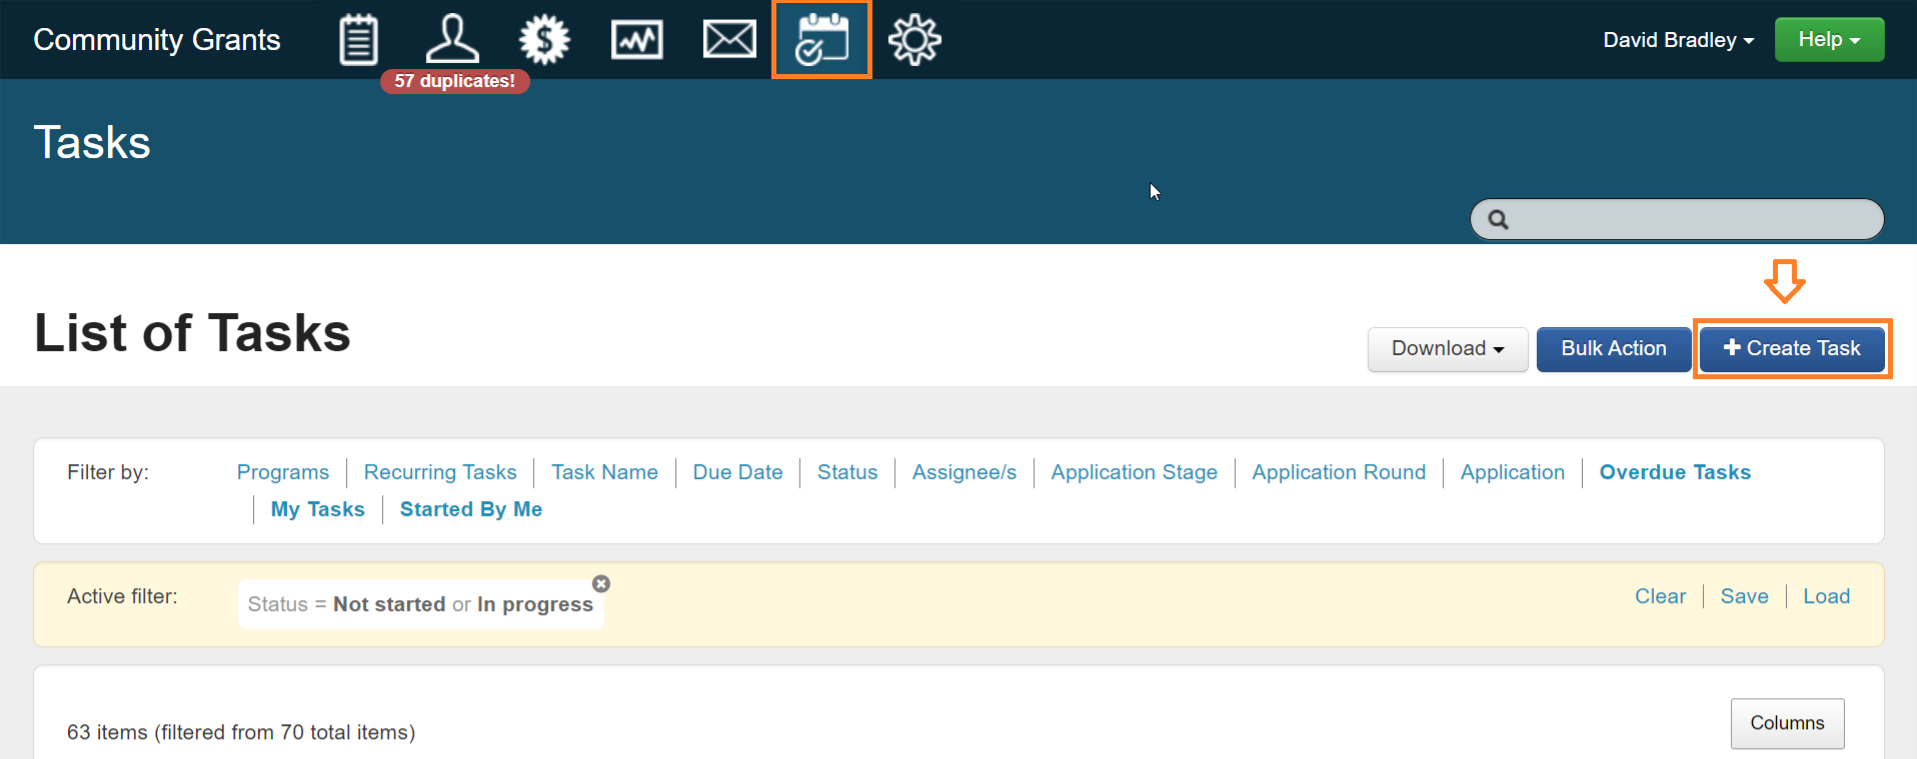
A task creation window will appear. Select your relevant options and then click on 'create task'.
Note: You can only create once-off tasks via the tasks icon. To create recurring templates, you will need to click into the workflow tab of the relevant program.
3. On an individual application
Navigate to an application you wish to crate a task for
On the right side application side panel, you will see Tasks listed. Click on the 'create task' button
A task creation window will appear. Select your relevant options and then click on 'save'.
The task will then be listed on the panel, and also under the task tab on the program.
Whilst on the application, you can change the task status, edit and view details by clicking on the drop arrow next to the task.
4. Bulk Action
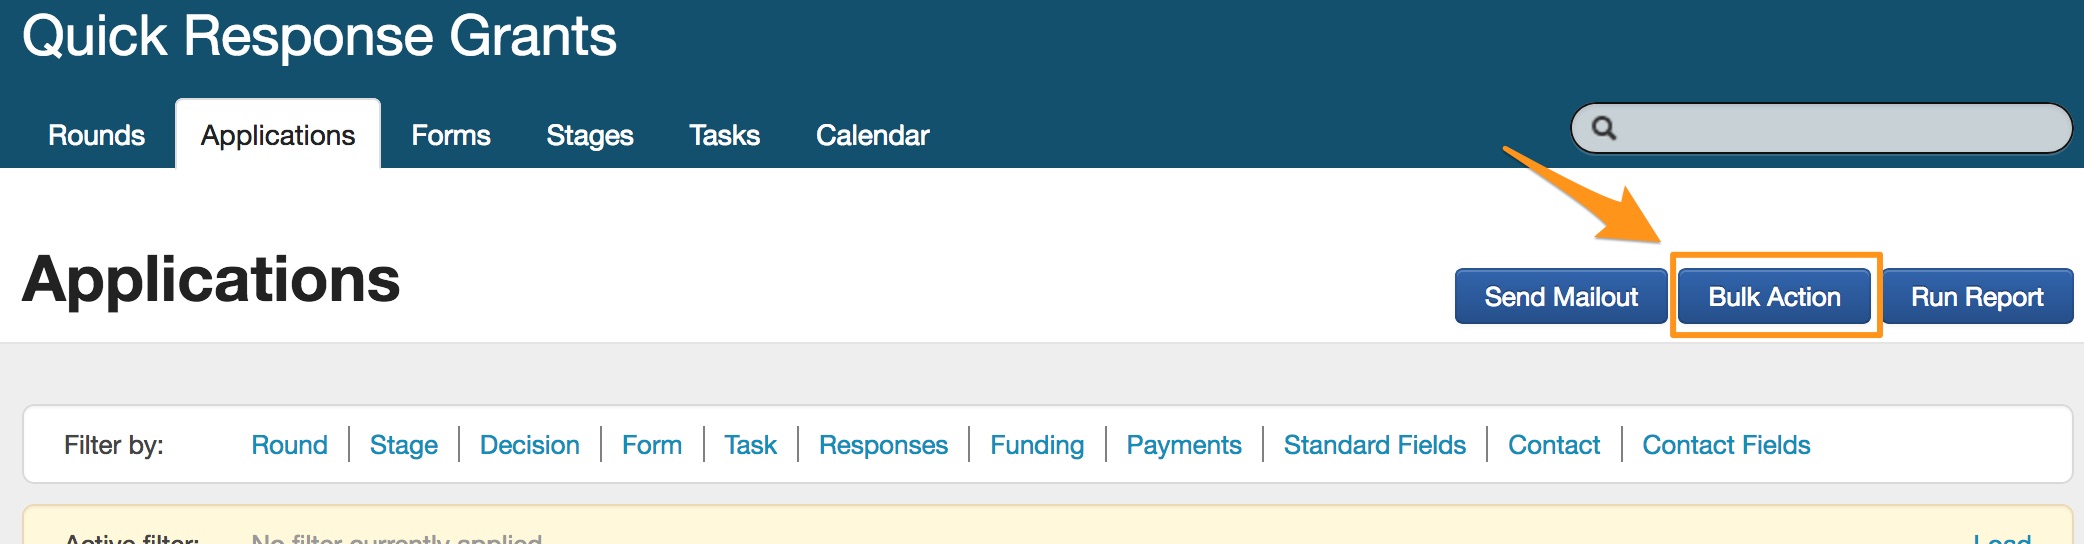
Once-off tasks can be added in bulk on the applications tab.
Navigate to the applications tab and apply the relevant filters to get the set of applications you require.
Click on the 'bulk action' button on the top right of the filters
Follow the relevant steps
Managing Tasks
Task Icon
Tasks can be managed either across all programs via the tasks icon, or at a program level via the tasks tab.
The tasks icon allows you to manage tasks across multiple programs by viewing tasks across different programs or filtering by tasks that are assigned to you. This will give you quick access to view, edit and access tasks. You can also create once-off tasks from this icon.
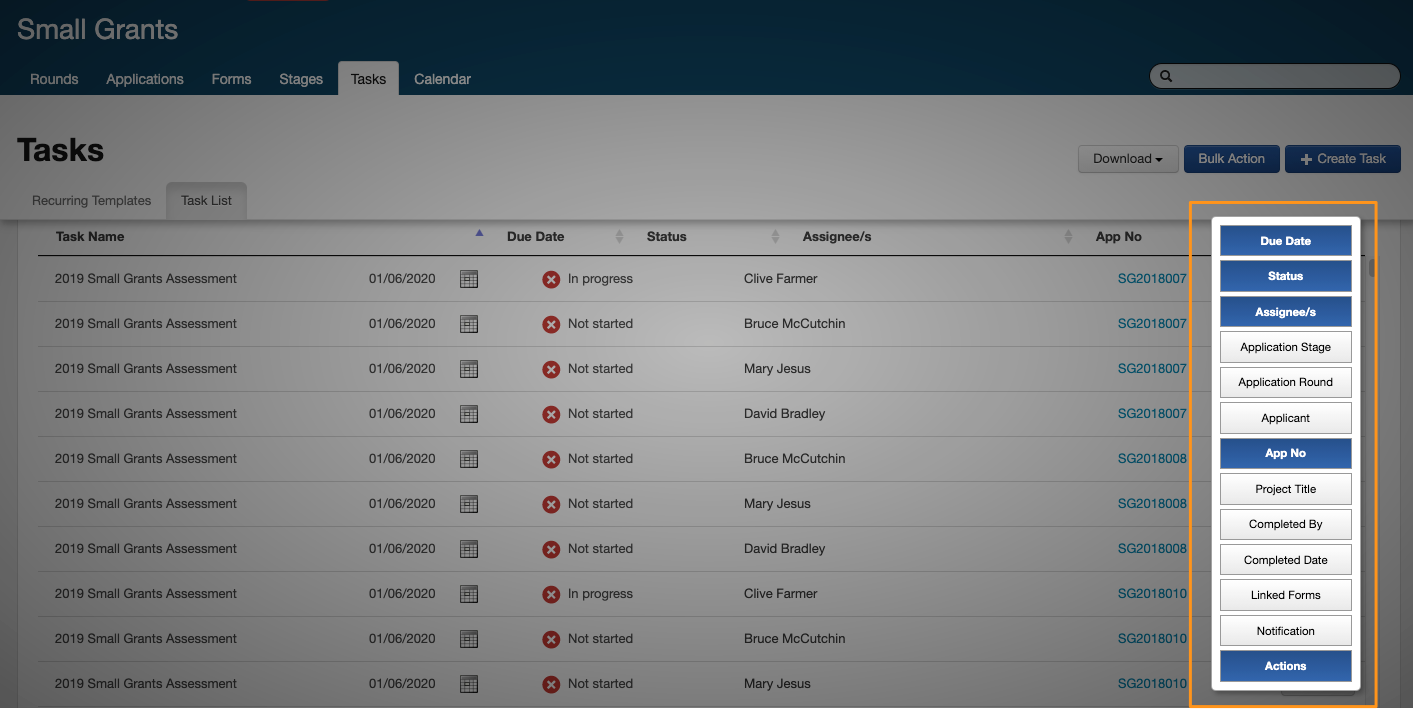
There are some additional column headings available by selecting Columns to the right of the list of tasks. These include:
Application Stage
Application Round
Applicant
Project Title
Completed By
Completed Date
Linked Forms
Task List
All tasks are listed in the tasks tab under 'Task List'.
Tasks can be edited within each row on the task list. Update the task name, assignee/s, due date and status. Just click your mouse within the row and relevant column and update from there.

Select the options button on each task to delete, view or edit the relevant recurring template (if applicable) and you can view a linked application if relevant.

Bulk Actions
You can manage tasks via bulk actions in the Tasks Icon, or via the task list tab of a specific program.
Bulk Action in Tasks icon (account level)
Bulk Action on Tasks tab at program level
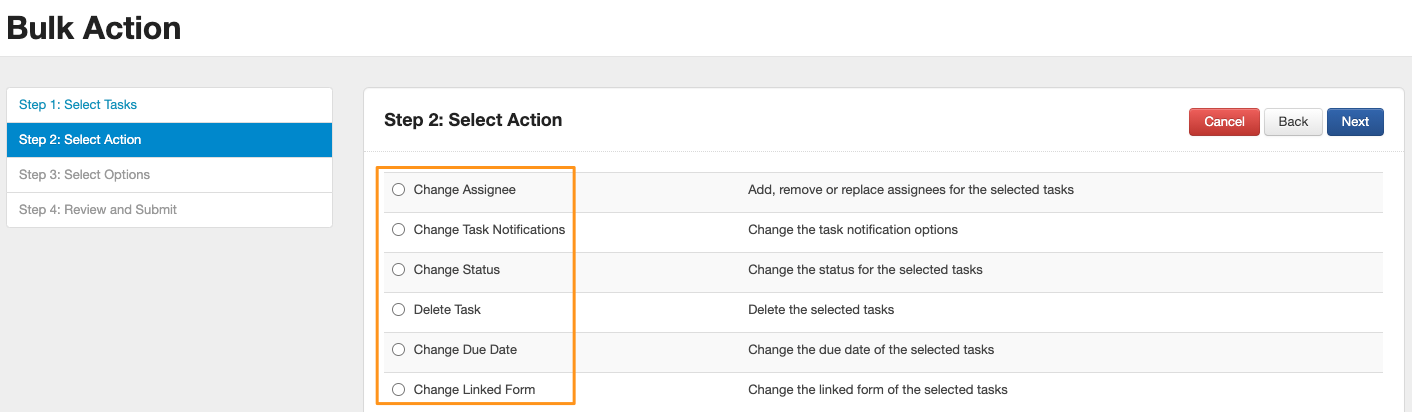
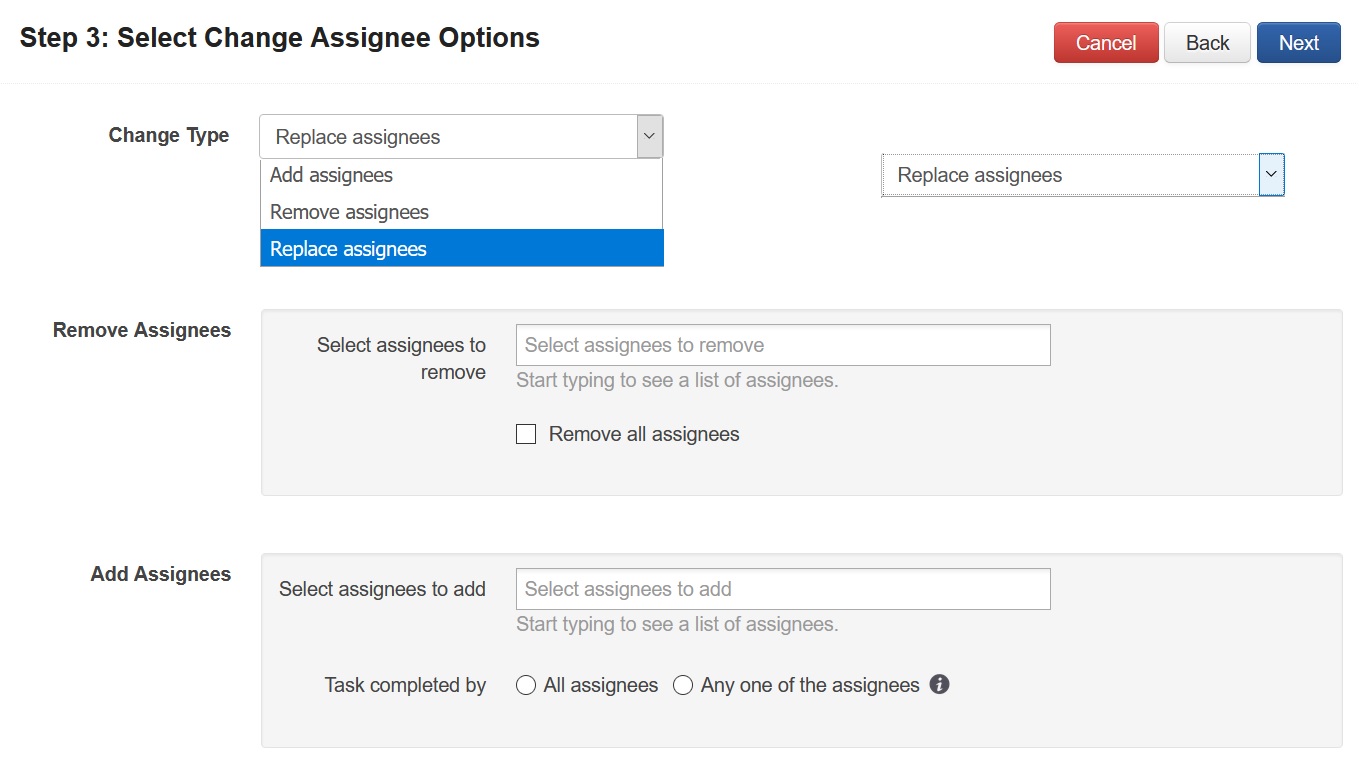
1.Change Assignee: you can add, remove, or replace task assignees in bulk. Replacing an assignee may be useful when a task assignee has left an organisation
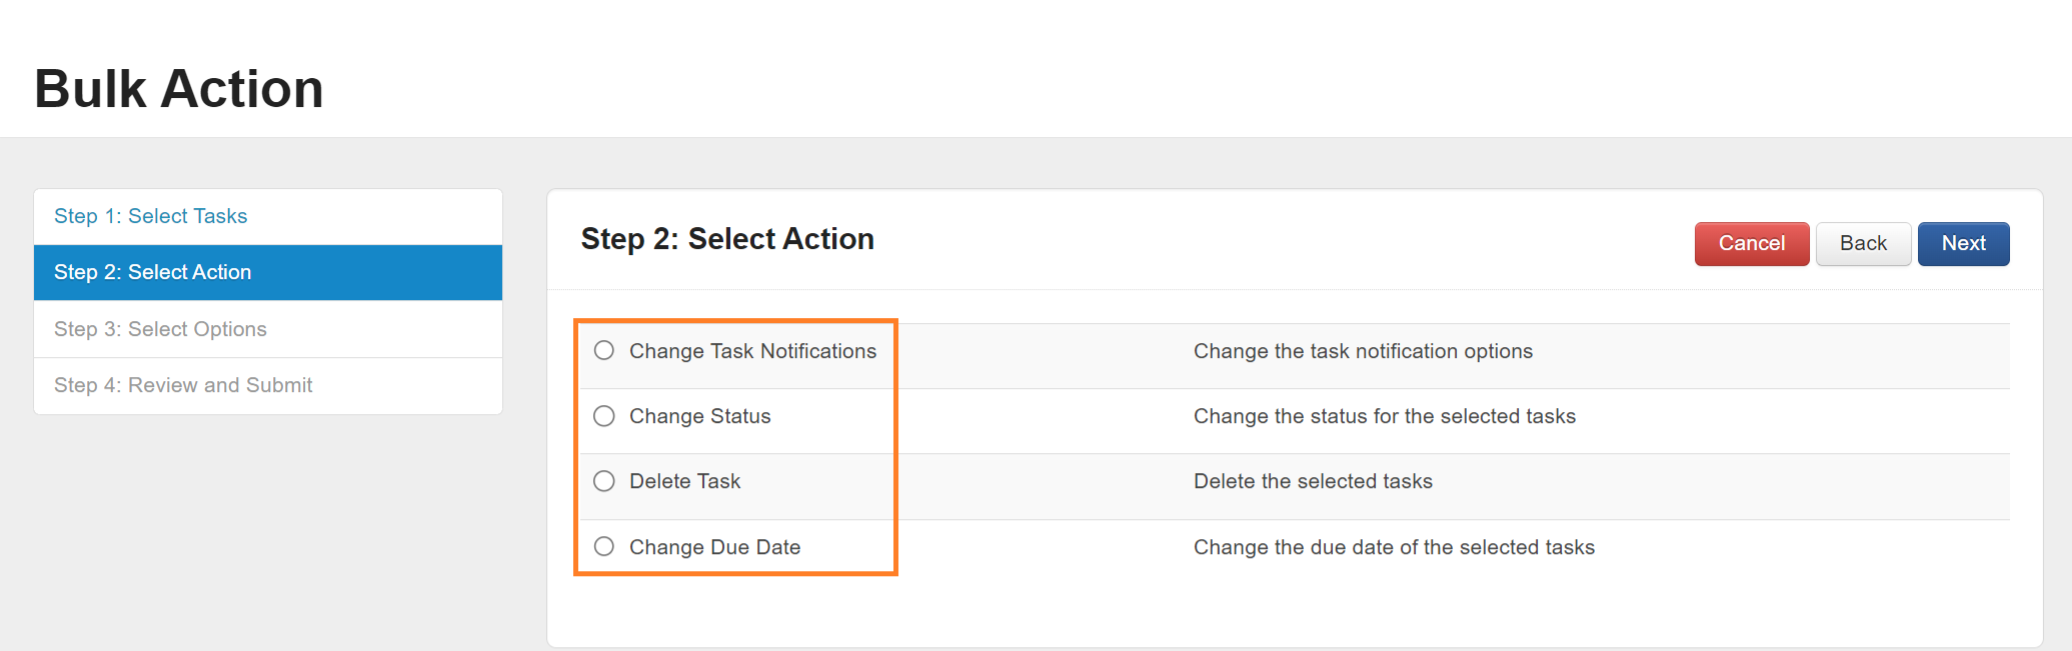
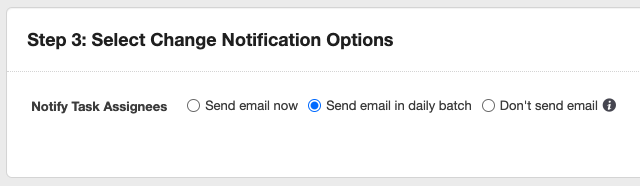
2. Change Task Notifications: you can change the way in which tasks are notified.
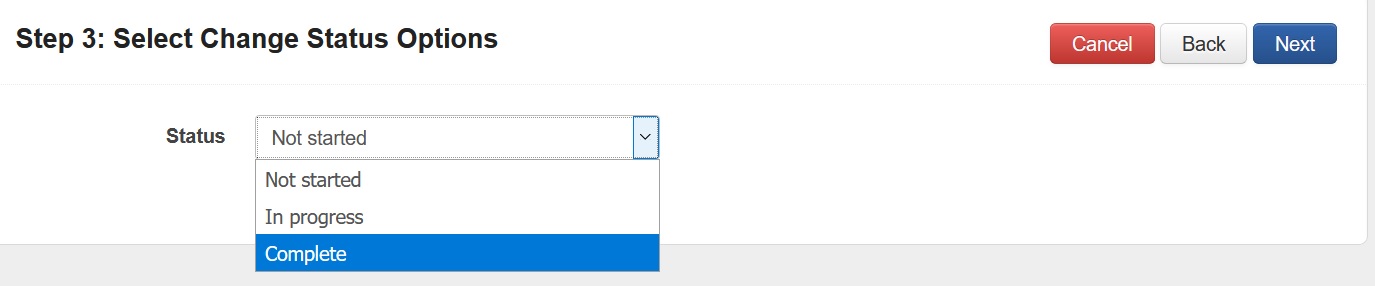
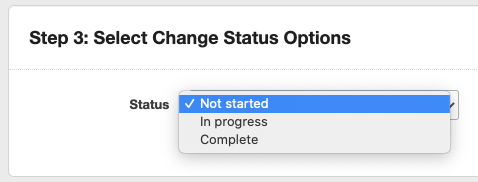
3. Change Status: You are able to change the status on tasks in bulk.
4. Delete Task: you can delete tasks in bulk. Deleting tasks in bulk might be useful to remove older tasks that no longer need to be kept in the tasks tab
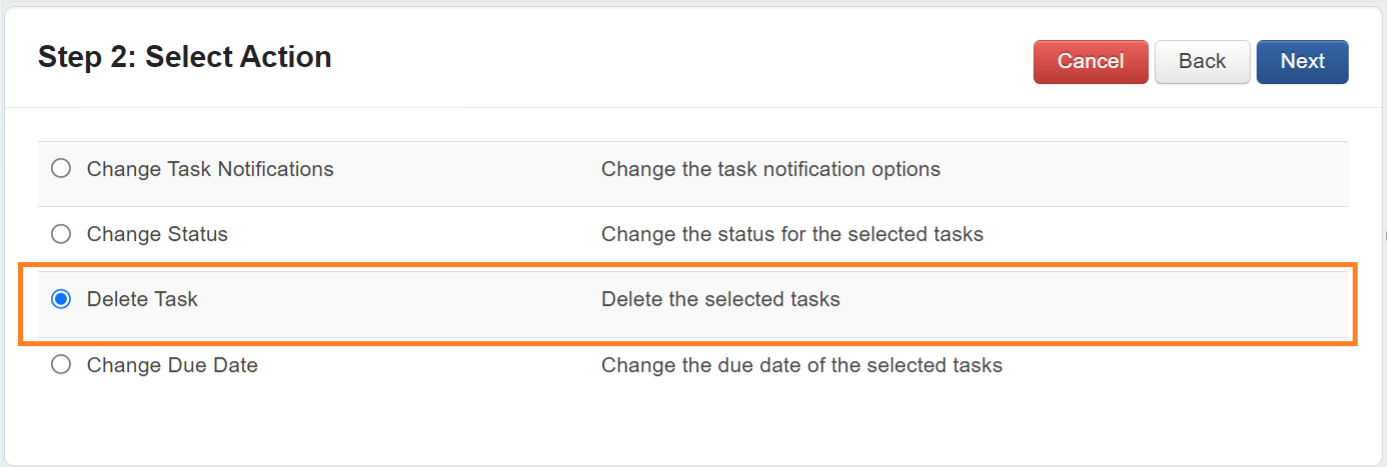
5. Change Due Date: you can change the due date in bulk to give assignees more time to complete their tasks. You can also choose to remove the due date by clicking the checkbox below the date field. Removing the due date may be useful when the deadline for multiple tasks is no longer applicable

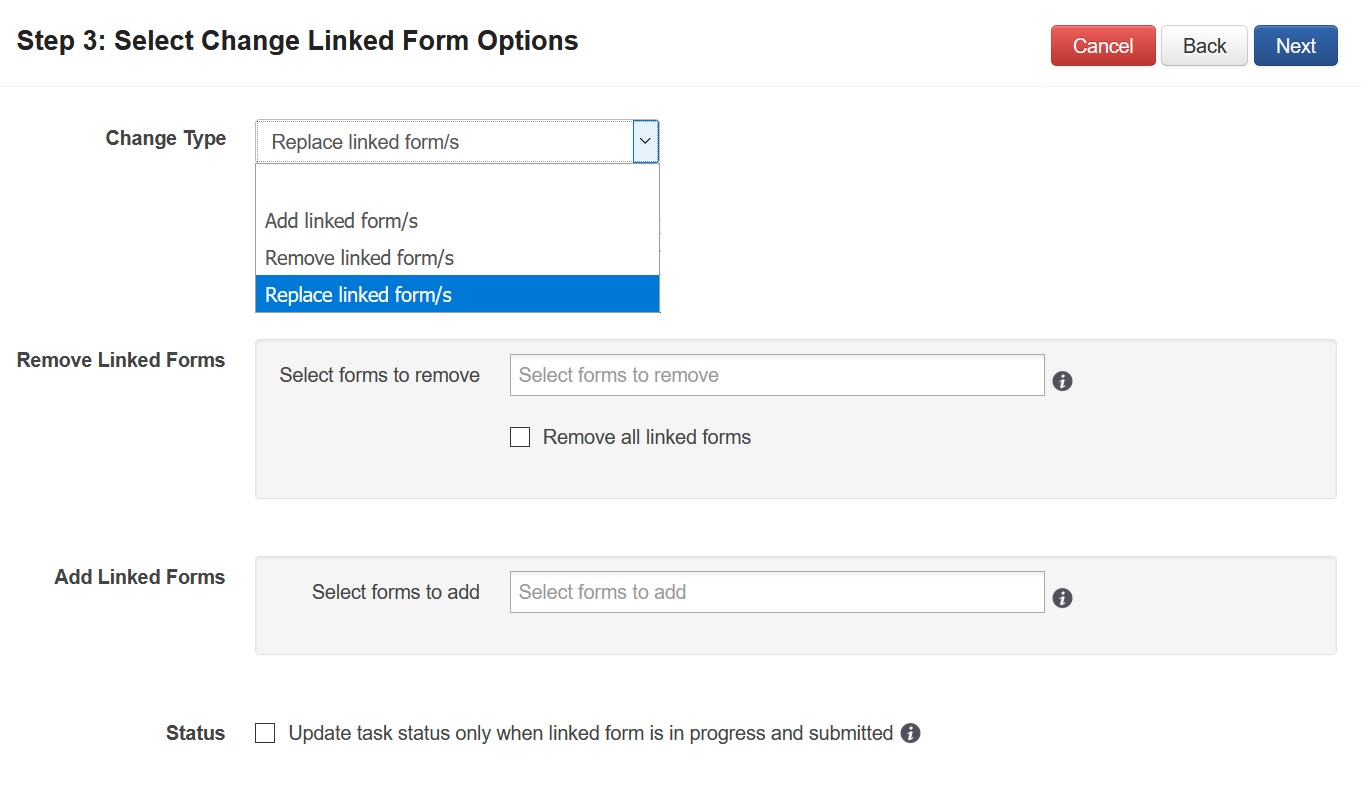
6. Change Linked Form: you can add, remove, or replace linked forms in bulk. Replacing a form may be useful when a change has been made to the form. Note that forms already added by an assignee will not be removed/replaced
Recurring tasks
Recurring tasks are an important component of workflow throughout the grantmaking lifecycle. A recurring task is a task that is created and assigned on the occurrence of an event in the system. For example, an application entering a particular stage, or a form being submitted.
An action can also be configured to take place upon the completion of a task to further automate application workflow. For example, to move an application into a subsequent stage.
You can create and manage recurring tasks on the Workflow tab. The below screenshot explains the format of the Recurring Tasks tab:
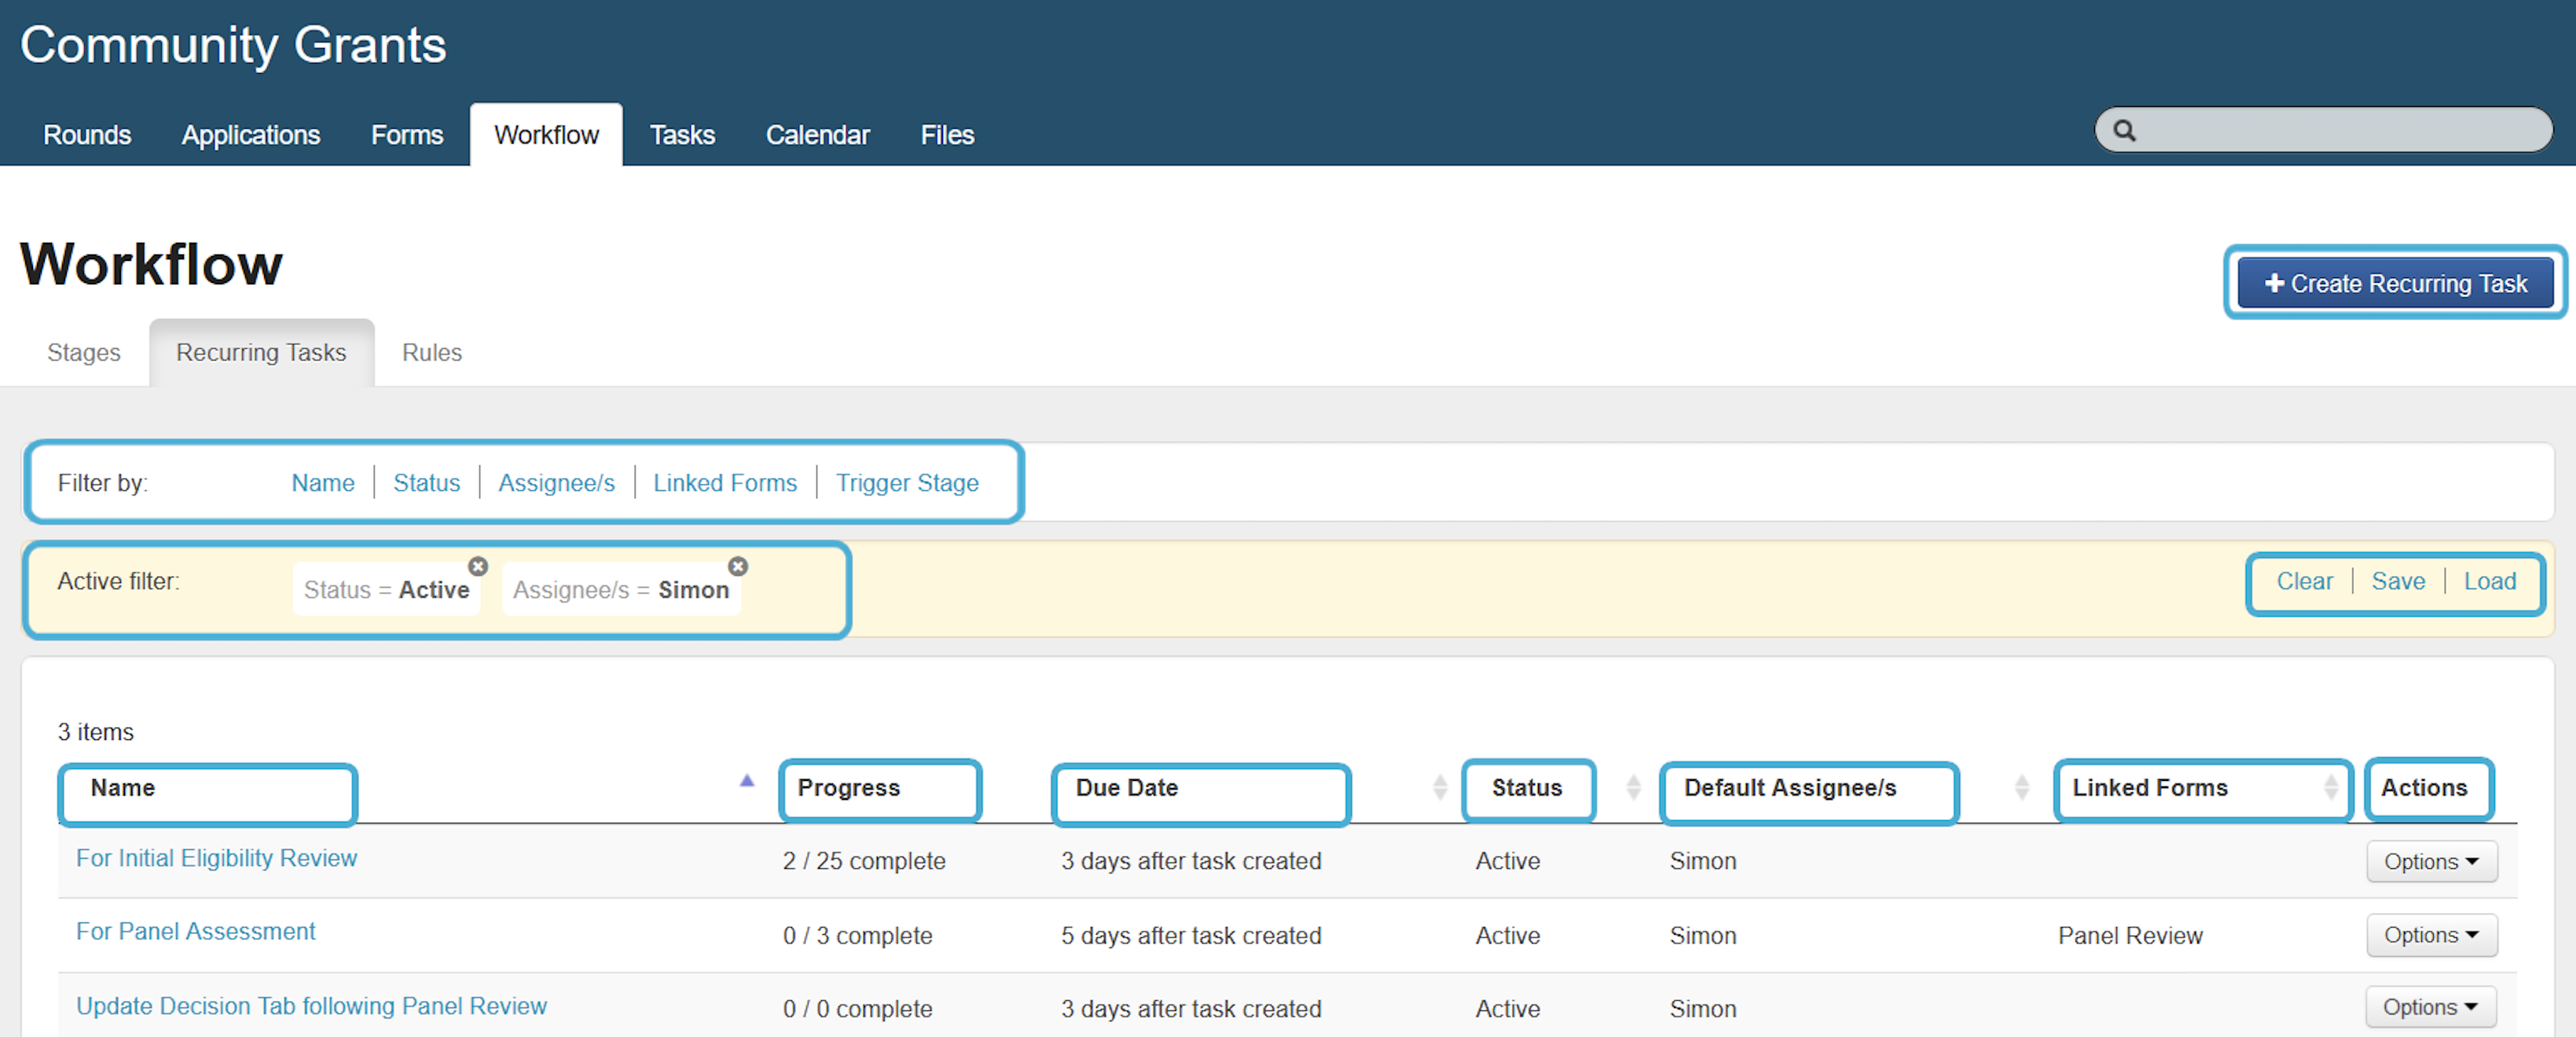
Name: the name of the recurring task. Selecting the name of one of the recurring tasks will open a list of all the tasks that have been created by it.
Progress: shows the number of complete tasks out of the total number of tasks created by the recurring task (e.g., 2/25 means 2 of 25 tasks created are complete).
Due Date: the due date of any tasks generated by this recurring task. This can either be a specified number of days after the task creation date or a specific date.
Status: the status of the recurring task, either active or inactive.
Default Assignee/s: which users the tasks are to be assigned to when created.
Linked Forms: which forms are available for assignees of the tasks created.
Actions: see editing, deleting, or deactivating a recurring task below.
Filter by:
Name: filter the list of recurring tasks by name (one or multiple).
Status: filter by status (active or inactive).
Assignee/s: filter by assignee (one or multiple).
Linked Forms: filter linked form (one or multiple).
Trigger Stage: filter by the triggering stage in the stages tab (one or multiple).
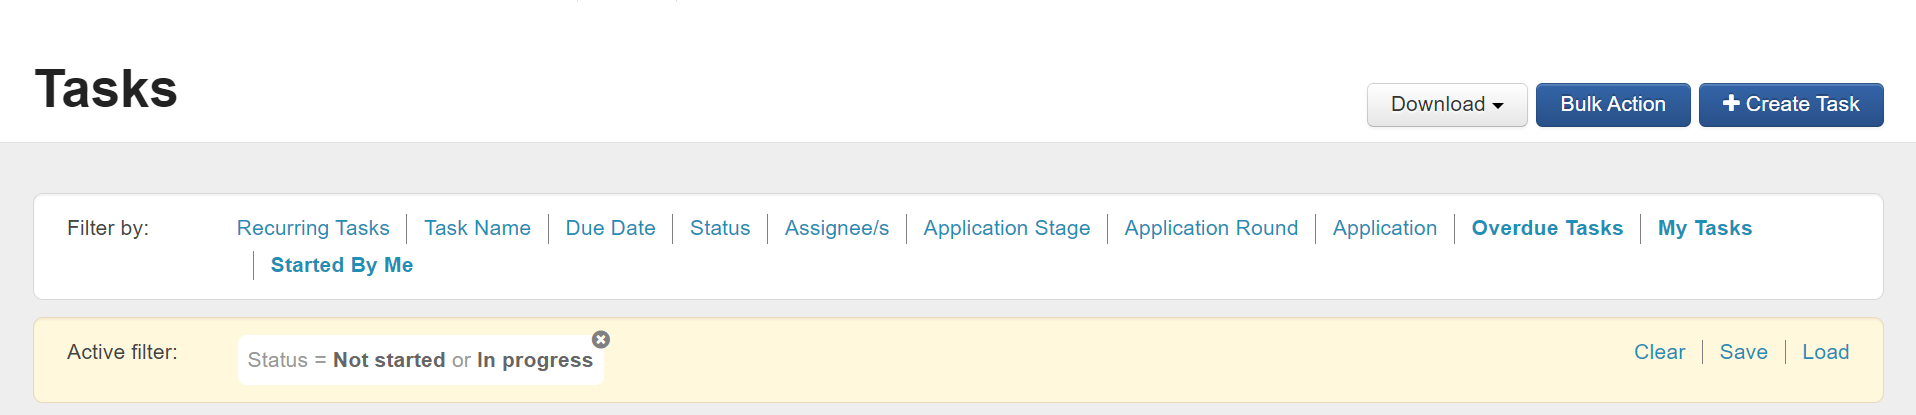
Active Filter:
Clear: to clear the currently active filter.
Save: if you regularly use the same filter, select save to save a filter only visible to you.
Load: this will list all previously saved filters so they can be recalled. You can also delete any previously saved filters from here.
Create Recurring Task: to create a recurring task. For more information, see the below section.
Creating a recurring task
The following functions are available from the Create Recurring Task menu of the Recurring Tasks screen:
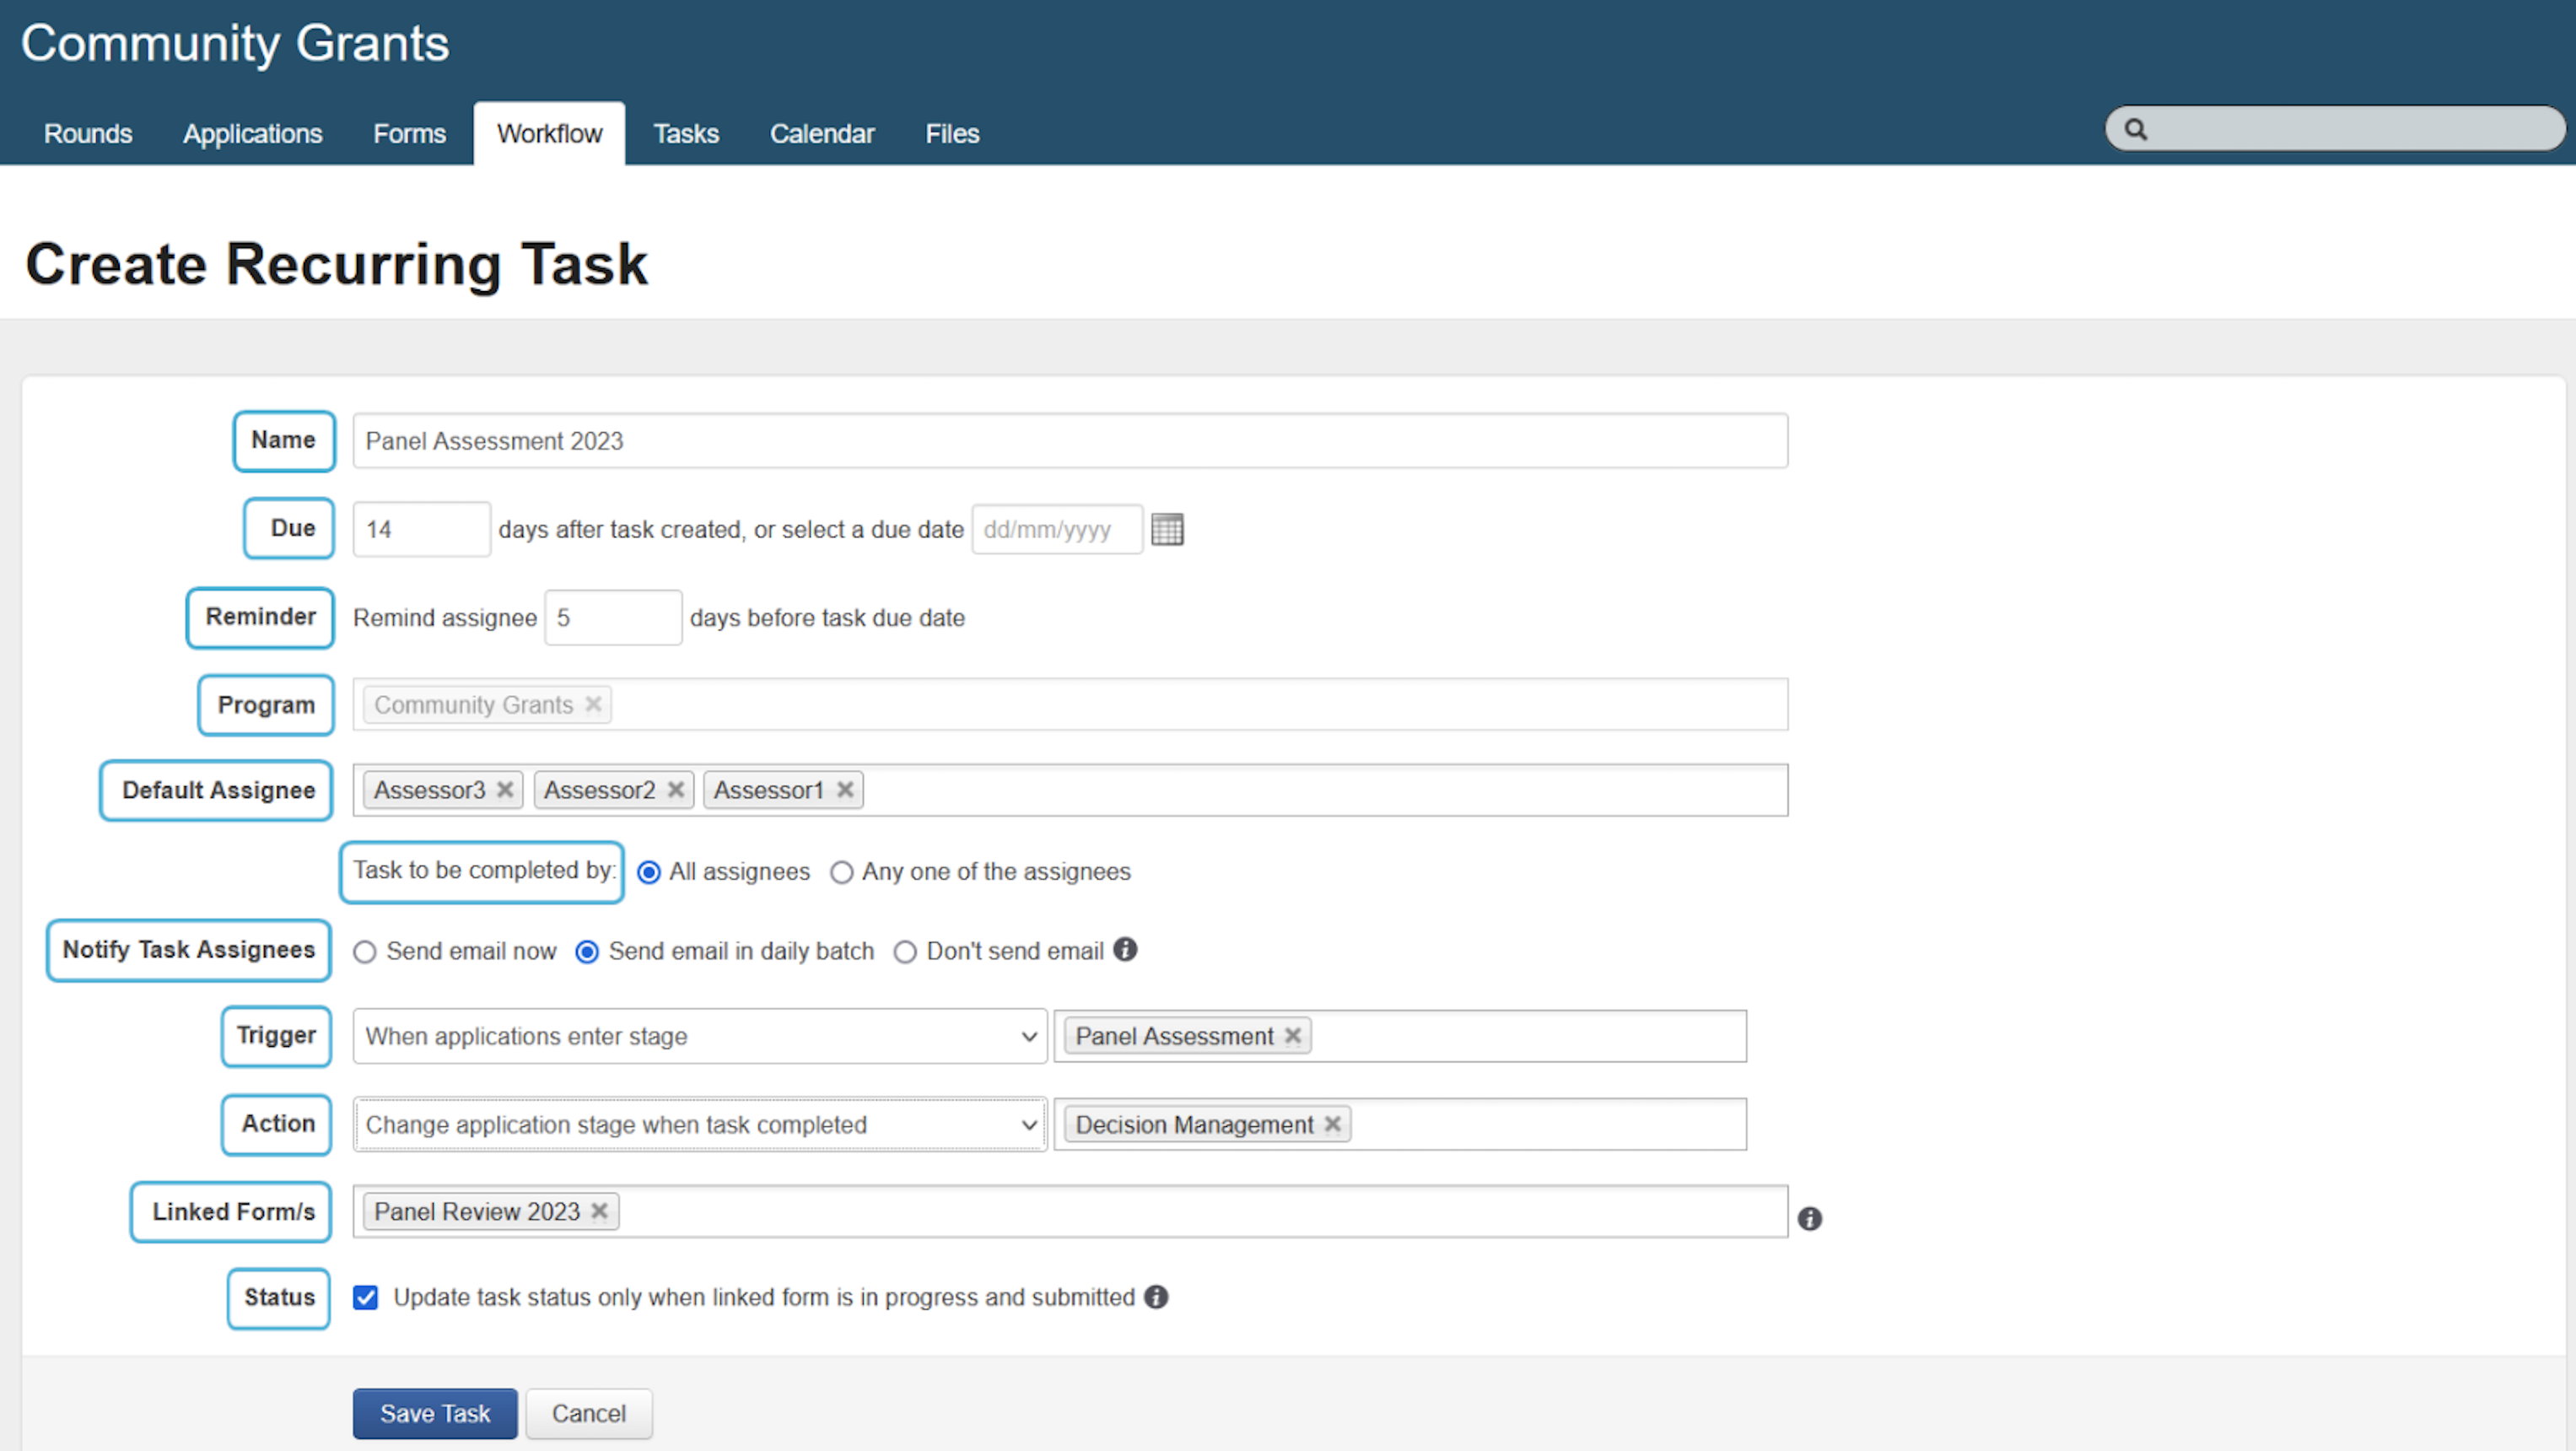
Name: the name of the recurring task.
Due: the due date of any tasks generated by this recurring task. This can either be a specified number of days after the task creation date or a specific date. Once the due date has passed, task assignees can no longer access the related application records. However, you can always extend the due date later if needed.
Reminder: the number of days prior to the task due date that a reminder email should be sent to assignees (only if the task is not yet completed).
Program: the program name.
Default Assignee: which users the tasks are to be assigned to when created. Select ✗ to remove individual assignees.
Tip: If you select the type of user (e.g., assessors) it will select all users of that type.
Task to be completed by: appears when you have selected more than one assignee. Options available are:
All assignees: creates a task for each assignee to be completed independently.
Any one of the assignees: creates a shared task for all assignees. When the task is in progress, the name of the assignee who updates the status or fills out a linked form will be highlighted.
Notify Task Assignees: there are three options available for task notification emails. Note that emails are sent when the task is created or the assignee on the task is changed, not when the recurring task is created:
Send email now: will send an email around ten minutes after the task is created or the assignee is changed.
Send email in daily batch: will include the task assignment in the batch email, which is sent automatically every day at 5:00am Australian Eastern Time.
Don't send email: will not send an email notification for any task creation or assignee change.
Trigger: there are three options available for triggering task creation:
When applications enter stage: triggers task creation when an application moves into a particular stage.
When applications enter stage (including those already in stage): the same as the first task trigger, except also applicable to applications already in the stage at the time the recurring task is saved.
Warning: Be careful using or editing and saving a recurring task with this option as it could cause duplication of tasks on applications already in the stage.

When form is submitted: triggers task creation when the specified form is submitted anywhere across the whole program. You may select one or multiple forms.
Task will be triggered by: appears when you have selected more than one form. Options available are:
All selected forms being submitted: requires all listed forms to be submitted before the recurring task is triggered.
Any selected form being submitted: requires any listed form to be submitted before the recurring task is triggered.
Info: Each time a form is submitted, it will trigger the recurring task, including where a form is reopened and then resubmitted.
Action: you can configure an action for the recurring task so that a particular event occurs on task completion. If you select Change application stage when task completed and specify a stage, the application will move to that stage when the task is completed.
Info: This action cannot be reversed by changing the task status (i.e., reverting the task status from complete will not move the application back to its previous stage).
Linked Form/s: where assignees are required to fill out a form while they are completing their task, linked forms can be specified. These forms will need to already exist in the forms tab. Specifying linked forms is optional if you only require assignees to view the applications. For an assessment task, you would normally link an assessment form that the assessor is able to add to the application to fill out and submit. Assessment and administration forms can be specified as linked forms. You may select one or multiple forms.
Status (Update task status only when linked form is in progress and submitted): updates the task status to In progress when the assignee starts filling out a linked form, and updates it to Complete when they submit a linked form. Assessors are not able to manually update the task status. Regardless of whether this option is selected, other types of assignee can still manually update the task status:
Editing, deleting, or deactivating a recurring task
The following functions are available from the Options menu of the Recurring Tasks screen:
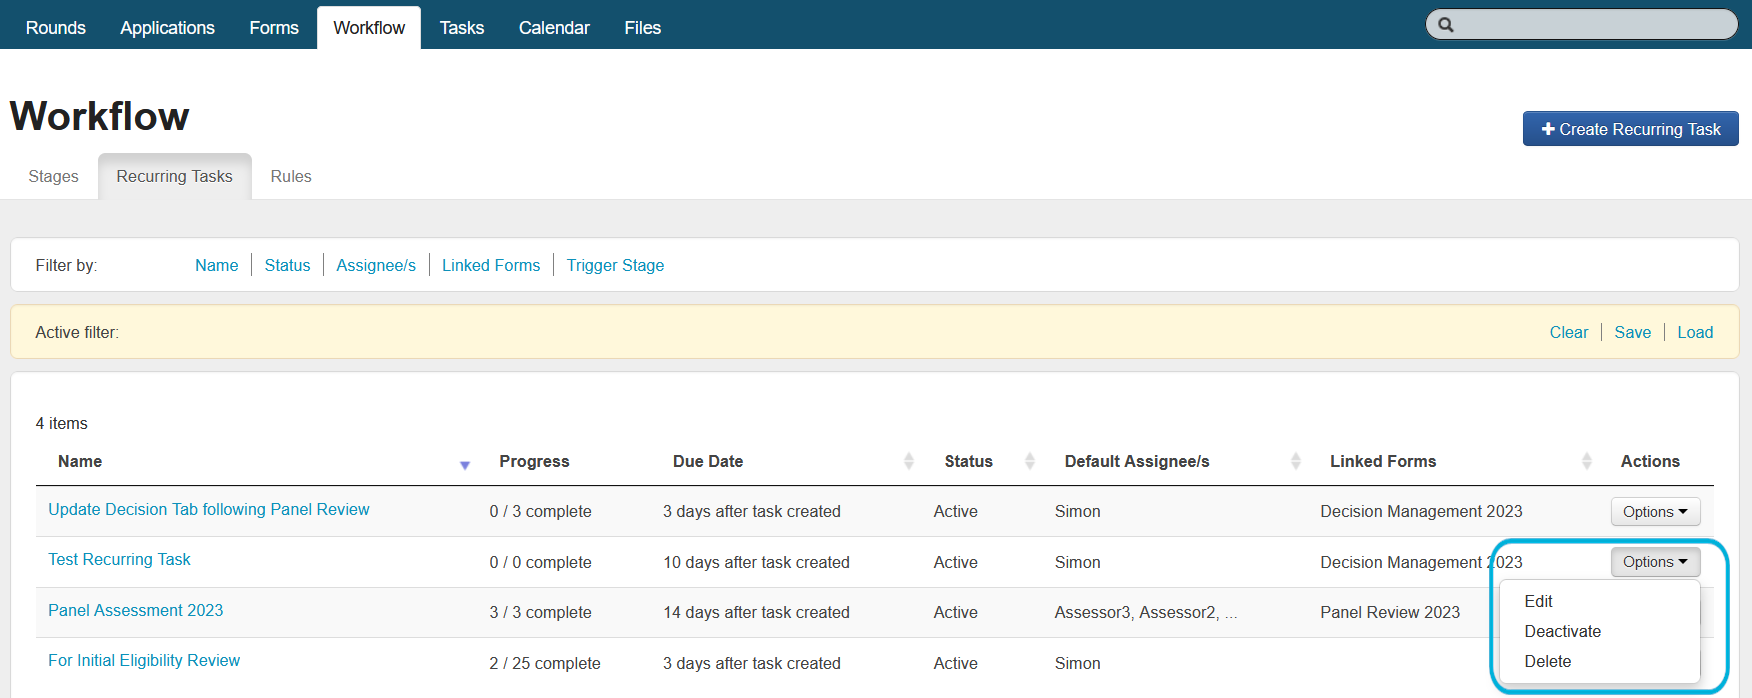
Actions (Options):
Edit: edit the existing recurring task to make changes for new tasks created (not any existing tasks).
Deactivate: after deactivation, no further tasks will be created. You can reactivate the recurring task any time.
Reactivate: after reactivation, tasks will again be created using the recurring task.
Delete: to delete a recurring task.
Info: You can only delete a recurring task if there are no tasks in the account that were created from it. In this case, you would first need to delete any associated completed tasks (which can be done individually or with a tasks bulk action). Alternatively, you can deactivate the recurring task.
Who can see tasks? Access Levels
There are 3 Access Types:
System Wide
Program Specific
No Access
Assessor access can be given at the 'Program Specific' and 'System Wide' access level. This allows program specific users who may be Program managers for one program to now be 'assessor only' for another. Assessors can only see tasks and applications where they have been assigned the task. You can select from:
Assessor Application Only
Access Application & Acquittal
See User Access for more information.
Assessor Only Note: when an Assessor Only logs into SmartyGrants, they are only given access to the applications (and optionally acquittals) which are linked to tasks that they have been assigned. You can only assign tasks to an assessor within a program to which you have given them access. Tasks and their associated application are visible to an assessor until one day past the due date (if complete), if incomplete the task will be listed, however, the application will not be viewable.
Do I have to use tasks for Assessment?
'Assessor Only' users will only see applications that they have been assigned tasks on. So at a minimum you do need to use tasks to allow 'Assessors Only' to view and complete assessments.
Please see Assessment and Assessors
Putting it all together
Lets look at some examples of how you might use tasks in your process:
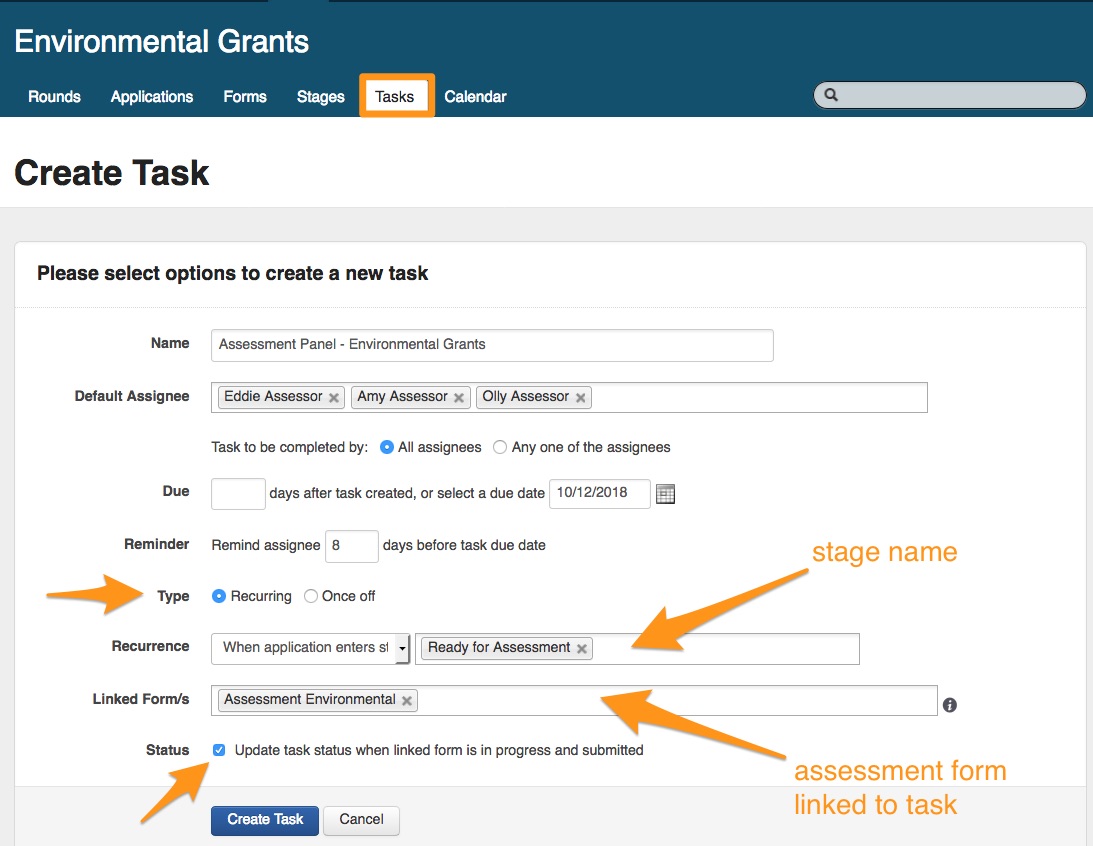
Example 1
Panel Assessment example: In this example I have created an Assessment Panel task with 3 assessors assigned to the task. In this scenario I need all 3 assessors to complete this task. I will specify that I want the Task to be completed by the 10/12/2018 and I want the assessors to be reminded by email 8 days prior to that date. This will be a recurring task and I want this task to be triggered anytime an application enters the stage called " Ready for Assessment". I also want the assessment form to be linked to this task, so that the assessors all complete their version of the same form and I want the task status to be automatically updated when the assessor begins using the form and when the form is submitted.
The assessors have been added as System wide, Access Level: Assessor in Account settings (NB: only administrators of an account have access to add users), I have built my assessment form and I have created a stage called "Ready for Assessment".
With all that in mind this is what the task would look like:
Example 2
In this scenario I want to create a task for myself as a reminder to follow up with an applicant on an overdue acquittal, on a specific application. A once off task can be created either in the application itself or from the Tasks tab. In this example I am selecting 'Create Task' from the application.
This is what creating this once off task might look like:
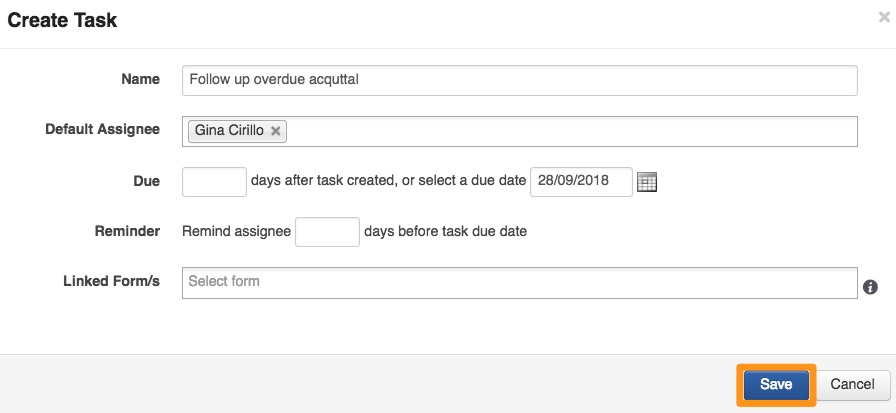
I can later manage this task in either 'My Tasks' from the top navigation bar or I can manage this from my Calendar or the Task List tab.

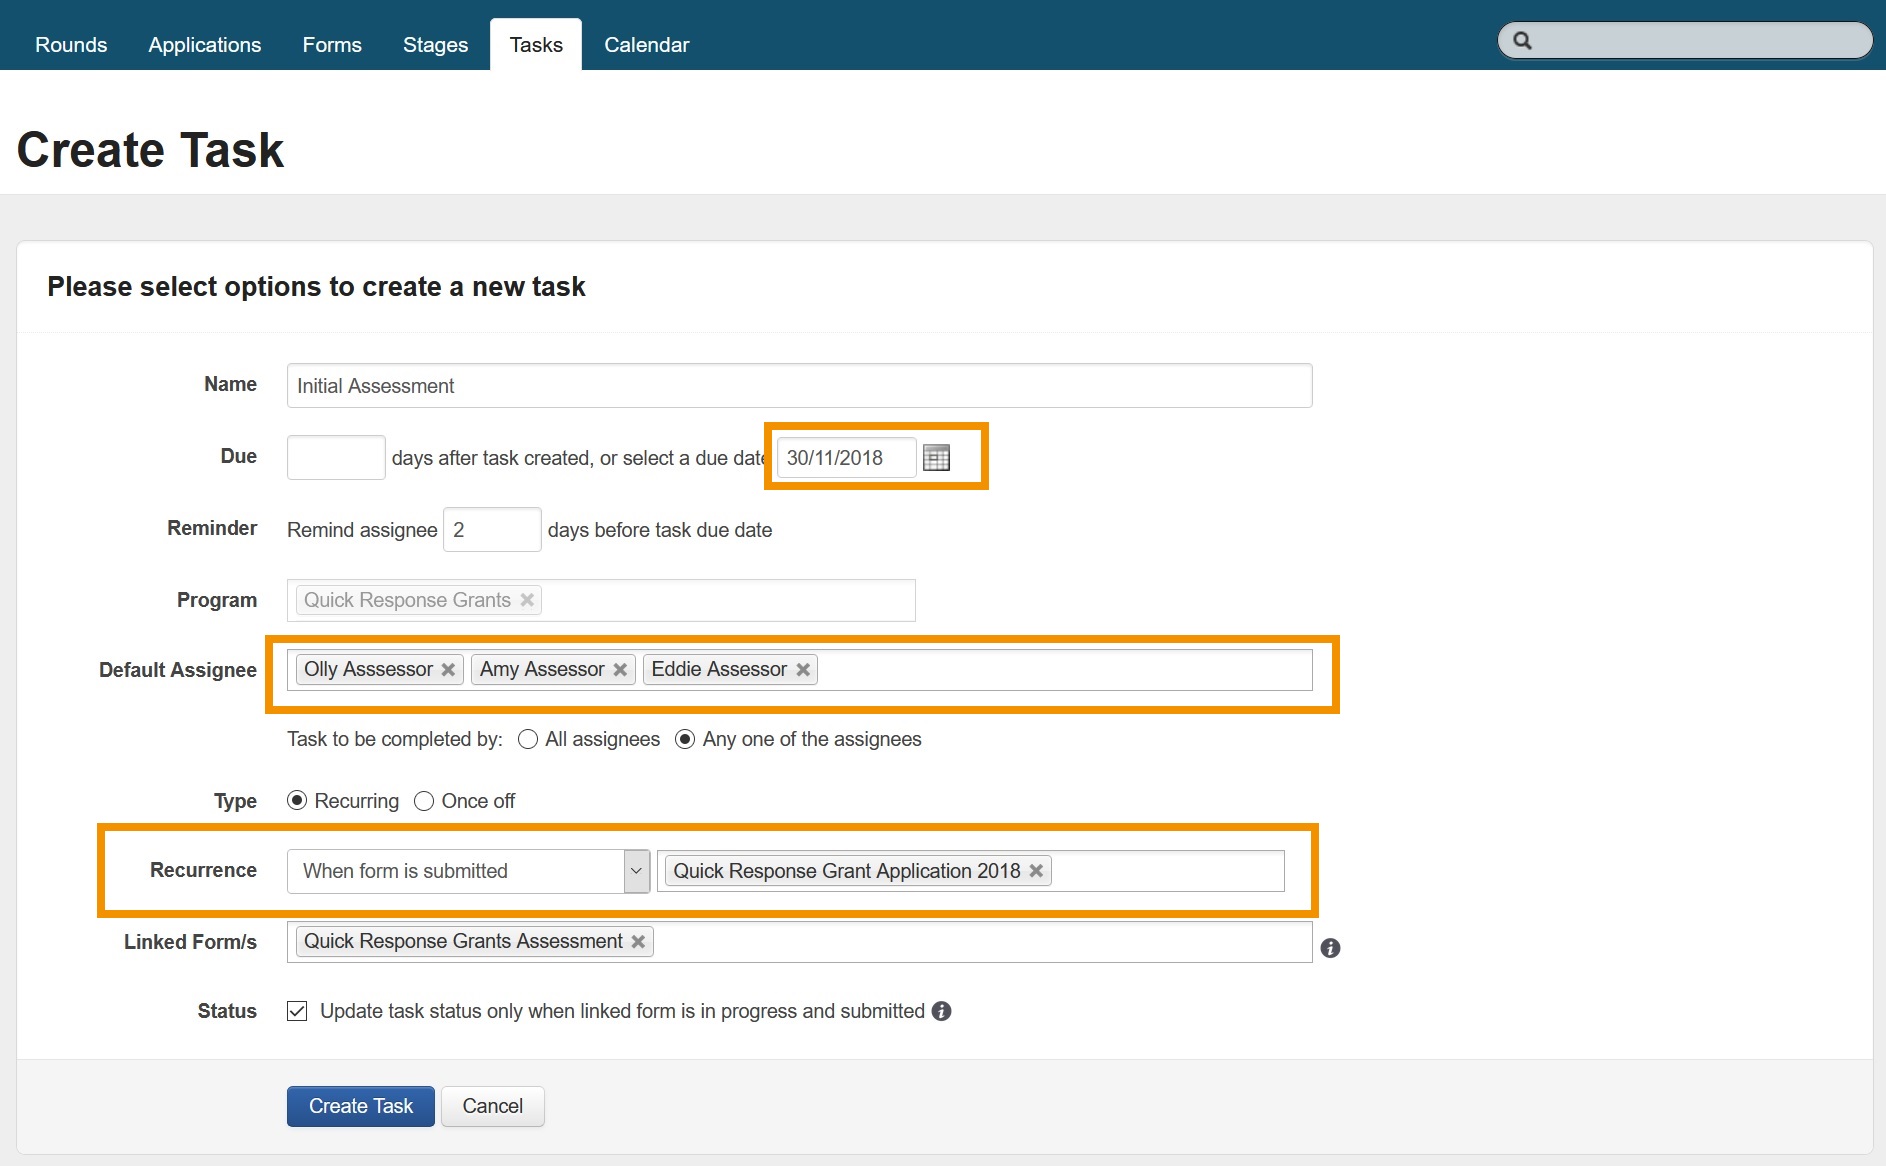
Example 3
In this scenario, my process is such that all newly submitted applications must be checked by the internal assessment team for eligibility. From the Tasks tab I have created a recurring task to be completed by any one of the three assessors. This task is triggered when the 'Quick response Grant Applications' are submitted. Either Eddie, Amy or Olly will be required to complete this eligibility task (using a form that I have linked to the task) by 30 November 2018. Once Eddie, Amy or Olly commence this task 'In progress' will display with the person's name highlighted so each Assessor knows who is working on that Task.
This is what the task template might look like:
This will remain in the recurring templates tab until an application form is submitted and the task is triggered.
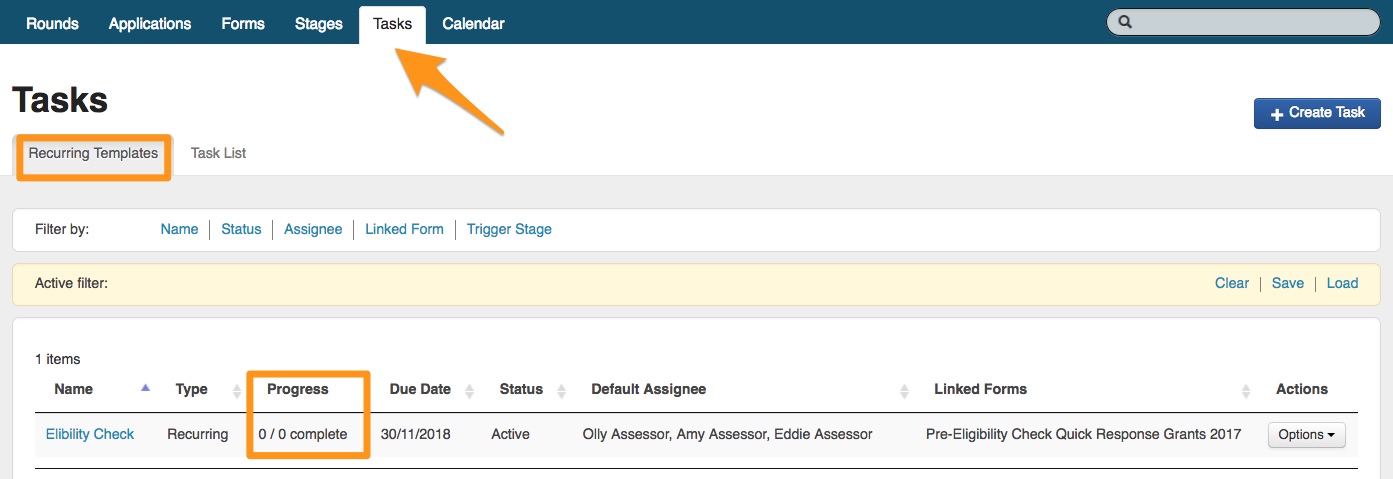
Once the task has been triggered (by the application form being submitted this task will be visible in the Task List tab. As you can see below the task has been triggered and Olly Assessor has made a start.