Run a report
Templates are used as the basis for running a report to extract data.
There are a number of default templates provided by SmartyGrants, however, new templates can be created and customised at any time to suit your specific needs.
Where can reports be run from?
There are a few areas reports can be run from depending on what type of template you wish to base the report on.
All template types can be run from the My Reports area and from within individual application records. This includes multi-program, single-program and contact templates.
Multi-Program templates can be run from the My Reports area and from within individual application records. However, a Multi-program reports can’t pull form response data.
Single-Program templates can be run from the relevant Program Application List tab, from the My Reports tab, or from within individual application records.
Contact templates can be run from the Contact Directory page, the My Reports area, or from within individual contact cards.
Info: The Round Snapshot Report is designed as a quick, handy report that pulls all application data specific to a round. There are two versions available: one for submitted applications, and one for unsubmitted applications. See Round Snapshot Report to learn more.
Table of Contents
Run a report from…
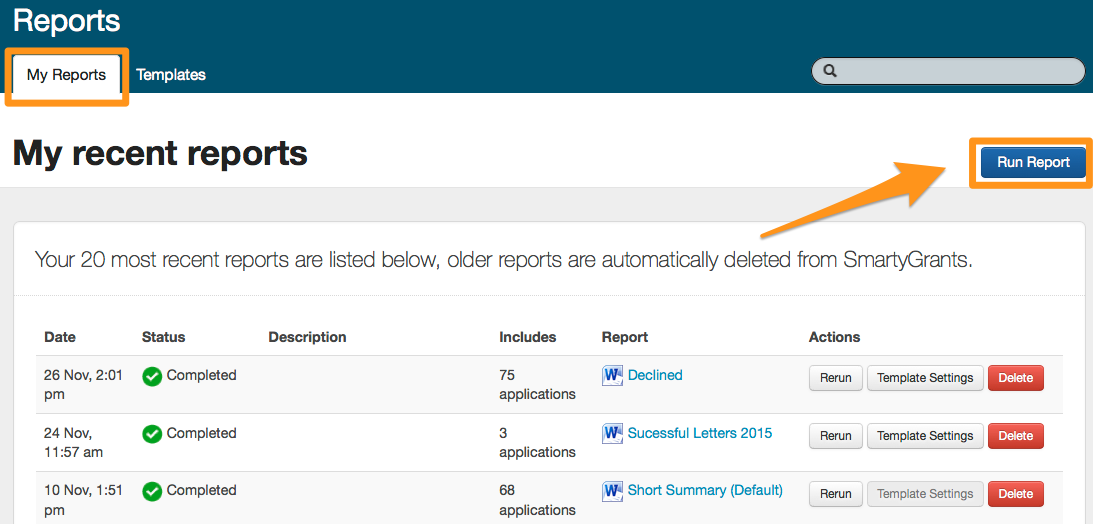
My Reports
Select the Report icon at the top of the screen.

Then, select the Run Report button.
Step 1: Choose Report Type
When running a report, you’re required to select the report type you would like to create.
The system will default to Application Based. Should you wish to create a report based on contacts, select Contact Based instead before selecting Next. The key differences between these two types of reports are outlined further below.

Application Based: Application based reports are based on applications in one or more grant programs. This reporting type choice will allow you to select either a single-program or multi-program template.
Contact Based: Contact based reports source their information from contact records from the Contact Directory area, including any related grant involvement information. This reporting type choice will allow you to select a contact template.
Step 2: Filter Items
You should now apply filters to your report to ensure you are capturing the correct applications or contacts you require in your report before selecting Next. You can apply as many filters as you wish. See View and filter applications for more information.
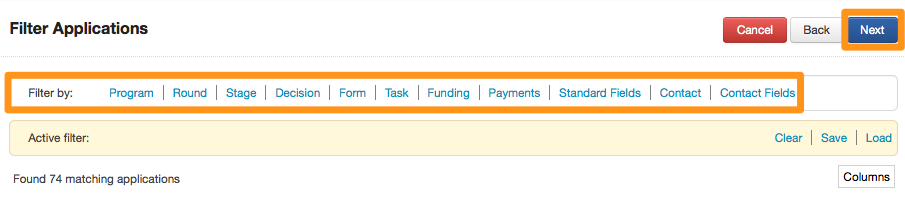
Filter Options | Filtered by | Tip |
|---|---|---|
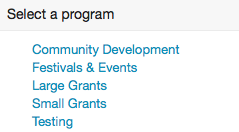
Program | you can select from one or several programs within your account | If you are using a Multi Program Template you can select more than one program. If you are using a Single Program Template you would only choose one. |
Round | round applications were submitted through | Rounds will be available for selection dependent on the program/s you have chosen in the previous filter |
Stage | stage applications are currently assigned to | |
Decision | status and date | |
Form | any particular type of form submitted and apply dates | |
Task | task name, status and date | |
Funding | by financial periods, sources, budgets, total allocated amount - min/max, conditional funding flag | |
Payments | status, amount, paid date | |
Standard Fields | a response to any standard field, match any or all | |
Contact | a contact linked to applications by type, flag, tags, contact name, primary address, ABN status, DGR status or GST | |
Contact Fields | any custom contact field categories and fields that may have been created in your account |
Tip: If you have a ‘favourite' set of filters you use all the time, you can also save them - meaning you don’t have to rebuild the same filters each time you log in. See Save/load filter set for more information.
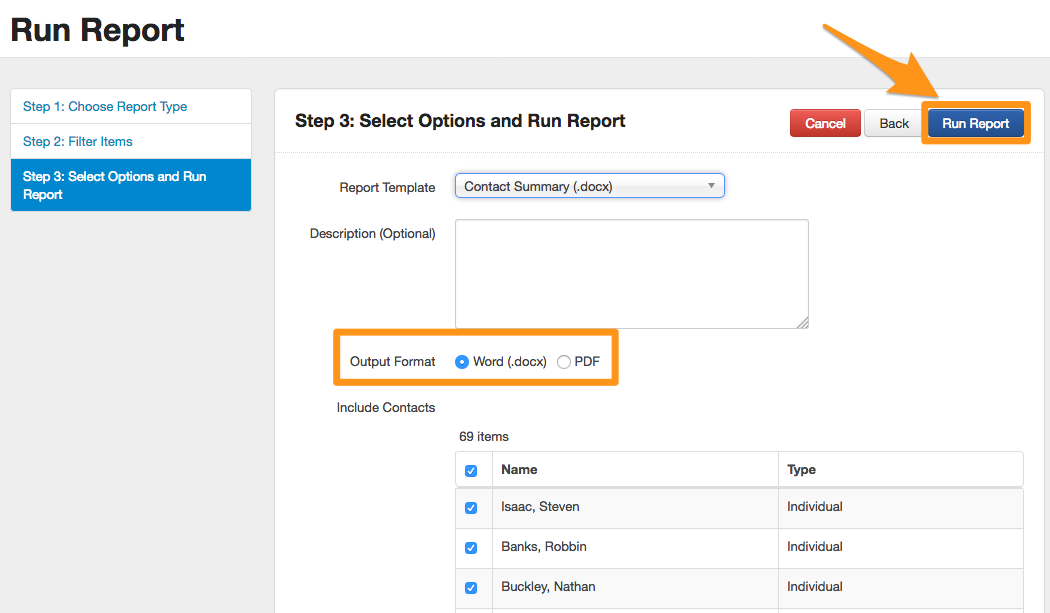
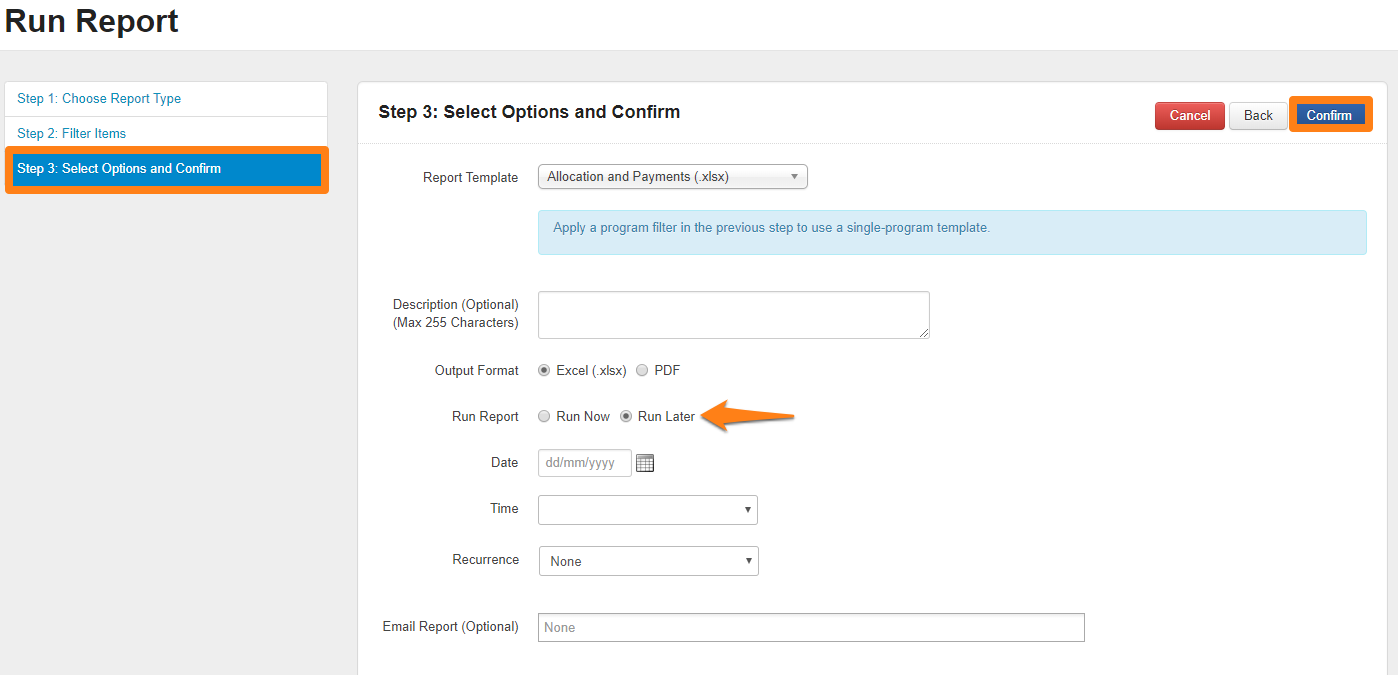
Step 3: Select Options and Run Report
In the next screen, you’ll be prompted to choose a report template and further refine what you’d like to run.
Important: If two or more programs have been selected in the filter options from the previous step, single-program templates will not be visible in the Report Template drop-down list.
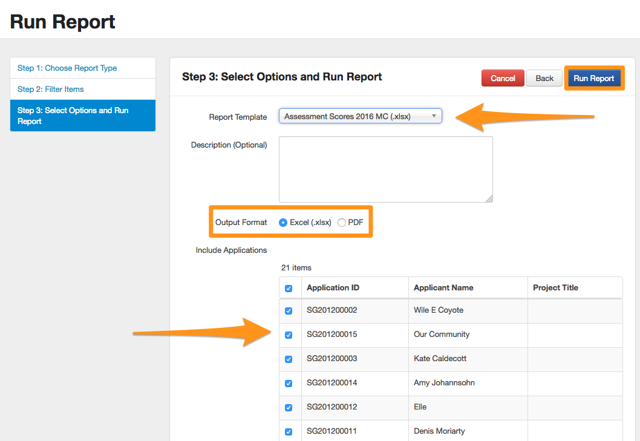
Report Template: You can either select a default template, or select a template you've already created from the drop down list. If you haven’t created a template yet, see create reporting template for more information.
Description: A description is optional, but can be beneficial if you’d like to explain why you’ve run this report at this time.
Output Format: You can select the output format of the report - either as an Excel file, a Word doc, or PDF.
Include Applications: If required, you can also de-select/re-select individual applications by un-ticking/re-ticking the boxes next to the application ID(s).
When you’ve made your selections, select the Run Report button.
The report will be added to the report queue and will be processed as soon as possible. While the report is generating, the My Reports list of reports will refresh every 8 seconds until the report is completed.
To return to your filtered list of applications/contacts, click on the link in the confirmation box or select the Back button.
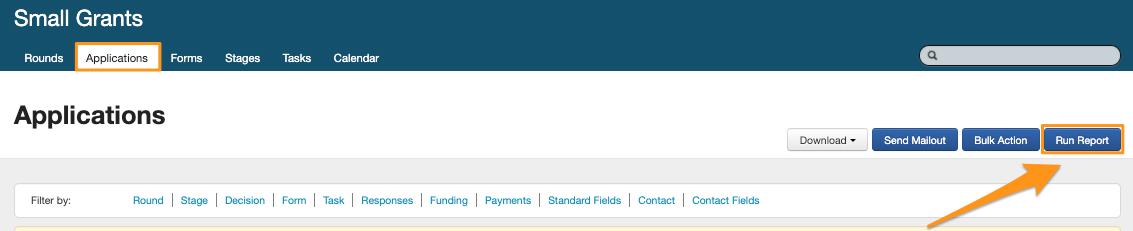
Program Application List
To find a list of all applications for a program, you can either:
Hover over the Program icon at the top of the screen, select the name of the relevant program, and then select the Applications tab, or
Select the Program icon at the top of the screen, select the relevant program name from the list of programs, and then select the Applications tab.

Now that you’re on the Applications list, you should apply filters so you can be sure to capture the correct applications you require in your report.
After you’ve selected your filters, select Run Report.
The report will be added to the report queue and will be processed as soon as possible. While the report is generating, the My Reports list of reports will refresh every 8 seconds until the report is completed.
To return to your filtered list of applications/contacts, click on the link in the confirmation box or select the Back button.
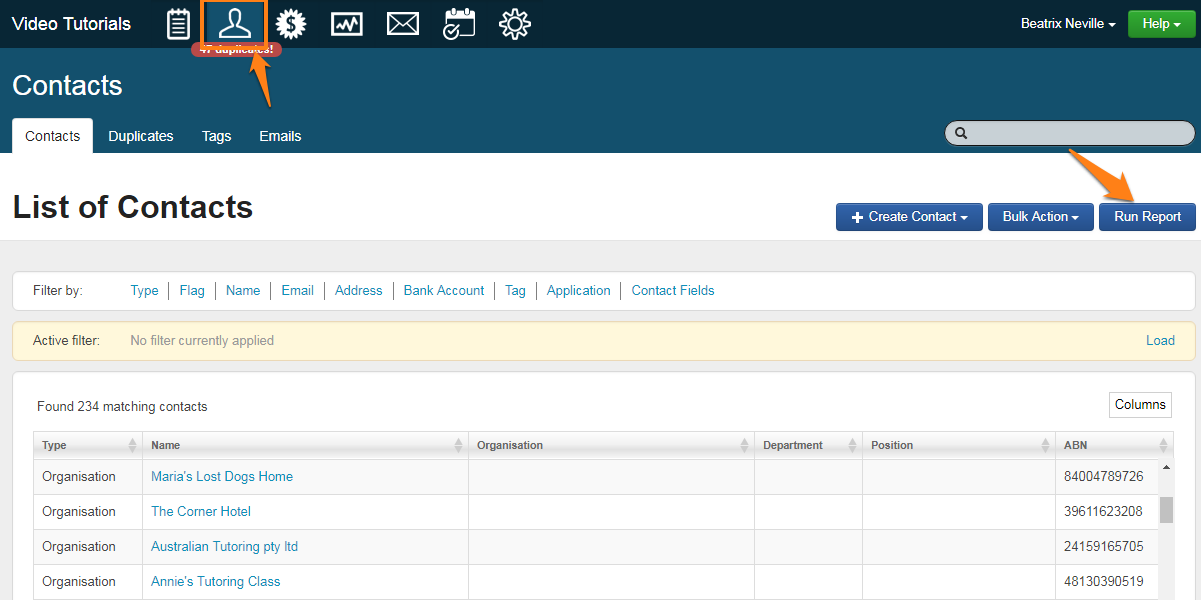
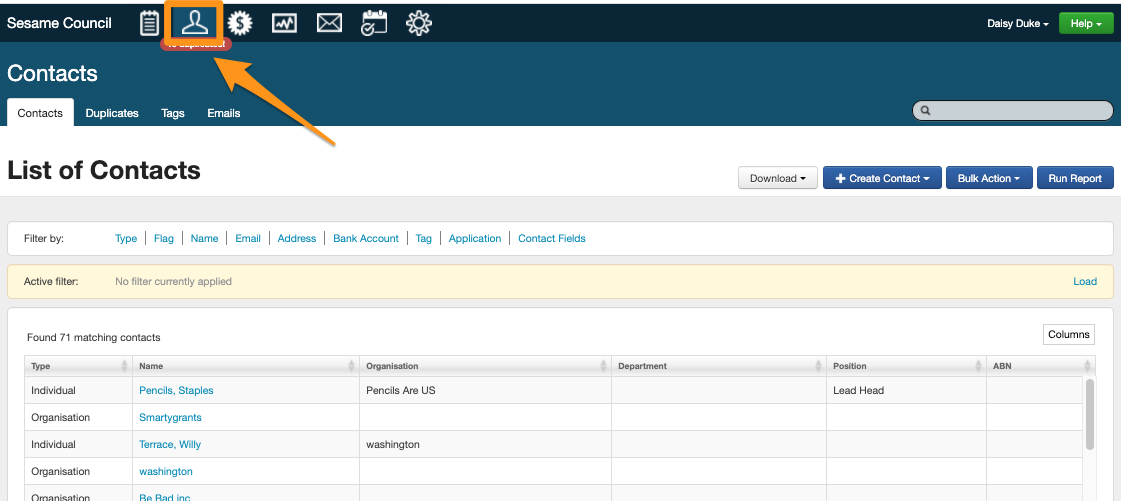
Contact Directory
Select the Contact icon at the top of the screen.

Now that you’re on the Contacts list, you should apply filters so you can be sure to capture the correct contacts you require in your report.
Once you’ve applied your filters, select the Run Report button.
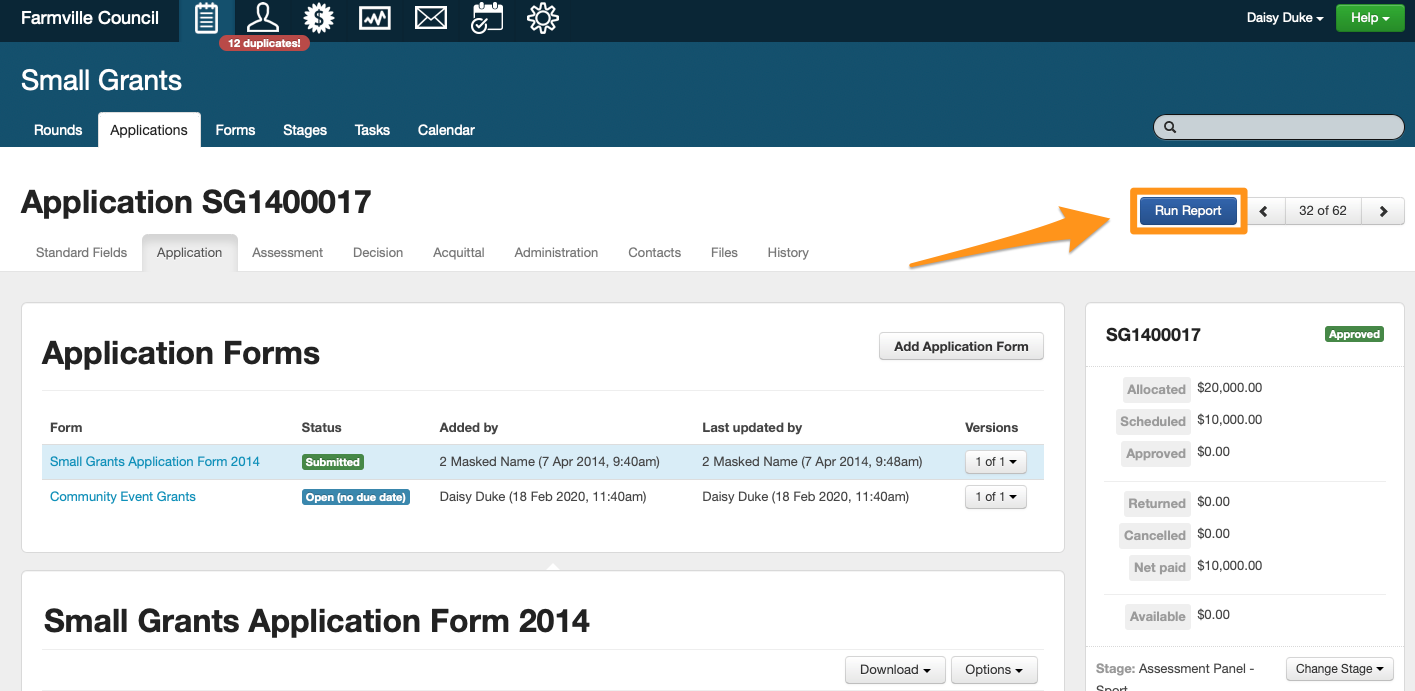
Individual Application record
To get to a specific application within a program, you can either:
Hover over the Program icon at the top of the screen, select the name of the relevant program, and then select the Applications tab, or
Select the Program icon at the top of the screen, select the relevant program name from the list of programs, and then select the Applications tab.
Then, select the application you want to report on by clicking on the Application ID hyperlink.
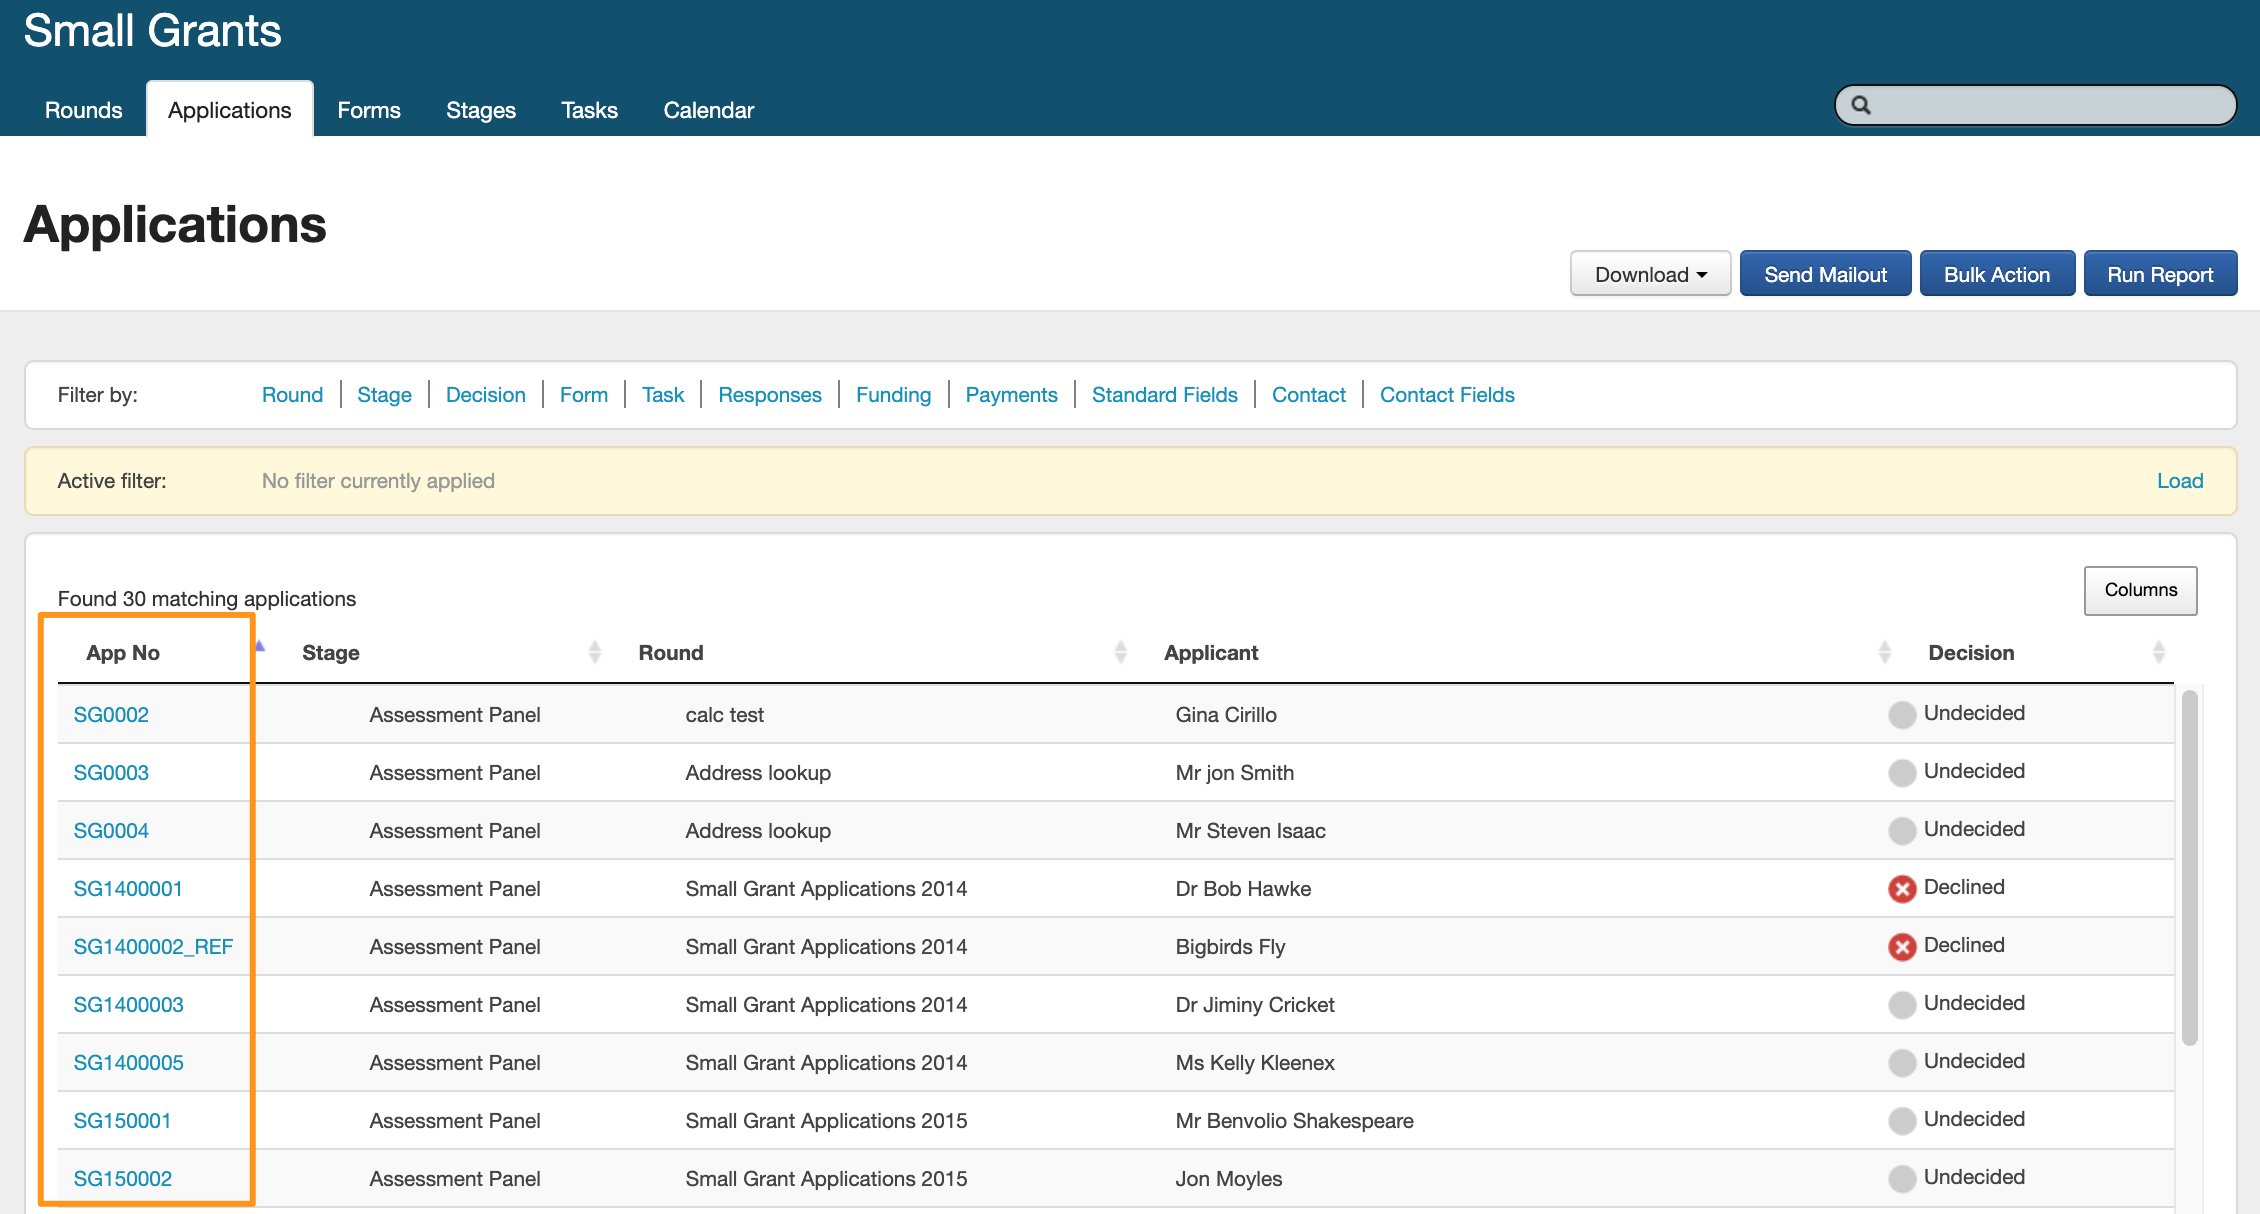
With the application record page now open, from the top-right hand side, click Run Report.
Report Template: You can either select a default template, or select a template you've already created from the drop down list. If you haven’t created a template yet, see create reporting template for more information.
Description: A description is optional, but can be beneficial if you’d like to explain why you’ve run this report at this time.
Output Format: You can select the output format of the report - either as an Excel file, a Word doc, or PDF.
When you’ve made your selections, click Confirm in the top-right corner to run the report.
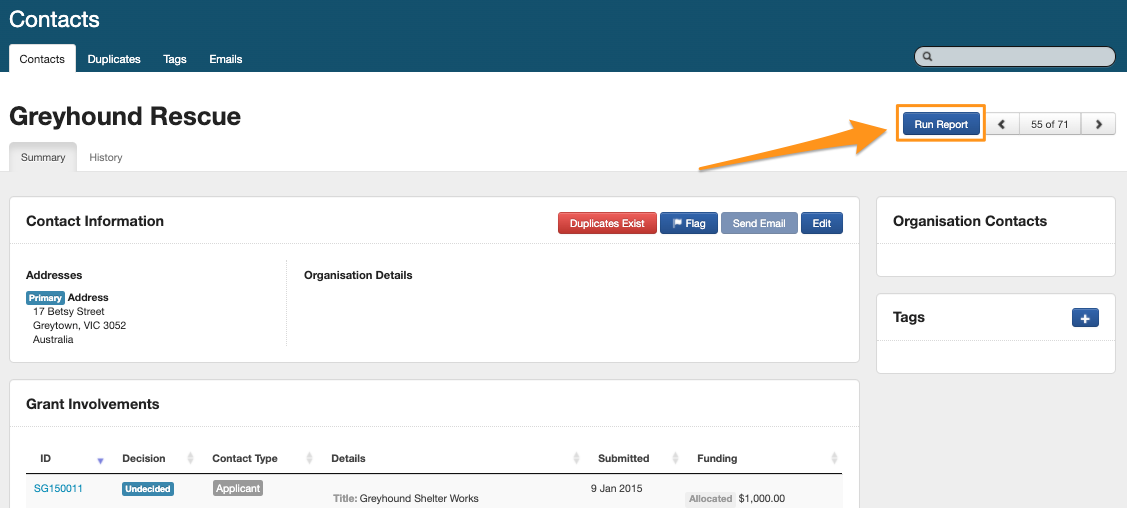
Individual Contact card
To get to a specific contact card, select the Contact icon at the top of the screen.
Then, select the name of individual contact you want to run the report against.
Tip: You can also access individual contact cards from multiple places - including the application summary sidebar, application decision tab, funding and payments screen, etc.
With the contact card screen now open, click the Run Report button.
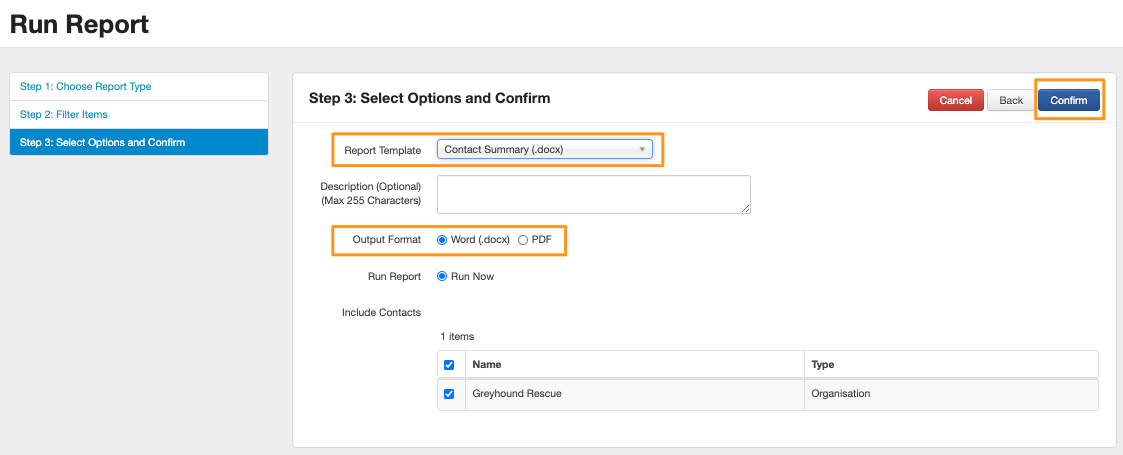
Report Template: You can either select a default template, or select a template you've already created from the drop down list. If you haven’t created a template yet, see create reporting template for more information.
Description: A description is optional, but can be beneficial if you’d like to explain why you’ve run this report at this time.
Output Format: You can select the output format of the report - either as an Excel file, a Word doc, or PDF.
Once you are ready, click Confirm in the top right corner to run the report.
Scheduling a report
You can opt to have a report scheduled and emailed to you at a particular time. You will not have this option when running a report from an individual application or an individual contact card, however.
While running a report, in Step 3: Select Options and Confirm, choosing the run later option will allow you to set a date, time, and recurrence that the report will run, and an email address that the report will be sent to once completed.
Once you have filled in the schedule details, click confirm.
Confirming the report schedule will then direct you to the My Reports screen and to the Scheduled Reports tab, where you can review upcoming reports that you have scheduled. You can use the Options button to run the report now or delete the scheduled report if required.
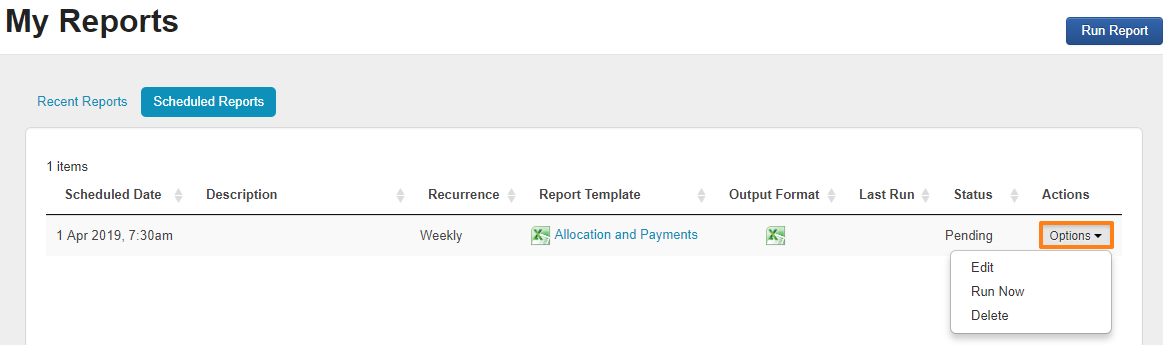
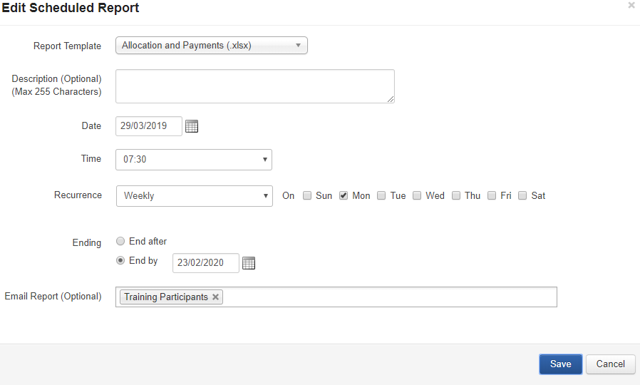
To edit the scheduled report, click on the Options drop down and then click Edit. Here you can edit the details of the scheduled report, including the template, description, date, time, recurrence, ending, and email address.
Warning: There is a limit on the size of report that can be emailed via Scheduled reports. The limit of the output file is approx 20-22MB. If your scheduled report is completing but you are not receiving it via email, please download the report file and check the size.
Rerun a report
To rerun a previous report, from the My Reports page or the Templates Information page, click the Rerun button. The report will rerun with the previously selected applications or contacts.
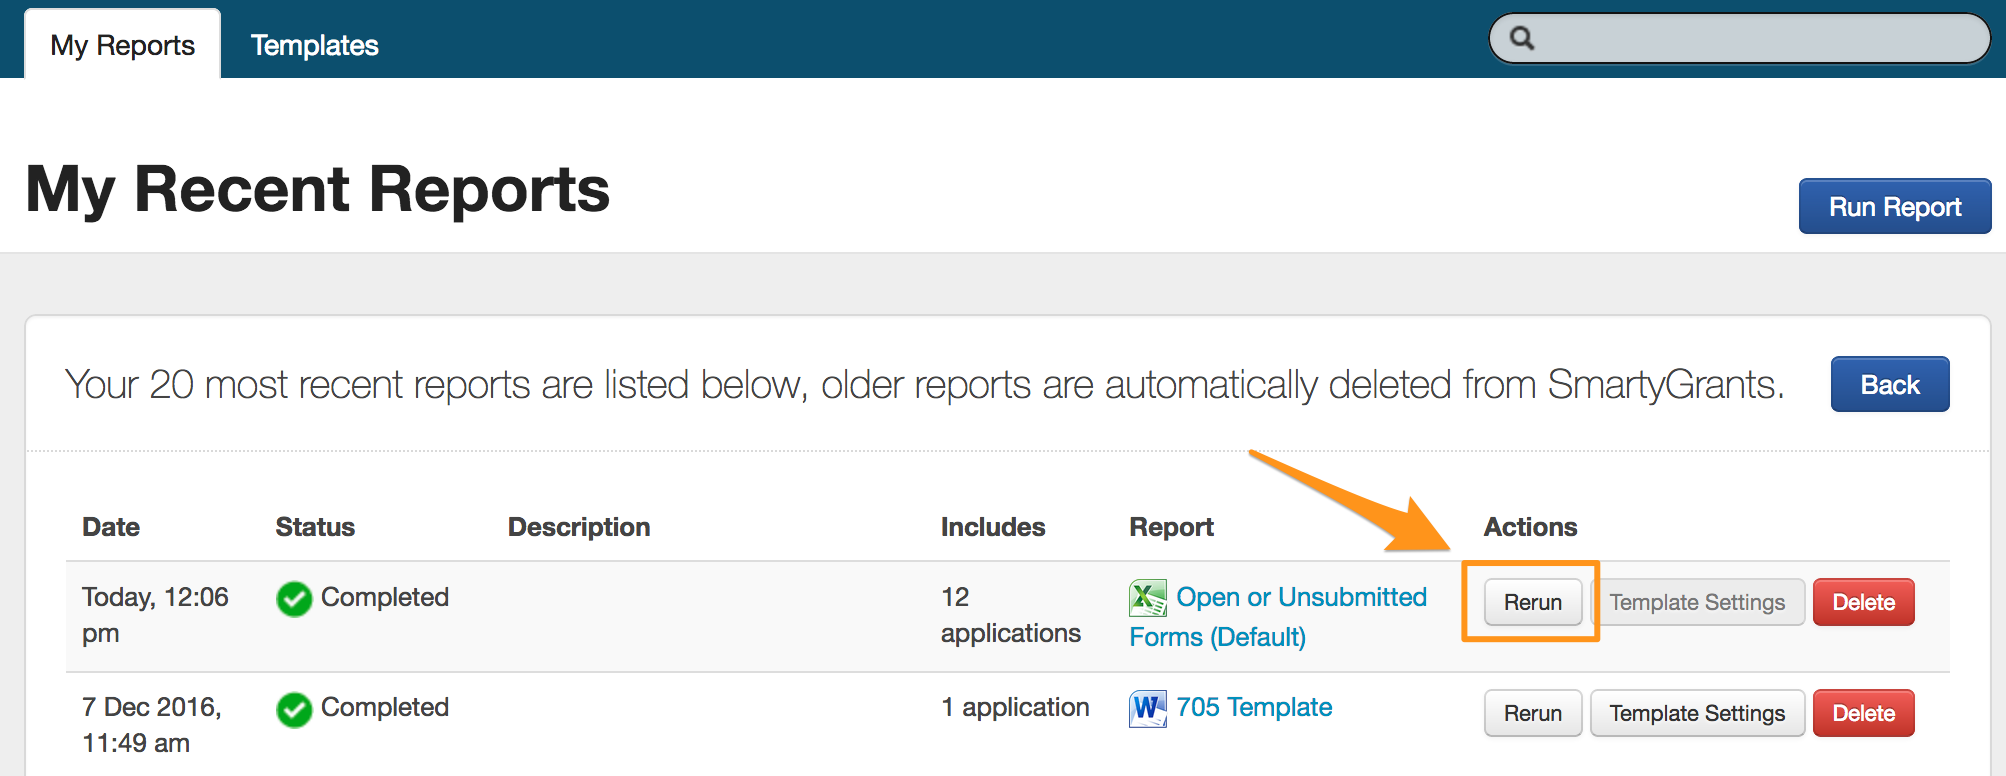
Important: Rerunning a report only includes previously selected items. It does not rely on any filters or check whether any more applications or contacts meet the filtered criteria which formed the basis of the original report.
For example, you created an application filter that only included Approved applications and then created a report from this filter, which included the 10 applications which met this criteria; however, subsequently you approve 5 more applications. Rerunning the original report will only return the original 10 applications. SmartyGrants does not attempt to go back and re-establish the original filters users to determine which applications / contacts to include in a report. To include all 15 approved applications, you should run a new report from the Applications tab.