View Contact History and Related Applications
View Contact History
SmartyGrants will keep an audit history of all changes made to a contact file.
A description of the changes made as well as the date, time and the name of the user who has made this change, is all available for viewing on the history tab.
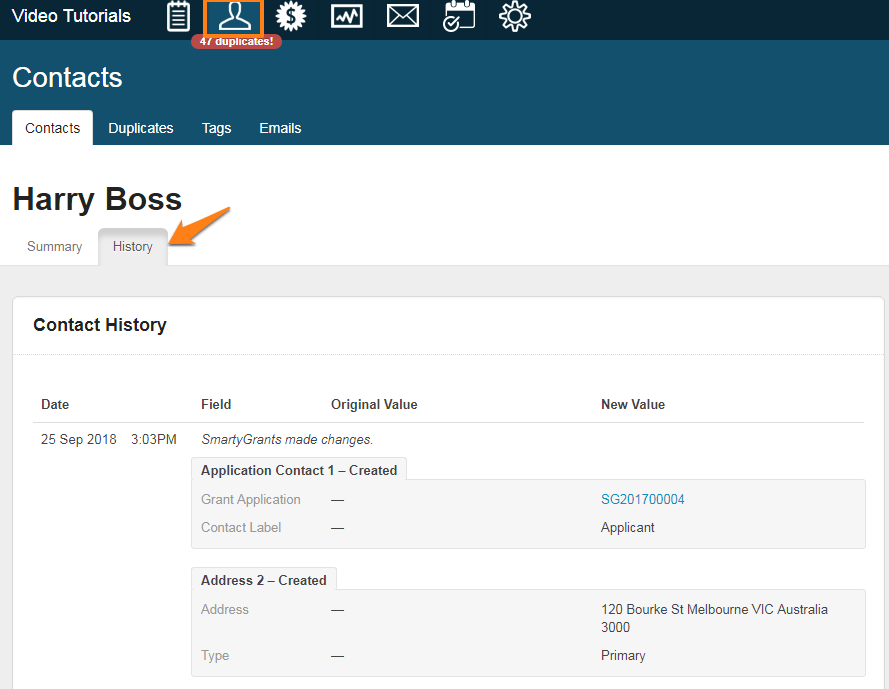
Tip: The history tab will contain hyperlinks to any attachments or applications that have been linked.
Related Applications
SmartyGrants allows you to keep track of contact relationships for each application.
If you create a new contact through the contact directory area, you are then able to link that particular contact to a specific application. This will ensure that all grant involvements are kept up to date, as well as giving you control over the linking relationships to different organisations.
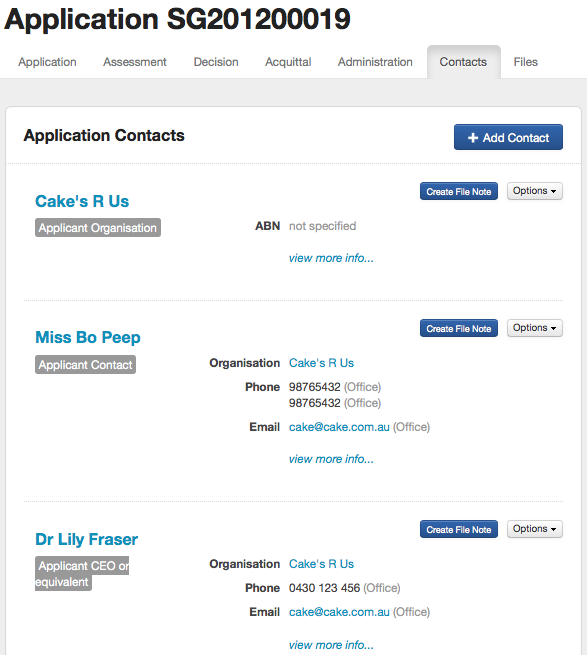
In the example below, we are looking at application SG201200019 and have clicked on the Contacts tab. All contacts listed in the application have come through linked with the application form as it was submitted.
Contact information that is linked in an application form can be found in two areas - the Contacts tab found on the specific application; and in the Contact Directory area of SmartyGrants
Note: All linked contact information against all programs feed into the Contact Directory.
In the following examples, we focus on contacts linked to a particular application, as well as looking at how to link a new contact to a specific application, edit the contact type, remove a contact from an application and create file notes.
On the Contacts tab, I can amend the existing relationship - for example: remove or change the 'relationship type', create a file note, or attach any additional documents. I may also link a completely new contact into the application.
If you need to create a new contact in the Contact Directory see Create/View/Filter/Edit contacts for more information.
Linking a new contact to an application
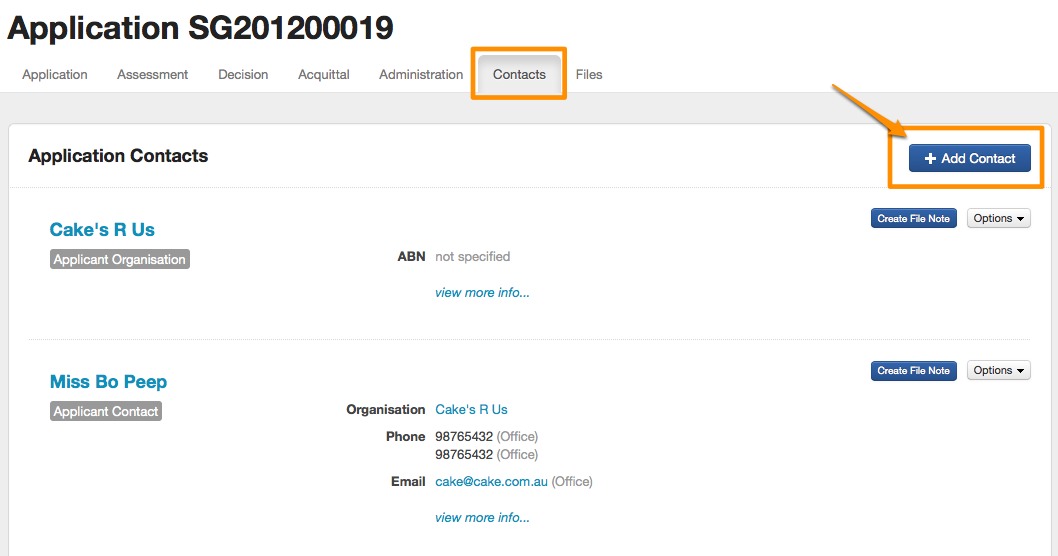
To link a contact to a particular application, go to that application and click on the Contacts tab.
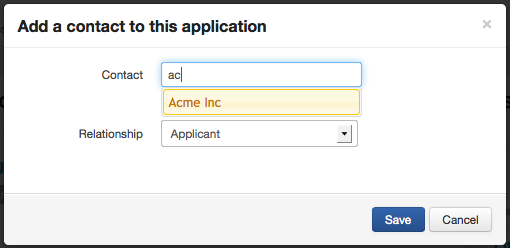
Then click on the Add Contact button.
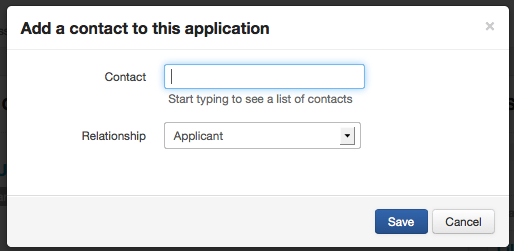
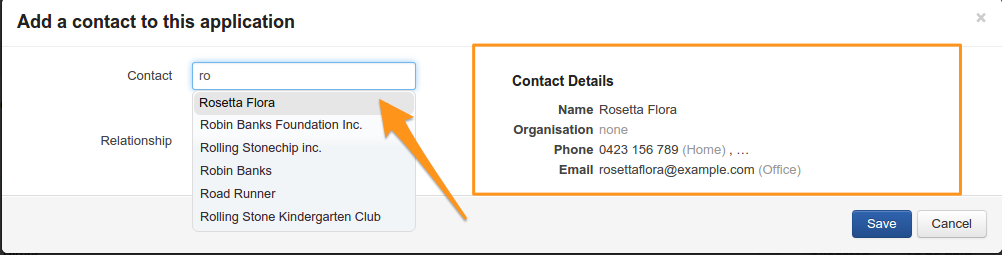
When you start typing the name of the contact you wish to link, a list of possibilities will appear. Click on the one you wish to link.
When you hover your mouse over the drop-down list of name options you will see a summary of contact information available. As you scroll down the names list the summary will change allowing you to pick the correct contact for your application. This is particularly useful if you have duplicates in the system with different information.
Choose the relationship the contact has to the application.

Then click on Save. Your contact has now been linked with this application.
Removing a contact from an application
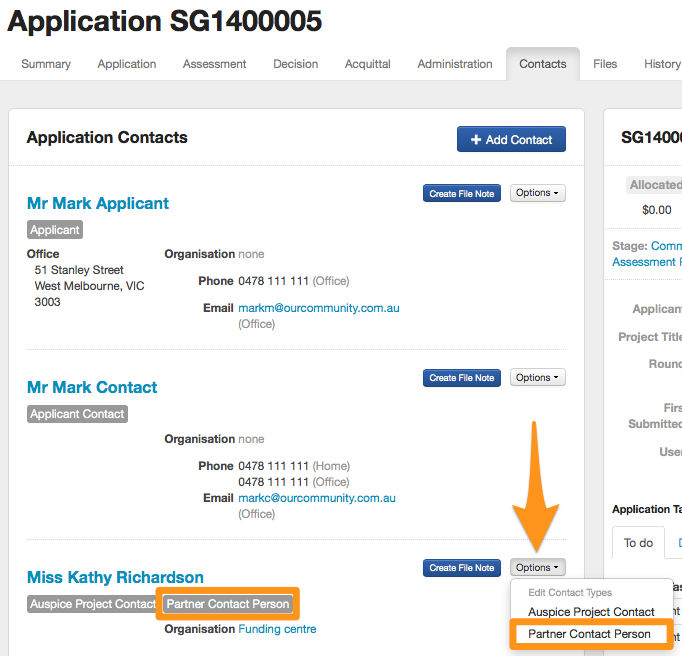
Go to the application you wish to remove a contact from and click on the Contacts tab.
From the listing of contacts, click on the grey Options button next to the contact you wish to remove. Click on the contact type you wish to remove. In the below example we will be removing the contact type "Partner Contact Person"
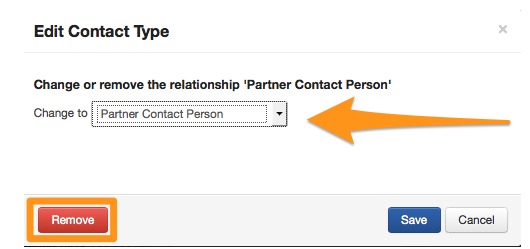
You then ensure that the correct contact type s displayed in the drop down list and click on the "remove" button. Your contact has now been removed from this application.
Info: You have the ability to add or remove a contact from the application involvement using a Bulk Action. To learn more, see Bulk Action Options.