Smart Choice Lists
Standard choice Lists - are a list of choices (one layer) you can create that can be used to create standard fields.
Smart choice Lists - are a list of choices (one or multiple layers, grouped into categories) that can be uploaded in bulk and used on a standard field or just added to a non-standard choice question in a form. They also include keyword searches for your applicants.
It's important to understand the difference between the list options and how they are maintained/updated.
Further information is provided below.
Smart Choice Lists
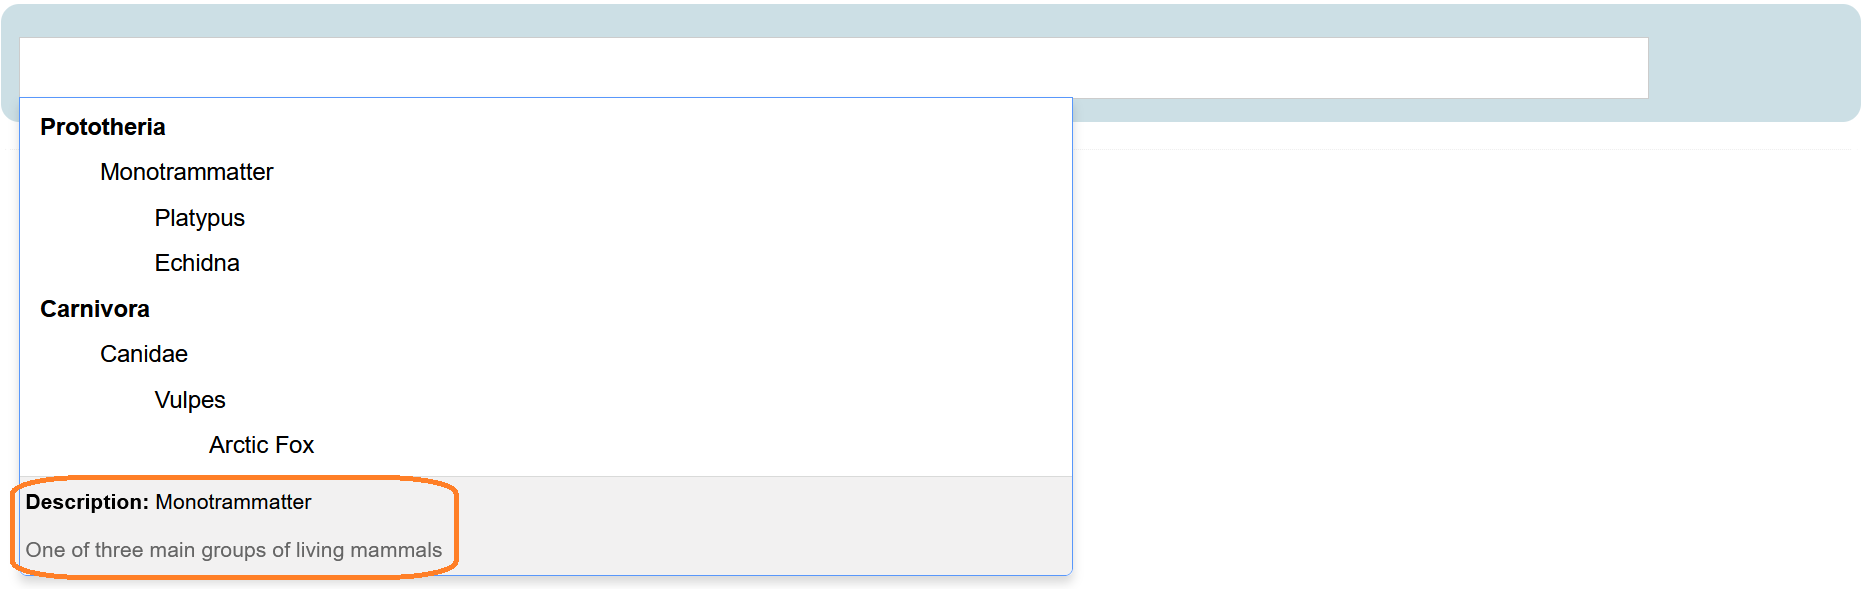
Smart Choice Lists allow you to create choice lists that are layered, and grouped into categories. Applicants can either 'browse all' options, or type in a keyword that will bring up the relevant response. These choice lists are :created via an excel template that is then uploaded into the system.
How do I create a Smart Choice List?
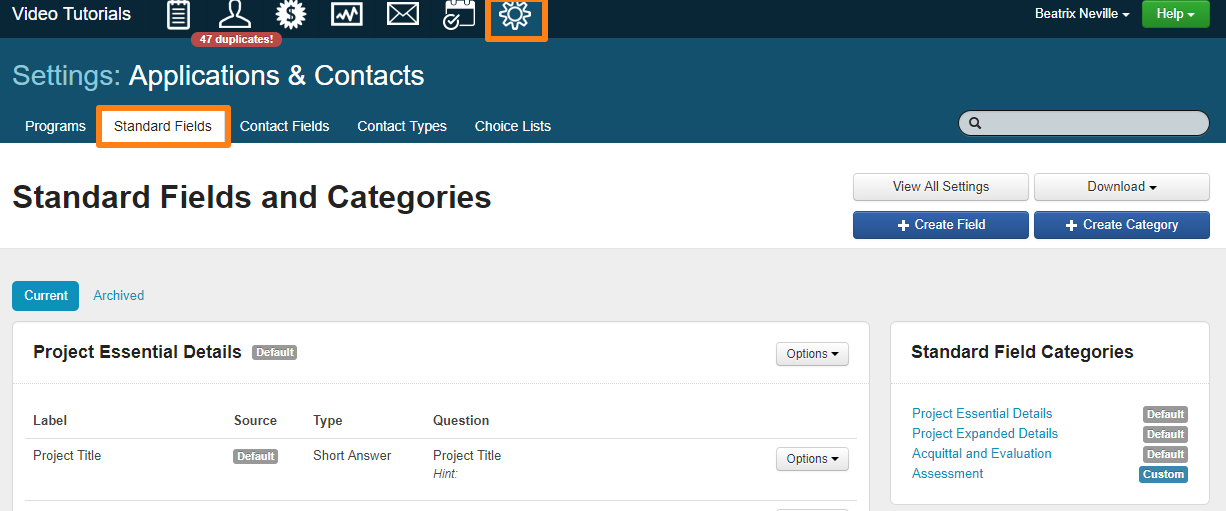
Smart Choice lists can be created via the account settings.
Select the settings icon and then select the choice lists link.
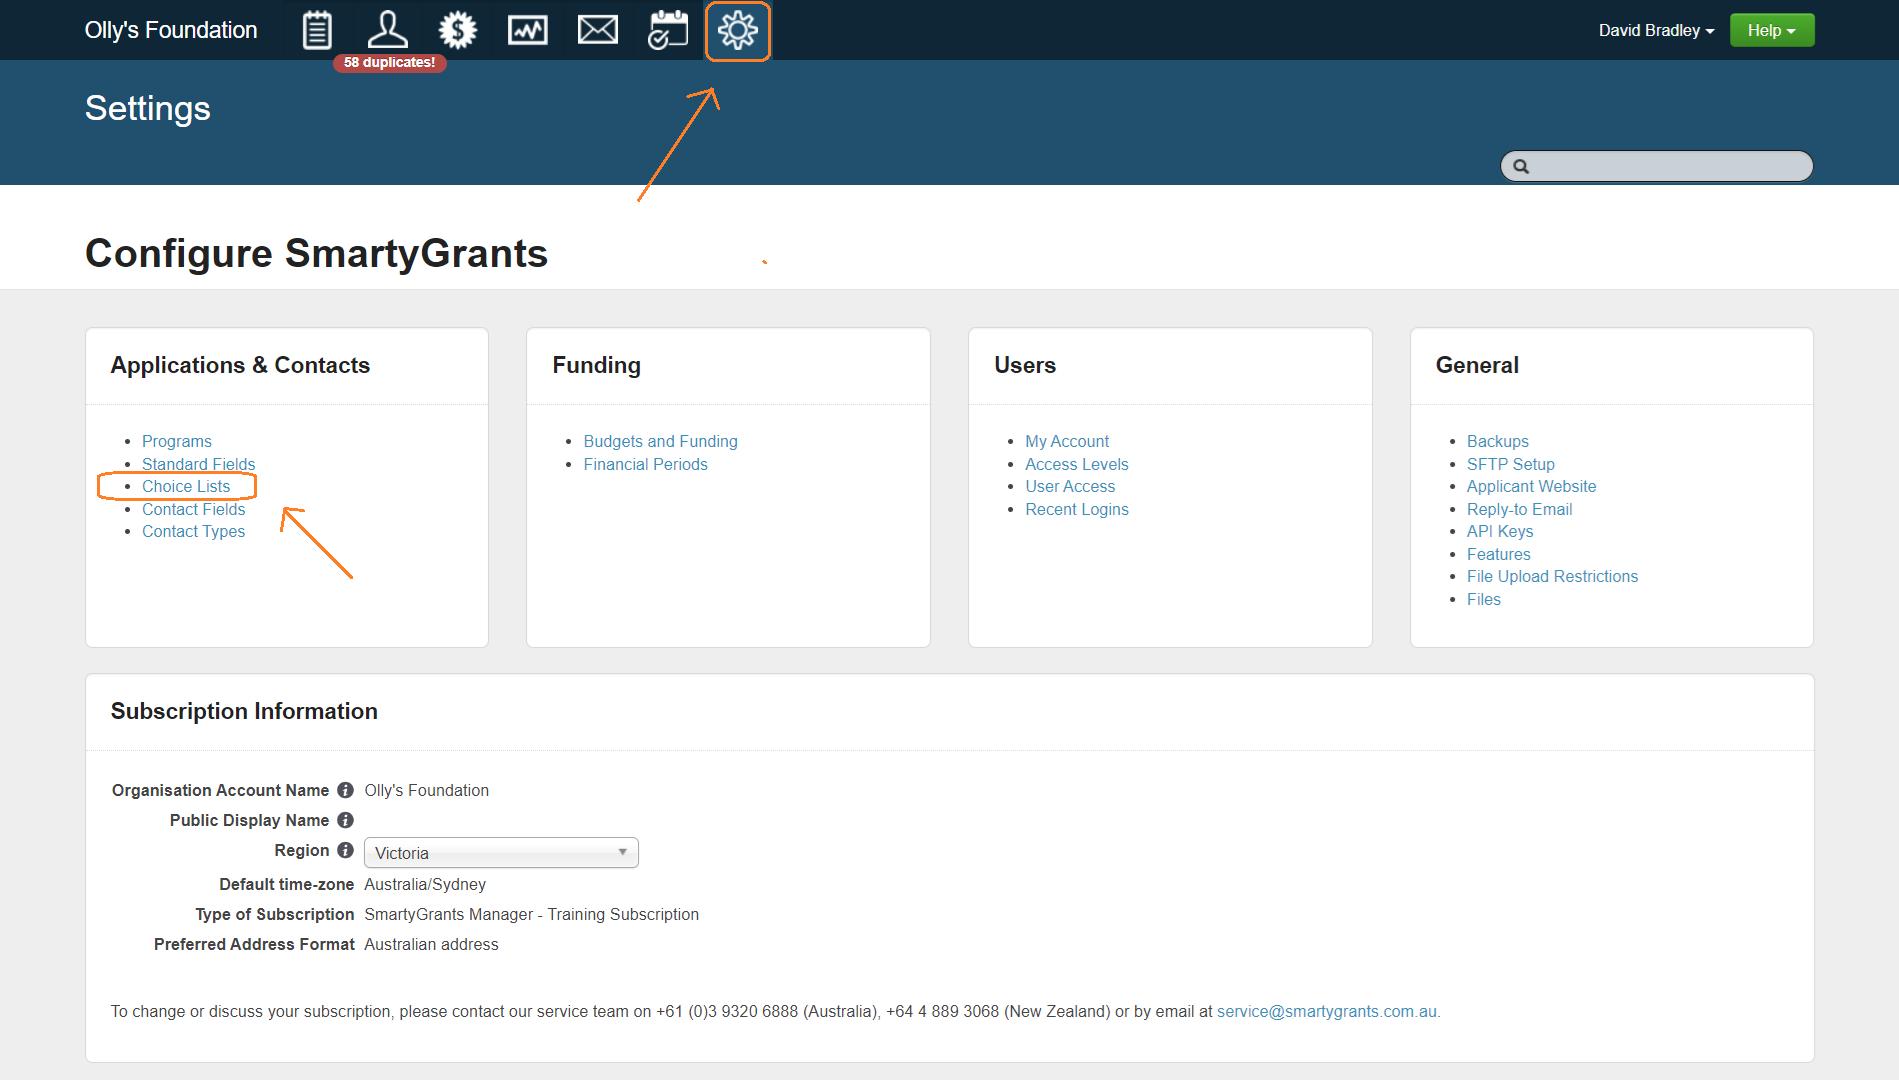
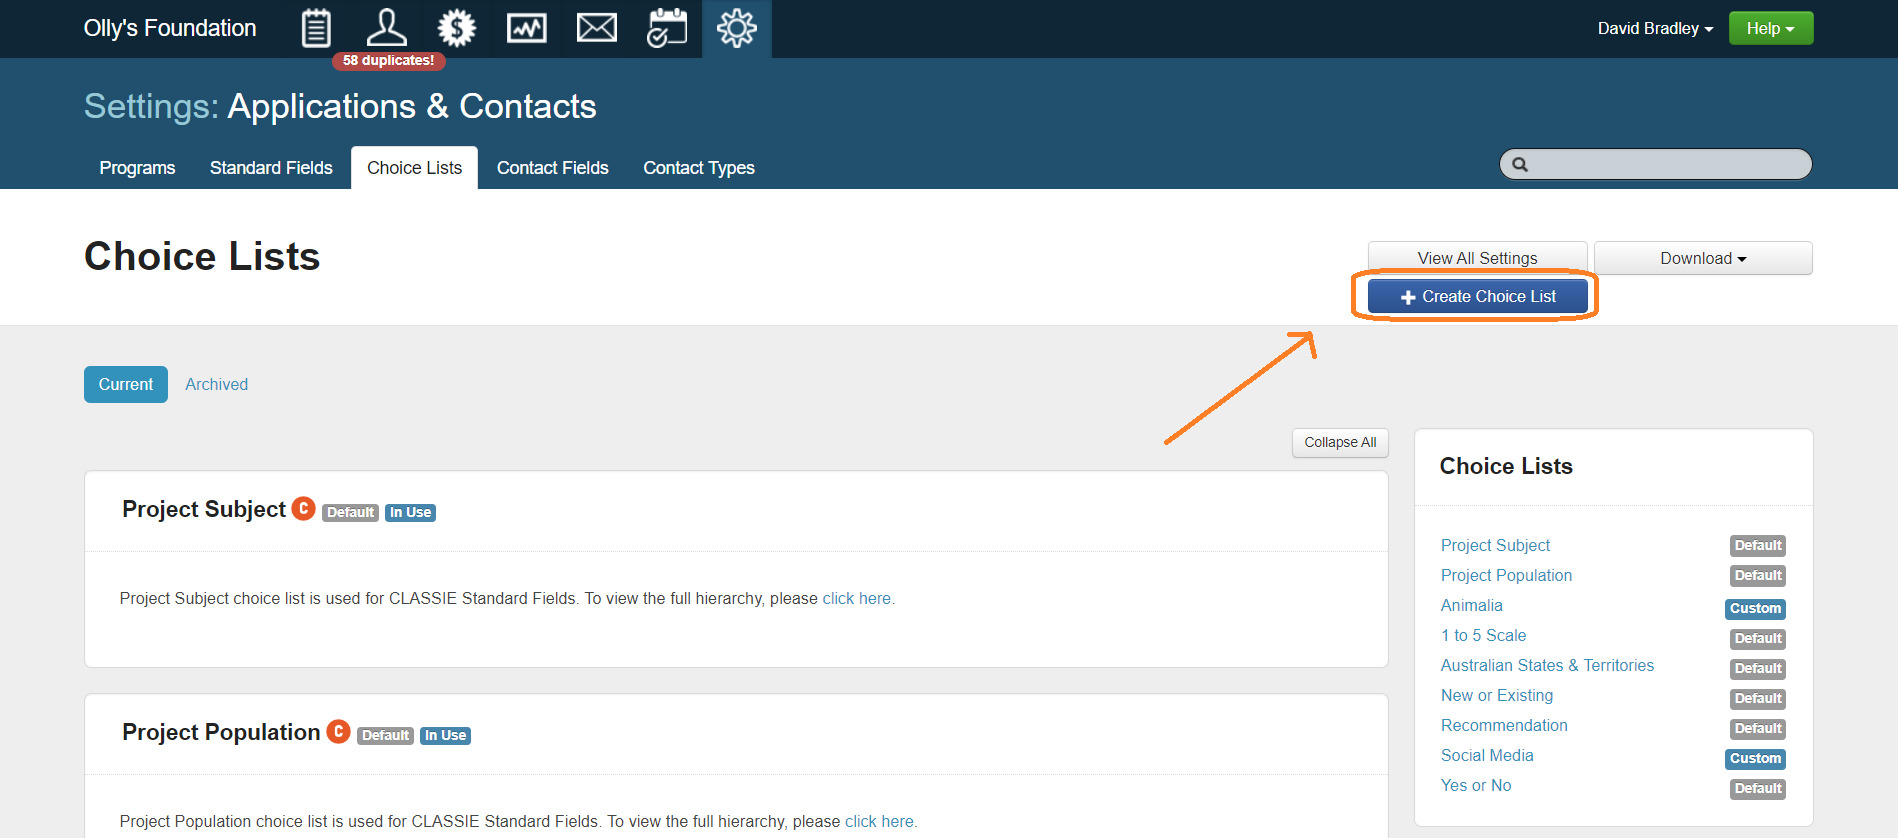
Select the Create Choice List button.
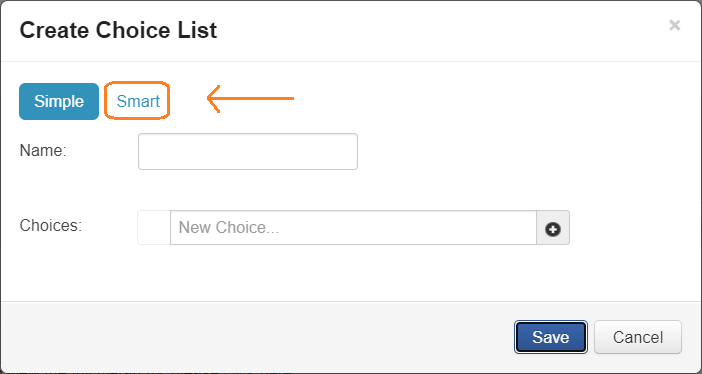
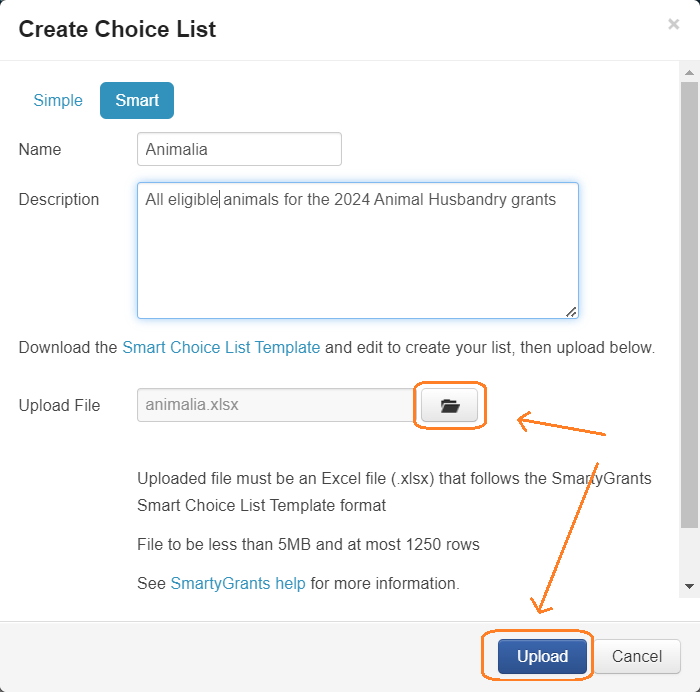
Select Smart.
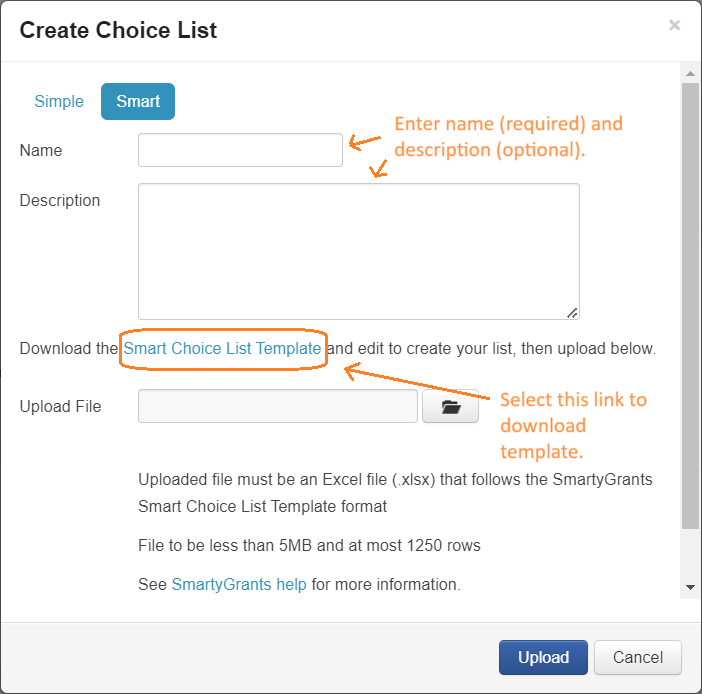
Add a name for the smart choice list (required) and a description (optional) to the relevant fields. Next, select the Smart Choice List Template link to download the template required to upload the smart choice list to SmartyGrants.
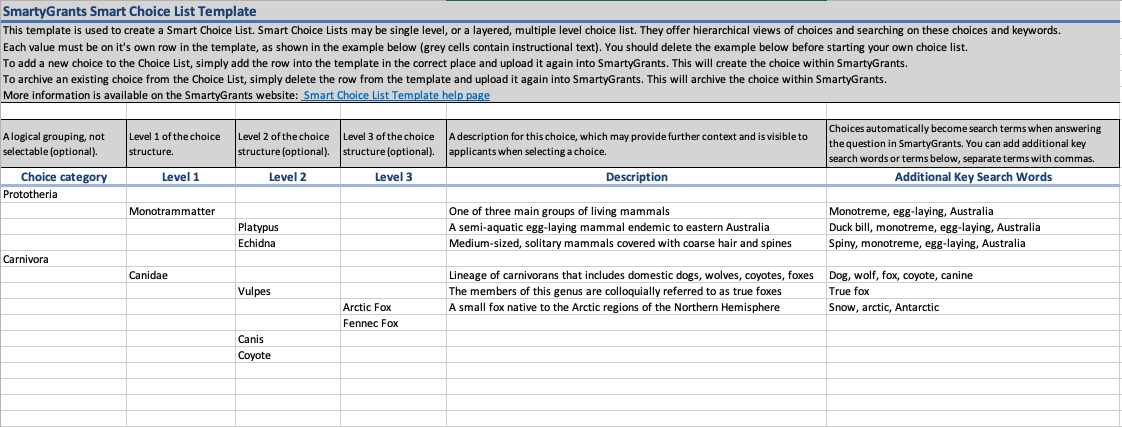
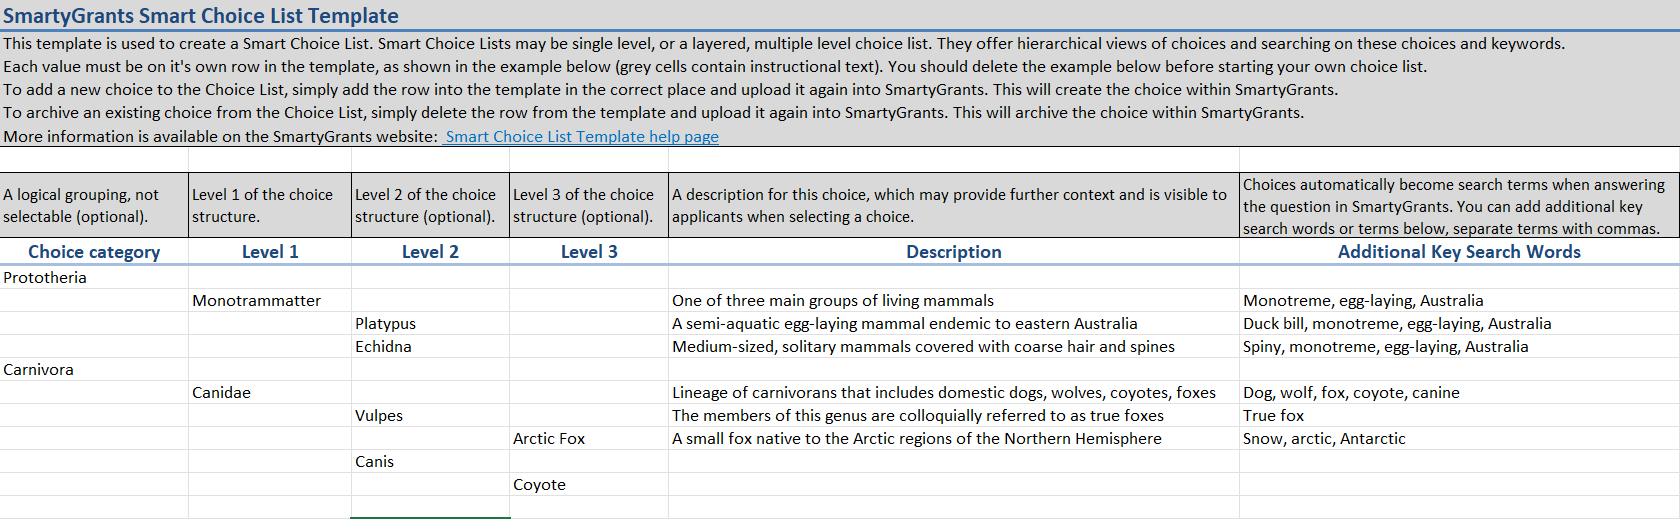
Once you have downloaded and opened the smart choice list template, you can then start adding your categories, the levels underneath them, description, and keywords.
There should be no empty rows within the spreadsheet when it is uploaded.
Categories: The category of the choice list is not selectable by applicants.
Levels: Levels exist underneath the category. Each category can be layered down to 3 levels.
Description: This is the text displayed to the applicant when viewing the smart choice. If you do not add a description, then no text will display
Keywords: Keywords can be used when searching. For example, if there is an item for 'orange' and you list 'citrus' in this column, when answering the question 'orange' will come up whether the applicant types in 'orange' or 'citrus'. When listing your keywords, separate each key word (or group of key words) with a comma.
Once you have populated the template, save the template locally. Then, select the Upload File icon and select the saved template from your saved files. Select Upload to upload the template..
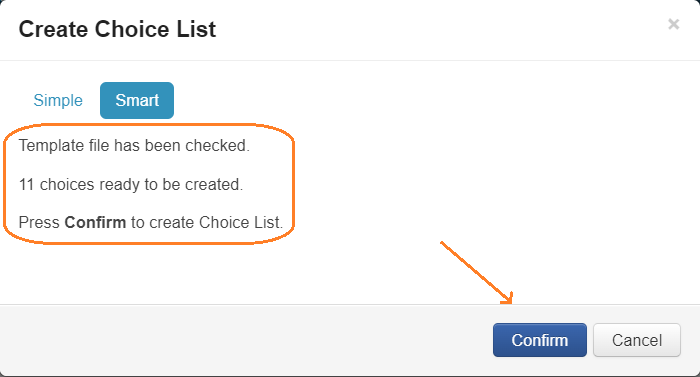
Once you select Upload, SmartyGrants will check the template for errors. Should there be no issues with the uploaded template, select the Confirm button to create the choice list.
Should there be errors with the template, SmartyGrants will note the errors and prompt to download a .xlsx file. The downloaded file is a copy of the uploaded template with the errors noted in Column G.
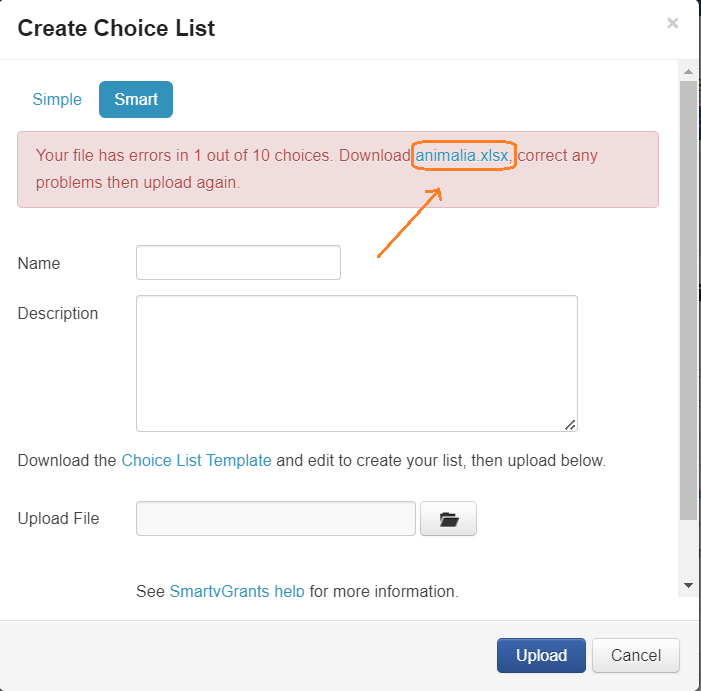
To resolve the errors, download the template and check column G of the .xlsx file for the specifics of the error. Update the template accordingly and save locally. Once edited and saved, repeat step 6.

How do I add Smart Choice Lists into Forms?
Adding Smart Choices as Single Questions
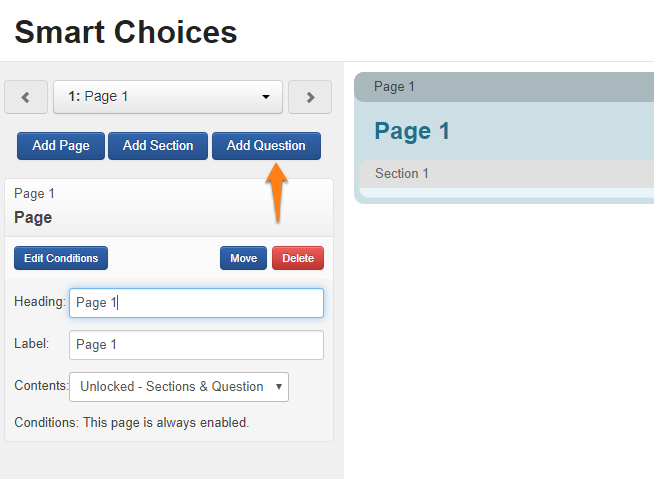
You can add the smart choice lists into your form via the form editor.
Once in the form editor, select the Add Question button.
Navigate to the Single Questions tab, and select Smart Choice.
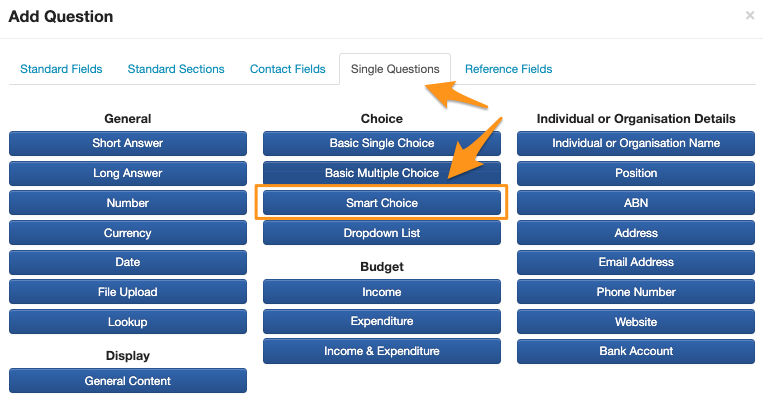
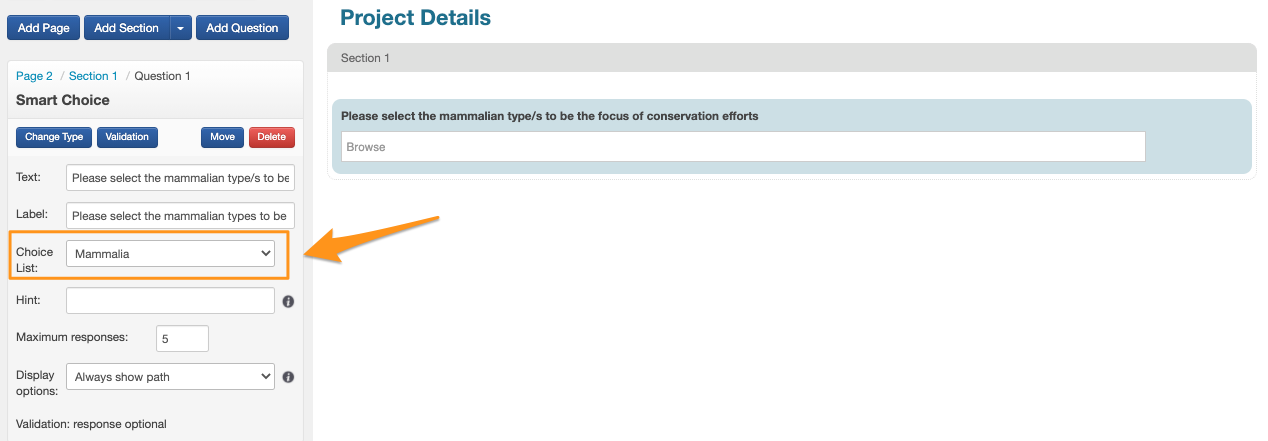
Type in your question text and question label, and choose your layered choice list from the drop-down menu
For more information about adding questions into forms, please refer to our Form Elements and Question Types written documentation.
Adding Smart Choices as Standard Fields
You can also have your smart choice lists set up as standard fields. Once you have uploaded your smart choice list into the system, you can create the standard fields via the Standard Field tab
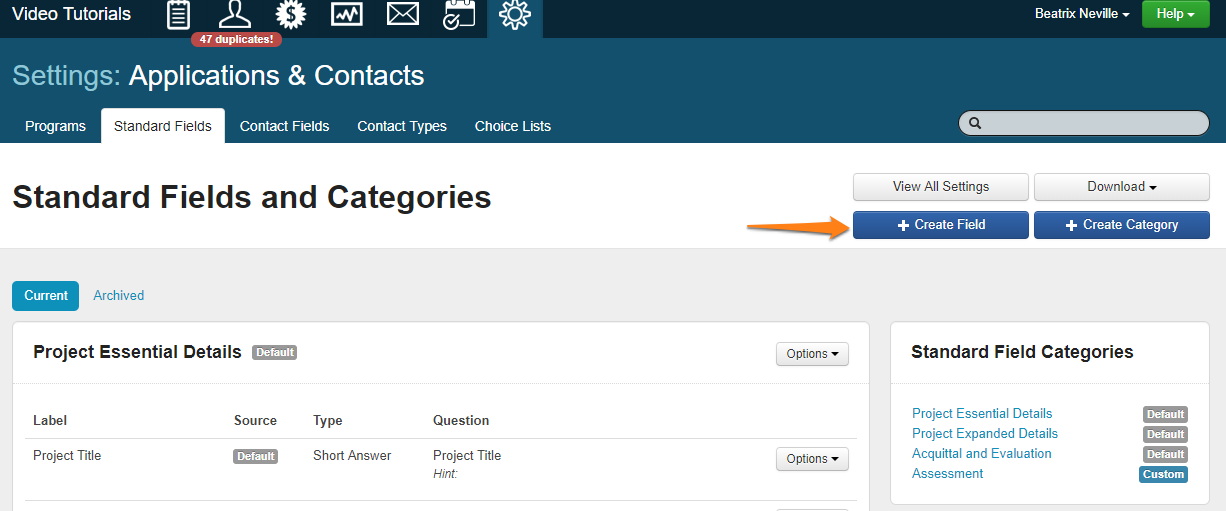
Select Account Settings and then select the Standard Fields tab.
Select the Create Field button
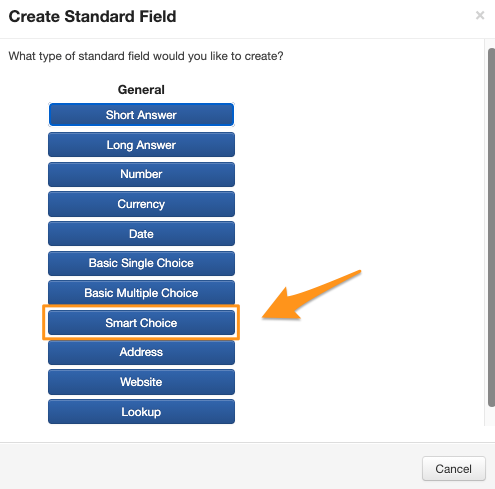
Select Smart Choice.
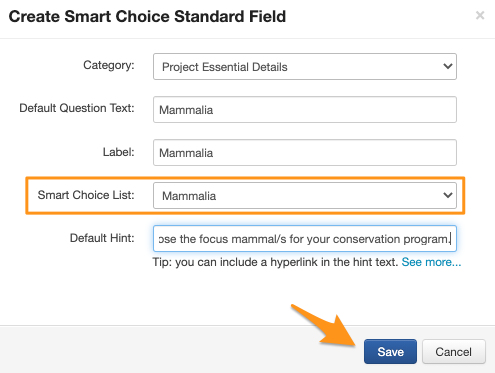
Choose what category your standard field will sit in, enter the question text and label, and select your smart choice list from the list. You can also add a default hint. Once these details are entered, select the Save button.
Your standard field has been created. This will therefore display on the standard field tab of your applications, and can be added into forms. For more information about standard fields, see our written documentation.
How can I Edit / Update my Smart Choice list?
There are two methods to editing an existing smart choice list. They are:
Edit the smart choice list via the user interface directly.
Edit by uploading a revised template
Select the Settings icon and then select Choice Lists.
Find the choice list that you wish to edit and select Options then Update using template upload

Download the template by selecting the .xlsx file link.
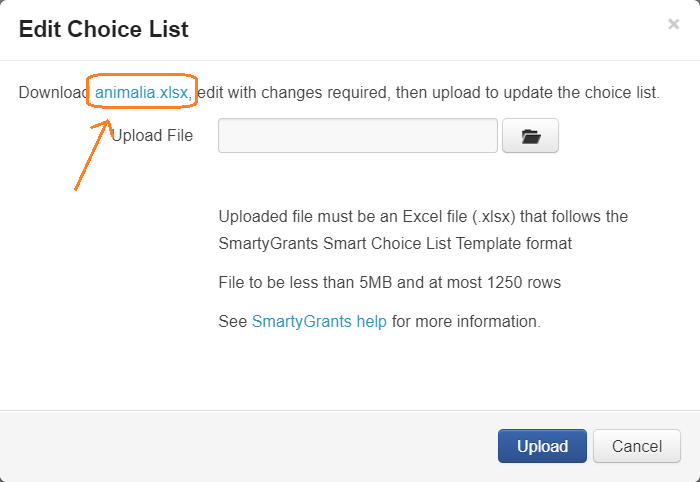
You can then make changes to the template in excel. In the example below, I have removed a Level 3 choice.
Note that if you only wish to re-arange the order of the choices, this is best done by editing directly via the user interface (see below for more details).
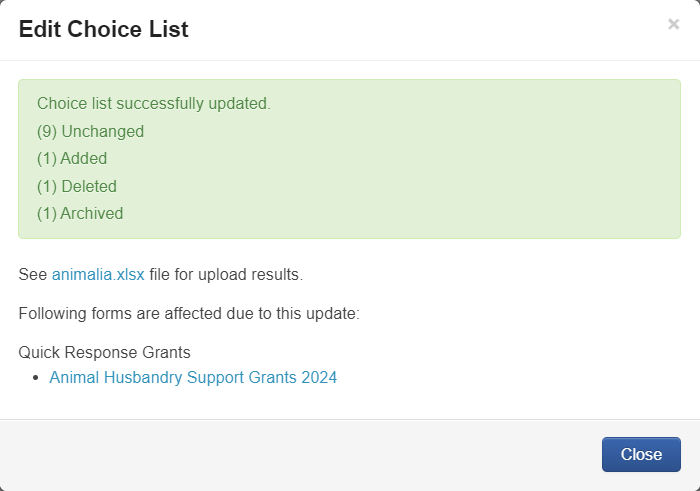
Save your template and upload it back into the system. The system will give you a summary of any changes you have made to the template. Select Confirm to confirm these changes.
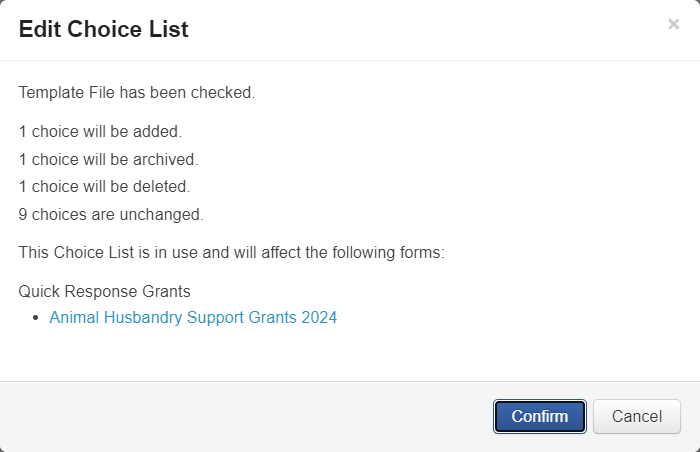
Once you select Confirm, the system will show a confirmation of any changes that have been made, and also a list of forms that are impacted by the change.
When a choice has been selected previously (e.g. as a response in a form) then it will be marked as In Use. If an In Use choice is deleted from the newly uploaded template, the system will not delete this choice when the changes are confirmed. Rather, it will archive the choice and it can be re-activated, if required, in the future. Please see Rules for editing smart choice lists below for more information.
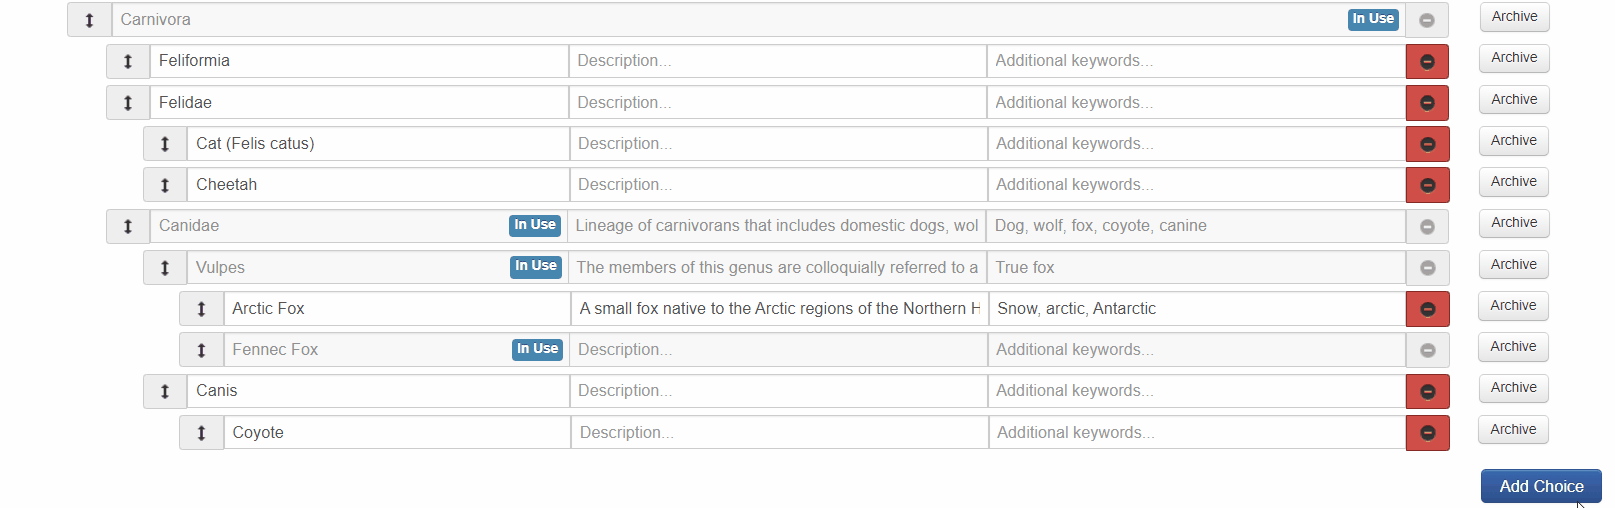
Editing via the user interface
To edit an existing smart choice list via the user interface, select the Settings icon then select Choice Lists.
Find the choice list that you wish to edit and select Options then Edit.

Edit the name, category or choice by selecting the required field and entering the required edit/s.
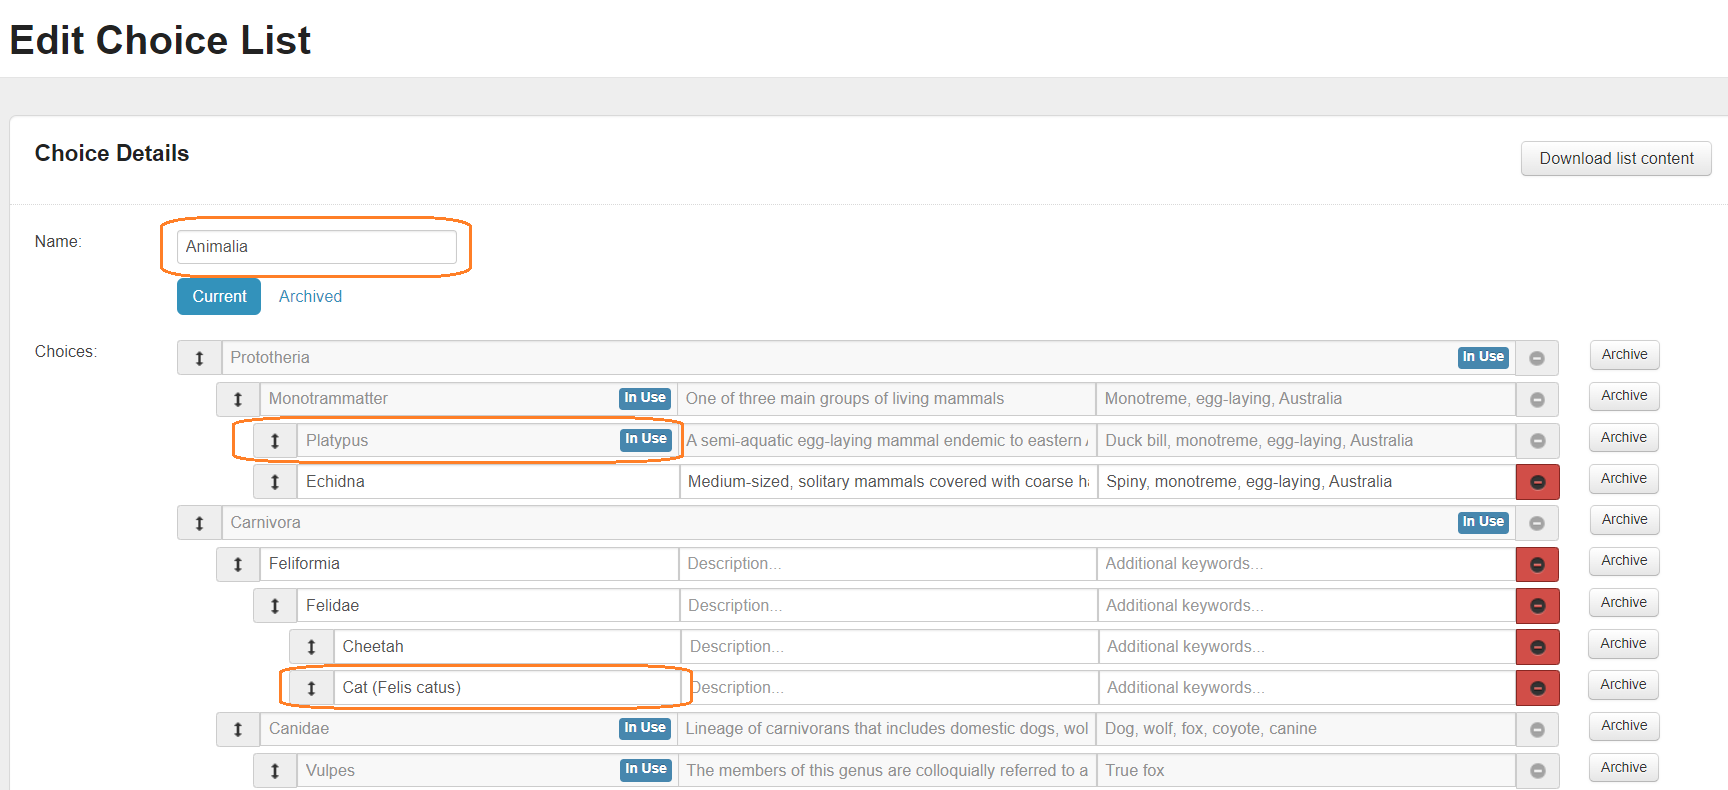
Edit the order of any category, level 1, level 2 or level 3 choice by selecting and dragging the double-headed arrow. A choice can be made into a category by selecting and dragging the choice into the appropriate position using this function also.
Delete a category or choice by selecting the red minus button.

Archive a category or choice by selecting Archive.

Add a new category or choice by selecting Add Choice.
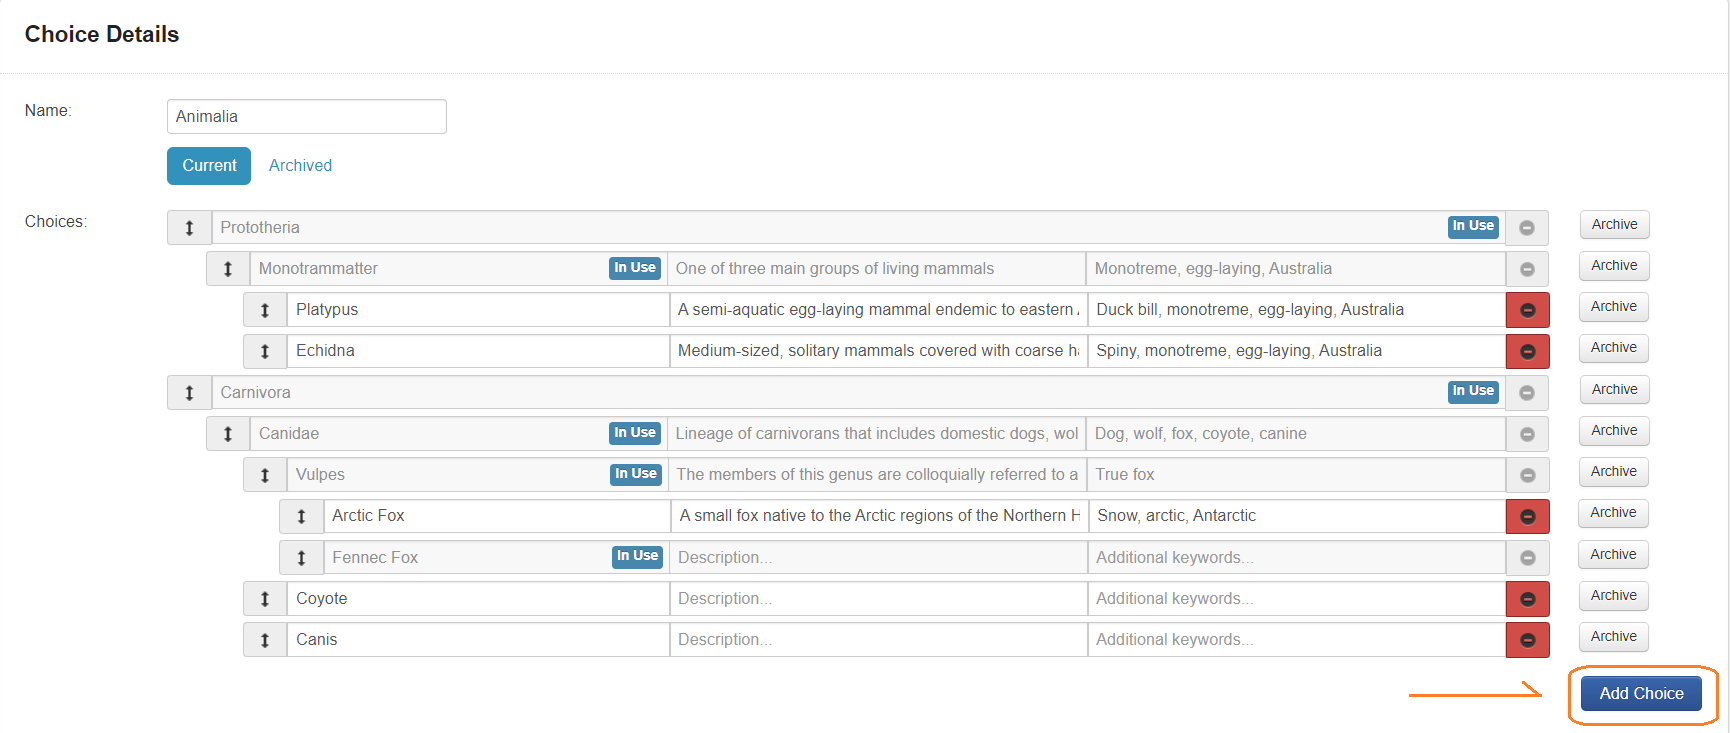
Type the category/choice name into the empty field provided once Add Choice is selected.
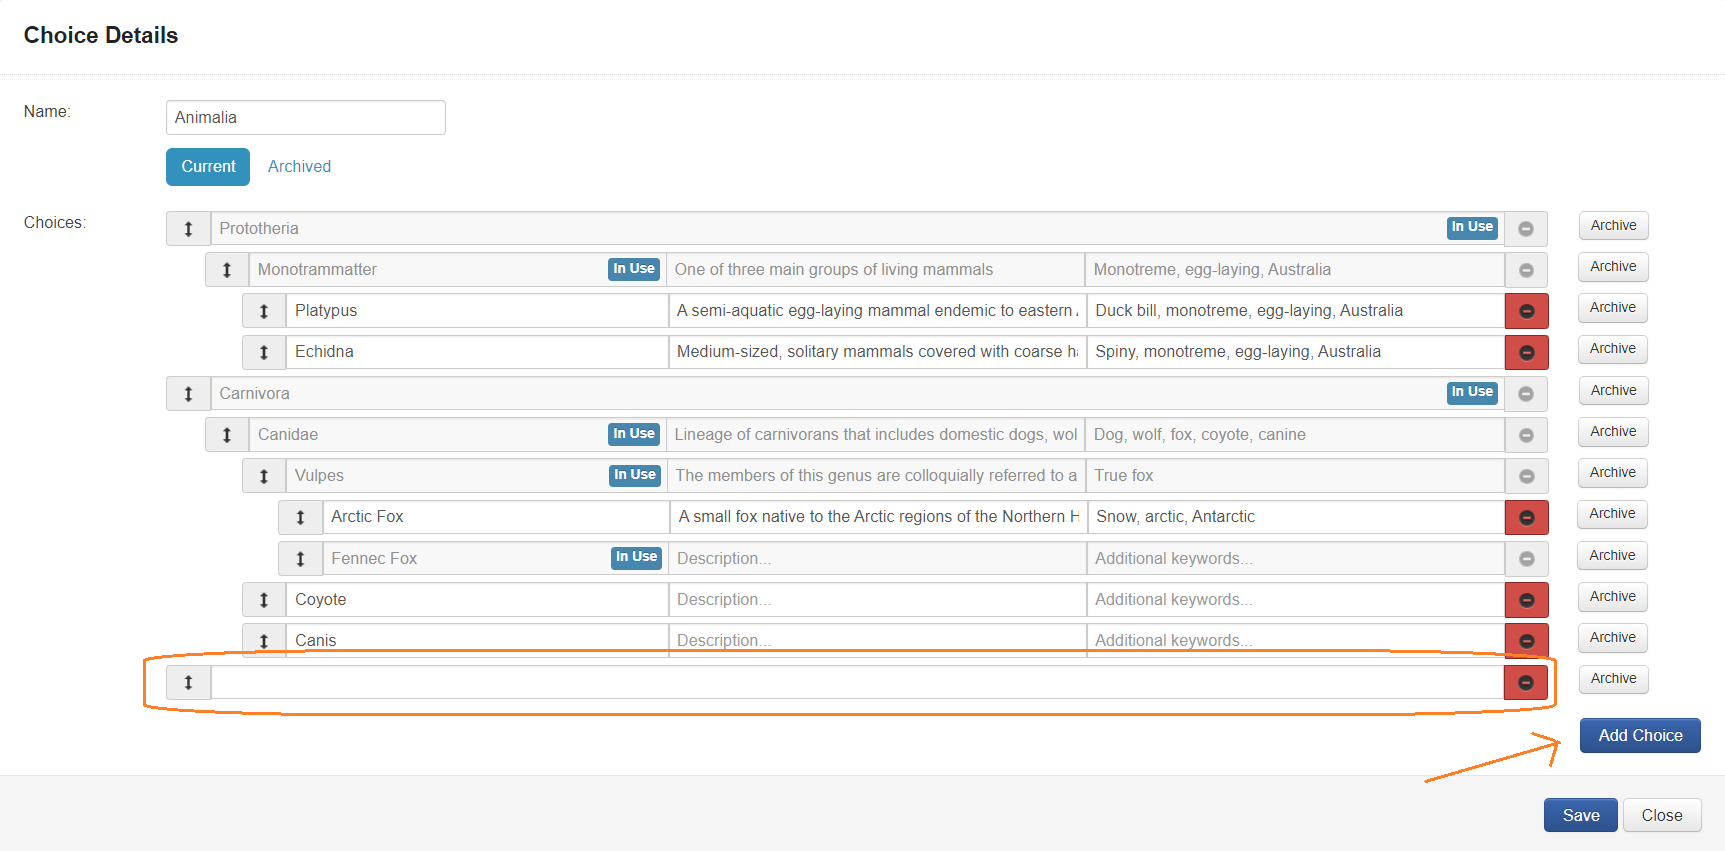
Select and drag the newly added item into the required position. If a choice is being added, select and drag the new choice to a position under the required category and slightly to the right hand side. The system will auto-justify the new choice into the category position.
Rules for editing SmartChoice lists
Edit item
If an item is in use (denoted by the blue In Use pill):
The item will not be editable in any way, including being able to delete the item. Should an in use item need to be deleted, you will only be able to Archive that item.
If the item is not in use:
The item will be editable.
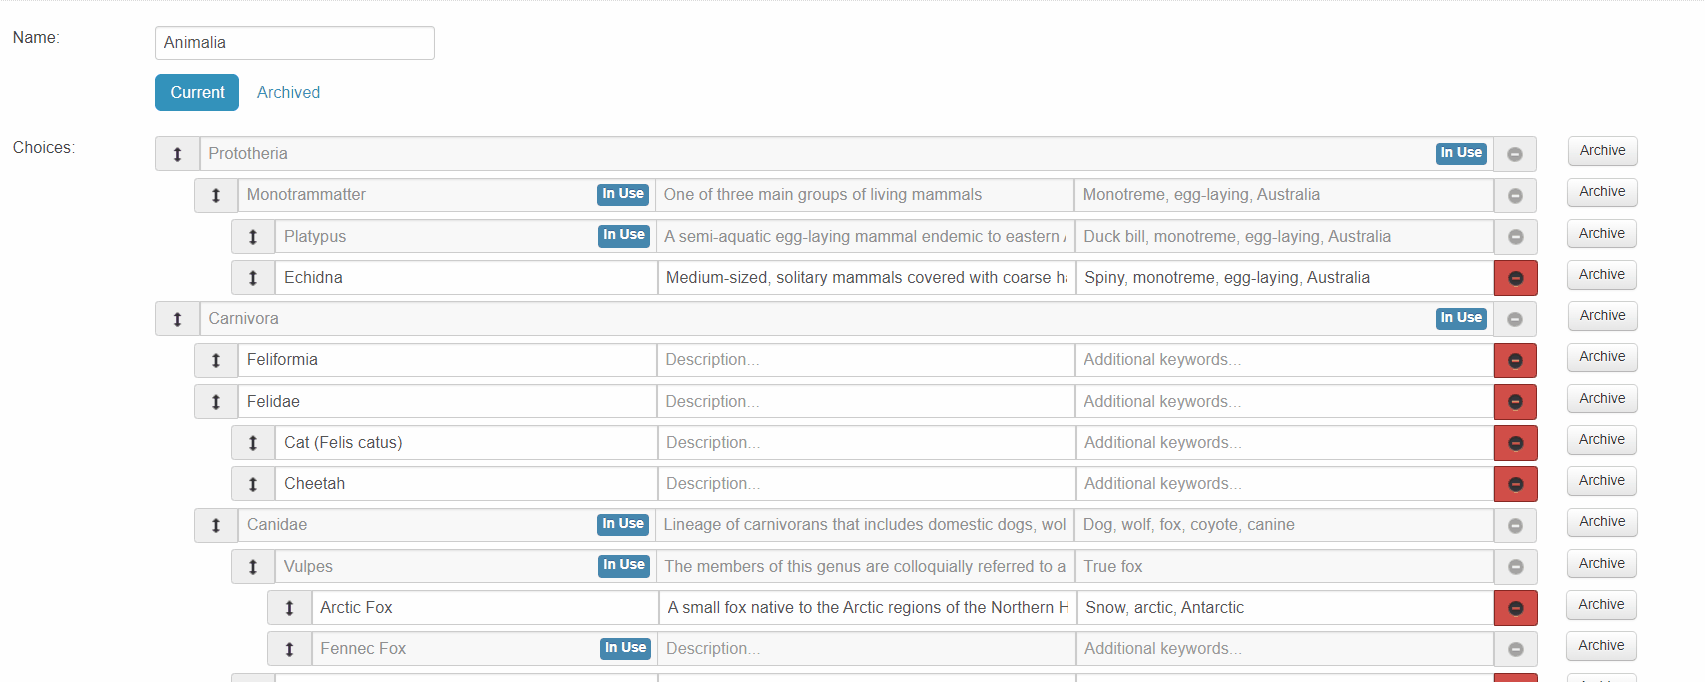
Move item
If the item is in use:
The item can only be moved within its parent category. In use items can not be moved into other parent categories.
If the item is not in use:
An item can be moved within the same level.
An item can be moved to another level. (For example: an item in level 3 can be moved to become level 2 item).
If an item is moved, any corresponding lower-level items will move with that item. (Note that there is a hard limit of 3 layers in smart choice list.
In the event where an item is moved and the item and its children create layer 4 and beyond, the system will:
Highlight the error (the offending layers) in the UI while editing is in progress.
Any attempt to save will fail until the offending layers are corrected.
When an item is moved (and saved), it will update all the responses using that item.
Archive item
Items can be archived at any time regardless of the item’s status.
When an item is archived, any response that uses the item will have the ‘(archived)’ indicator.